

Transcripted Summary
In this lecture we're going to be talking about element actions.
Let us start by creating a new test called “elementActions.test.js”.
We are going to require “internet.page”, [and then our] describe and it.
Our first element action that we're going to use is the click.
We did a bit of this in the last lecture when we were talking about element state.
Let's just do it here again
it('should click element', () => {

})
In this test, we are going to do something similar to this last test that we had here, which is
internetPage = require('../../pages/internet.page')
it('should click element', () => {
    internetPage.clickOnLink
})
However, this time we are going to use our asserts.
What we are going to do, because we have previously declared in our config file all our Chai assertions, we are going to use Chai expect.
We are going to say
expect(browser.getUrl())
What this does is get the current URL of the page that you are on, and we are going to specify the URL that we want.
If you remember from the last lecture, this function clicks on the first link. If we go here and click on the first link, this (http://the-internet.herokuapp.com/abtest) is the URL that it should be expecting. We can copy that and paste it into our test.
internetPage = require('../../pages/internet.page')
describe(' Test element actions', function () {
    it('should click element', () => {
        internetPage.clickOnLink()
        expect(browser.getUrl()).equals('http://the-internet.herokuapp.com/abtest')
    })
})
Before we run our test, we need to specify browser.url('/') so that our test will go to default URL.
internetPage = require('../../pages/internet.page')
describe(' Test element actions', function () {
    it('should click element', () => {
        browser.url('/')
        internetPage.clickOnLink()
        expect(browser.getUrl()).equals('http://the-internet.herokuapp.com/abtest')
    })
})
Now, let us run our test. We only want to run this test instead of both.
We can do that in the terminal by specifying the folder and the filename that you want to run.
npm test -- --spec ./test/elementActions.test.js
If we run, we see that it's only executing one file instead of both.
If we realize this test passed because the expect passed.
The next element action that we have used previously is the getText.
Let's just use it here again.
If we go to our Page Object, we realize that we have a function here that is getting a specific element text.

What we can do is return this. so that when we call this function, we can do an assertion on it in our test.
getSpecificElementText(index) {
    return this.specificChildElement(index).getText()
}
In our test, we are going to say:
it('should get Text', () => {
    browser.url('/')
    expect(internetPage.getSpecificElementText(1)).equals('A/B Testing')
})
We are going to wrap this in an expect.
If we look here, we need to specify an index. If we specify the first index, it should equal to “A/B Testing”.
Let's add browser.url('/') so that it will go back to the main URL, as we did in the previous test, we had clicked on a link.
Also, we need to add to this test, seeing as we are only navigating back to a page, we need to wait for this element to show up.
So, before we say getSpecificElementText, we can say:
getSpecificElementText(index) {
    this.specificChildElement(index).waitForDisplayed()
    return this.specificChildElement(index).getText()
}
What that [this.specificChildElement(index).waitForDisplayed()] does, it waits until we are fully back on the first page. It waits until this element is displayed. If this element is never displayed, then the test will fail.
So, a reminder that we need to enter the first index in our test.
Let us now run our test by specifying the test that we want in our terminal
npm test -- --spec ./test/elementActions.test.js
Okay, so it passed, because it got the specific element and it was equal to this (“A/B Testing”).
Let us also look at click in another context.
If we go here to the Checkboxes page, to select a checkbox, you have to click it, right?
Then, we can use the element state isSelected to determine whether or not our checkbox click was successful.
Let's do that now.
First, we need to get the element for the checkbox.
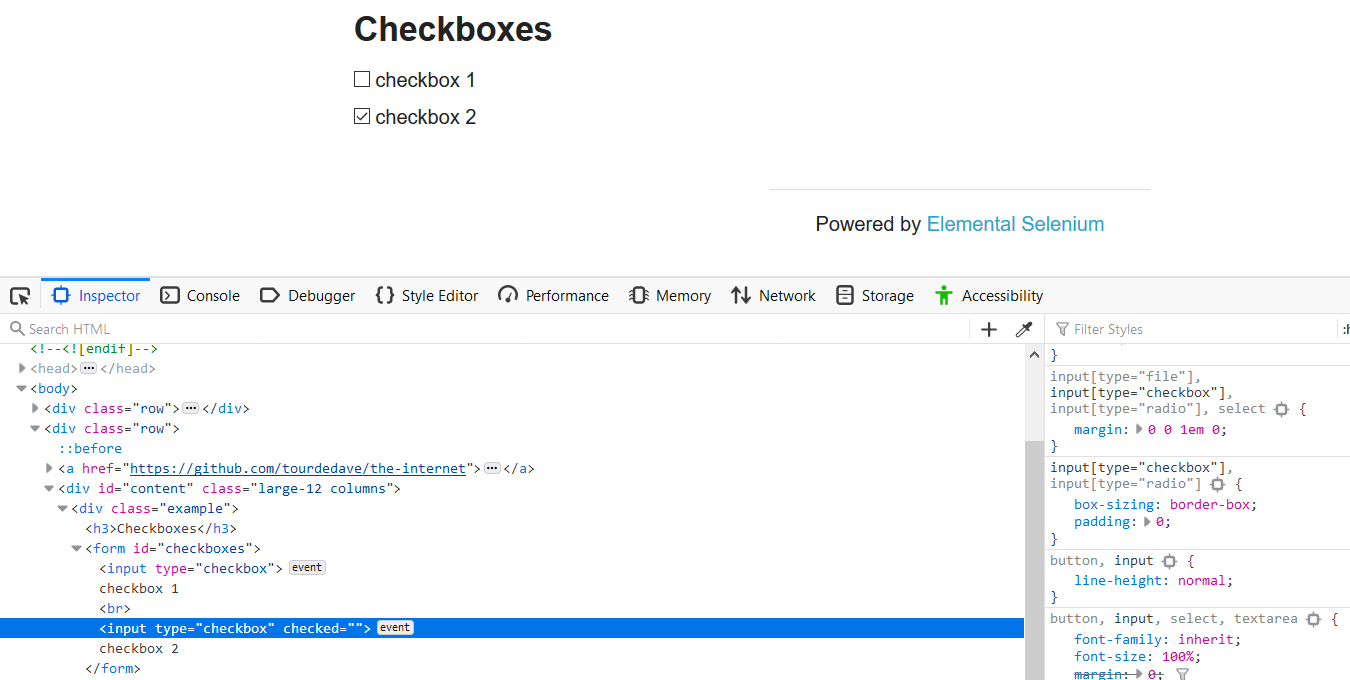
So, it says input type “checkbox”, which is within a form with the id “checkboxes”.
We can go into our internet.page.js file and create an element called “checkboxes” and we are going to be accepting an index.
checkboxes(index) { return $(`#checkboxes input:nth-child(${index})`) }
Okay.
Then, we're going to write a function called clickCheckbox, which accepts an index.
clickCheckbox(index) {
    this.checkboxes(index).waitForDisplayed()
    this.checkboxes(index).click()
}
In our test, we're going to say:
it('should click checkbox', () => {
    internetPage.clickCheckbox(1)
    expect(internetPage.checkbox(1).isSelected()).equals(true)
})
We're going to click on the first one, so we're going to put in the index of 1.
Before we run our test, let us do a few things.
In this test here [from the previous lesson], where we have our pause, we are going to remove it.
We are instead going to have a waitForDisplayed for an element that is on the firstLink page. If we click the first link on the page, it contains h3 tag. So instead, we're going to wait for an h3 tag, all right?
We're going to create that element here [in our internet.page.js file]
get h3Header() { return $('h3') }
Then, in our function, clickOnLink, we're going to add the waitForDisplayed:
clickOnLink() {
    if (this.firstLink.isDisplayed() === true) {
        this.firstLink.click()
    }
    this.h3Header.waitForDisplayed()
}
This will no longer be an explicit wait. It's now an implicit wait — meaning before we had to wait 5,000 milliseconds whether or not the element showed up. Here we are only waiting for the amount of time needed for the h3 header to show or until the timeout expires.
Before our test can get to the checkbox, we need to click on this element “Checkboxes”.
Let us look in our Page Object and we realize that we don't have anything apart from clicking on the first link [get firstLink() { return $('ul li:nth-child(1) a') }], so we need to add something as follows:
link(index) { return $('ul li:nth-child(${index}) a') }
Then we're going to have a function call clickLink that accepts an index.
It is a good practice to comment your code. Here we are going to specify that we have a number index, and this is the index of the element. This function clicks on the link based on the index provided. I will go through later on and add comments to these functions that we created early on.
/**
* Clicks on the link based on the index provided
* @param {Number} index the index of the element
*/

clickLink(index) {
    this.link(index).waitForDisplayed()
    this.link(index).click()
}
We are accepting an index; we are going to waitForDisplayed and then it’s going to click our link.
So, in our tests, we can now add the code to click on the sixth link:
it('should click checkbox', () => {
    internetPage.clickLink(6)
    internetPage.clickCheckbox(1)
    expect(internetPage.checkboxes(1).isSelected()).equals(true)
})
So, a thing to know before we run our test, we have CheckBox here [in our previous version on the expect line], but if we go to our Page Object, we realize that we use CheckBoxes. We need to ensure that they are the same.
Okay, so it passed.
What we did was we clicked on the link for checkbox. We click the first checkbox, then we verified that it was indeed selected.
We can click links; we can click radio buttons and verify that they are selected or not selected afterward.
So, if it is that we were to unclick this checkbox, what we would do is just add on a test here that says:
it('should uncheck checkox', () => {
    internetPage.clickCheckbox(1)
    expect(internetPage.checkboxes(1).isSelected()).equals(false)
})
We are going to click the checkbox again; this time we expect that it is selected as “false”. We are already on the page, so we don't need to specify any browser URL or click the link. We can just continue with our test.
Let us run that test.
If we look very closely, you'll see it checking and unchecking the checkbox. It is no longer selected. Okay, great.
Another element action that we can use is adding a value.
If we look here [on the “Welcome to the-internet’ homepage] and we realize that we have a Form Authentication. It would require of us to enter a username and password. What we can do is use a set value to enter text to these fields.
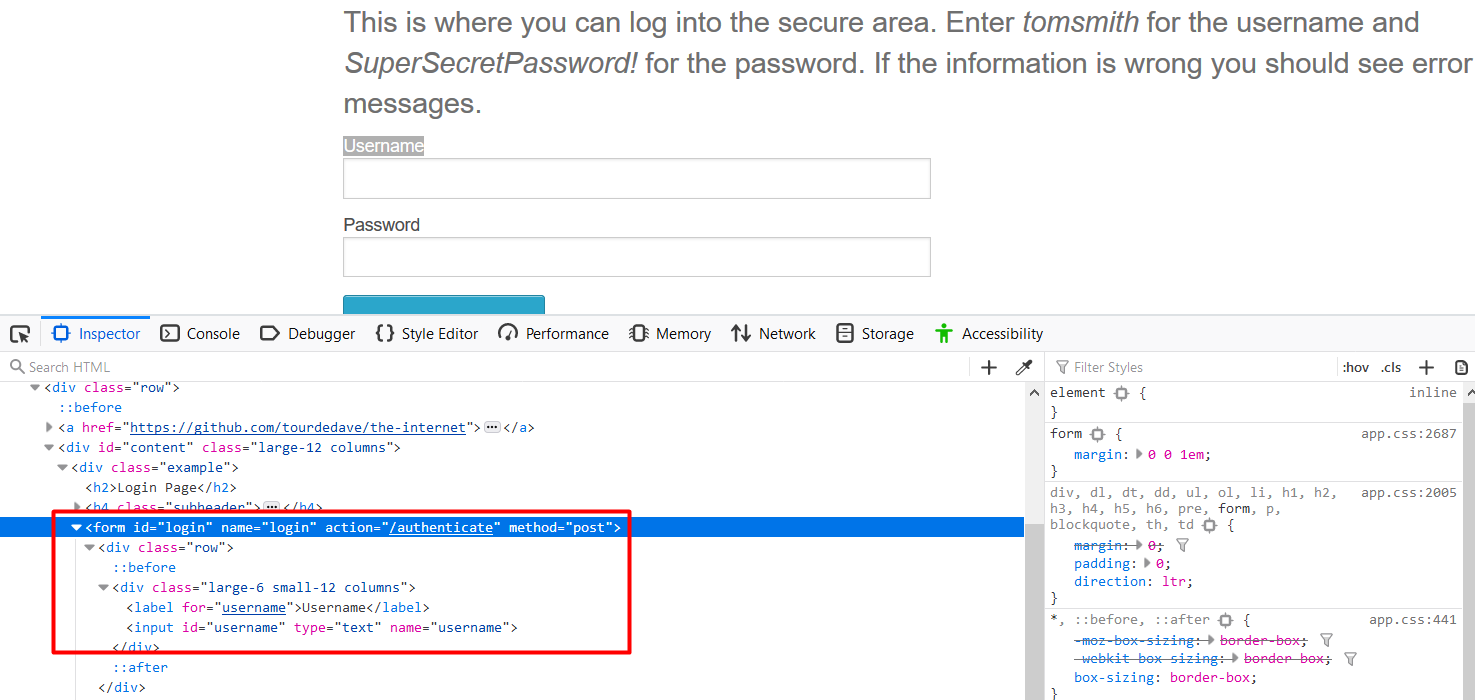
If we Inspect here, we realize that we have a form with a name of “login” and it has two rows. These rows contain the “username” field and we have the “password” field.
What we are going to do in this next test is to navigate to this URL, enter a username and a password and verify that the username and password has been entered. Let's do that.
We start by adding our elements to our Page Object.
We have our element “username” and we say
get username() { return $('#username') }
Our next element is “password”, which also has an id of “password”
get password() { return $('#password') }
We are going to create a function called enterUsername, and we’re going to accept text:
/**
* Enter the username into the field
* @param {String} text username to be entered
*/
enterUsername(text) {
    this.username.waitForDisplayed()
    this.username.setValue(text)
}
We're going to do the same for our password.
/**
* Enter the password into the field
* @param {String} text password to be entered
*/
enterPassword(text) {
    this.password.waitForDisplayed()
    this.password.setValue(text)
}
What we are going to do here is we want to navigate to this URL for the “login” page.
We already have this [http://the-internet.herokuapp.com/] as our baseUrl, so we can just use that and then append /login to it. As we remember, this navigates to the specified URL. What this does, it takes our baseUrl that we had specified in our config file and it appends /login to it. It will take us directly to this Login page.
Once we are on the Login page, we need to then say internetPage.enterPassword, and in this case we are going to enter username of “Julia”.
We're going to use assert now so you're going to say assert.equal to “Julia”. We're going to compare “Julia” against the element and we're going to get the value of the element.
it('should enter username', () => {
    browser.url('${browser.options.baseUrl}/login')
    internetPage.enterUsername(`Julia`)
    assert.equal(`Julia`, internetPage.username.getValue())
})
Let's run this test.
If we realize, it enters the username and the test passed because it got the value of it and it realized that it entered it.
We can do the exact same thing for our password. Let's just modify.
it('should enter password', () => {
    browser.url('${browser.options.baseUrl}/login')
    internetPage.enterPassword(`Password`)
    assert.equal(`Password`, internetPage.password.getValue())
})
Let's run our test. Okay, it entered both the username and the password.
Right there we used two element actions. We used the getValue, which is something that we haven't done before. Normally, we are using getText.
I will tell you why we used getValue here.
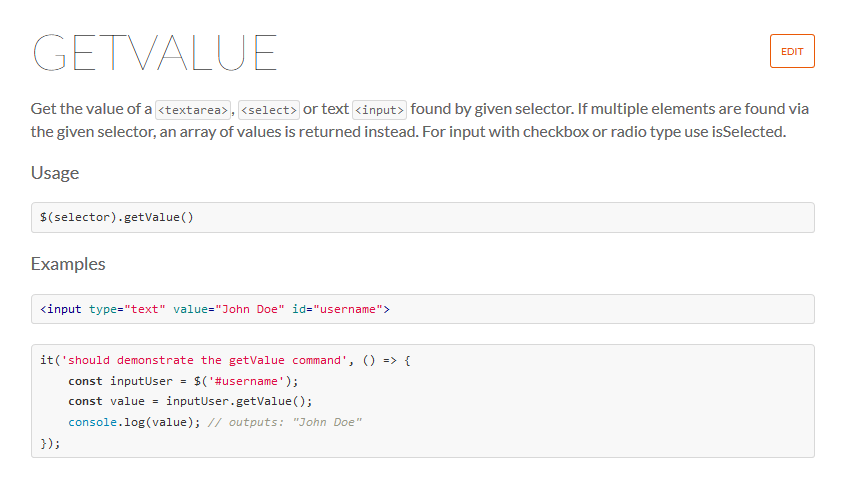
If we go to WebdriverIO documentation, we realize that getValue is best used for text areas or input fields.
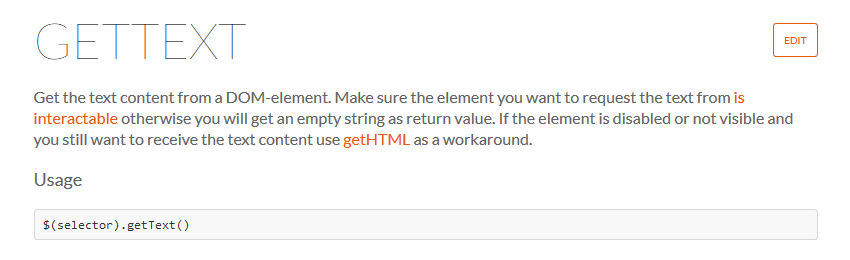
getText, on the other hand, is best used for other elements.
If you have an h2 tag or a h3 tag, whatever the case is, you can use getText. But in order to get the value of a text area or an input field, you need to use the command getValue instead of getText.
Let's put getText here and see what happens.
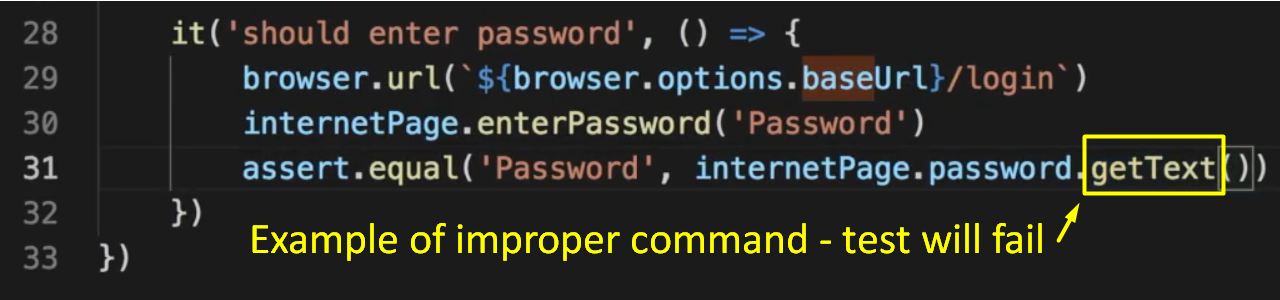
All right. Let's run our test. It fails because it's expecting password to equal to something, but here getText cannot get the value of an input field. It returns blank and therefore, your test fails.
If it is that you are using a text area or an input field, you have to say getValue.
Let's say that we entered “Julia” but we want to enter something else. Or let's say we are on a text area or input field that already contains value and we want to erase that value in order to enter orders.
We can use a clearValue functionality.
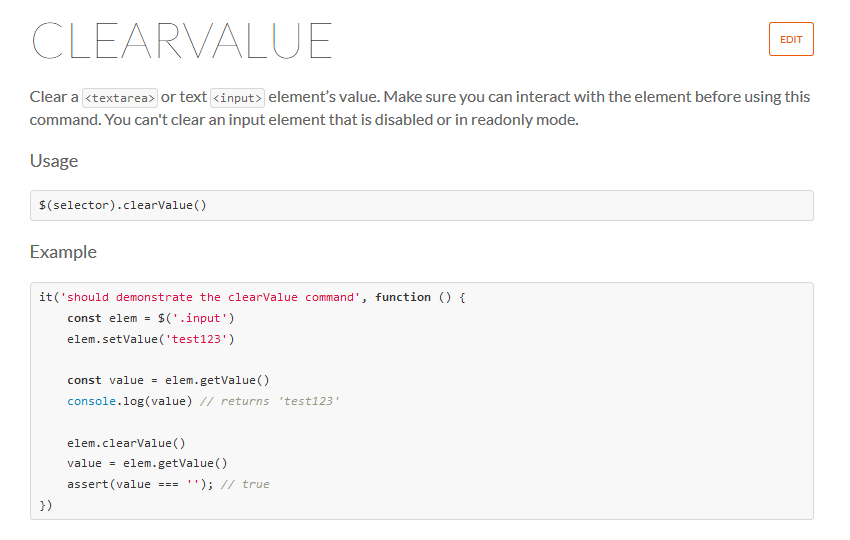
What it does, it clears a text area or text input value. You have to interact with the element first before you use this command.
What is advised, is that you click on the element and then you clear the value. Or you can do a getValueon it. You have to do some form of interaction with the element before you attempt to clear it.
Let's try.
All right, we're going to say:
it('should clear Value', () => {
    internetPage.username.click()
    internetPage.username.clearValue()
    assert.equal(`Julia`, internetPage.username.getValue())
})
We're going to verify that the value has been cleared. Before that, we're going to do a click on the element.
Then, we're going to check what the values equal to. We're going to check that it's equal to “Julia”. We should expect this test to fail as the value of it should have been cleared.
Okay. Let's run this test.
Okay. So, it failed because it cleared the value here and it's expecting this to equal to blank.
Now, we can set our test to blank:
it('should clear Value', () => {
    internetPage.username.click()
    internetPage.username.clearValue()
    assert.equal(``, internetPage.username.getValue())
})
Run it again and it should pass. Okay, awesome.
These are some of the element actions that WebDriver has.
In the next lecture, we will go further on speaking about different WebDriver actions such as using the keyboard and mouse inputs, how to scroll to an element, how to go to a new tab, how to drag and drop, and how to do file upload.
See you in the next lecture.
Resources
Quiz
The quiz for this chapter can be found in section 3.5
