

Transcripted Summary
In this video, we will install all the prerequisites or the dependencies that are required to run Appium on macOS.
We will start with the first thing that we should install, which is Java JDK.
# Installing Java JDK
We will open our browser, in my case, it's Google Chrome and here I will search "java JDK download" and click on the first link, which will redirect to the Oracle website.
Here, we will find the different Java versions and the latest version is SE 15, but I will install the Java SE 11 (LTS) version, which is the long-term support or the stable version, and then I will click on the "JDK download".
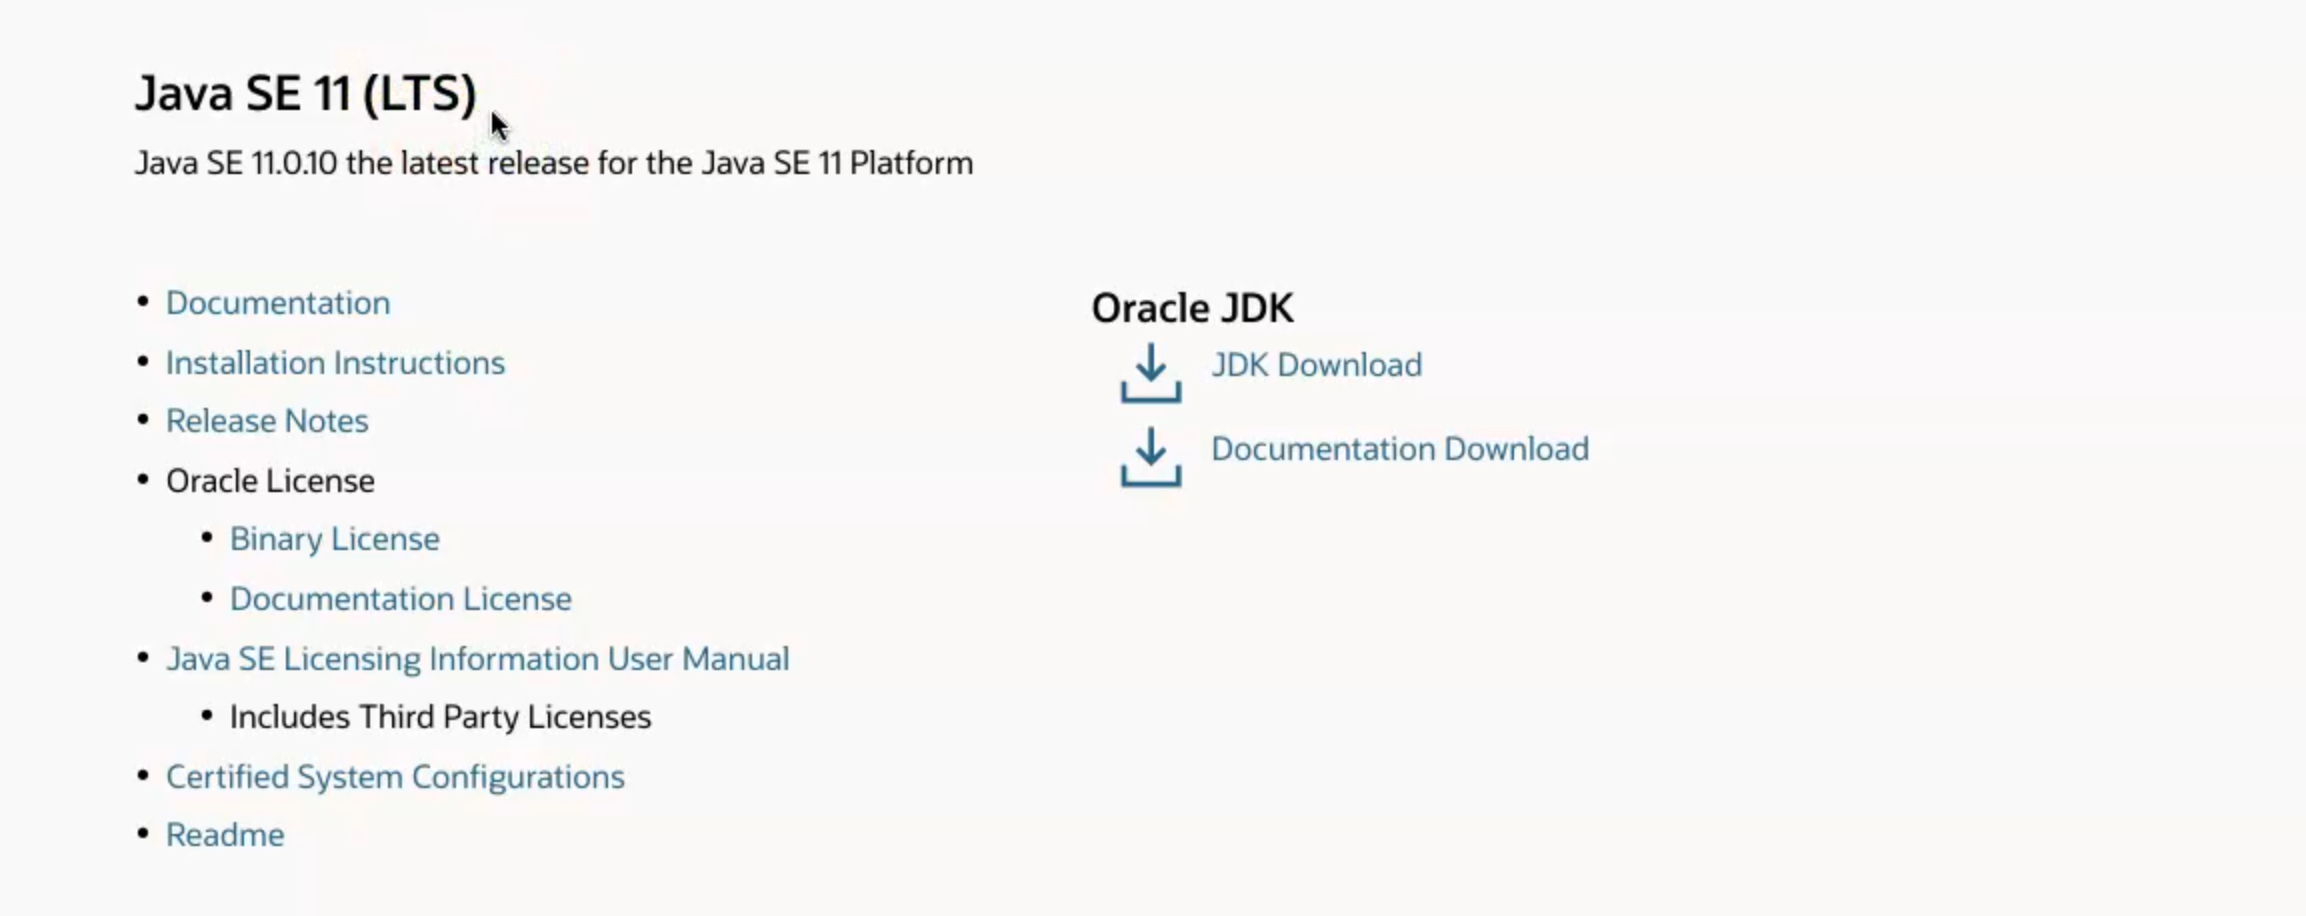
Here, we can find the different versions and different operating systems for Java - I have here two versions or two types of files I can download - the DMG file or the Compressed Archive file.
I will click on the Compressed Archive file, and then it will display the terms, and then I will log in to the Oracle website with my account to be able to download this file.
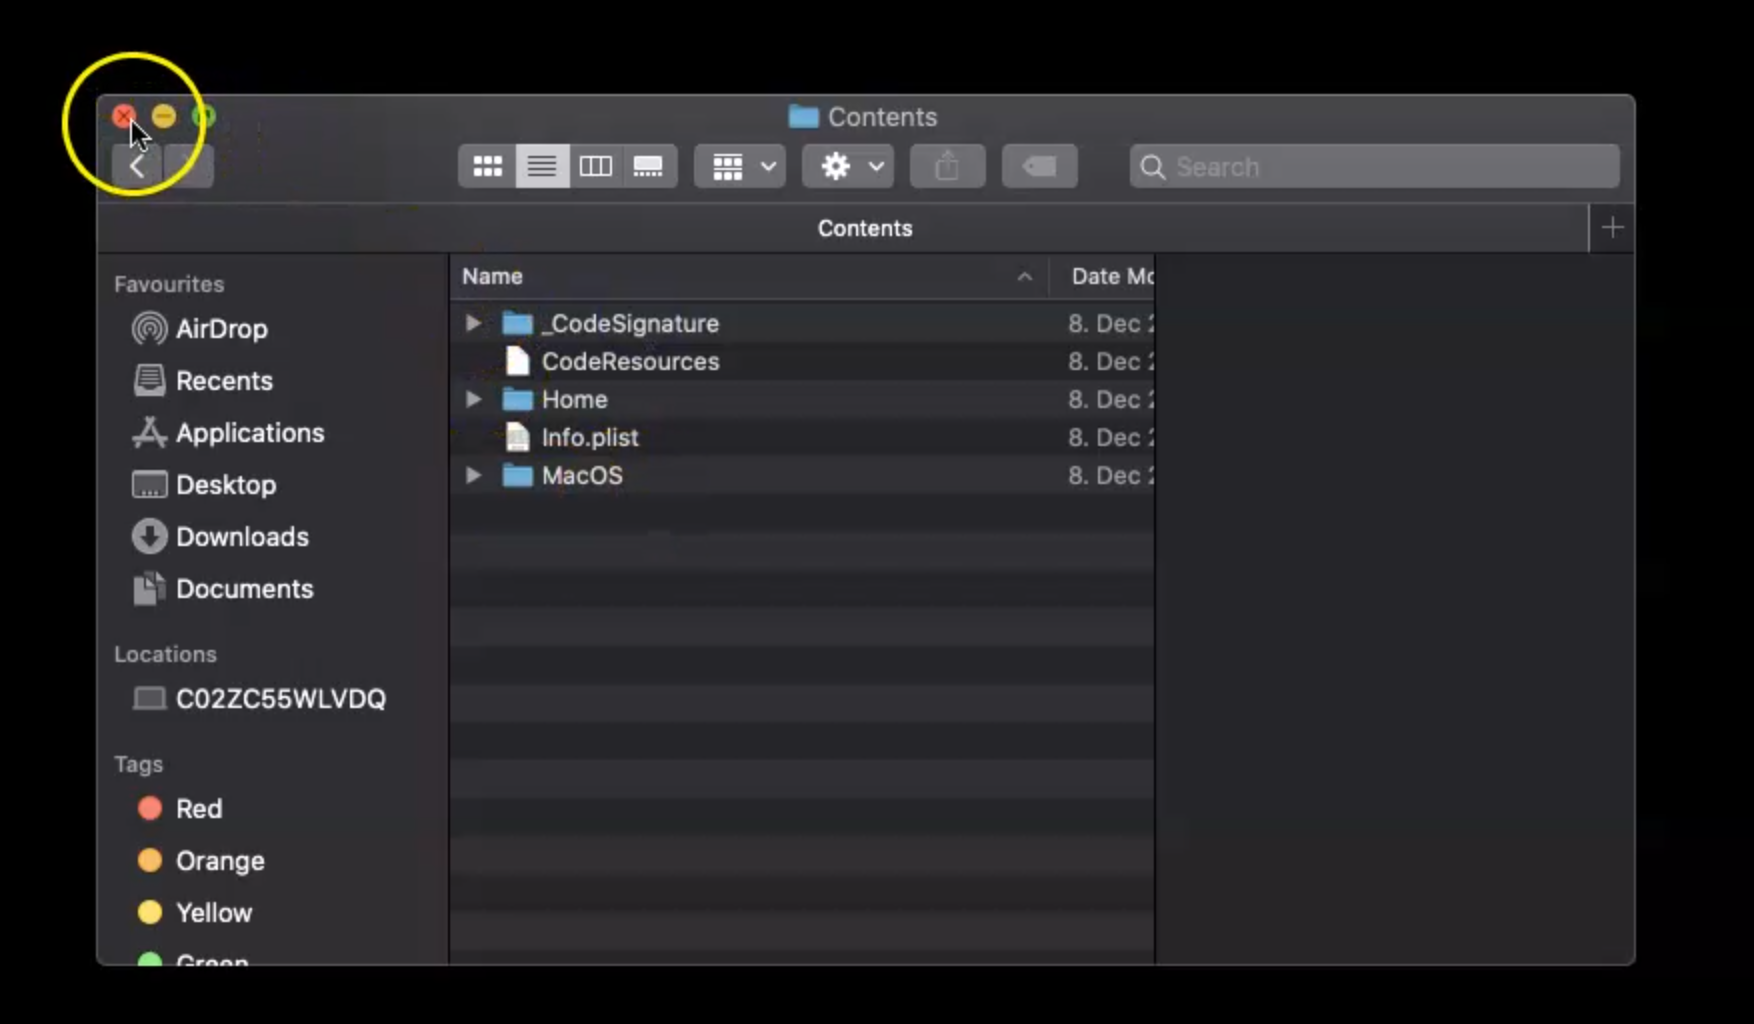
After I downloaded the file, I will double-click on this file to extract the file onto the desktop.
Here, I have the Java JDK and the content is Java.
From the command line, I will open the Library/Java/JavaVirtualMachines folder and here, I already have an existing version of Java, so I will drag and drop this version here and authenticate my account to be able to copy this folder.
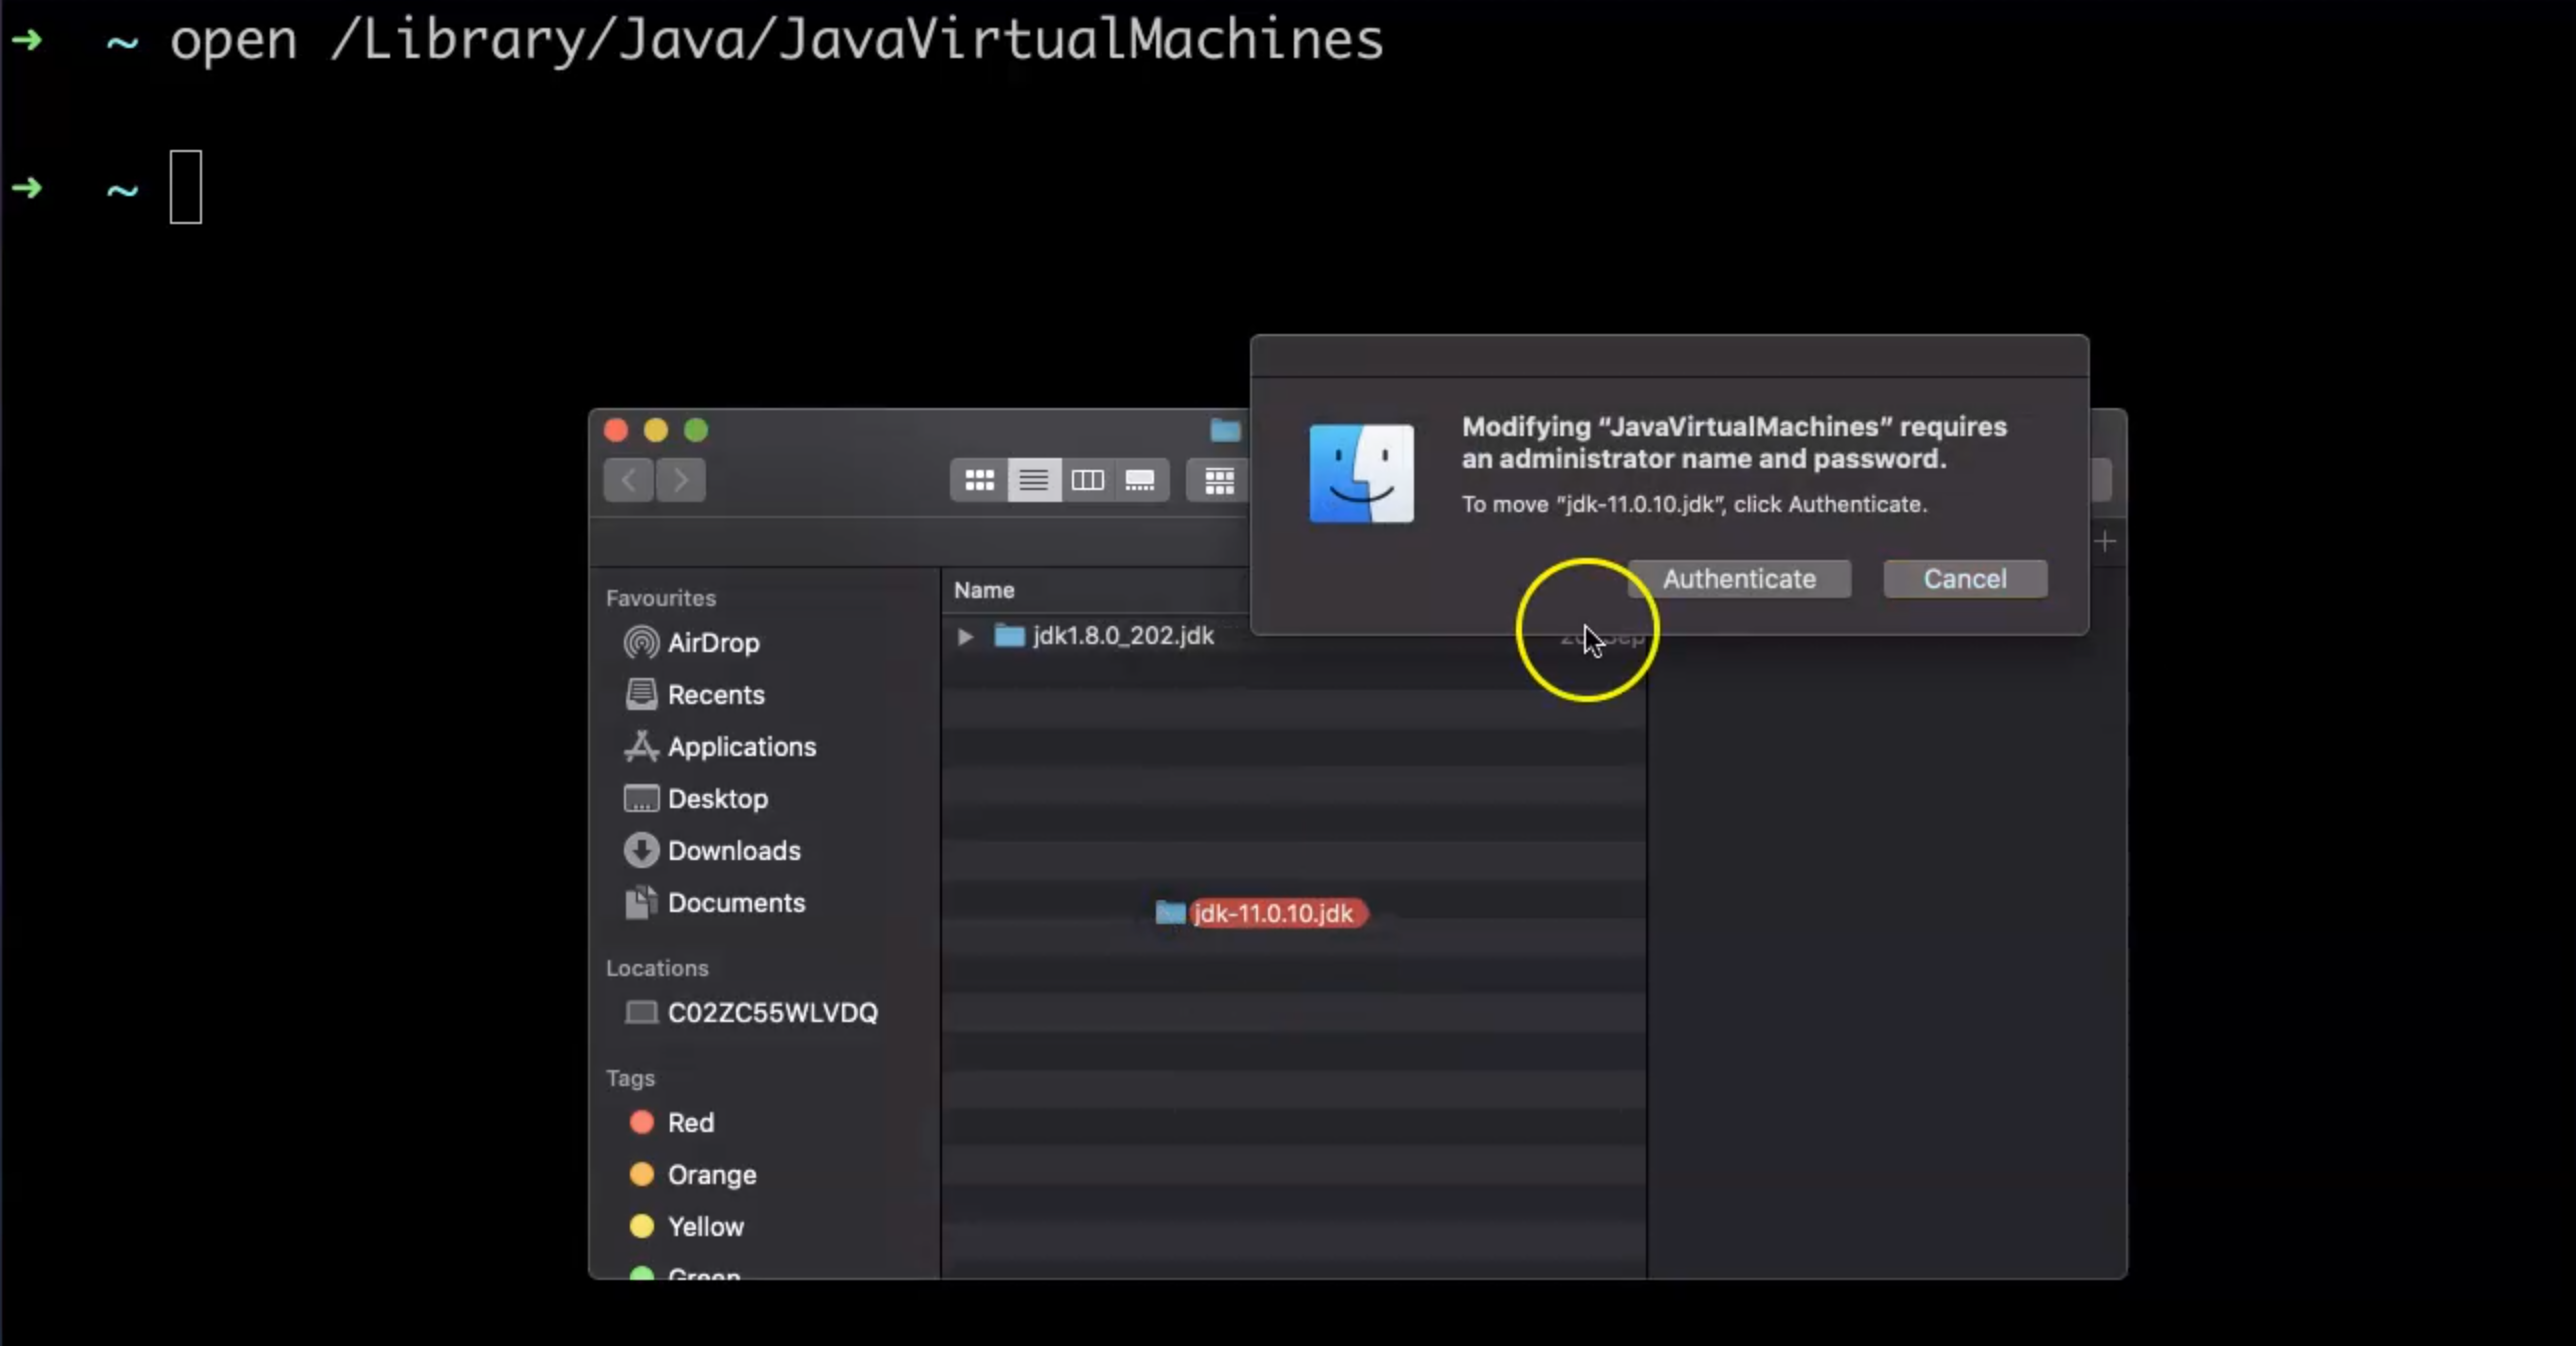
After we moved the folder here, I have here two versions, and then I will open the profile ~/.zshrc for the command line to switch to version 11 if I already have a version in this file.

Because I already have a Java version in the profile, we should add export JAVA_HOME and then add the path for the JDK.
Because I already have an existing one, I will change it to version 11 or the version that I prefer to use, and then I will save the file.
Then I will run
source ~/.zshrc
to save the changes to my profile.
To verify that Java is installed on my machine, I will run:
java -version
Here, I will have the versions that are already added to the profile, or I can run:
javac -version
# Installing NodeJS and NPM
Now we installed the first thing, Java, and then we will install the Node JS and the rest of the necessary dependencies for Appium.
The second tool that I wanted to install is Node JS and NPM.
I will open the browser and then search "nodejs download" and from the first link, I will click on Node JS download, and here we also have an LTS version - we already installed the LTS version for Java.
Here we have different operating systems - in our case, we are still using the macOS version, so I will download the package file.
I will click on this file and continue with the wizard to install Node JS on my machine.
Once I install Node JS, it will include NPM or Node Package Manager on my machine.
From the command line, I will verify that Node JS and NPM are installed.
After the installation is finished, it gives us information about where the Node JS latest version is installed, under bin.

NPM is installed under this path /bin/npm and then you need to make sure that the bin path is in your $PATH to be able to use it from the command line.
From the command line, I will open a new session and run:
node -v
This will give me the version of Node JS and this will give us the Node package manager version:
npm -v
Now, we have Java installed on our machine and also, Node JS and NPM.
# Installing Android Studio and SDK
For the next step we will install and download Android Studio, and from Android Studio, we will download the Android SDK and initialize the Android emulator with the specific version for Android.
We should install Android Studio because it is highly recommended to be installed since it already includes the Android SDK, which includes all the tools that we need with Appium, and also from the Android studio, we can create our virtual devices or emulators.
In the browser, I will search for "android studio download" and from the first link, I will click on "Download Android Studio and SDK tools".
Then, I will run the download for Mac.
After the download is finished, I will run the file and continue with installing Android studio on our machine.
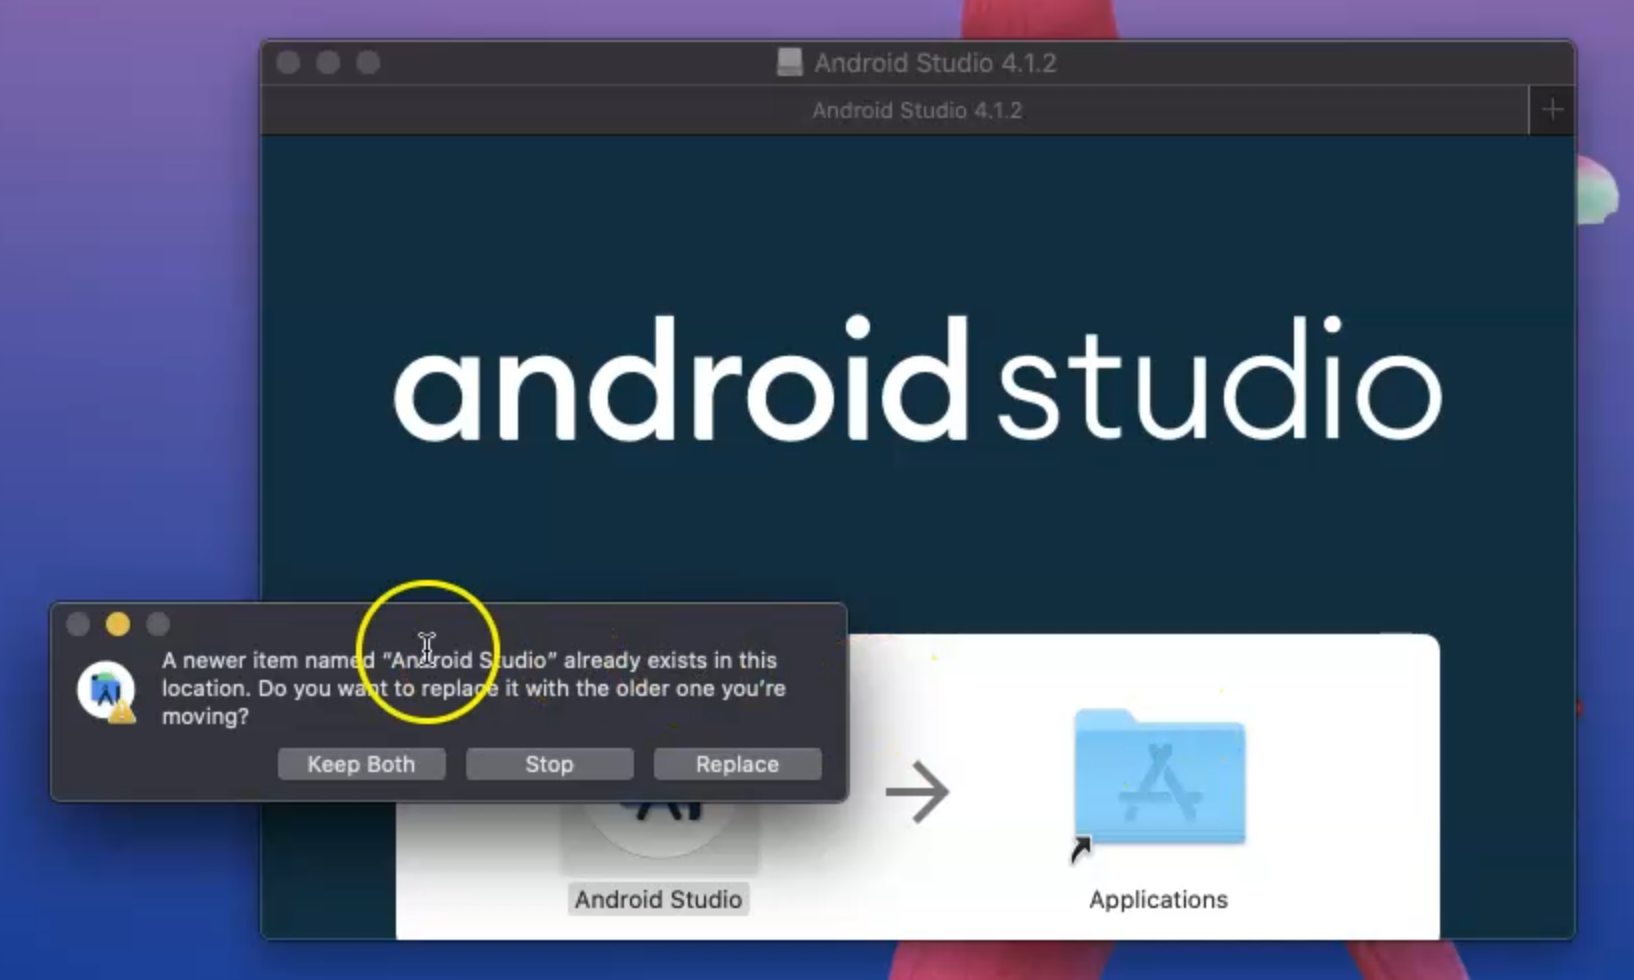
We need to move Android Studio to our Applications folder and here, because I have an already existing version for Android studio, I can select "Keep Both" to be able to save the existing Android Studio version in my Applications folder.
Then in Applications, I will have two Android Studios, so I will open the new version that I already installed on my machine.
Once I open Android Studio, I will get a starter screen if I don't have any existing or previous projects.
Here, I can "Create New Project" or "Open an Existing Project" and here I can also configure Android Studio.
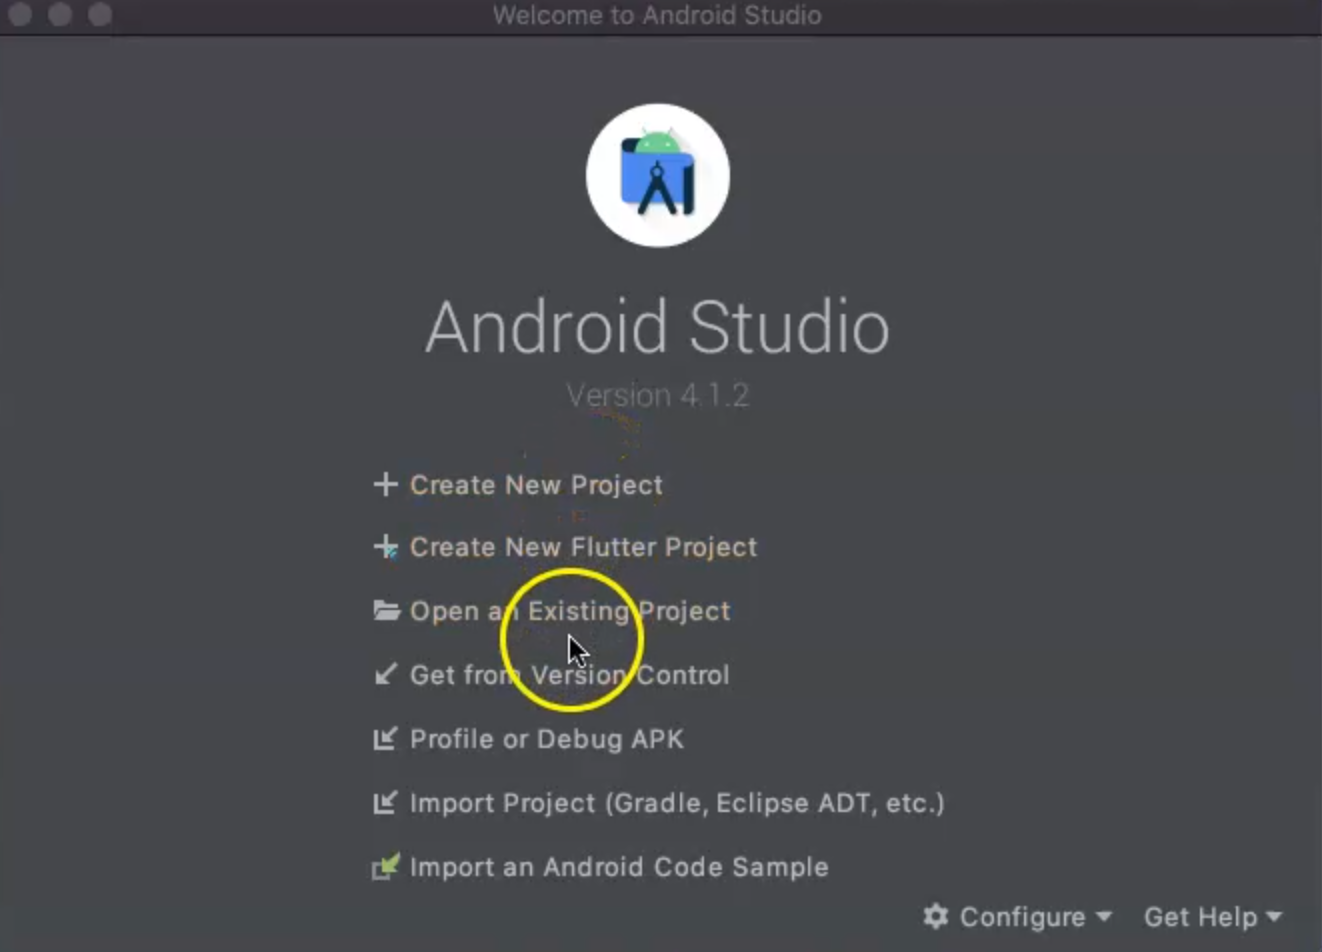
Maybe we don't need to open Android Studio or create a new project, and we just want to click on the "Configure" menu.
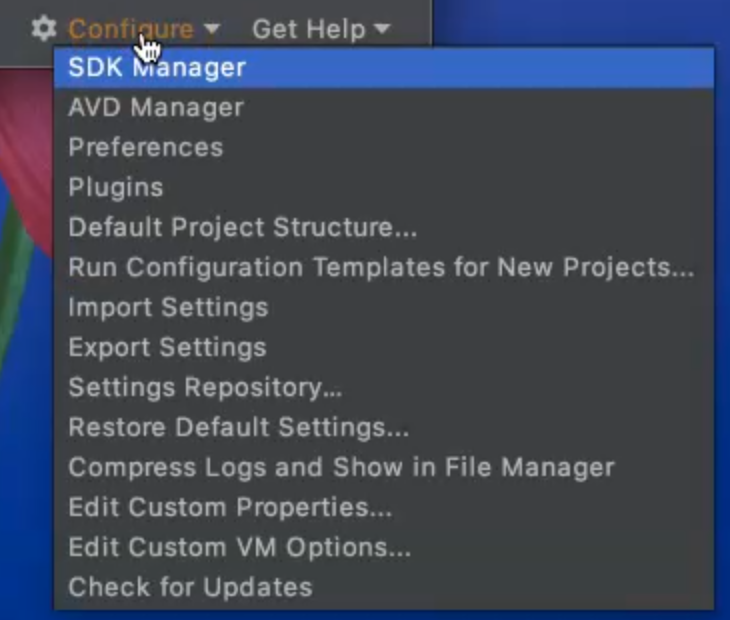
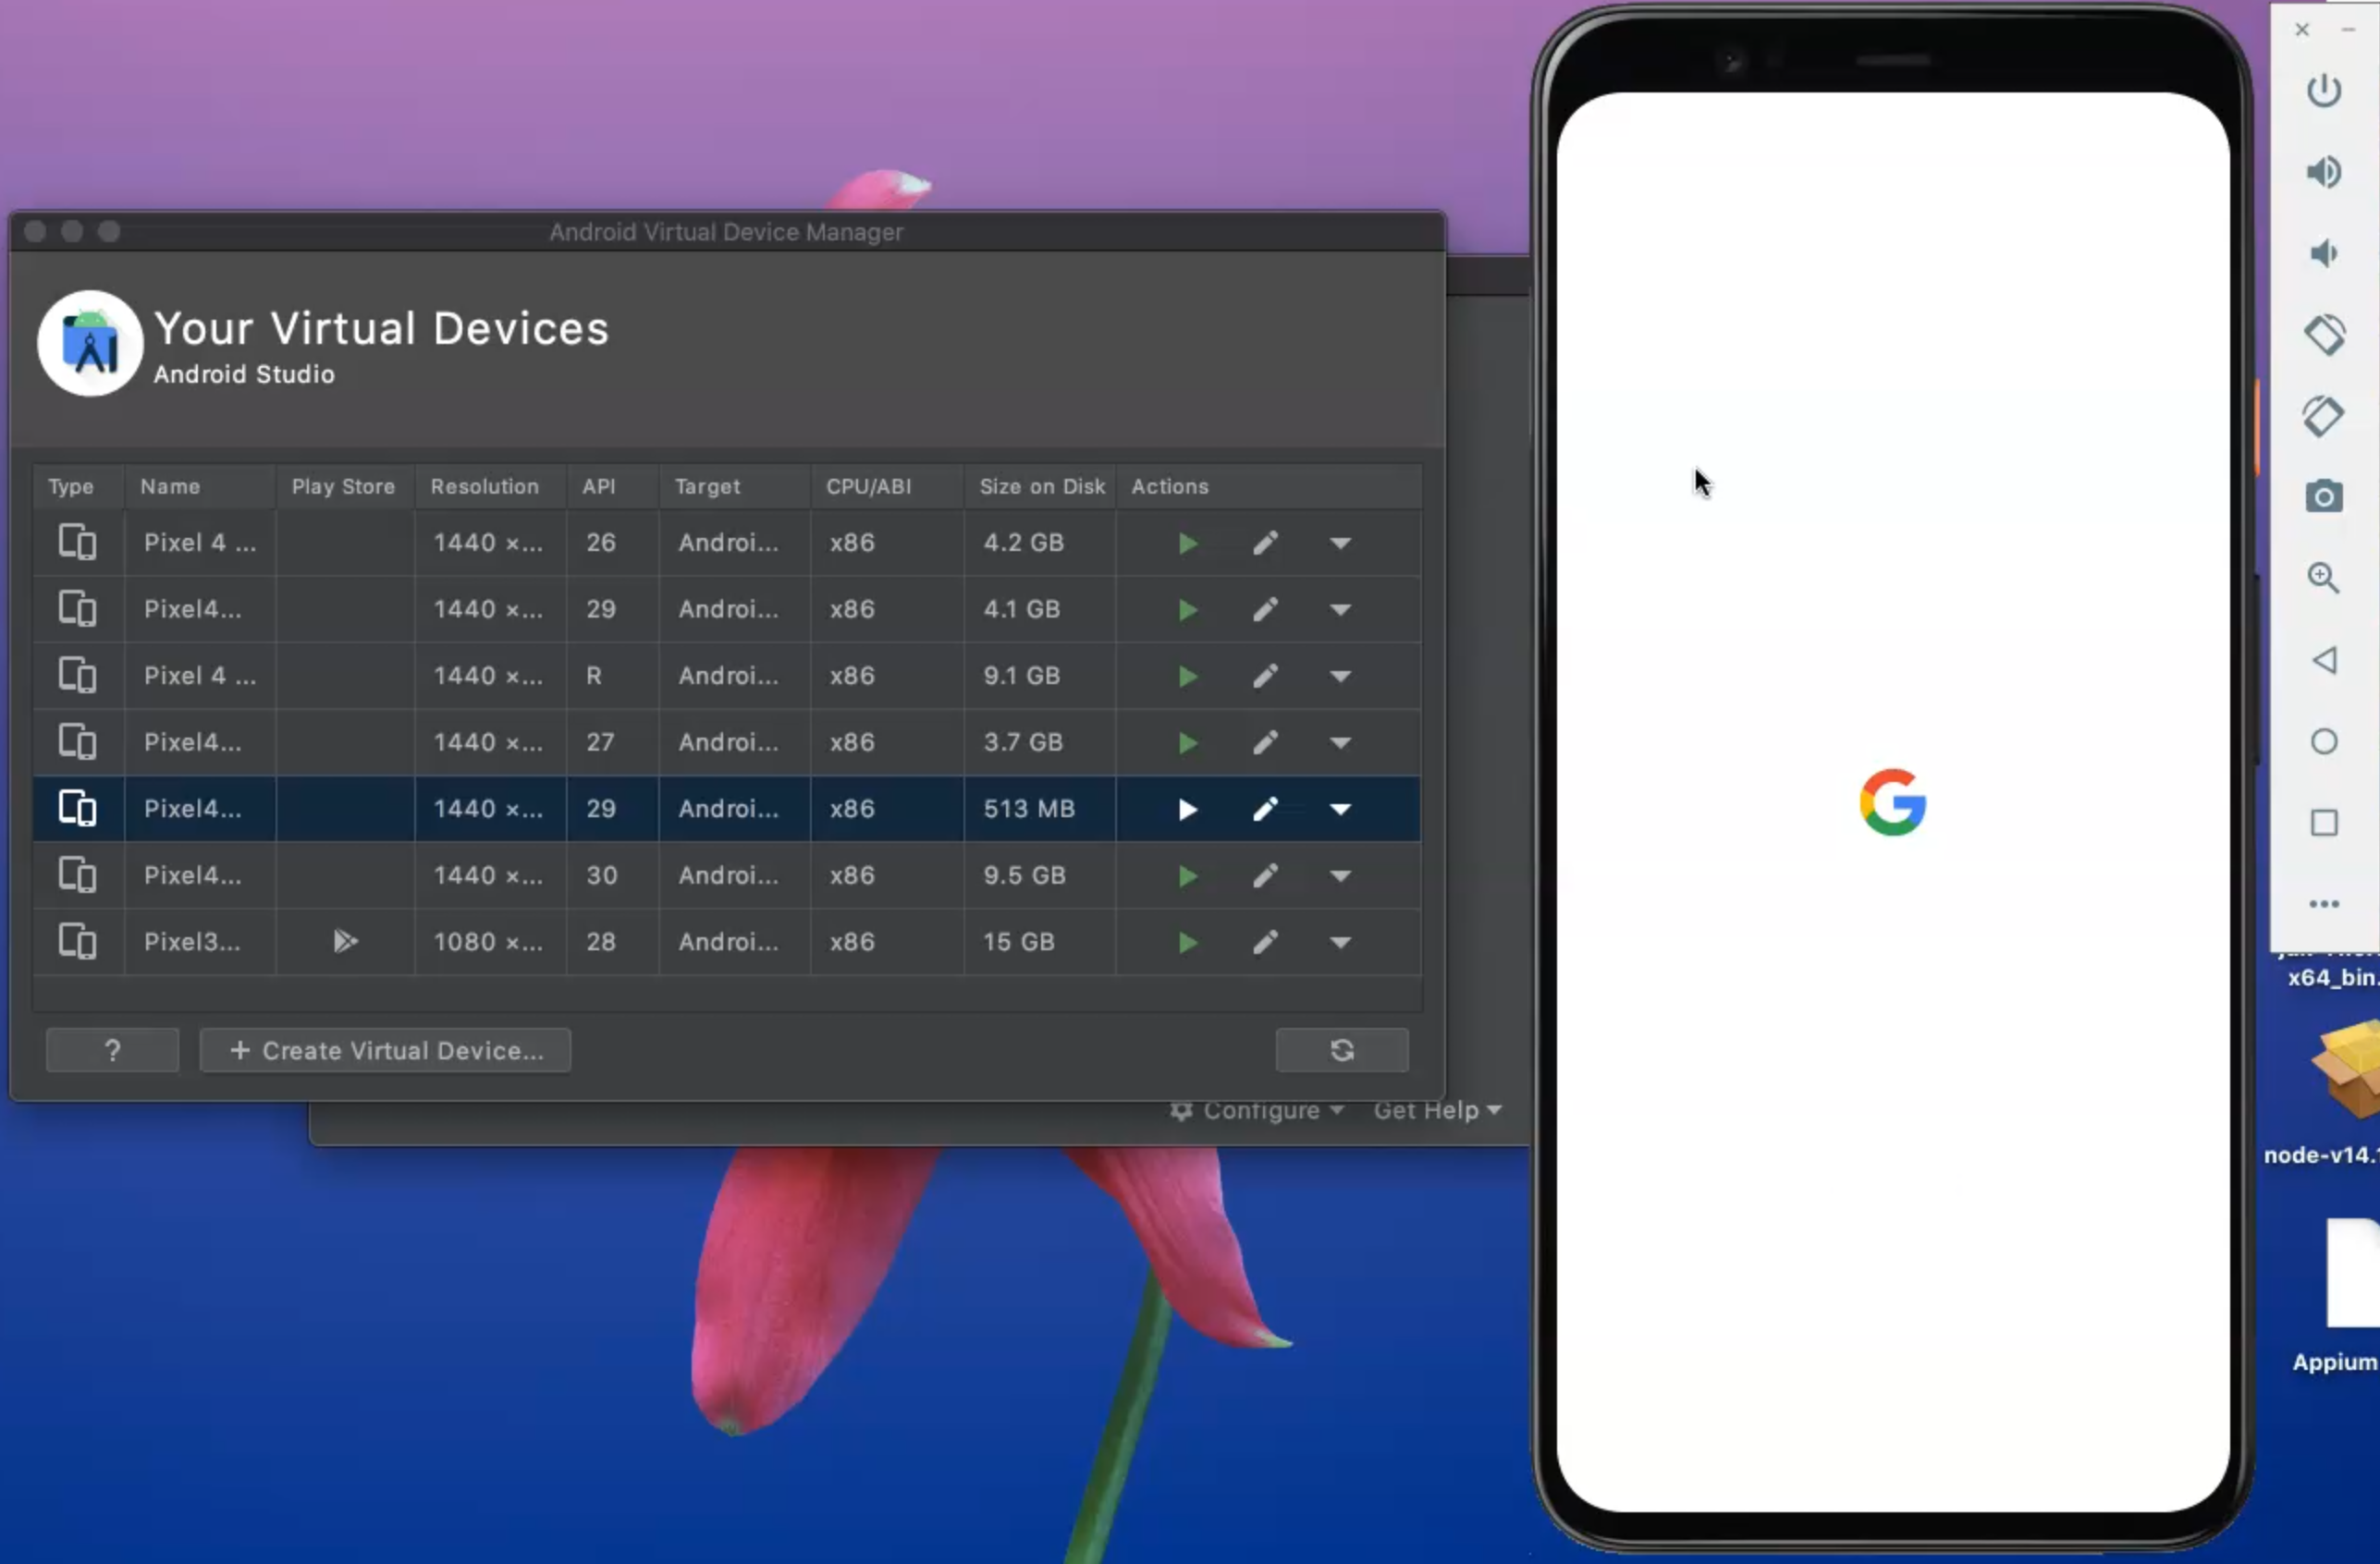
Here, we have two things we may want to configure - SDK Manager and AVD Manager.
The SDK manager gives us the indicator where the Android Studio SDK is installed and which SDK is installed on my machine or if I have already it installed before.
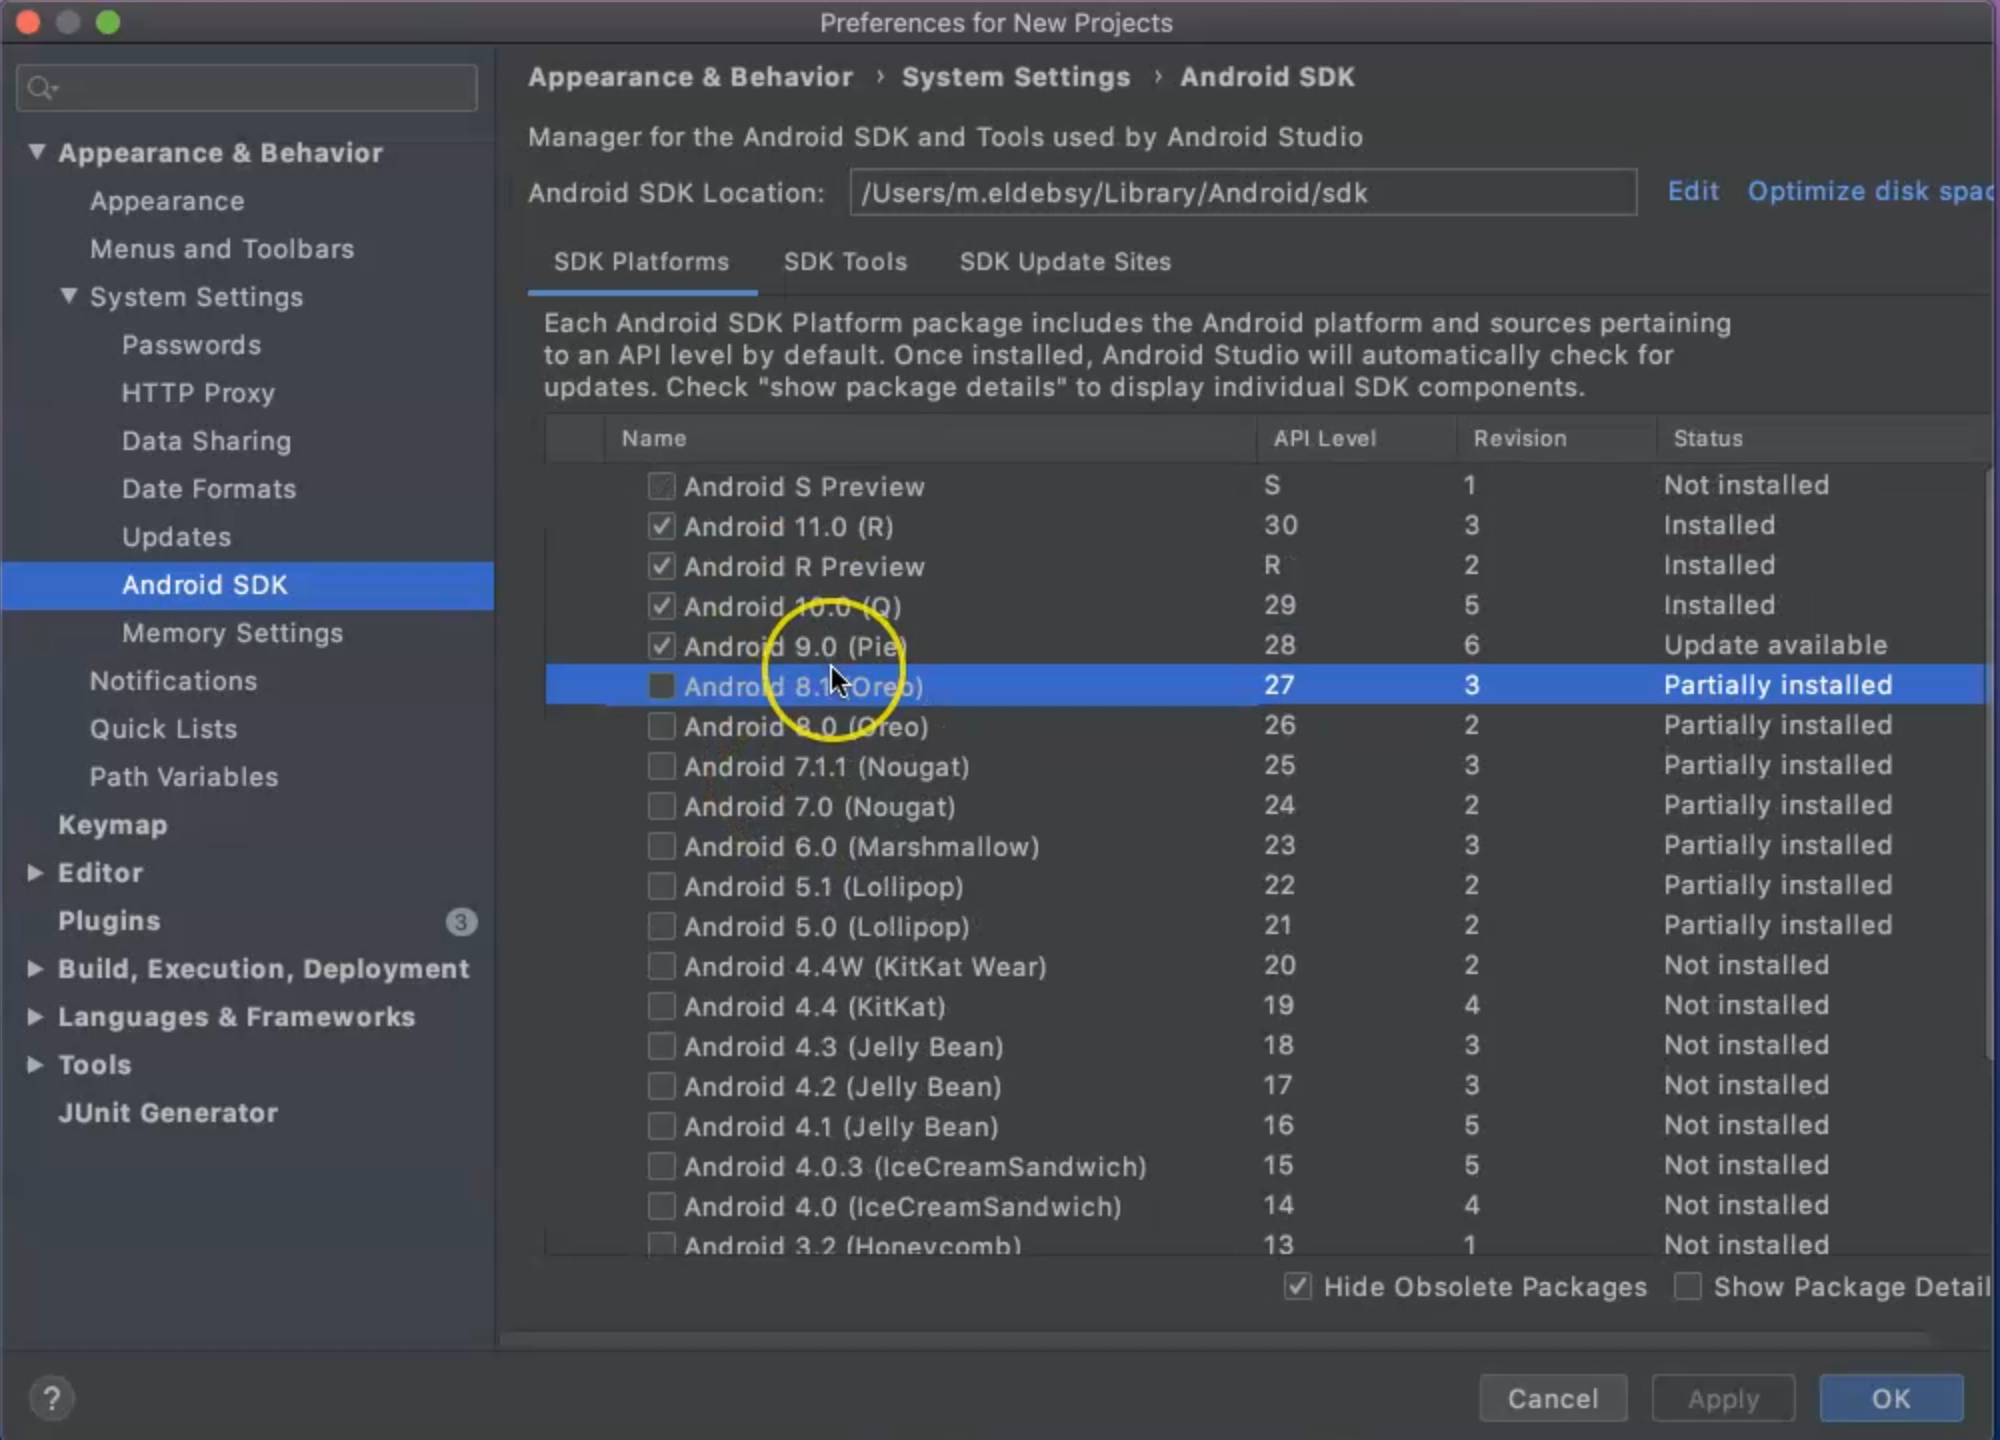
For example, if I wanted to install Lollipop or Marshmallow, I can select it to be installed.
We also have SDK tools.
For example, I can check if I want to download something for the Play Store or Google Web Drive, or Emulator Accelerator.
You can also check Update Sites and other things so the SDK Manager just gives us the different versions of the SDK that I want to install.
After I finish downloading the items I've selected, I can go to the AVD Manager and start creating my virtual device.
Again, I will open that configure menu and click on AVD Manager.
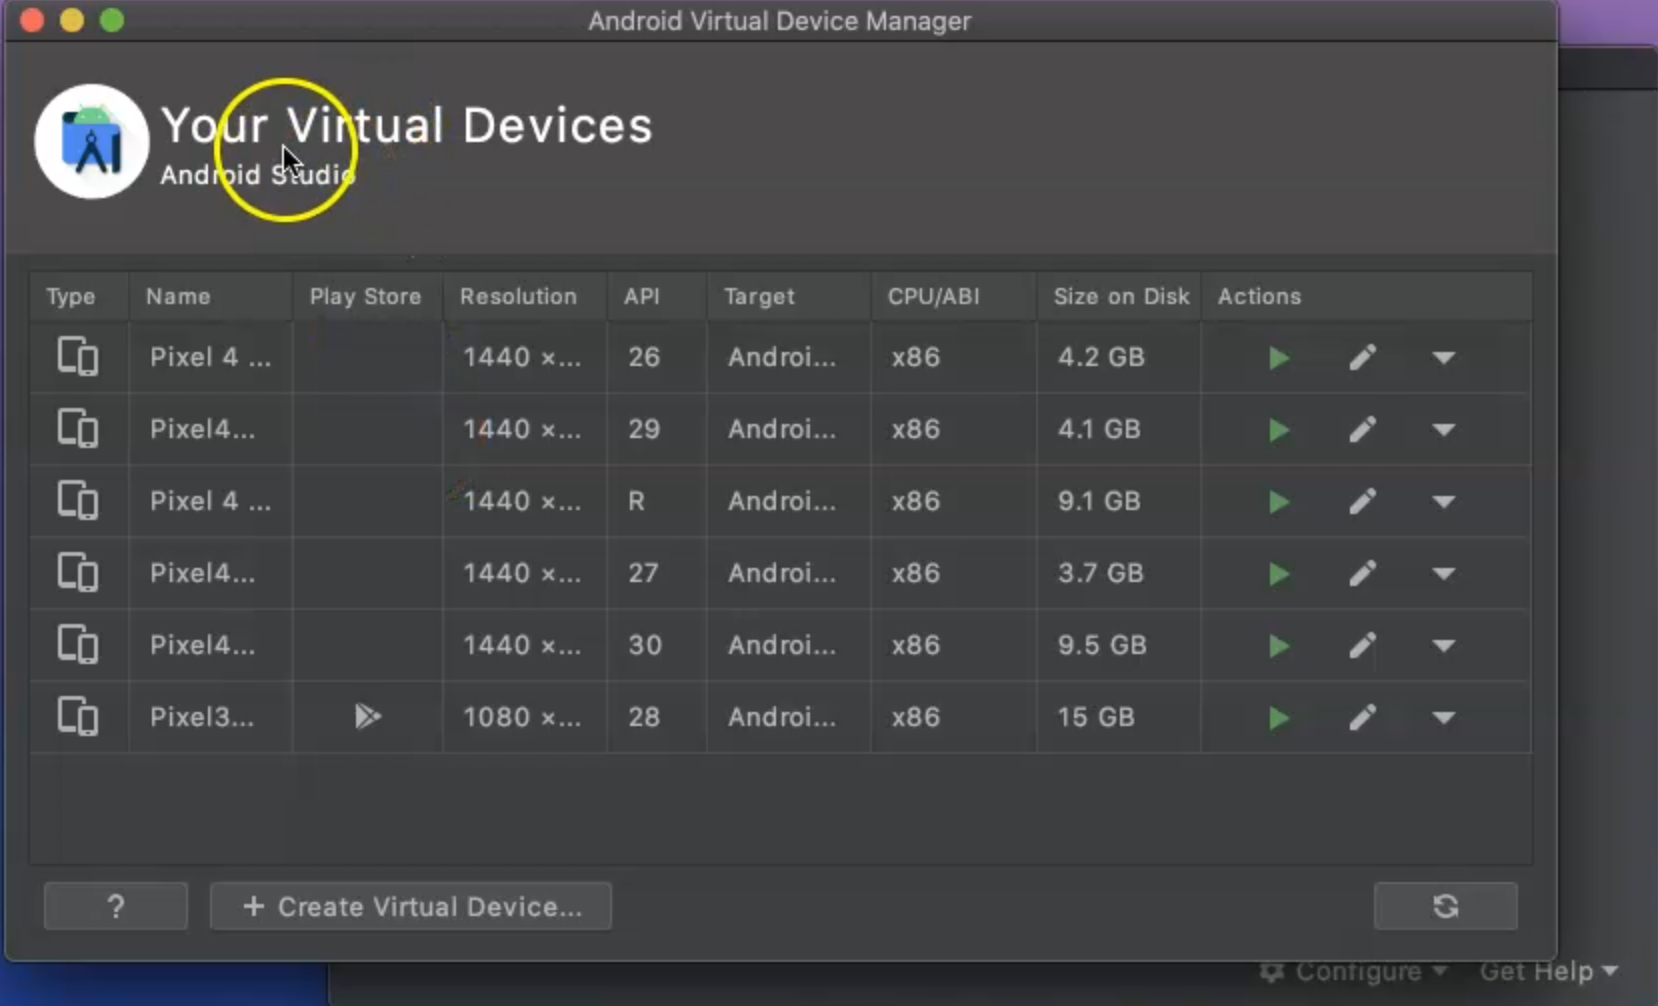
From the AVD manager here, I have already pre-installed the existing emulators or virtual devices.
AVD Manager stands for Android Virtual Device Manager.
Here, I can create a new virtual device and then select the phone hardware profile for the device I want to use - like Pixel 2 or Pixel 2 XL, or Pixel 3.
For example, I will click on "Pixel 4 XL" and then click "Next".
From this screen, I want to select a system image, which is the operating system or the software that you want to install on this hardware.

For example, if you wanted to install the API level at 30, which is Android 11, you can select this version, or if you want to install 29 or 28 or 27, it's always based on your choice.
Click "Next" and here, this is the AVD Name.

We will remove the spaces and name it "Pixel4API29", so we know which device it is and the version that was installed on this device.
We can also select the "Startup orientation" as "Portrait" or "Landscape" and click "Finish".
Now, our device is created and we can just double-click on this device.
This will start the AVD manager and start booting, and we'll need to wait for the system to be running so we can work with this device.
Resources
Quiz
The quiz for this chapter can be found in Chapter 3.8
