

Transcripted Summary
# Using WebDriverAgent
To download the WebDriver agent, the application on the real device or physical device for iOS, you should also add the profile and signing certificate in the application or in the project itself because when Appium builds this application, it will take the provision and the development certificates and starts installing the application successfully on the device.
To do that we can go to open and here is the path of the Appium WebDriver application.

If we open this folder, we will find that we already have an Xcode project for the WebDriver agent and we can open it.
In Xcode, I already opened the WebDriver agent and here I can go to the WebDriverAgent project, and for WebDriverAgentRunner under "Signing & Capabilities", I can select my account and for "Signing Certificate", I can select "Development".
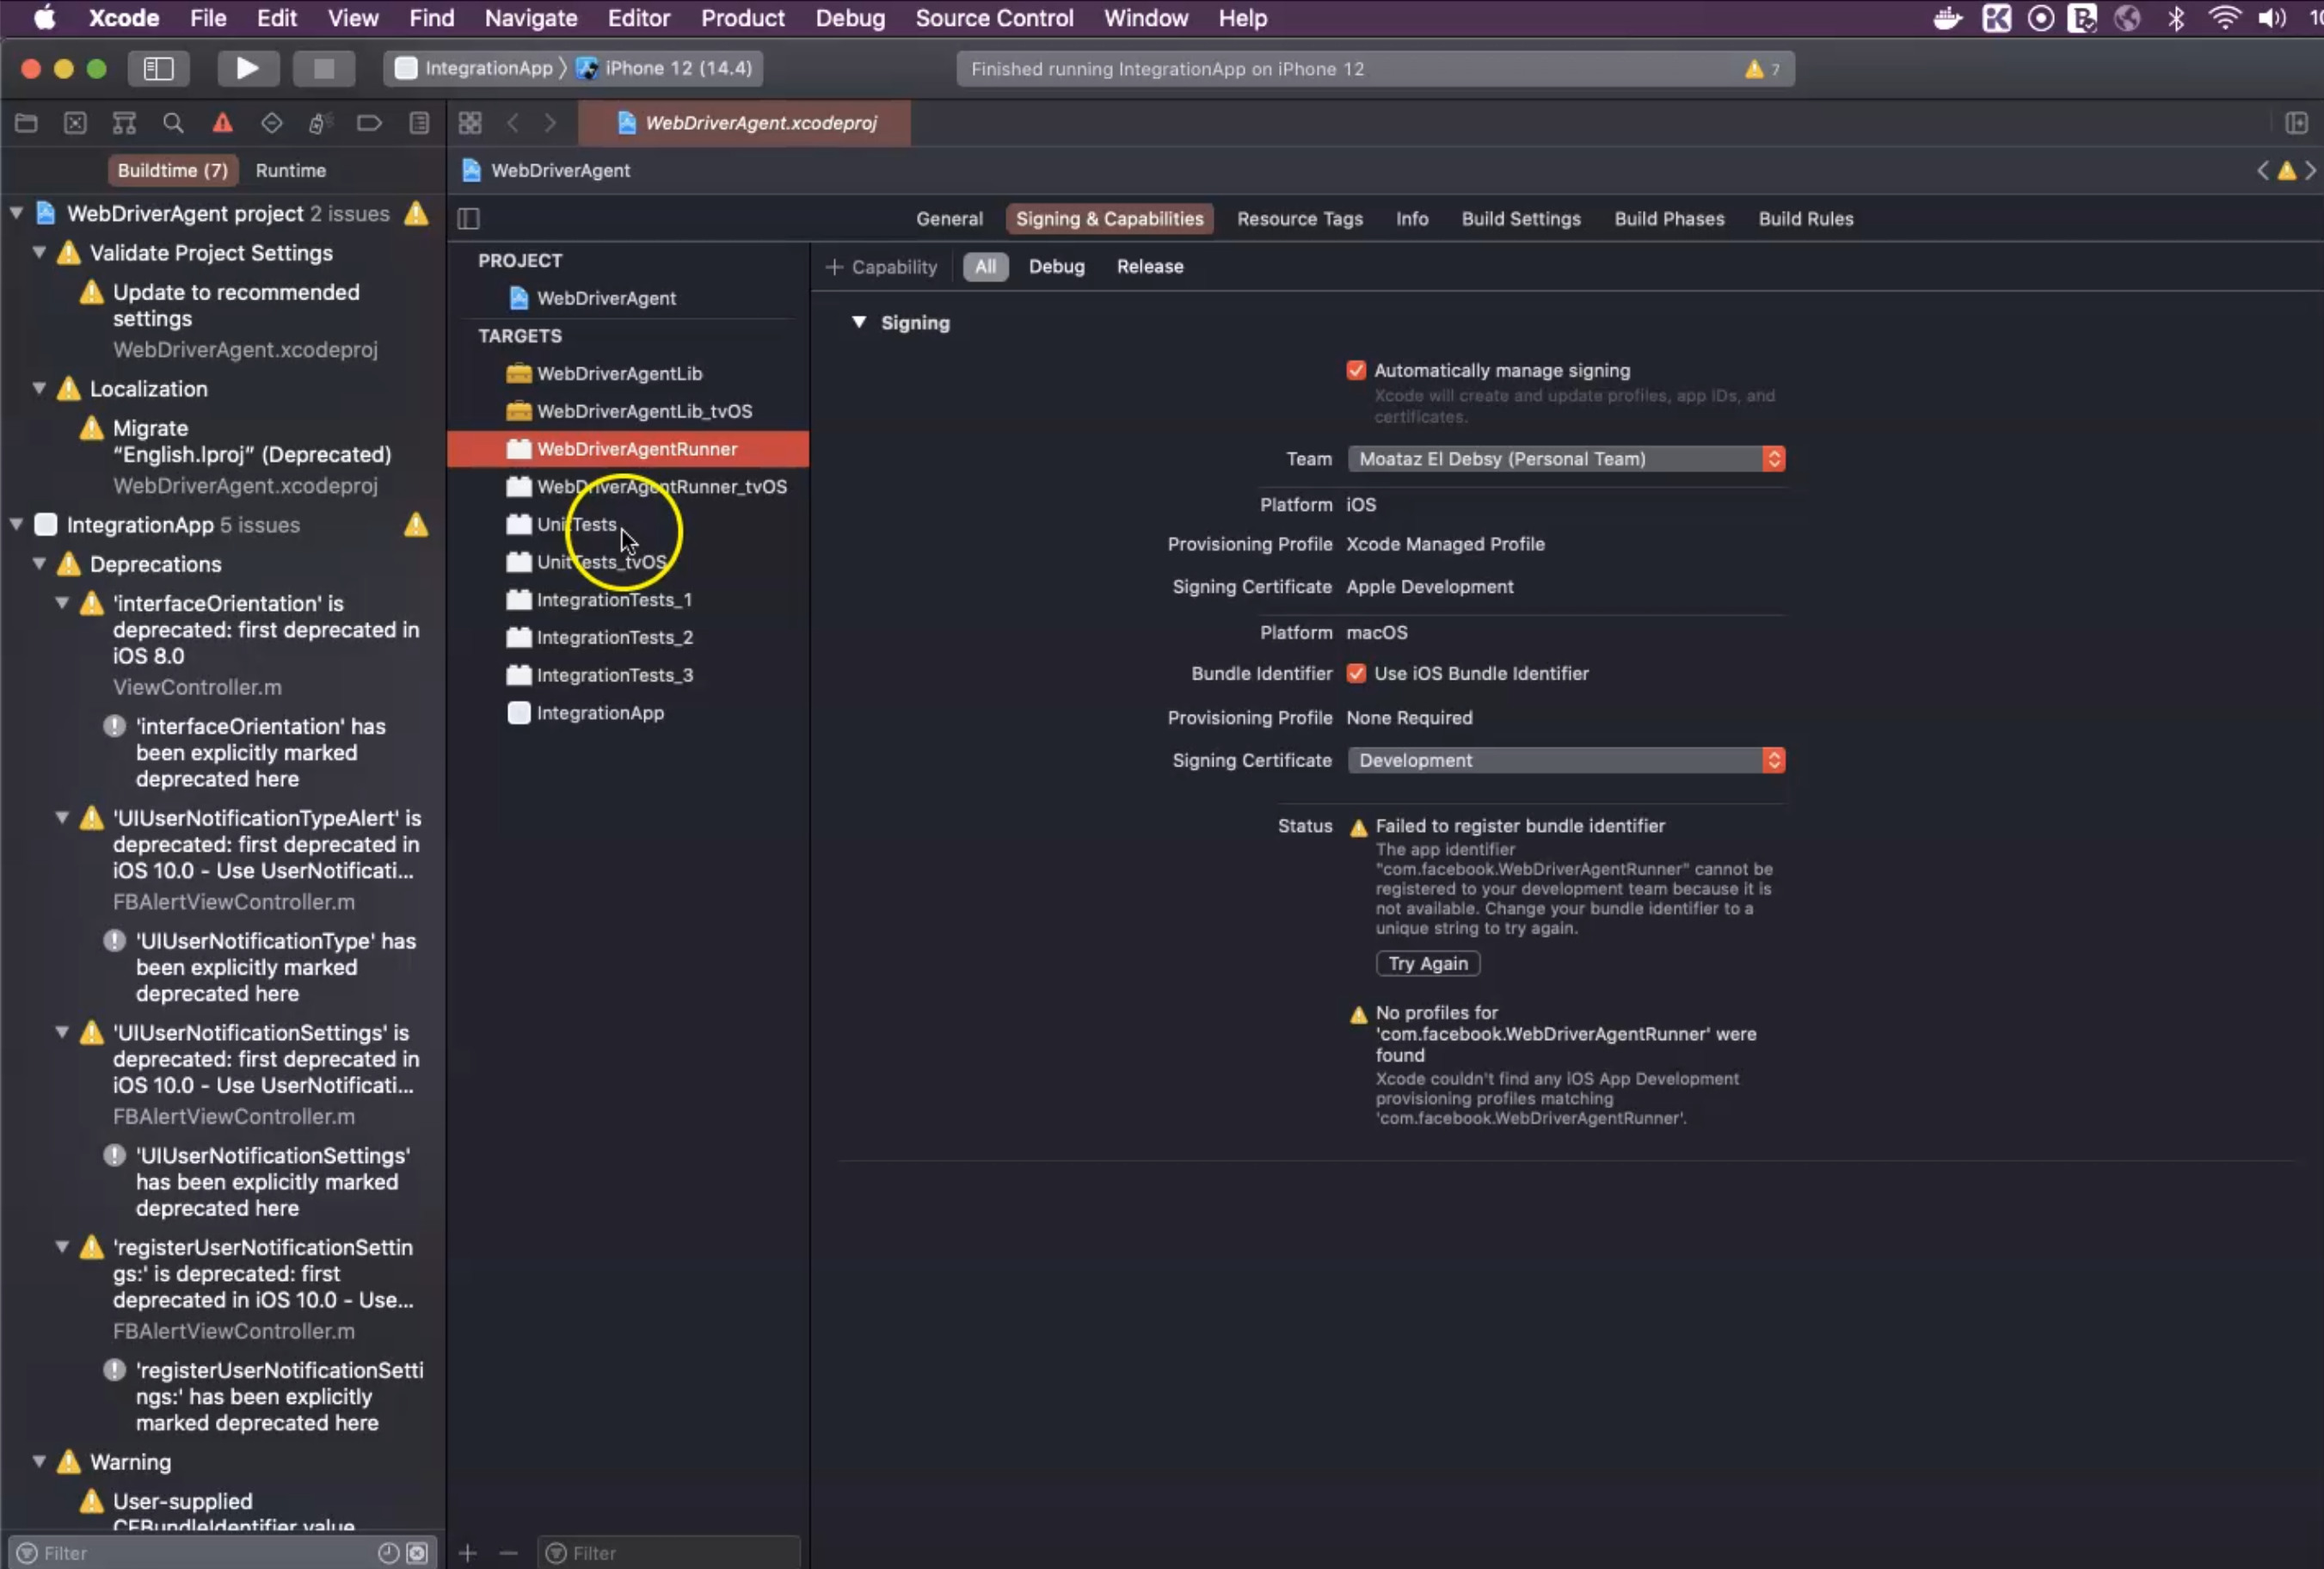
To run the IntegrationApp, I should also select a team and a certificate to be able to download it on the physical device.
In this case, if we run this application again, it will build successfully.
When we open the iPhone simulator, it's like a test application with a WebDriver agent, but when we connect a real device, it will run on this device successfully, and we can use it with Appium test cases.
# Installing Ruby
We should also have a RubyGem installed on our machine since sometimes we can use it for different commands.
I can install it by using this command line prompt:
brew install ruby
This will download the latest version of Ruby on our machine.
Sometimes we will install different tools using Ruby as a prerequisite, so we should download and install Ruby on our macOS machine.
# Installing and Using Appium
After that, we want to install Appium from the command line by running:
npm i -g appium
This will install the latest version of Appium, or if you want to, you can install a specific version by specifying the version number - for example, Appium 2 - if you want to install the latest beta version for Appium.
I will just install the latest one with Appium, and then with NodeJS, we will install Appium and we can run the Appium server from the command line, but usually, we are running it from the Appium Desktop to run the inspection sessions.
With the CI server, you can run Appium from the command line using the Appium command line to initialize the server from the command line, without using any GUI.
After we installed Appium, it's time to run the Appium command line:
appium
Here we have the welcome to Appium and the current version and this is the Appium REST HTTP interface and the server is started on this URL or the localhost, and this is the default port for the Appium server.

Now Appium is running as a server, without any GUI, but usually, as I mentioned, we are running it through Appium Desktop to have the inspection sessions and to be able to detect the elements on our devices for our test cases.
Now, it's time to write our first script using Appium because we installed it.
We did it already, and Appium now is up and running on our machines for MacOS and also Windows Operating System.
# Installing Maven
During our course, we will use a Maven Project.
To be able to run Maven Projects from the command line, we should also install Maven into our machine.
You can use brew to install Maven if you have a macOS operating system, or you can download the zip folder for Maven and unzip it and edit it in your environment variables.
I will install Maven by running:
brew install maven
After installation, I can confirm Maven added as an environment variable, and I can use Maven from the command line.
# Installing IntelliJ
Also in our demos, we will use the IntelliJ IDEA as a recommended IDE for our projects.
You can use any IDE as you prefer - for example, Eclipse - or anything else.
From this link, you can just download or change your operating system, and after that, you can download the community version, which is free, and you can use it directly from this link.
Resources
Quiz
The quiz for this chapter can be found in Chapter 3.8
