

Transcripted Summary
# How to Use iOS with Appium
Now, it's time for an iOS demo and our first application using Appium.
In our java folder, we can just create a new folder to put the Android test cases in a subfolder, and then we will move these test cases to this folder.
We will create a new one for iOS just to organize our application.
Inside iOS, we can copy the FirstAndroidTest and as we mentioned, we can change the desired capabilities.
I'll rename this to FirstiOSTest.
We will start with the platformName which is iOS, not Android, and the automationName is XCUITest.
For platformVersion, we can use any version - 14.4 or 12.2 - it's based on the SDK that you installed on your device.
The deviceName can be, for example, iPhone.
From Xcode, we can check what devices we have, or you can also install any additional simulators on your machine.
You can open the UIKit catalog, which is the application that we mentioned in the previous videos.

This is the UI catalog that we will use in our first demo.
Here, you can find all the simulators that we can use - for example, iPhone Pro with version 13.5 or iPhone Pro with 14.4.
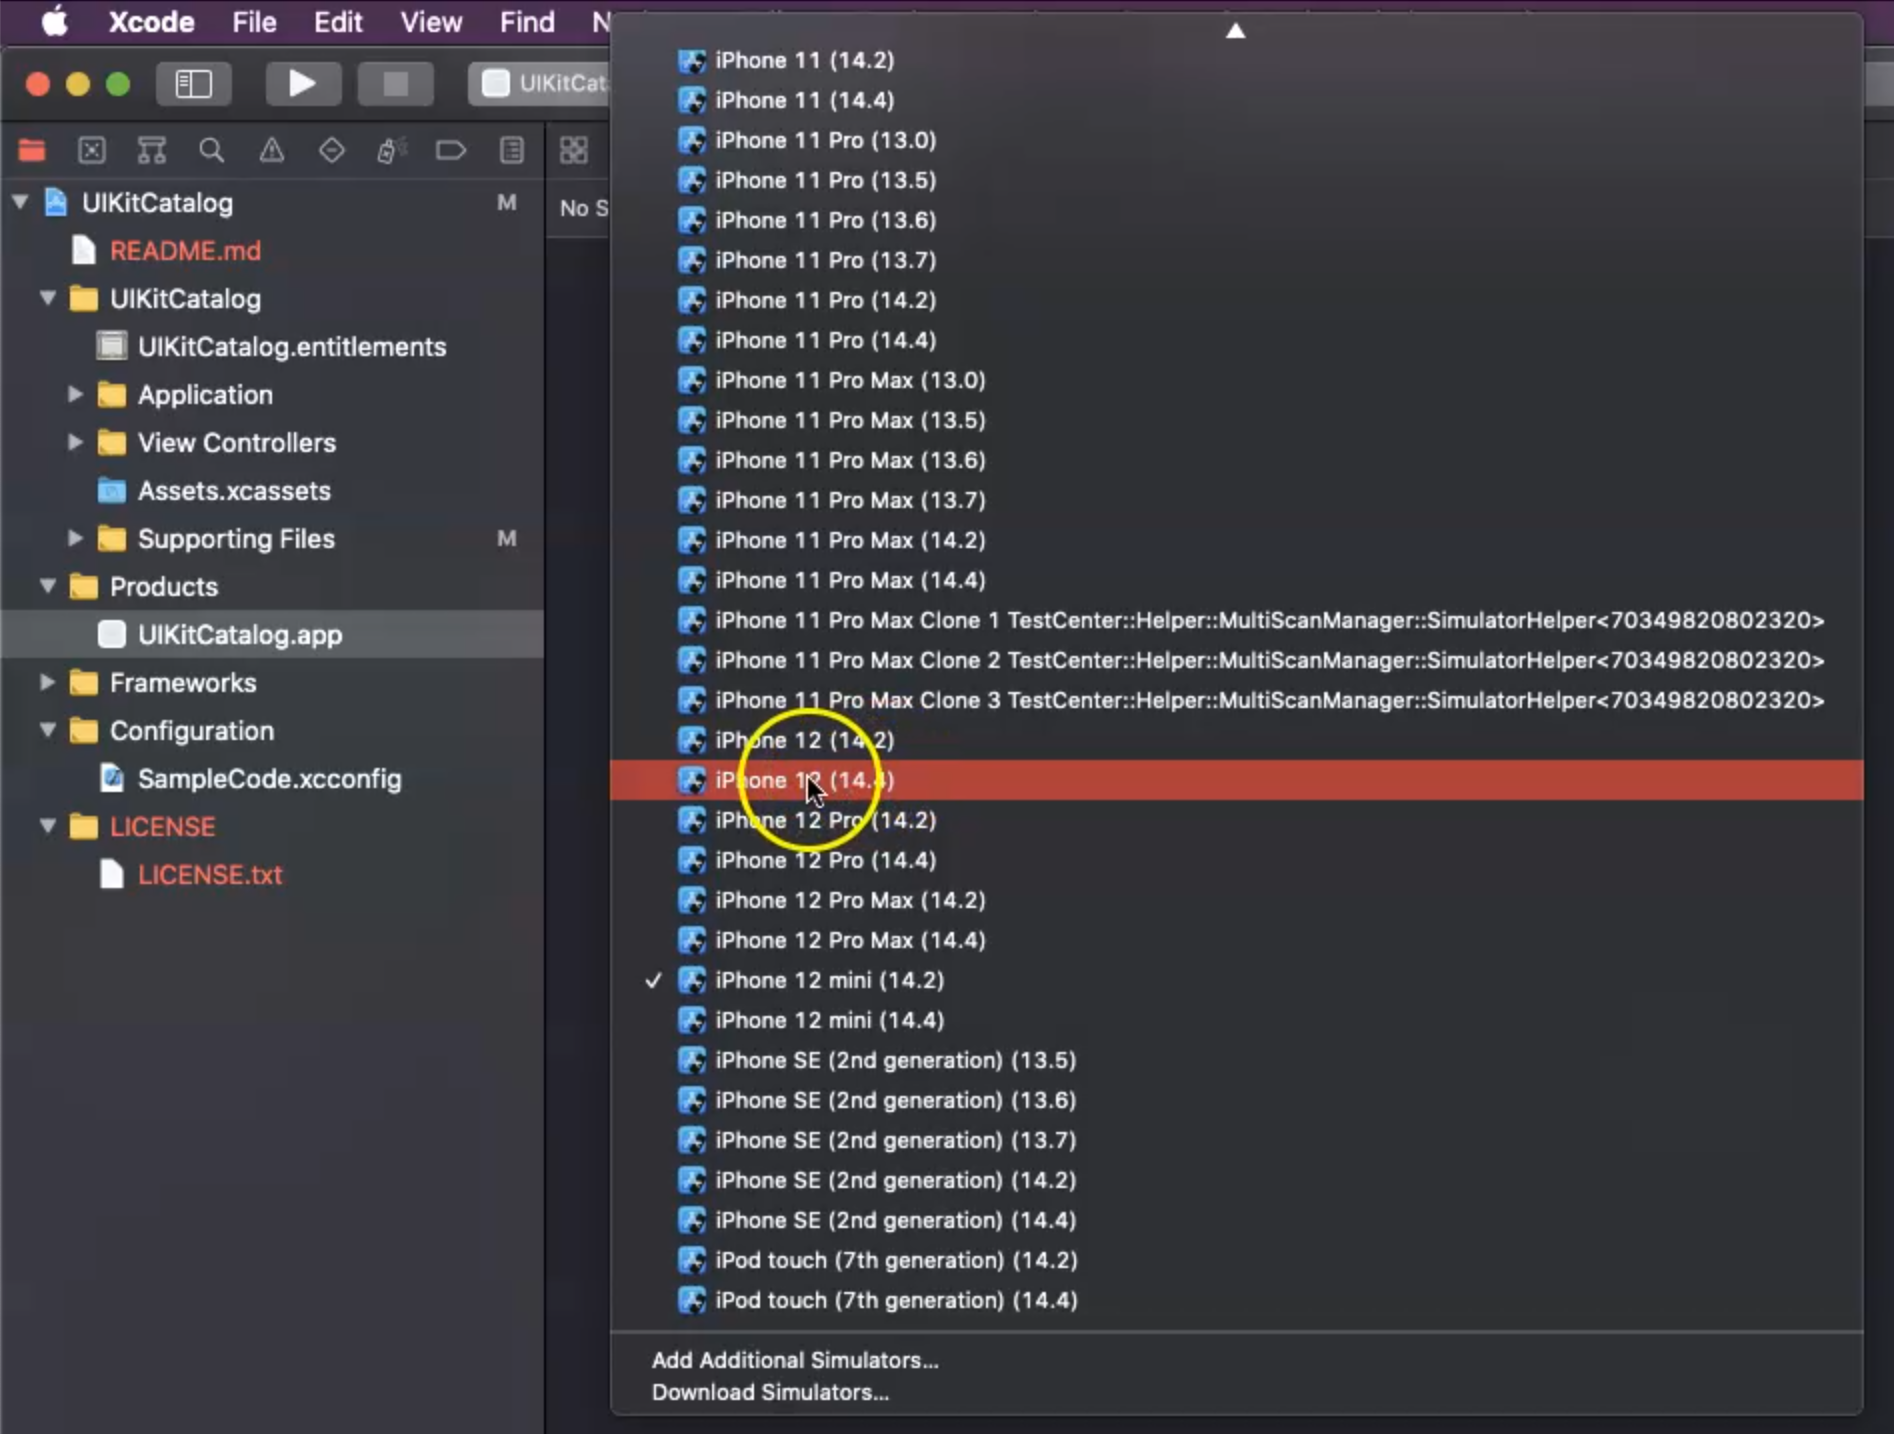
We added 14.4 so in this case, we can select the iPhone 12.
So for deviceName I can just add "iPhone 12" with version 14.4 because I already have this one, or we can select the iPhone mini, for example, or you can download simulators.
If you don't have this full list, you can just click on "Download Simulators", but it will take time because it's 5GB and 3GB - almost 4GB on average.

You can select, for example, "iOS 14.1" if you don't have it and you need this version, and it can be downloaded on your machine.
So, this is our application and in our application, when we build the product, this is the UIKitCatalog - the project that we downloaded, and here, under Products, you can find UIKitCatalog.app, which is the application that we can use.
As we mentioned, for iOS, we can use a .ipa application, if it's signed and ready to install on the iOS device, physical or simulator, or you can use .app, which is like a developer mode or debug mode.
This is the full path of the application.
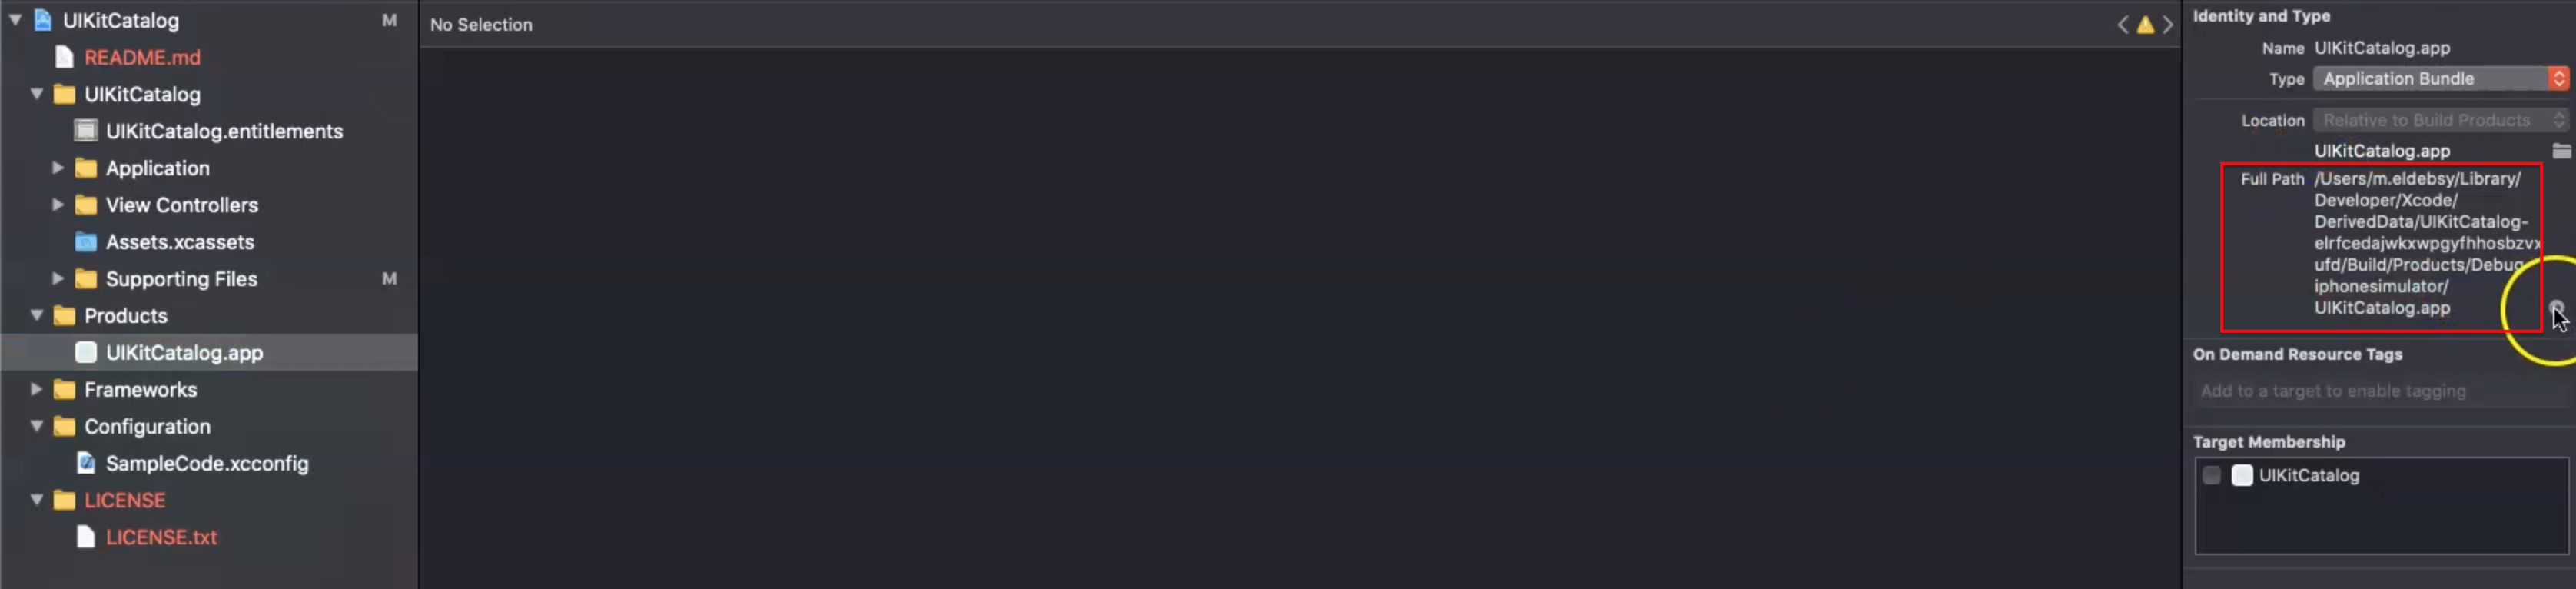
From this button, you can click and you can copy just this application and put it on the Desktop.
I did this already, and then I will copy this and paste it into my apps folder.
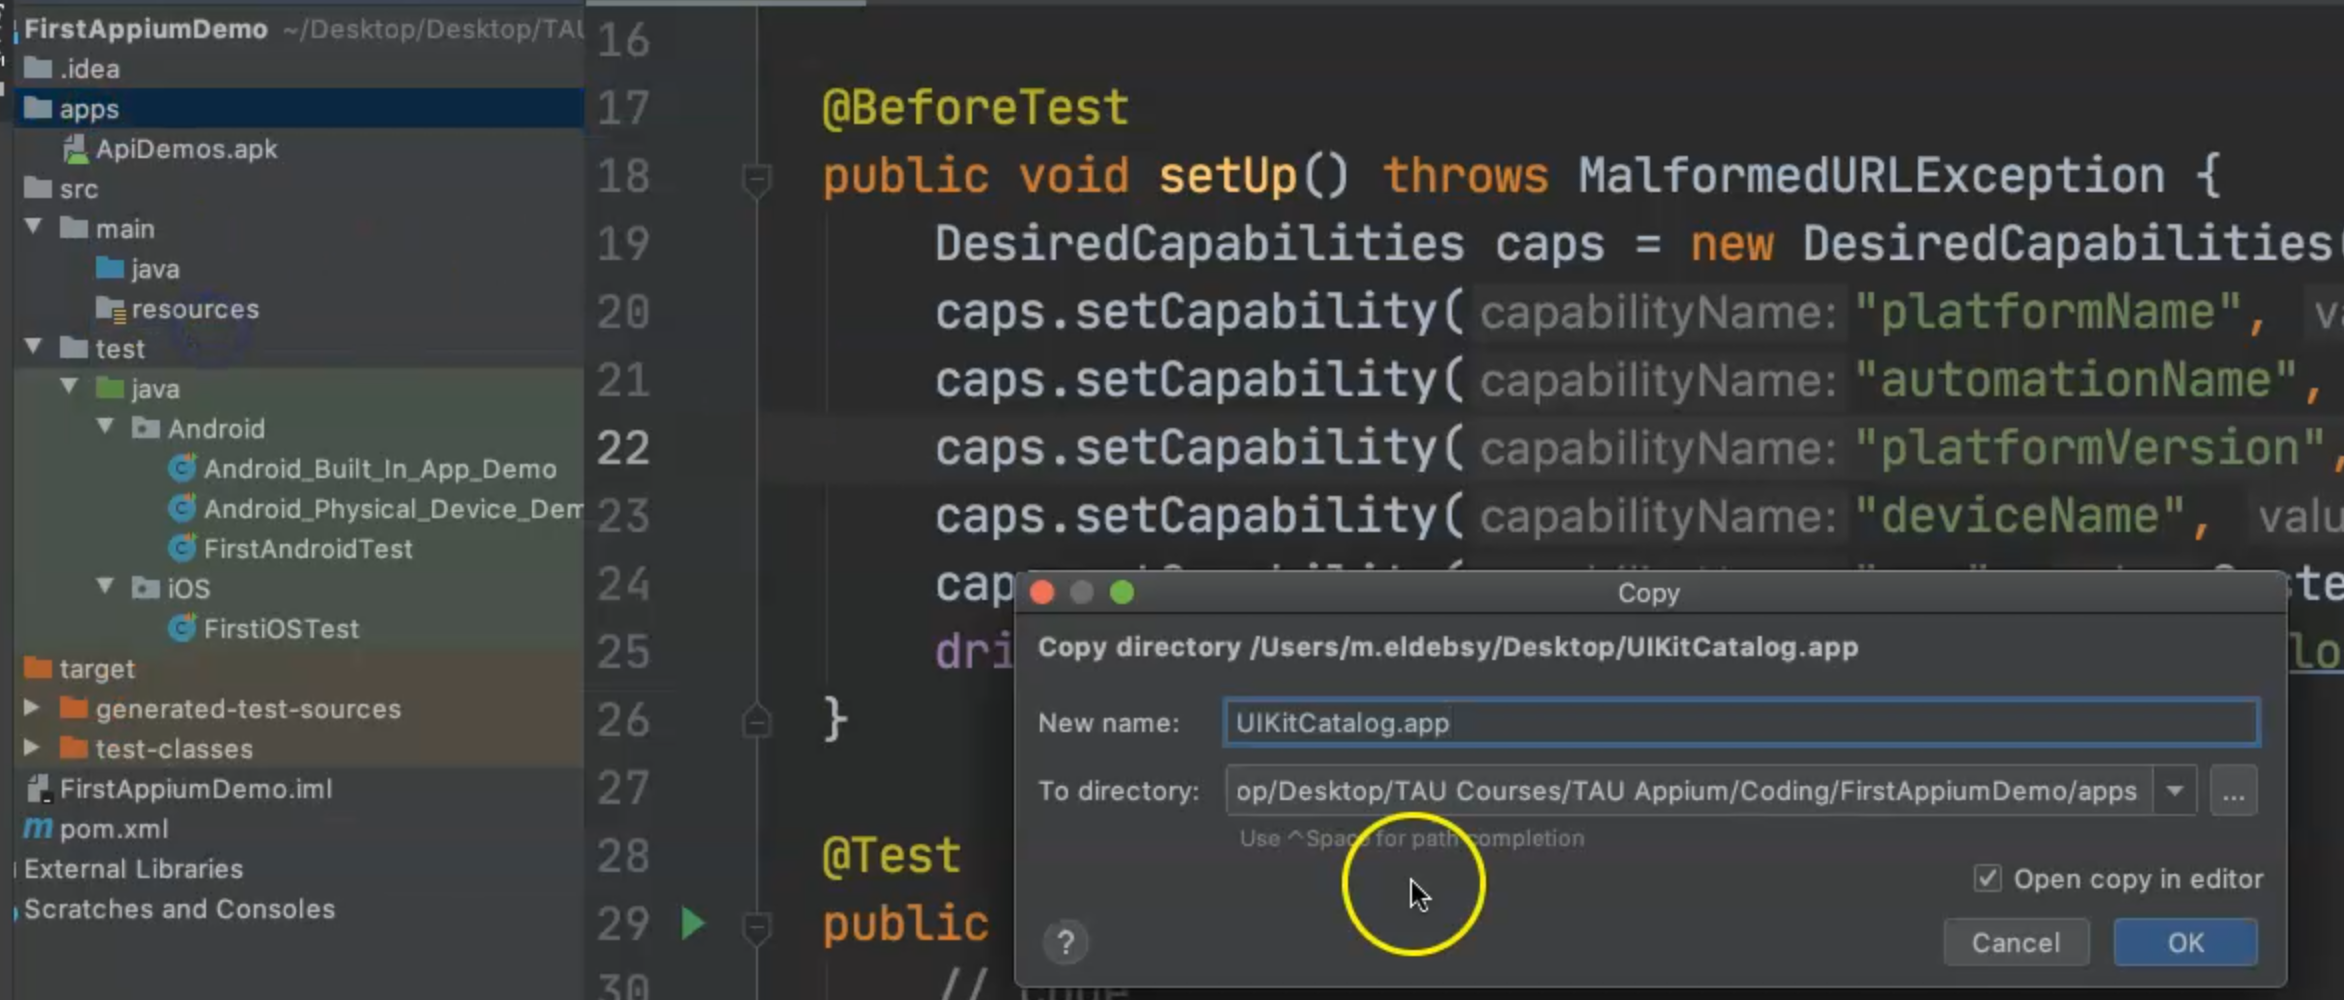
It will be added as a folder and will work with our FirstiOSTest.java.
Or a zip folder is also supported, so I can right-click on the .app on the Desktop and compress the UIKitCatalog and then drag and drop this into my apps folder in the project.
We can try both formats, .app or .zip and iOS working with both of these.
In the test, I changed the deviceName, the platformName, the automationName, and the platformVersion, and I will need to change the app.
I will remove this path to ApiDemos.apk and I will add UIKitCatalog.app.
I will not use driver.findElementByAccessibilityId… because this is a different application.
package iOS;

import io.appium.java_client.AppiumDriver;
import io.appium.java_client.android.AndroidDriver;
import io.appium.java_client.ios.IOSDriver;
import org.openqa.selenium.remote.DesiredCapabilities;
import org.testng.annotations.AfterTest;
import org.testng.annotations.BeforeTest;
import org.testng.annotations.Test;

import java.net.MalformedURLException;
import java.net.URL;

public class FirstiOSTest {

    AppiumDriver driver;

    @BeforeTest
    public void setUp() throws MalformedURLException {
        DesiredCapabilities caps = new DesiredCapabilities();
        caps.setCapability("platformName", "iOS");
        caps.setCapability("automationName", "XCUITest");
        caps.setCapability("platformVersion", "14.4");
        caps.setCapability("deviceName", "iPhone 12");
        caps.setCapability("app", System.getProperty("user.dir") + "/apps/UIKitCatalog.app");
        driver = new AndroidDriver(new URL("http://localhost:4723/wd/hub"), caps);
    }

    @Test
    public void click_App_Button() {

    }

    @AfterTest
    public void tearDown() {
        if (null != driver) {
            driver.quit();
        }
    }
}
In an inspection session, I will start to inspect this application.

So, I will open the Appium server and start an inspection session and then I will select from the "Saved Capabilities" - "iOS_Simulator".
Here, I can change the value for platformVersion to "14.4" and deviceName to "iPhone 12".
For app, I was adding the full path, but here I can copy the absolute path and add it.
Then, I can save the desired capabilities and then start my session.
One more thing about iOS that is different from Android is that I didn't initialize iOS simulators at the beginning because iOS and Appium are doing this for me.
Now we have opened the device, so Appium already boots a device for us.

The device is booted now, and we have started installing the application to the device, and it will open the application for us to start inspecting it.
So maybe to save time, you can install or run the simulator before.
You might get this message if you are using a VPN or anything else - to allow the connection for the device.

You can click on "Allow" and here I have the application installed on the device and everything is okay from here.
I can collect "Image View" or "Buttons", for example, or "Date Picker", but here you will not find an accessibility ID.
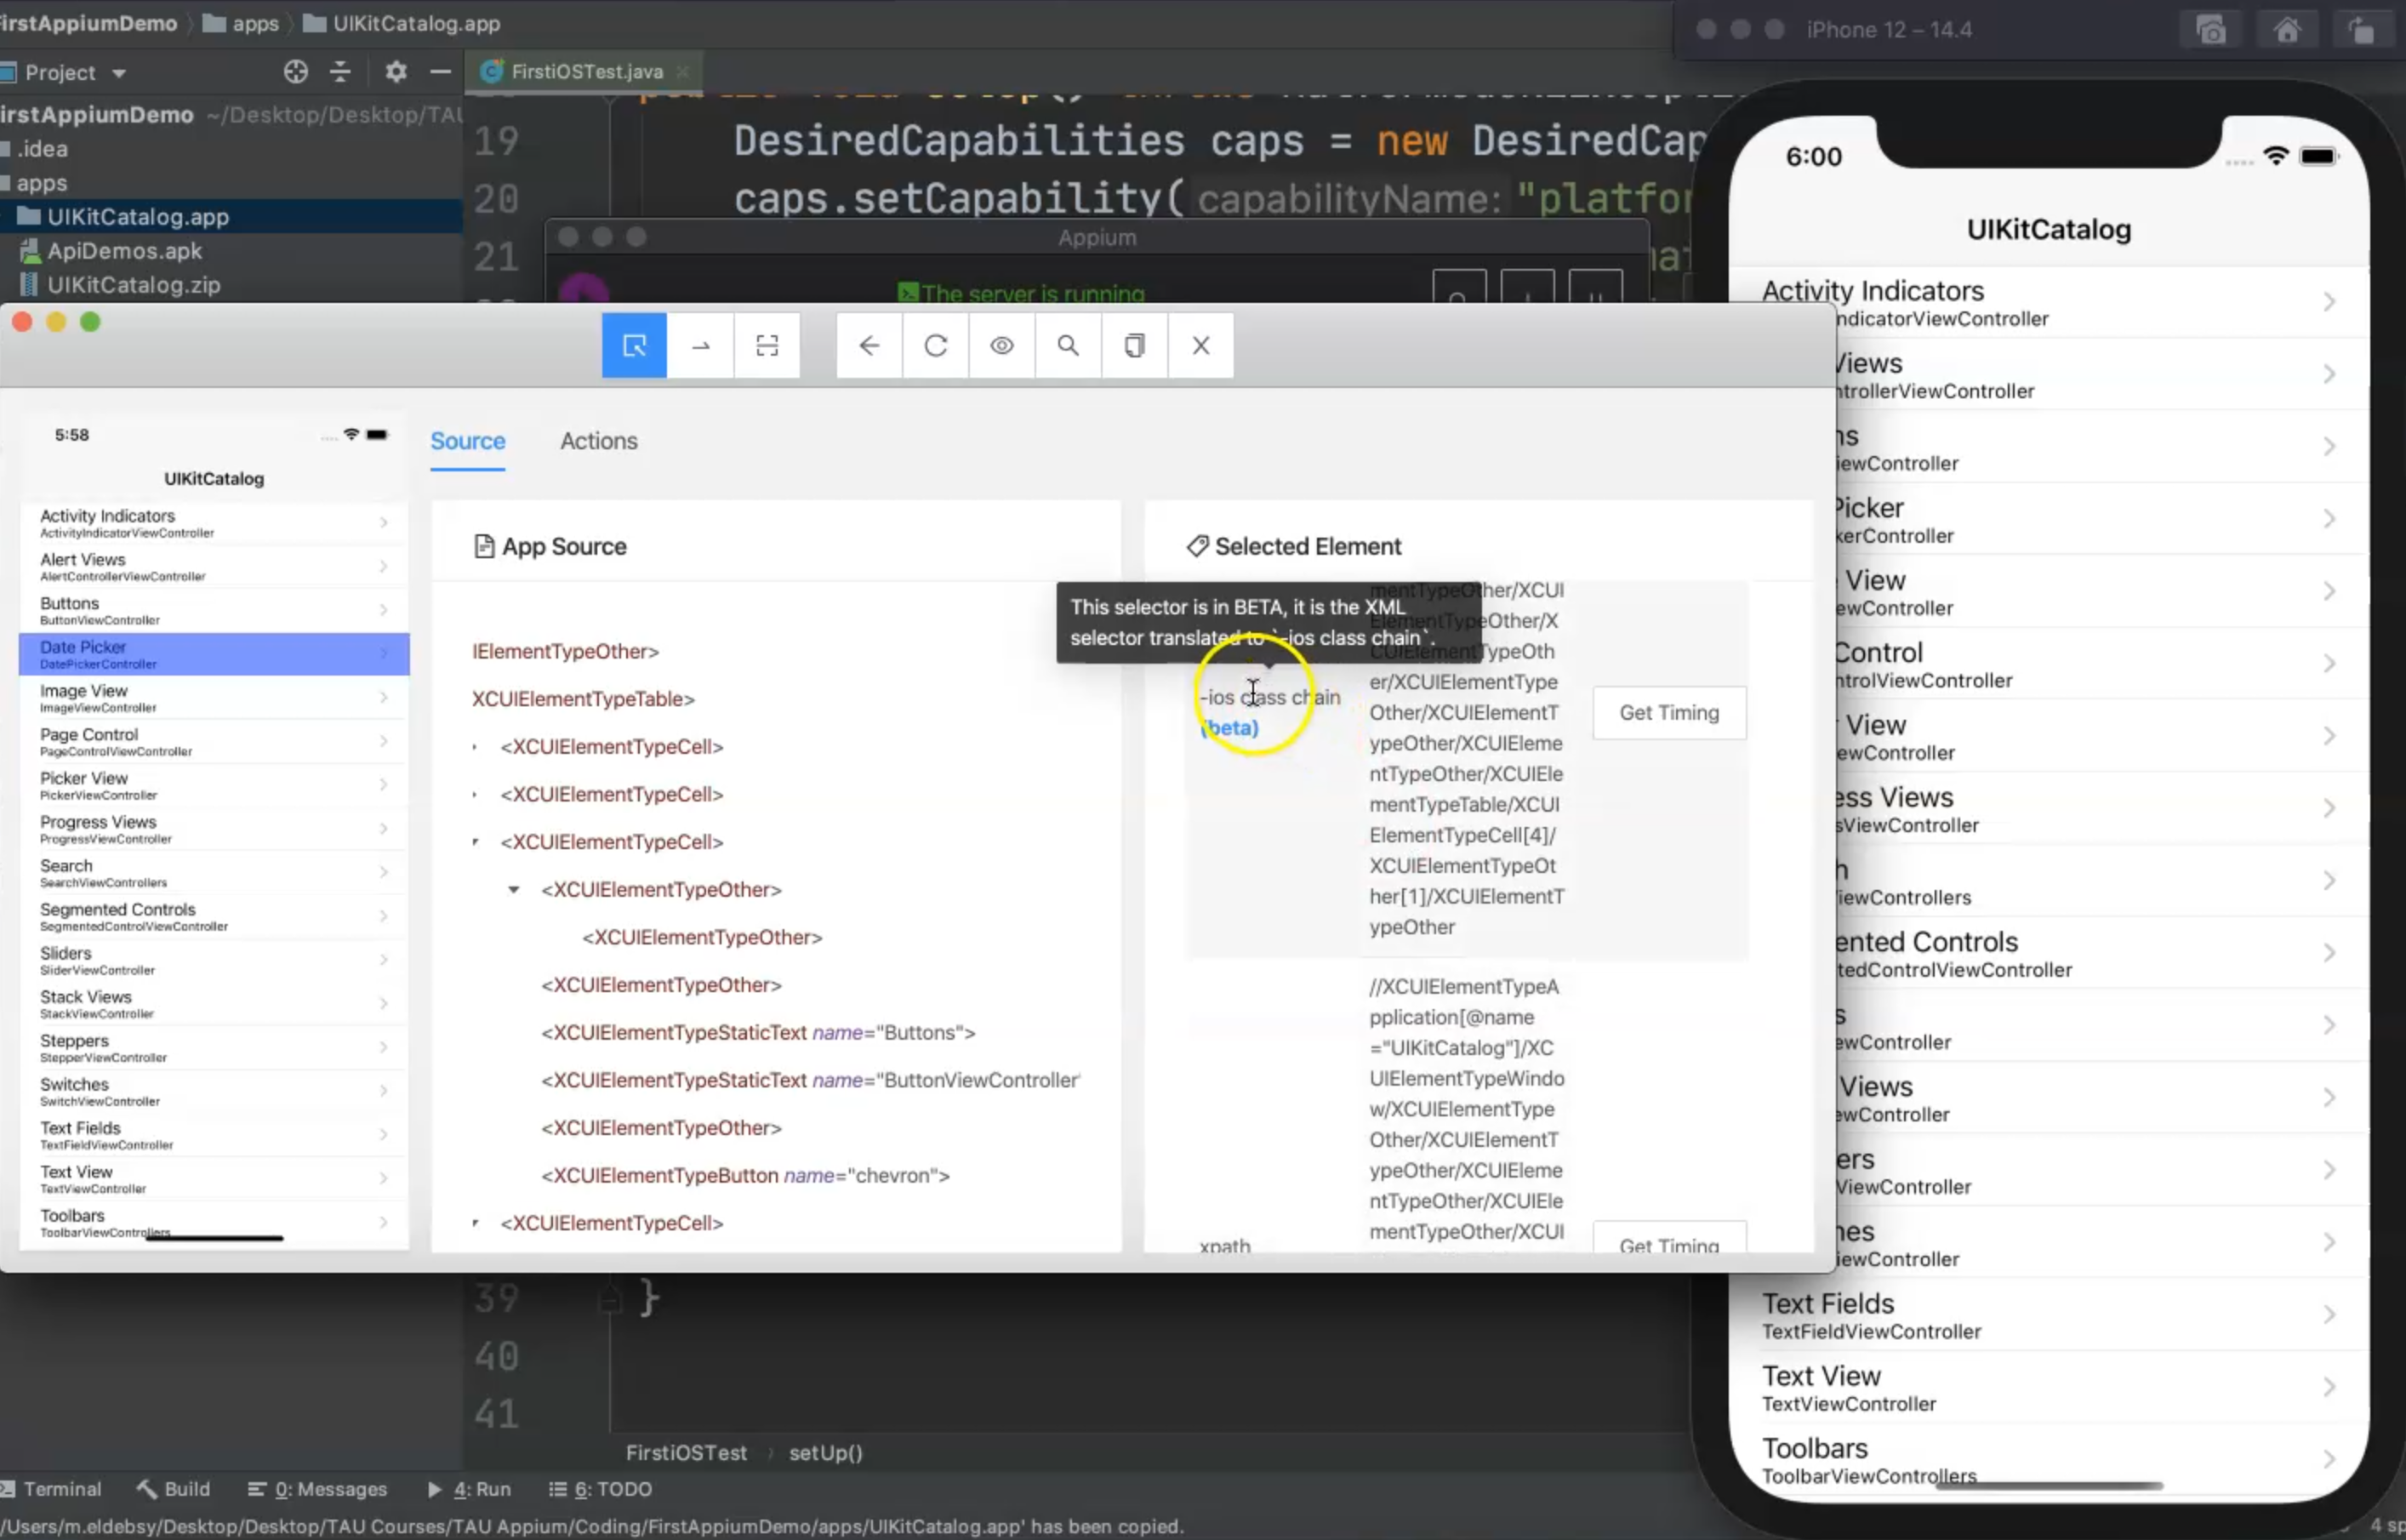
You have a new thing for finding an element using "-ios class chain" or "xpath" but usually, xpath is not recommended because your test would be fragile.
If I want to click on "Buttons", you can open all the chains in the elements and you will find that the buttons are type "XCUIElementTypeStaticText" and here we have accessibility ids, so we can copy this "accessibility ID" and start using it.

If it's not displayed from the beginning, we can open all the elements in the chain in "App Source", and try to check all the things.
Here in the code, we will start using the same concepts that we did on Android.
So we will use driver.findelementByAccessibilityId() and in our case, it's "Buttons", and then you can click on this button.
After that, we will tearDown.
The same idea from Android is the same case for iOS - we just change the desired capabilities, but Appium is working with the same concepts - create the capabilities, open the session, and find the elements using the driver.
So, now we need to change the driver because in our case now it's iOS.
I will change it to IOSDriver with desired capabilities and the application, and then we will start finding the elements using accessibility ID, and then we can close this.
package iOS;

import io.appium.java_client.AppiumDriver;
import io.appium.java_client.android.AndroidDriver;
import io.appium.java_client.ios.IOSDriver;
import org.openqa.selenium.remote.DesiredCapabilities;
import org.testng.annotations.AfterTest;
import org.testng.annotations.BeforeTest;
import org.testng.annotations.Test;

import java.net.MalformedURLException;
import java.net.URL;

public class FirstiOSTest {

    AppiumDriver driver;

    @BeforeTest
    public void setUp() throws MalformedURLException {
        DesiredCapabilities caps = new DesiredCapabilities();
        caps.setCapability("platformName", "iOS");
        caps.setCapability("automationName", "XCUITest");
        caps.setCapability("platformVersion", "14.4");
        caps.setCapability("deviceName", "iPhone 12");
        caps.setCapability("app", System.getProperty("user.dir") + "/apps/UIKitCatalog.app");
        driver = new IOSDriver(new URL("http://localhost:4723/wd/hub"), caps);
    }

    @Test
    public void click_App_Button() {
        driver.findElementByAccessibilityId("Buttons").click();
    }

    @AfterTest
    public void tearDown() {
        if (null != driver) {
            driver.quit();
        }
    }
}
From this case, I will close this inspection session and just leave the Appium server running and then I will start running my test.
I can just click on "Run", this is the device, and I will start my test cases.
Appium will start installing the WebDriverAgent application to start my application.
Here, we will find that we have another application installed.

If we go up in the session since this is for iOS, we are installing another application for iOS which is WebDriverAgentRunner with bundle ID "com.facebook.WebDriverAgentRunner", and then we are using it.
Then, we are installing our application in the test, which is "UIKitCatalog", and then we can start our session and start using it.
So this is the first script, we didn't waste a lot of time because it's the same concept from Android.
We just changed the desired capabilities and the driver version and the application.
Let's now try to change this application to be zipped.
So for example, I can just remove .app and change it to .zip to check if it works with the application.
I will open the server, and now the application is removed and installed again, so the zip path or the zip application is already also supported in our iOS test using Appium.
Resources
Quiz
The quiz for this chapter can be found in Chapter 4.8
