

Transcripted Summary
# How to use a real iOS device with Appium
In the next demo for iOS, we will use a real or physical device and we will check together what we need to add in the desired capabilities or how we can prepare our application to be able to install it on the physical devices.
We will open XCode and we will open the UIKit application, which we need to install on the physical device, and from the simulators here, we can select the iOS devices.
I already connected my iPad Pro device to the machine using a USB cable.
Here you can find that all of these are simulators, but this is a physical device.

I will select the physical device, but first, you should check that you have already added the developer account and signing a certificate to be able to install the application on the physical device.
You can click on the application from the left pane and then in the "Signing & Capabilities" tab, this is the Team, so you should select your account, and if you didn't add it yet, you can click here to add it or from Preferences > Accounts, you can add your account with an Apple ID if you have one.
Here, I'm adding my account, this is the platform, and also I changed the bundle ID to be unique - for example, I added "moataz" in this bundle ID, so it's "com.moataz.UICatalog".
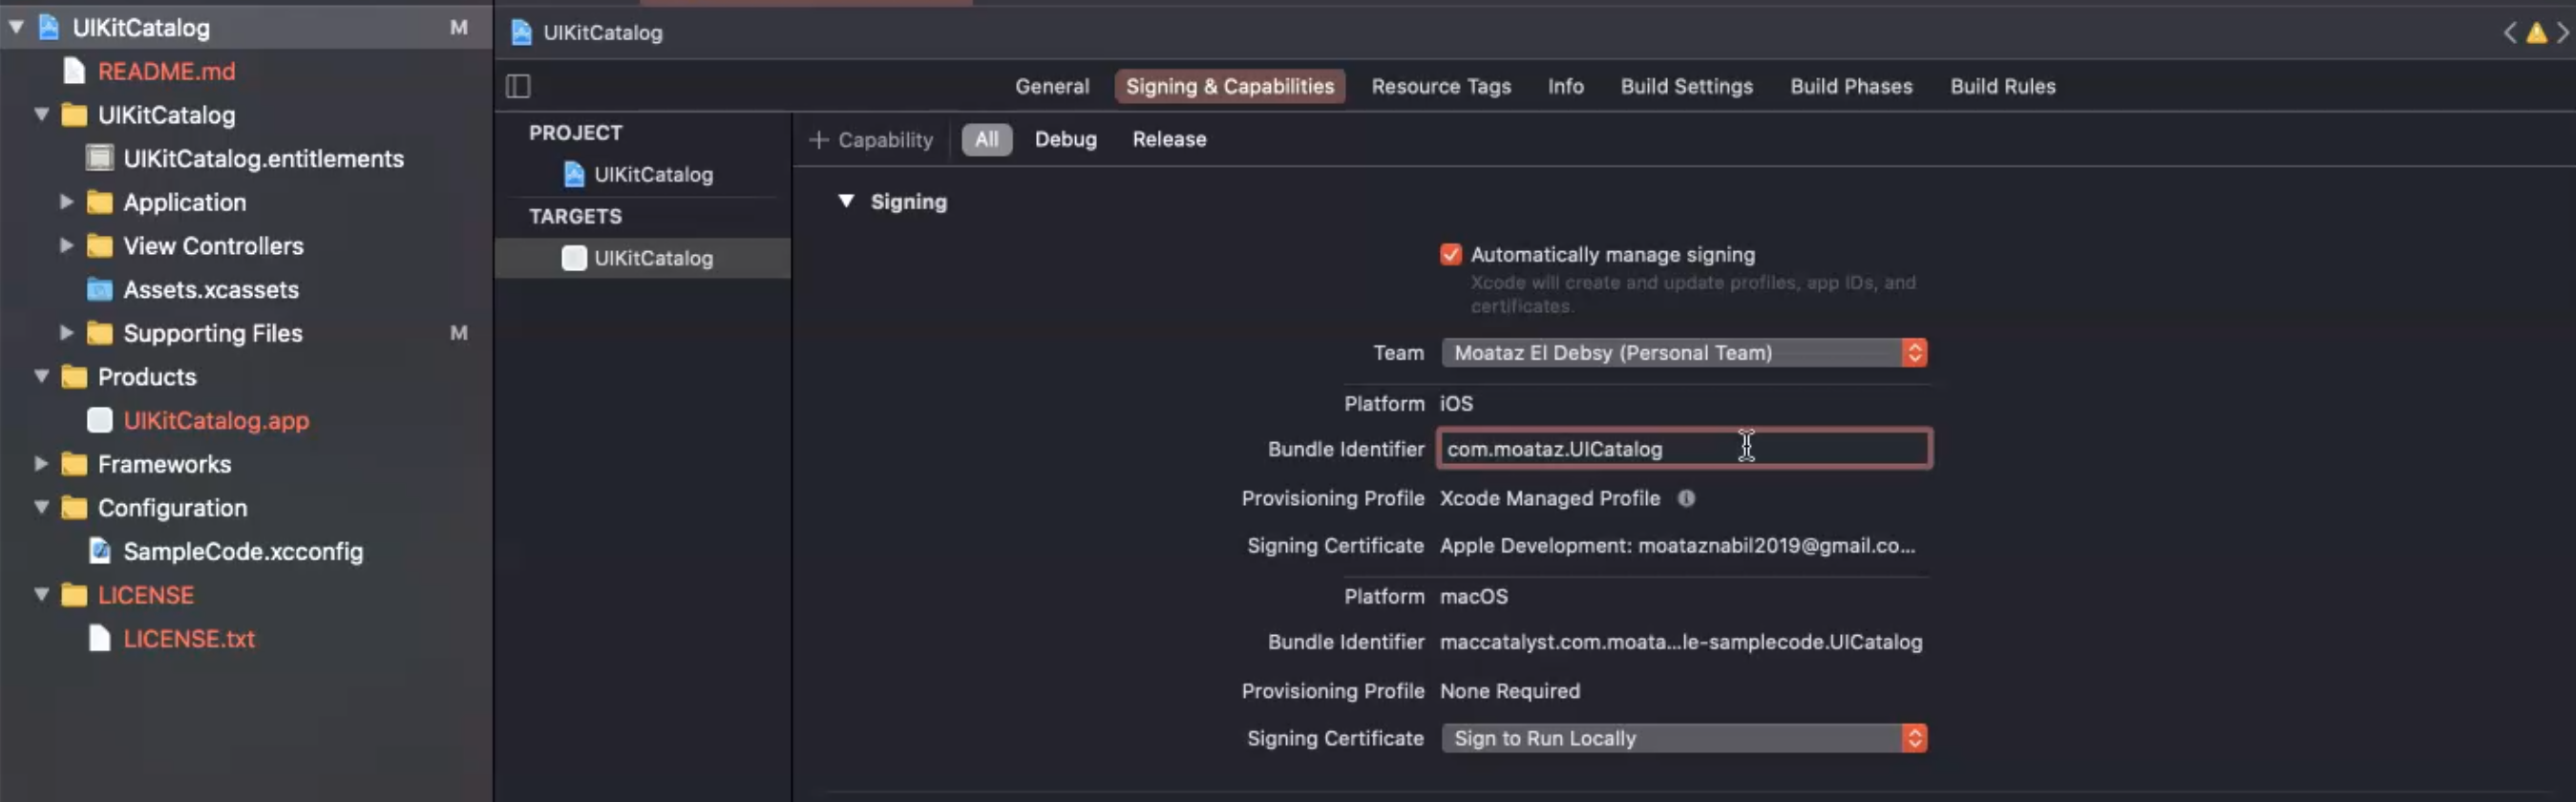
This means that I already have a "Signing Certificate" and "Provisioning Profile" - if you don't have it, you should download it from Preferences after you have added your account.
So for example, here, you can "Download Manual Profiles" or "Manage Certificates" for your account after you have added your account to XCode.

So these are the application settings.
After that, I can start to build the application to be ready for building the physical device and then to be able to use the application in a physical device with Appium.
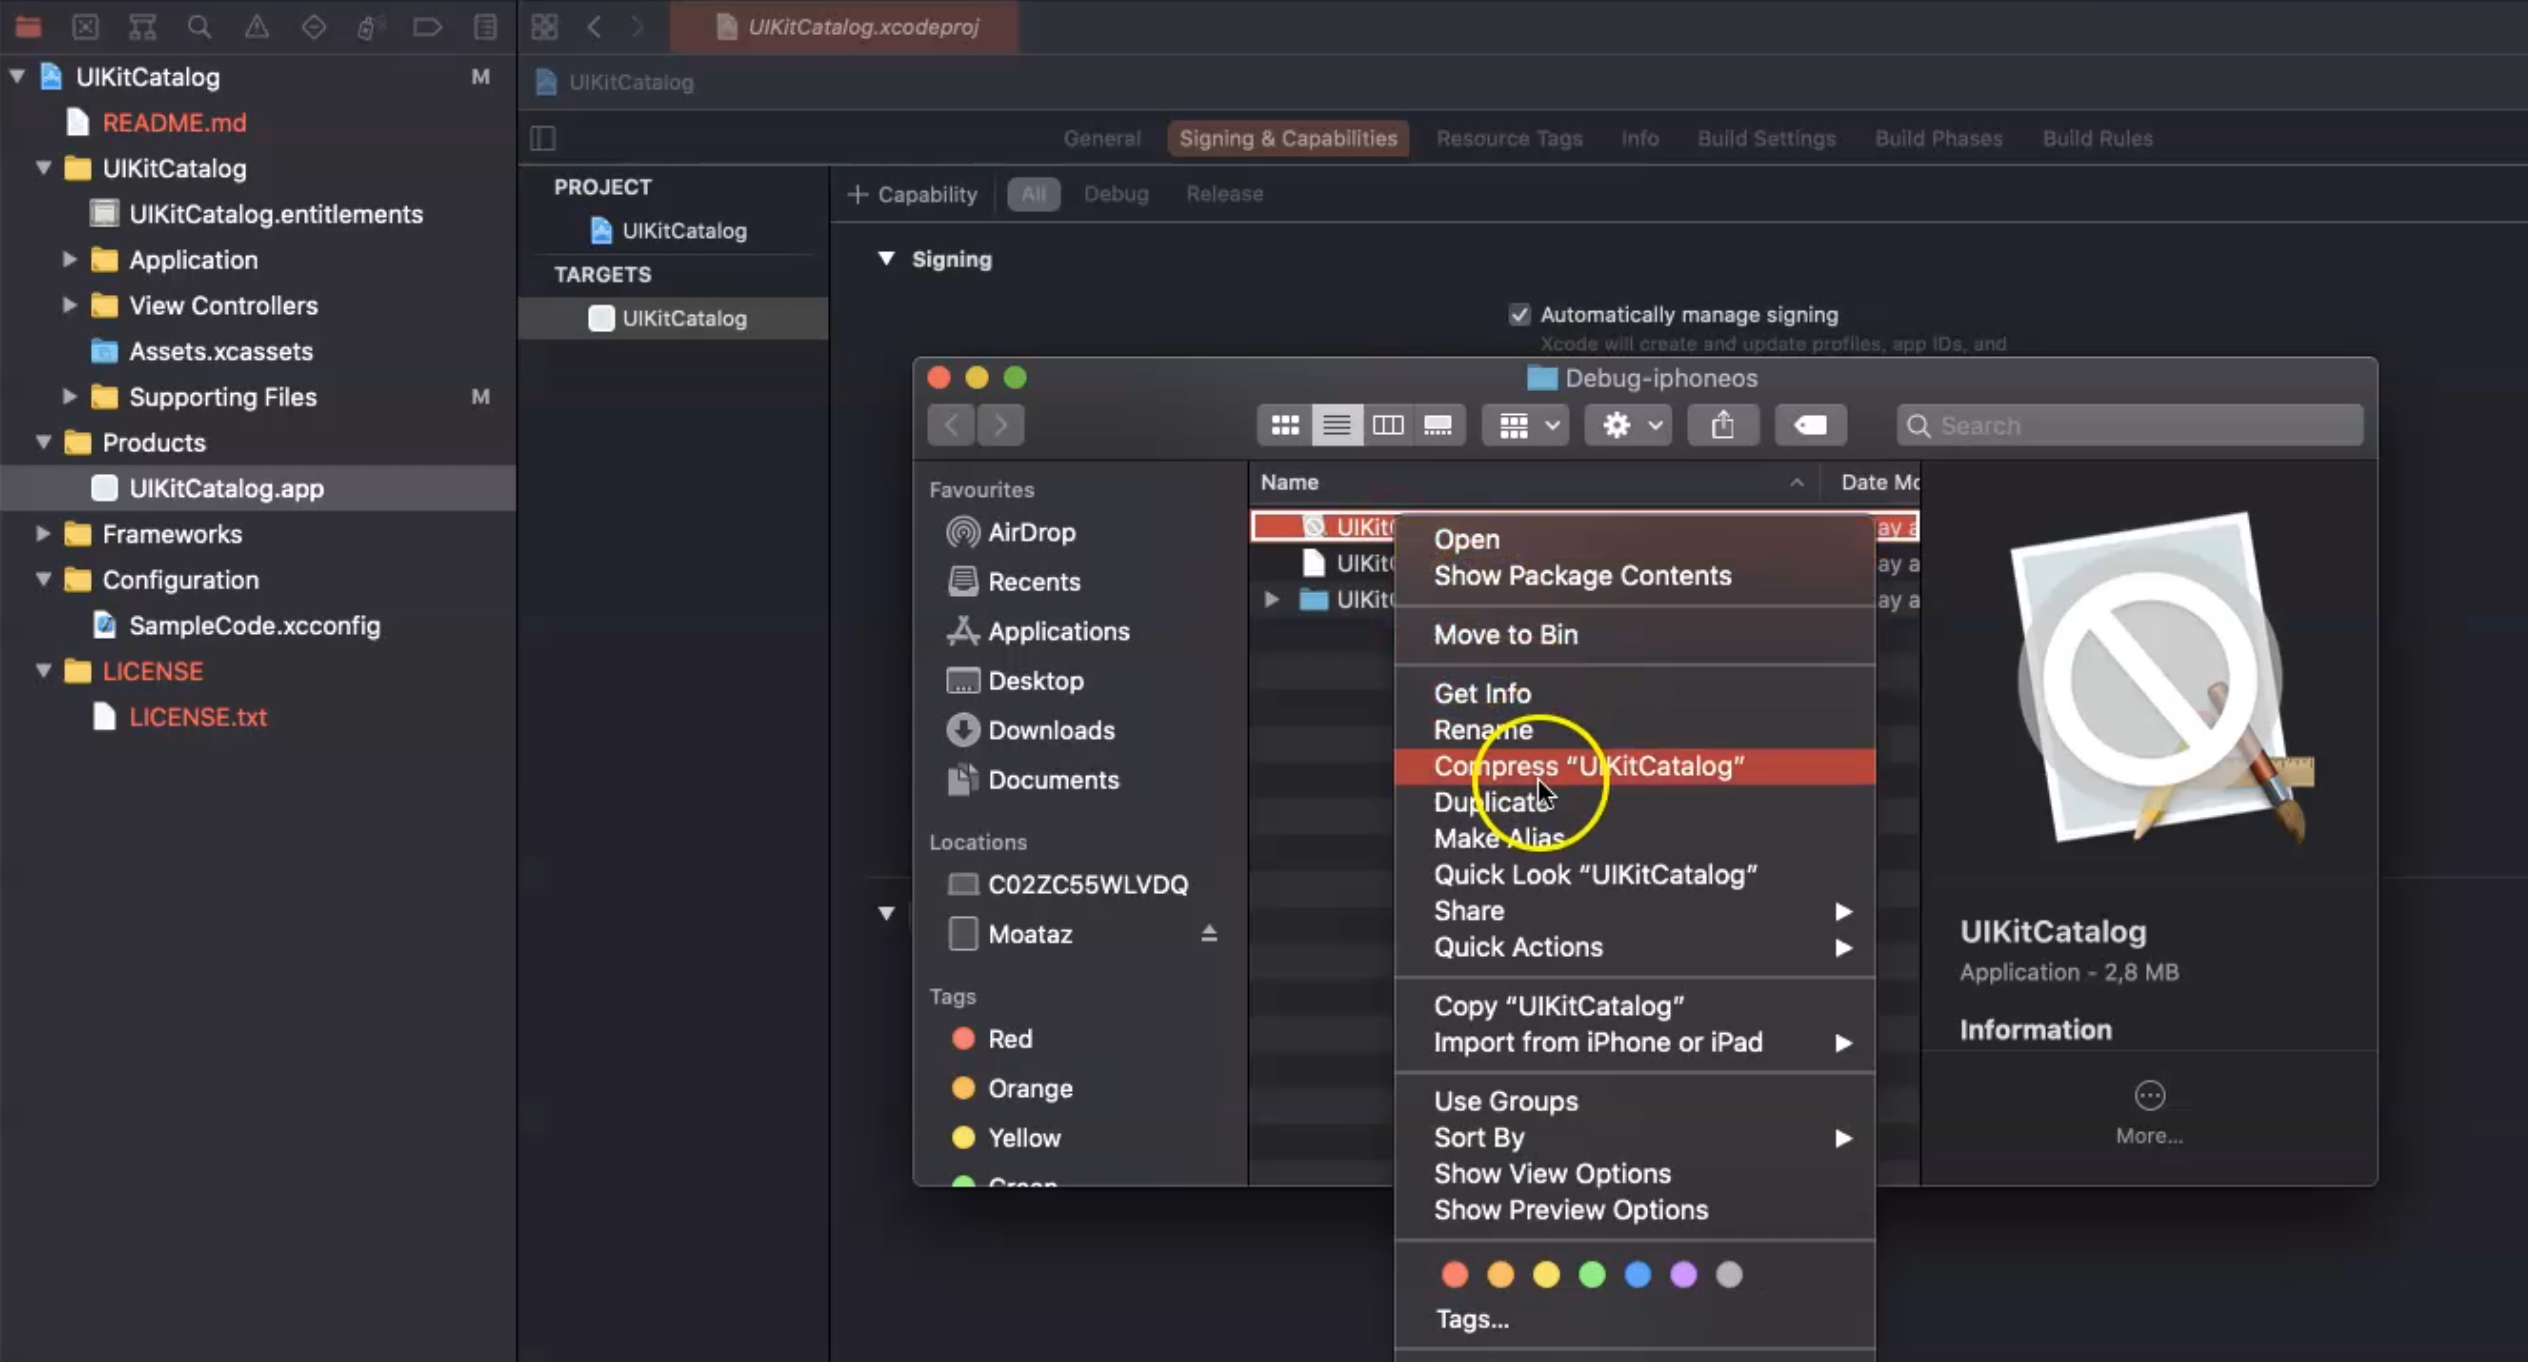
Then, this will be the product under the Products folder - UIKitCatalog.app - and I will copy the product path because in this case, it will be a different product since it's a product for a physical device and the architecture is changed from a simulator to a physical device.
So, I will copy this application and try to install it on my physical device.
The build has succeeded, and this is the UI application, I will open the full path, and I will zip the UIKitCatalog by right-clicking and selecting 'Compress "UIKitCatalog"'.
In my application, I can change the name to UIKitCatalog-ios.zip, for example.
I can copy this one and go to my apps folder and paste it here.
So this is the application, but in this case, I flagged it with "ios" to know this is for physical devices.
Then, we can use it in the Appium session, but we also need to change the desired capabilities to be able to use it.
We should add the udid - this is a device, so I should add the device ID.
I can open the Finder here, and here, I will find my application or my device.
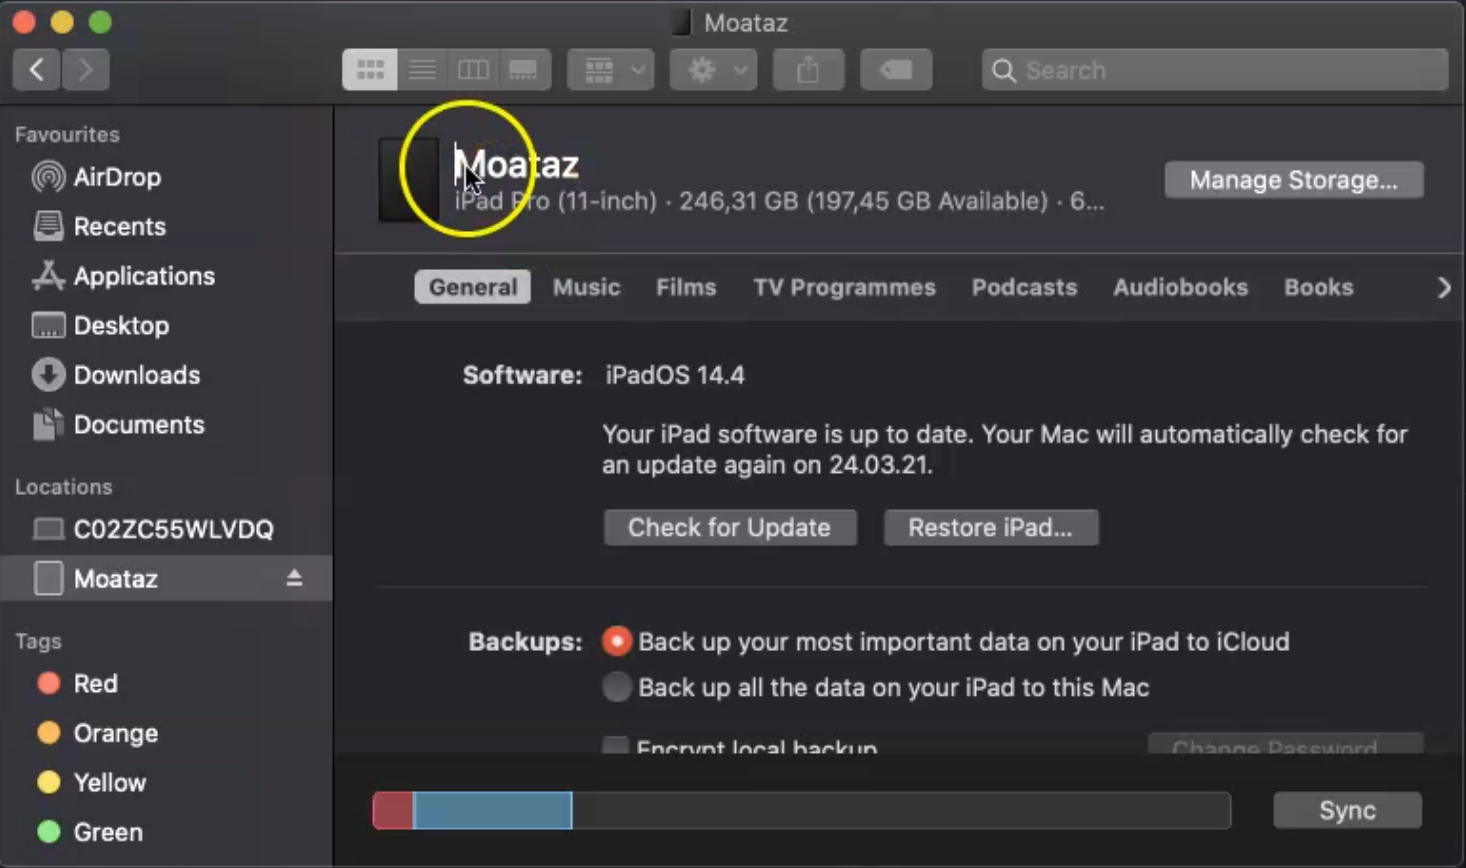
This is the iPad Pro, this is my device name, this is software that is installed - so I will use 14.4 with Appium.
If I click on the device with two clicks, I can find the UDID, so I can copy this.
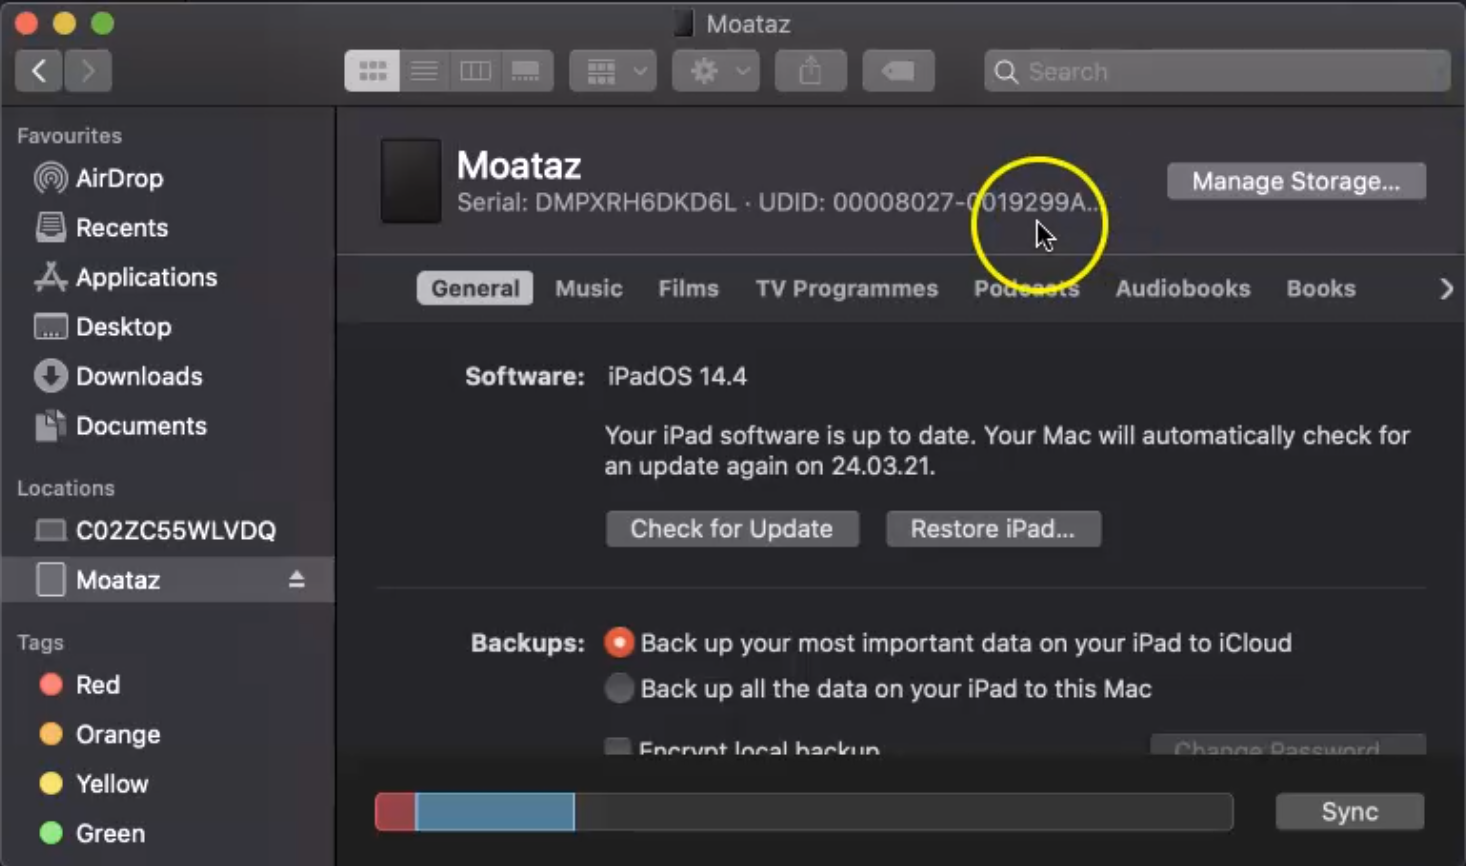
I can copy the UDID, and then use it in my test case.
First I will copy FirstiOSTest and create a new one for my physical device named FirstiOS_real_device_Test.
Then here in the test, I will need to change the application and I need to add the desired capabilities to be able to use this.
So I will open the Finder, "Copy UDID" for my physical device and then after that, I can copy the Xcode organization ID and the signing ID also, which is my email or if I have a team.
Then, we can start using our application.
So, let's add the desired capabilities and let's check what the required capabilities are for the real iOS devices, and then we can start.
We don't need to change anything in the code because we will use the same application, but we need to add specific things for the real device.
How can we know what the required capabilities are for physical devices?
From a browser, we can search "appium real devices", and here we can find XCUITest Real Devices from Appium.
This is documentation from Appium and here are the desired capabilities.
We should for sure install the WebDriverAgent-Runner on the device and also, because it's an iOS application, it's also required to be signed in.
The bundle ID should be unique, and you should also add your team or your profile to be able to install the WebDriverAgent-Runner on the physical device because it's also an iOS application.
So, this should also be done.
Also, you need to specify the xcodeOrgId, which is your team ID - in your case, if you are an individual, it will be your email - and the xcodeSigningId, which is "iPhone Developer", so you should these desired capabilities.
Another thing after we install it, you should trust your application on the device to be able to install and use the application after that.
These are the steps for how we can provision or create the WebDriverAgent-Runner to be able to use it with this application.
In our script, we can start adding the capabilities.
We will add caps.setCapability(), and then we can add udid, which I already got from my physical device, so I can just copy this ID and put it here.
Then, I need to add caps.setCapability() for xcodeOrgId, and then I will add my email or the team ID - in this case, it would be my email.
Then, another caps.setCapability(), and I can add xcodeSigningId and value "iPhone Developer".
So we have signing ID "iPhone Developer", the UDID, the device name "Moataz", the version is 14.4, and the automation name is "XCUITest", the Xcode organization IDs, and that's it.
We can change the application to UIKitCatalog-ios because this one is built for the physical device.
package iOS;

import io.appium.java_client.AppiumDriver;
import io.appium.java_client.ios.IOSDriver;
import org.openqa.selenium.remote.DesiredCapabilities;
import org.testng.annotations.AfterTest;
import org.testng.annotations.BeforeTest;
import org.testng.annotations.Test;

import java.net.MalformedURLException;
import java.net.URL;

public class FirstiOS_real_device_Test {

    AppiumDriver driver;

    @BeforeTest
    public void setUp() throws MalformedURLException {
        DesiredCapabilities caps = new DesiredCapabilities();
        caps.setCapability("platformName", "iOS");
        caps.setCapability("automationName", "XCUITest");
        caps.setCapability("platformVersion", "14.4");
        caps.setCapability("deviceName", "Moataz");
        caps.setCapability("udid","");
        caps.setCapability("xcodeOrgId","");
        caps.setCapability("xcodeSigningId", "iPhone Developer");
        caps.setCapability("derivedDataPath","");
        caps.setCapability("app", System.getProperty("user.dir") + "/apps/UIKitCatalog-ios.zip");
        driver = new IOSDriver(new URL("http://localhost:4723/wd/hub"), caps);
    }

    @Test
    public void click_App_Button() {
        // code
        driver.findElementByAccessibilityId("Buttons").click();
    }

    @AfterTest
    public void tearDown() {
        if (null != driver) {
            driver.quit();
        }
    }
}
So we have added additional desired capabilities to use for physical devices.
We start connecting and then we can start using it.
So let's try for the first time to use Appium with a real device.
Maybe we will find an issue with the WebDriverAgent-Runner.
Where can we find the WebDriverAgent?
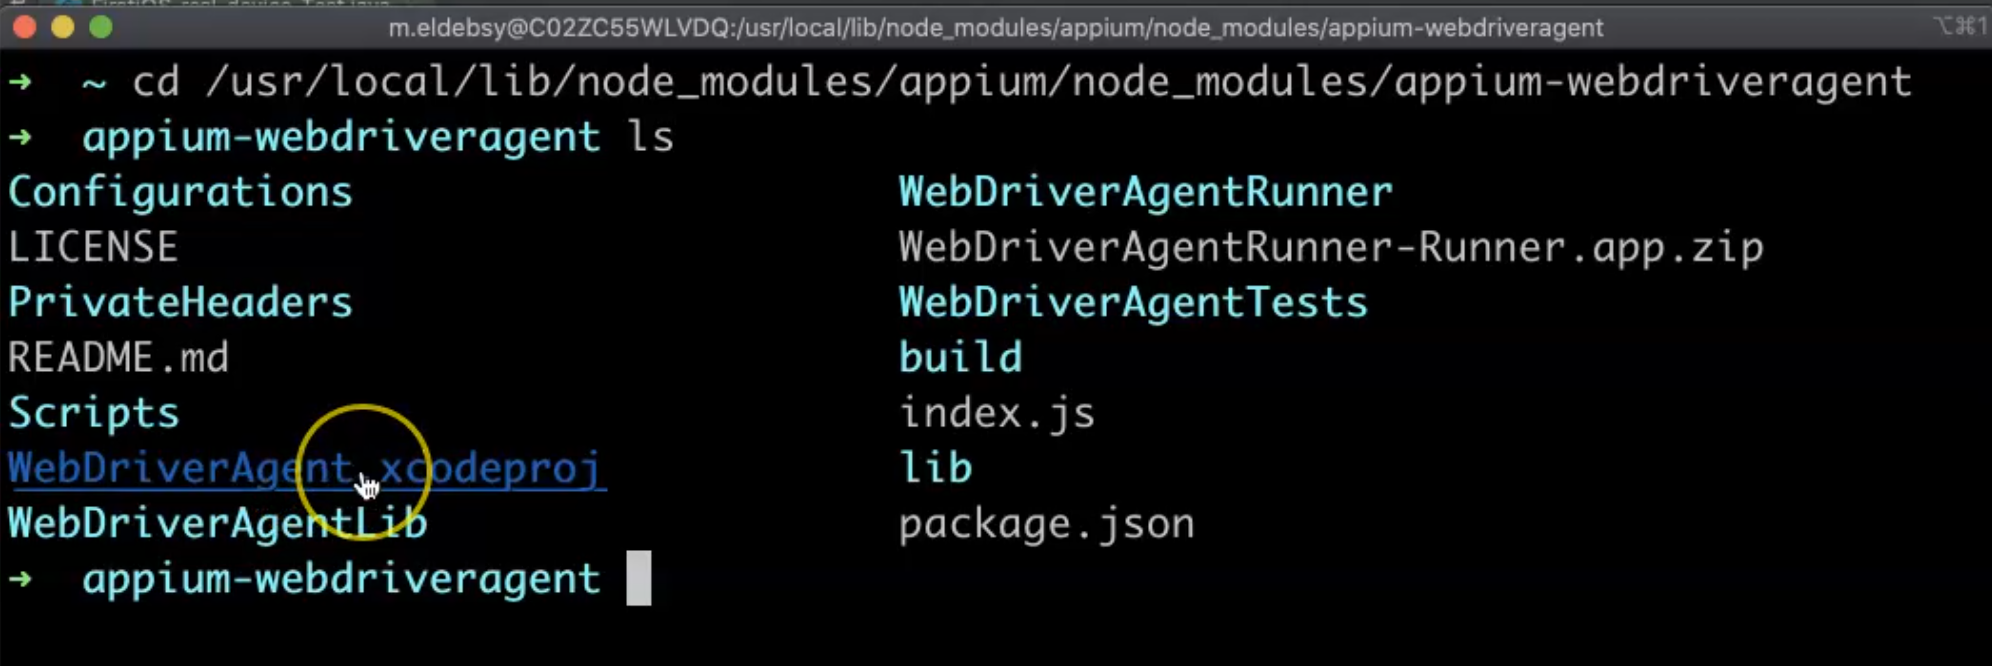
We can find the WebDriverAgent in this location - /usr/local/lib/node_modules/appium/node_modules/appium-webdriveragent.
So we'll go into this folder and here we have the WebDriveAgentRunner and also, we have tests, and as I mentioned, this is already an .xcodeproj.
I can click on this project to open it and also this project should be installed or built successfully on the physical device to be able to run Appium on a physical device.
So, because Appium has installed this one first, the application should be trusted on the device and able to be used with your application as well.
Under "Product", we can build our application for my device, because this is a physical device, and then check if it's built successfully.
The build failed. After all, because I wanted to check what the issue was in my application.
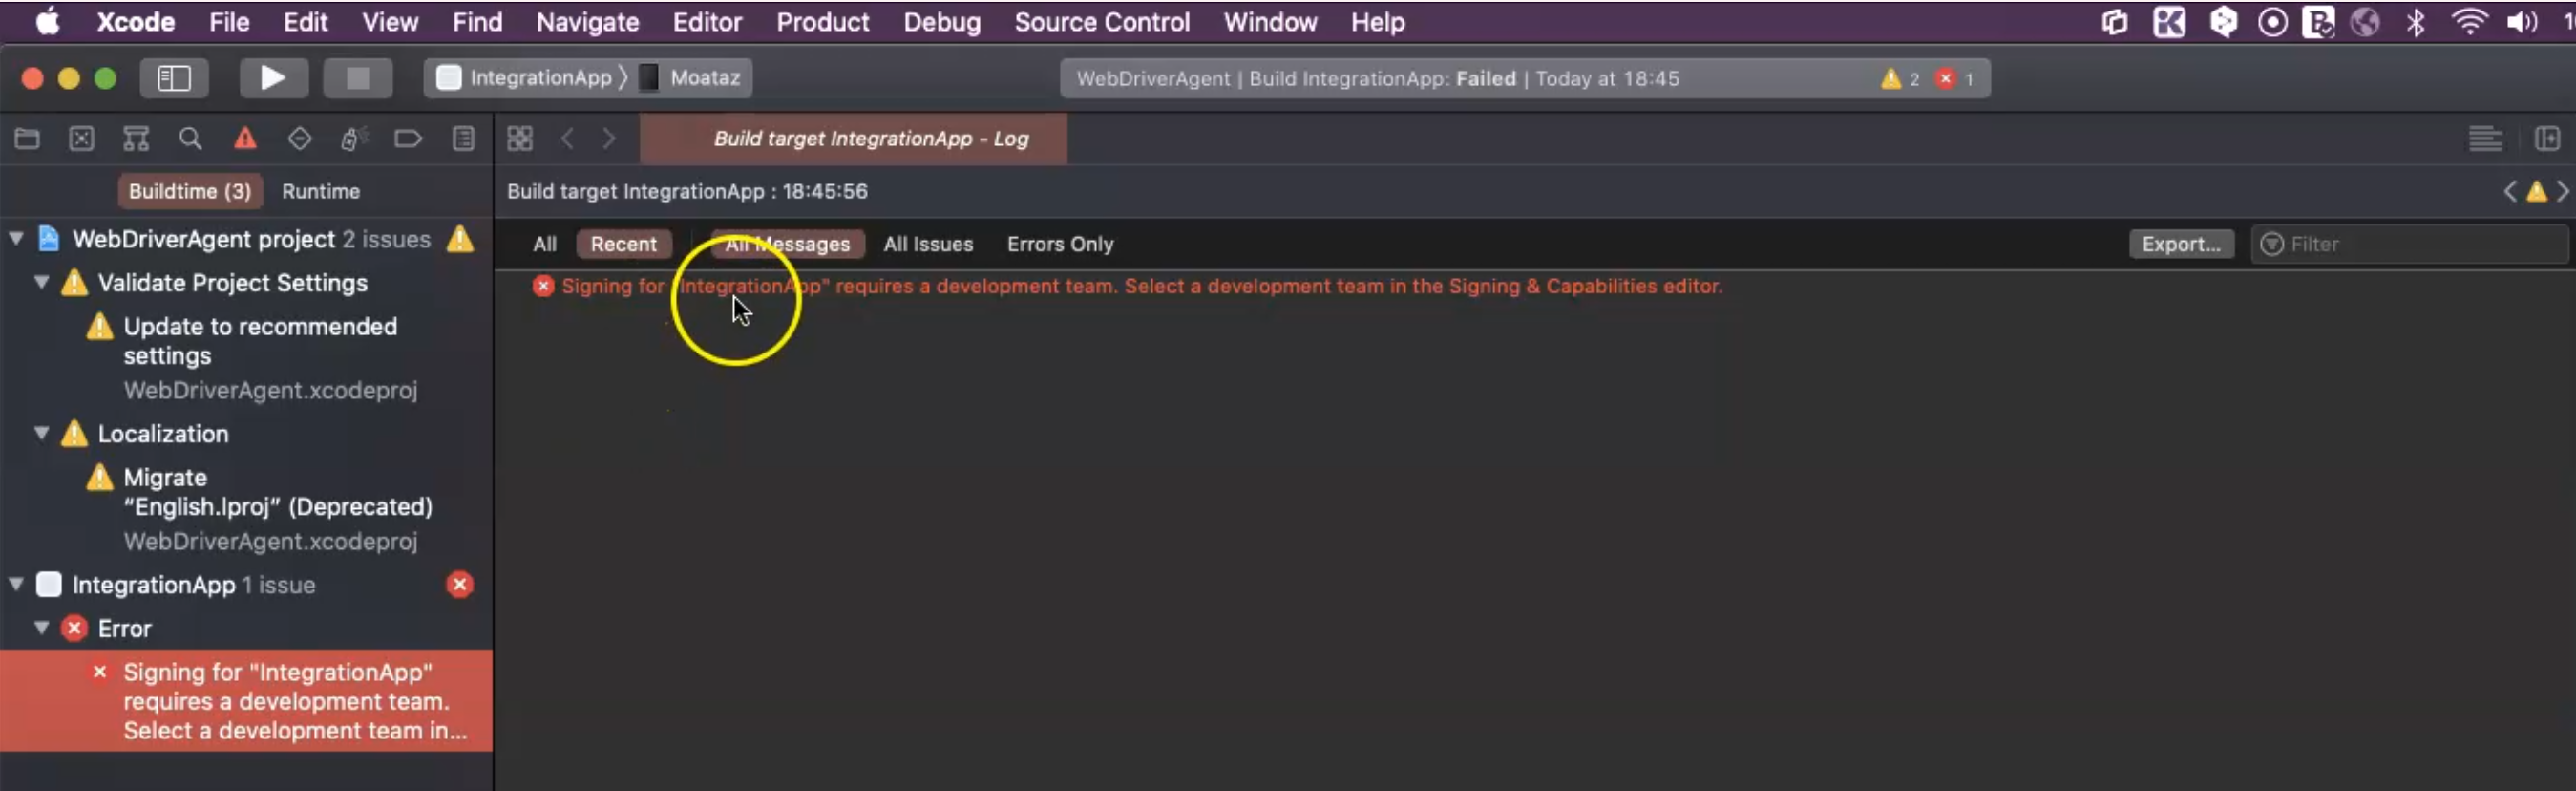
So, here I have a problem with the signing application.
I can try to change the Bundle Identifier under "General" to be a unique one or maybe I can go to "Signing & Capabilities" here - I don't have a team and I should assign it for the WebDriverAgent library so if I want to install the application with the IntegrationApp with WebDriverAgent, I can do it.
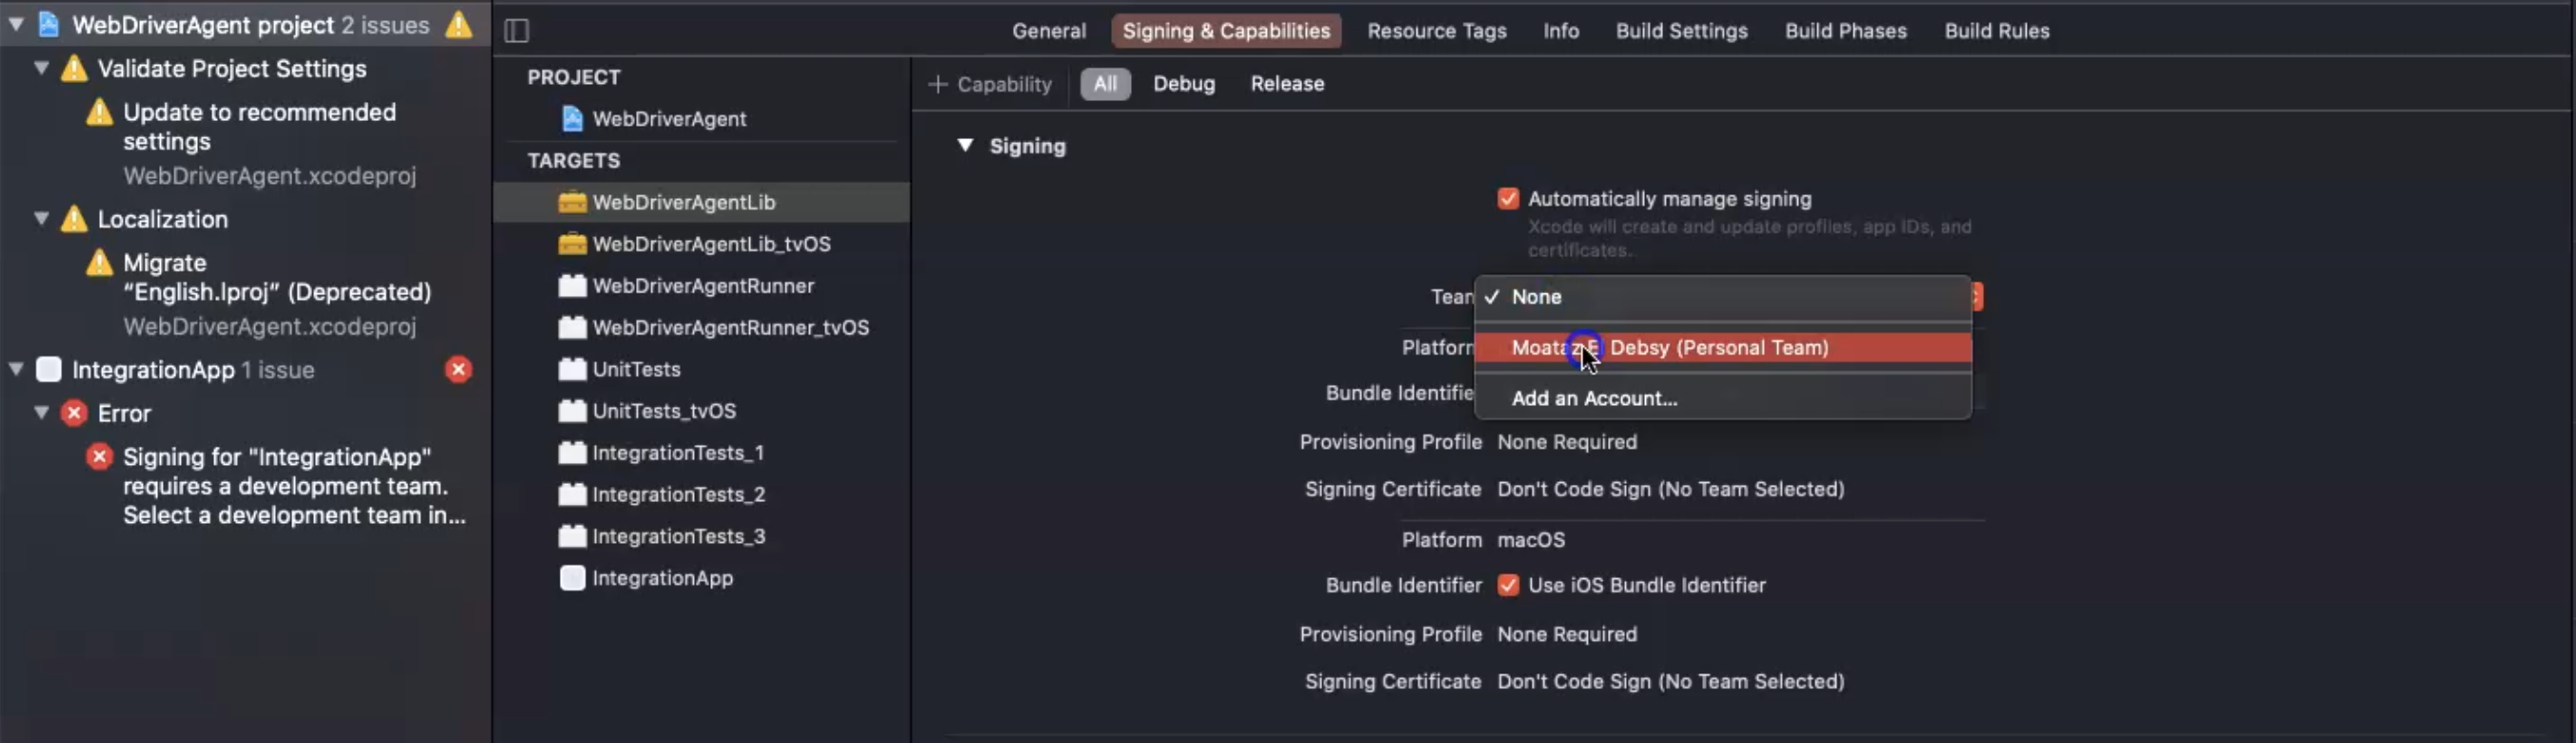
So I can just select my team and set the "Signing Certificate" as "Development".
Then I can go to "IntegrationApp" and select my team - I still have an issue here because the app identifier can't be registered because it is not unique.
So I will try to change the Bundle Identifier to "com.moataz.IntegrationApp".
Now it passes, and we can also change it for the "WebDriverAgentLib".
For WebDriverAgentRunner, I also need to change it in the application to be able to use it.
Let's build the application again and let's see if we still have this problem with signing.
This application has now been built successfully for the physical device and now the WebDriver can be installed on the physical device and we can use it with Appium.
If you have any problems with signing certificates or provisioning profiles, or with the WebDriverAgent application, you should remember this case.
We can start running our application and check what happened during our test.
I already connected my iPad pro to my machine, so this is the screen for my iPad, and let’s try to run our first script and see what happened.
Here we have one error in setUp, let's see what it is.
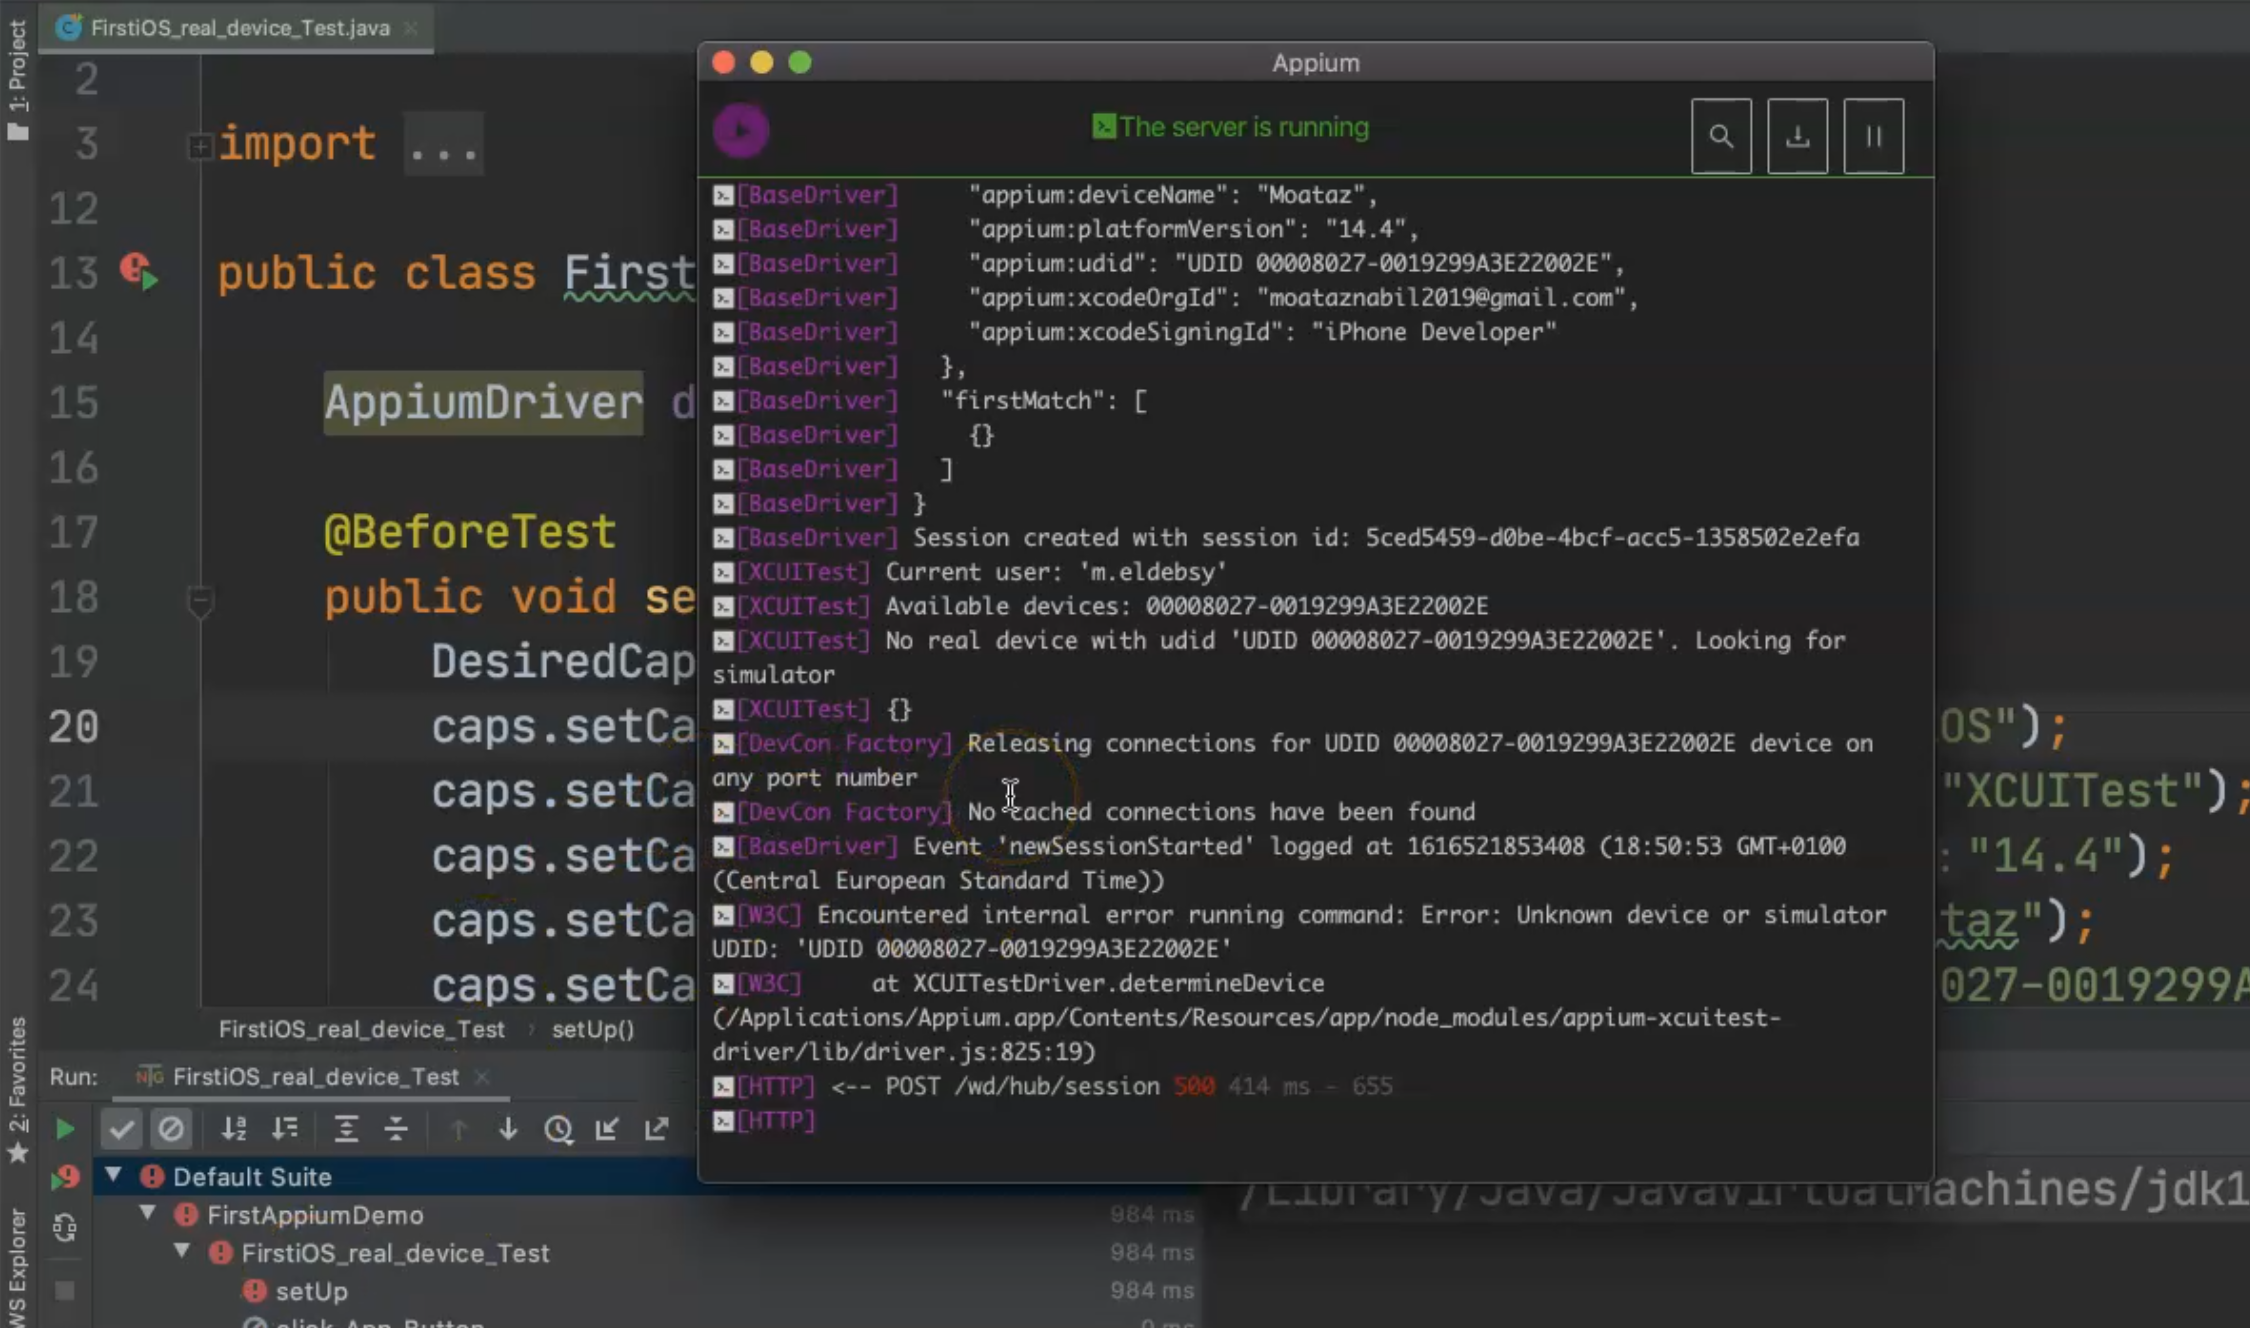
Let's also try to find the error in that Appium log server - so here, the error "No connections found" so they can't find this device with the UDID.
Let's check what the error is with the UDID.
I added string - I copied the string with "UDID ", so I need to remove this because the UDID should be a unique number.
Now, let's run our test again and check what happened during our test.
This is our device, this is our Appium server, now the Appium server is installing the WebDriverAgent on the physical device, and then it will install our application.
We still have a problem here that we are unable to run the WebDriverAgent.
Here, we will find that this is a problem in the WebDriverAgent and this usually happens.
Let's open the project again, and build the application.
So for example, WebDriverAgentRunner - we will run this one and check if it's open already on the device.
Now we are building and we just need to check that the WebDriverAgent is working successfully because this is the main problem.
Whenever we are running on a physical device, if we don't have a WebDriverAgent set up successfully, we will find all of these problems.
Sometimes we want to remove the WebDriverAgentRunner from the device, reboot the device, connect the device again, and try to run on this device.
If a problem still exists, maybe we can follow the documentation for going to the application from the command line and trying to build the application using Xcode.
For example, you can run a script bootstrap to install the dependencies for this project, and also maybe after that, we can just run:
xcodebuild -project WebDriverAgent.xcodeproj -scheme WebDriverAgentRunner -destination 'id=<udid>' test
This will install and run the test on the physical device, which will install the WebDriverAgent on this device.
One additional point about the desired capabilities is that if we have already built WebDriverAgent in a specific path on our machine, you can mention this path so we don't need to install or build the application WebDriverAgent from scratch with WebDriverAgentRunner each time.
Also, we can add two additional desired capabilities for the real device.
We will open our script and add the new desired capabilities so we will start with caps.setCapability() - and then what are new desired capabilities will we add?
From the appium-xcuitest-driver repository, here in the desired capabilities, we can search for the WebDriverAgent, and here you can pass two things.
You can add the derivedDataPath for the application - when we built the application, we already have the path on our machine so we can use it with Appium.
Also, we can use useNewWDA - if it's true, this will force uninstall any existing WebDriverAgent app on the device, so we need to set it to true because every time we need to uninstall the WebDriverAgent and then install it on the physical device.
So we will copy this and to our test and set it to true.
Then for the second one we will call caps.setCapability() and we can pass derivedDataPath and set the value by going to the WebDriverAgent project, looking under Products, and then copying the full path for WebDriverAgentRunner.xctest up to /Build… so it will include all the products under this path.
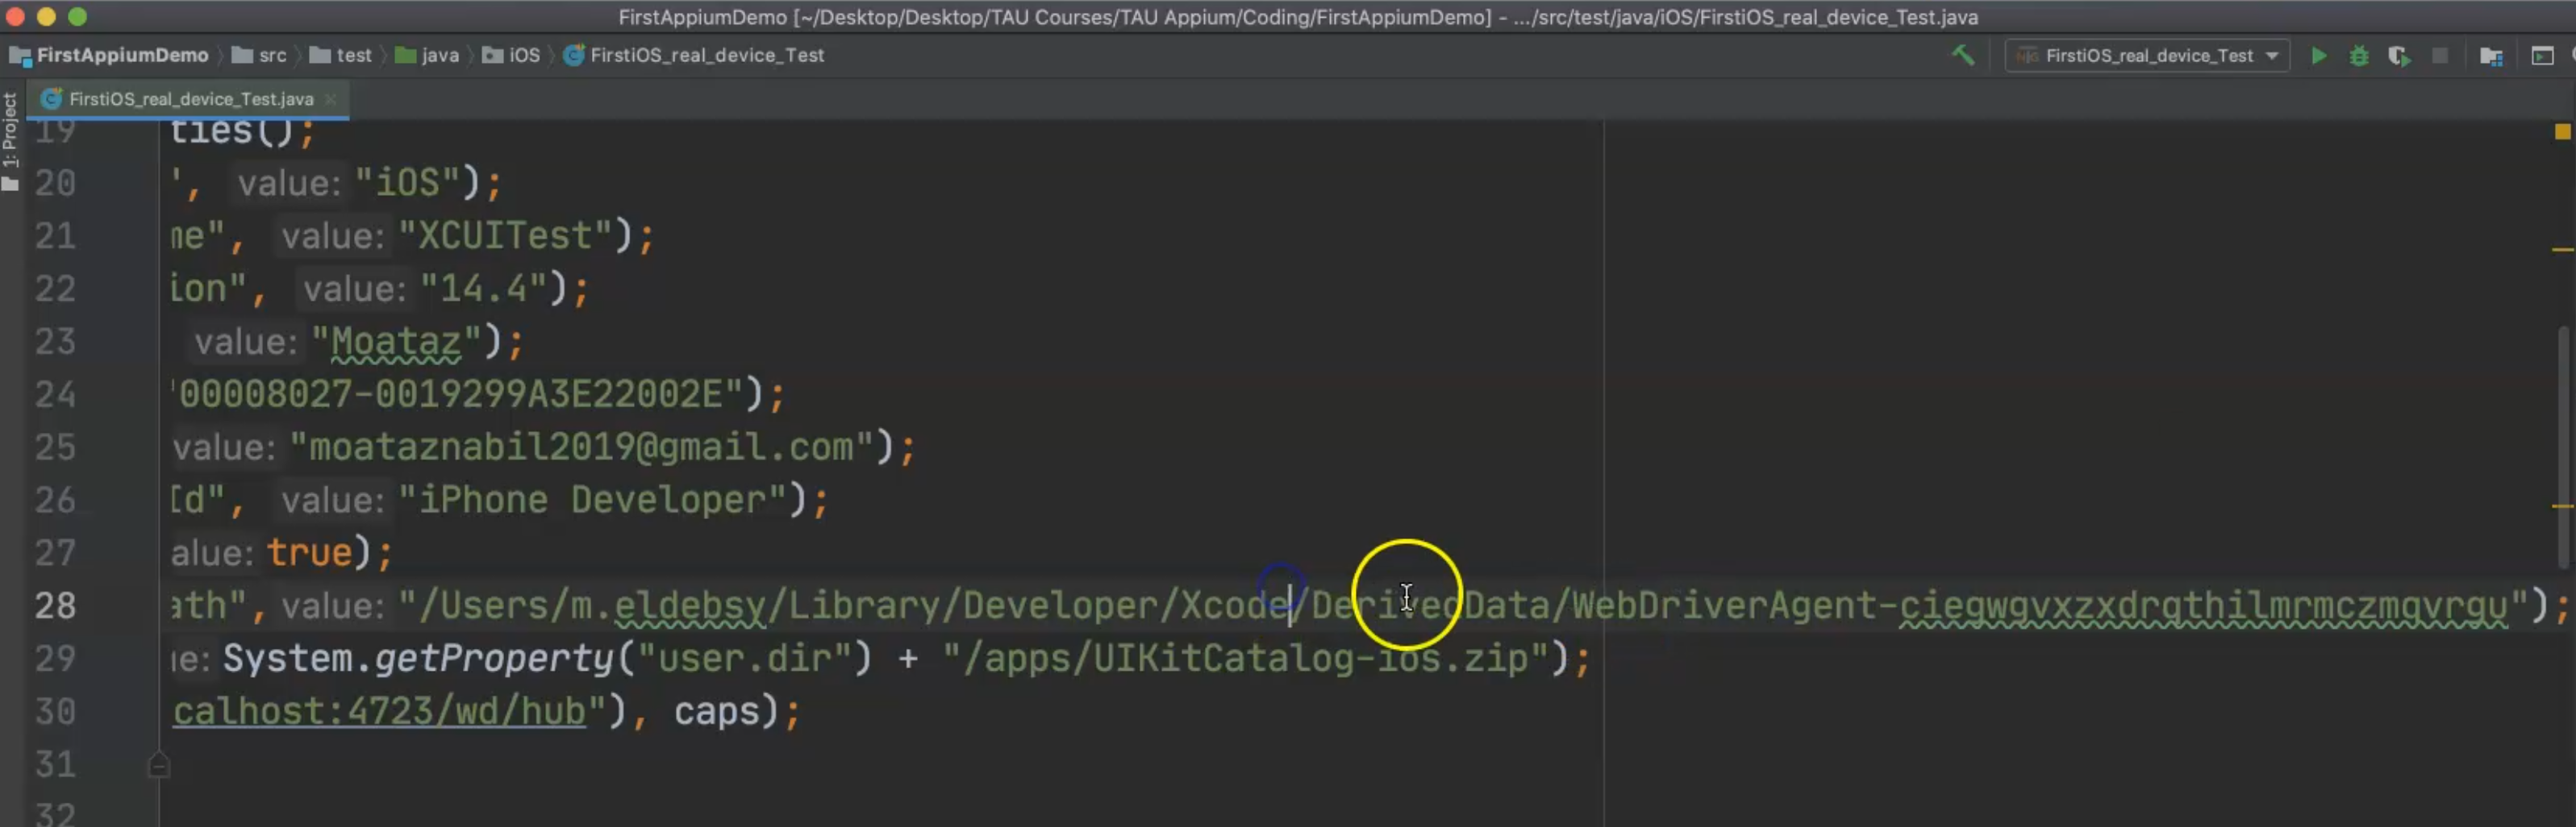
This means that every time we will call the WebDriverAgent application from this path, and also, we don't need to uninstall the existing one, which will fix our problems.
So, here, we added different things with the real device udid, xcodeOrgId and the xcodeSigningId, useNewWDA is true, and the data path for the application, which is for the WebDriverAgent.
package iOS;

import io.appium.java_client.AppiumDriver;
import io.appium.java_client.ios.IOSDriver;
import org.openqa.selenium.remote.DesiredCapabilities;
import org.testng.annotations.AfterTest;
import org.testng.annotations.BeforeTest;
import org.testng.annotations.Test;

import java.net.MalformedURLException;
import java.net.URL;

public class FirstiOS_real_device_Test {

    AppiumDriver driver;

    @BeforeTest
    public void setUp() throws MalformedURLException {
        DesiredCapabilities caps = new DesiredCapabilities();
        caps.setCapability("platformName", "iOS");
        caps.setCapability("automationName", "XCUITest");
        caps.setCapability("platformVersion", "14.4");
        caps.setCapability("deviceName", "Moataz");
        caps.setCapability("udid","");
        caps.setCapability("xcodeOrgId","");
        caps.setCapability("xcodeSigningId", "iPhone Developer");
        caps.setCapability("useNewWDA",true);
        caps.setCapability("derivedDataPath","");
        caps.setCapability("app", System.getProperty("user.dir") + "/apps/UIKitCatalog-ios.zip");
        driver = new IOSDriver(new URL("http://localhost:4723/wd/hub"), caps);
    }

    @Test
    public void click_App_Button() {
        // code
        driver.findElementByAccessibilityId("Buttons").click();
    }

    @AfterTest
    public void tearDown() {
        if (null != driver) {
            driver.quit();
        }
    }
}
So this is our application and now let's try to run our application.
Before running our application, we also need to double-check that we have these applications in the trusted applications on the physical device.
So I will go to the "Settings", and under "Settings" in "General", I have the "Device Management" and then under "Device Management", I have the developer application, or this is my account.

Here, I have all the verified applications - WebDriverAgentRunner-Runner, the UIKitCatalog - the application will be different every time for the test, and this is the IntegrationApp that's related to WebDriverAgent.

So these should be verified on the physical device to be able to use them in our test.
Let's run our script and check what happened during our test and if it passes or fails.
We will now run the script, and this is the server, and every time we are now calling from the path of the WebDriverAgent and we are now installing the application, then the application will restart on the device, and then we can start our test.
The WebDriverAgent is used now, and the UI catalog is opened and we clicked on the button.
Our test has passed now and we fixed the problems with WebDriverAgent and Appium with physical devices with different steps and you need to handle these steps in your case.
