

Transcripted Summary
Previously, we've configured our test suite to run outside of our IDE by using a Maven target.
Now, it is time for us to put this capability to the test by running it via GitHub Actions on a remote repository every time we push new code.
GitHub Actions is free for all public repositories, so this will cost you anything as long as you use GitHub and leave your repo public.
GitHub Actions also requires us to configure everything via the codebase.
So while most continuous integration tools allow configuration as code, GitHub Actions actually enforces it, so it's a great way to learn.
An action comes with a bit of hierarchy.
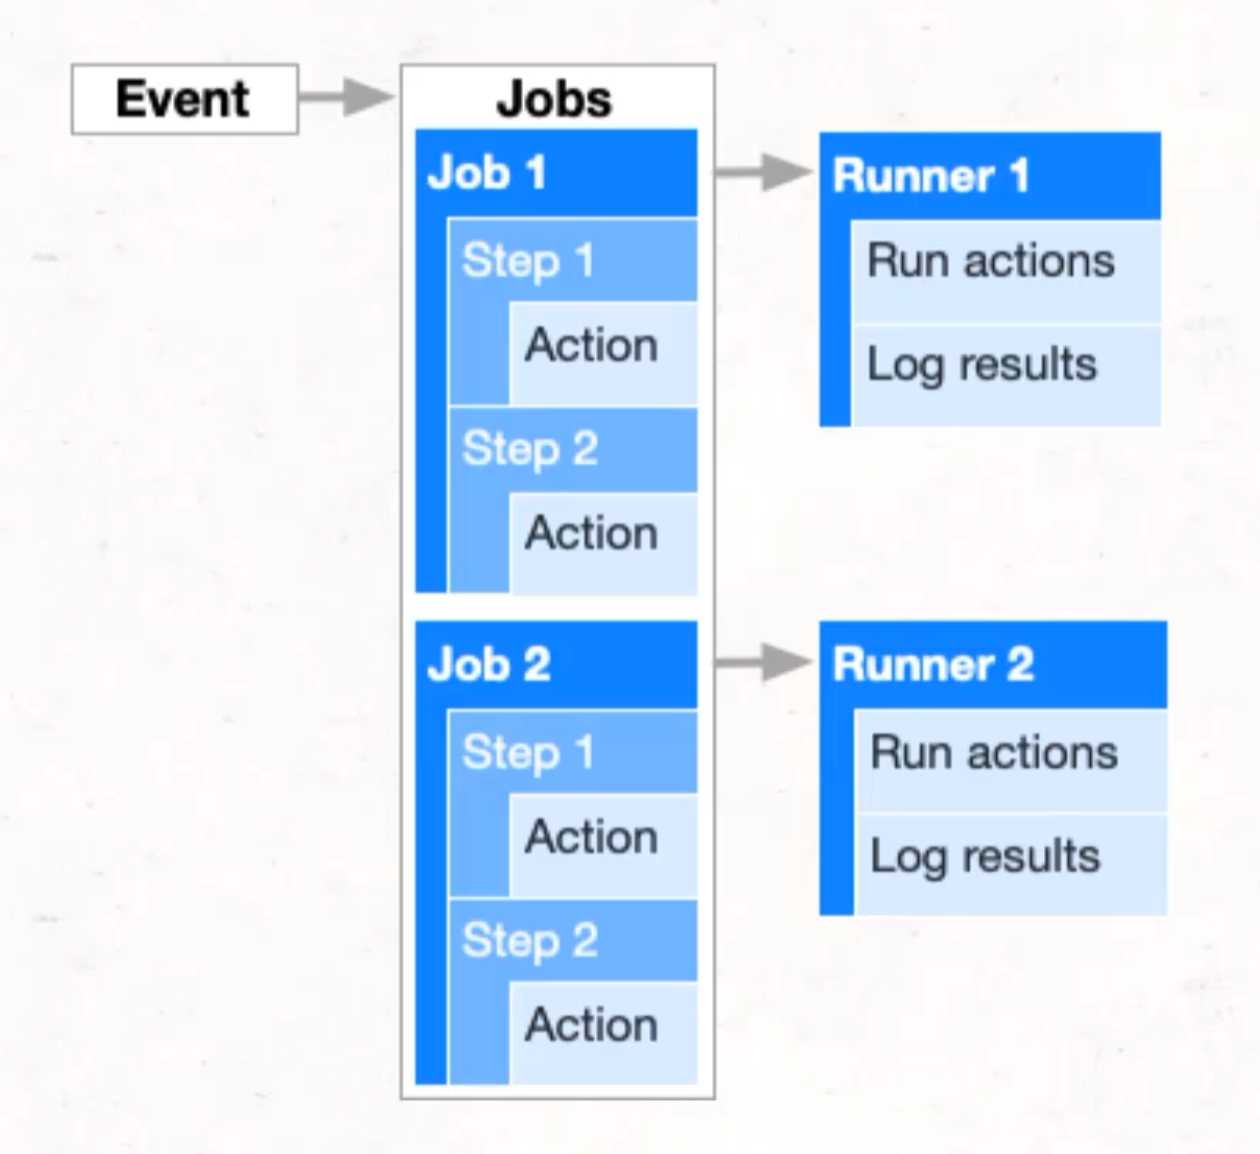
The first thing that we'll need to do is to configure an event that will trigger this action - for us, this will be about pushing to a branch.
Then, we will need to introduce a job, which is going to be a set of actions.
You can have one or many jobs, but in our case, we only need a single job in order to build and test our application.
The final piece is to define the steps and actions that will be taken - these can be thought of like when you click a button in IntelliJ, or you run a command on the command line - these are the actually nitty gritty things that are going to be executed.
But before we get started, let's talk codebase hygiene.
Each of these chapters in this course will be building on the previous chapters.
If you successfully complete a chapter, you can just continue on from where you've left off.
But if for some reason you want to forgo your local changes, you're welcome to use the ones I've submitted.
These are going to be taken from my repository by reviewing the branch by chapter name.
So for example, we are currently starting chapter four, so you would need to go and grab the changes that are on the branch chapter3_complete.
Assuming that you have the necessary code in your repository now, we can get started with introducing the actions.
The good part about setting up GitHub Actions is that there is a lot that just follows convention.
So first of all, at the root of our repository, we need to introduce a New > Directory.
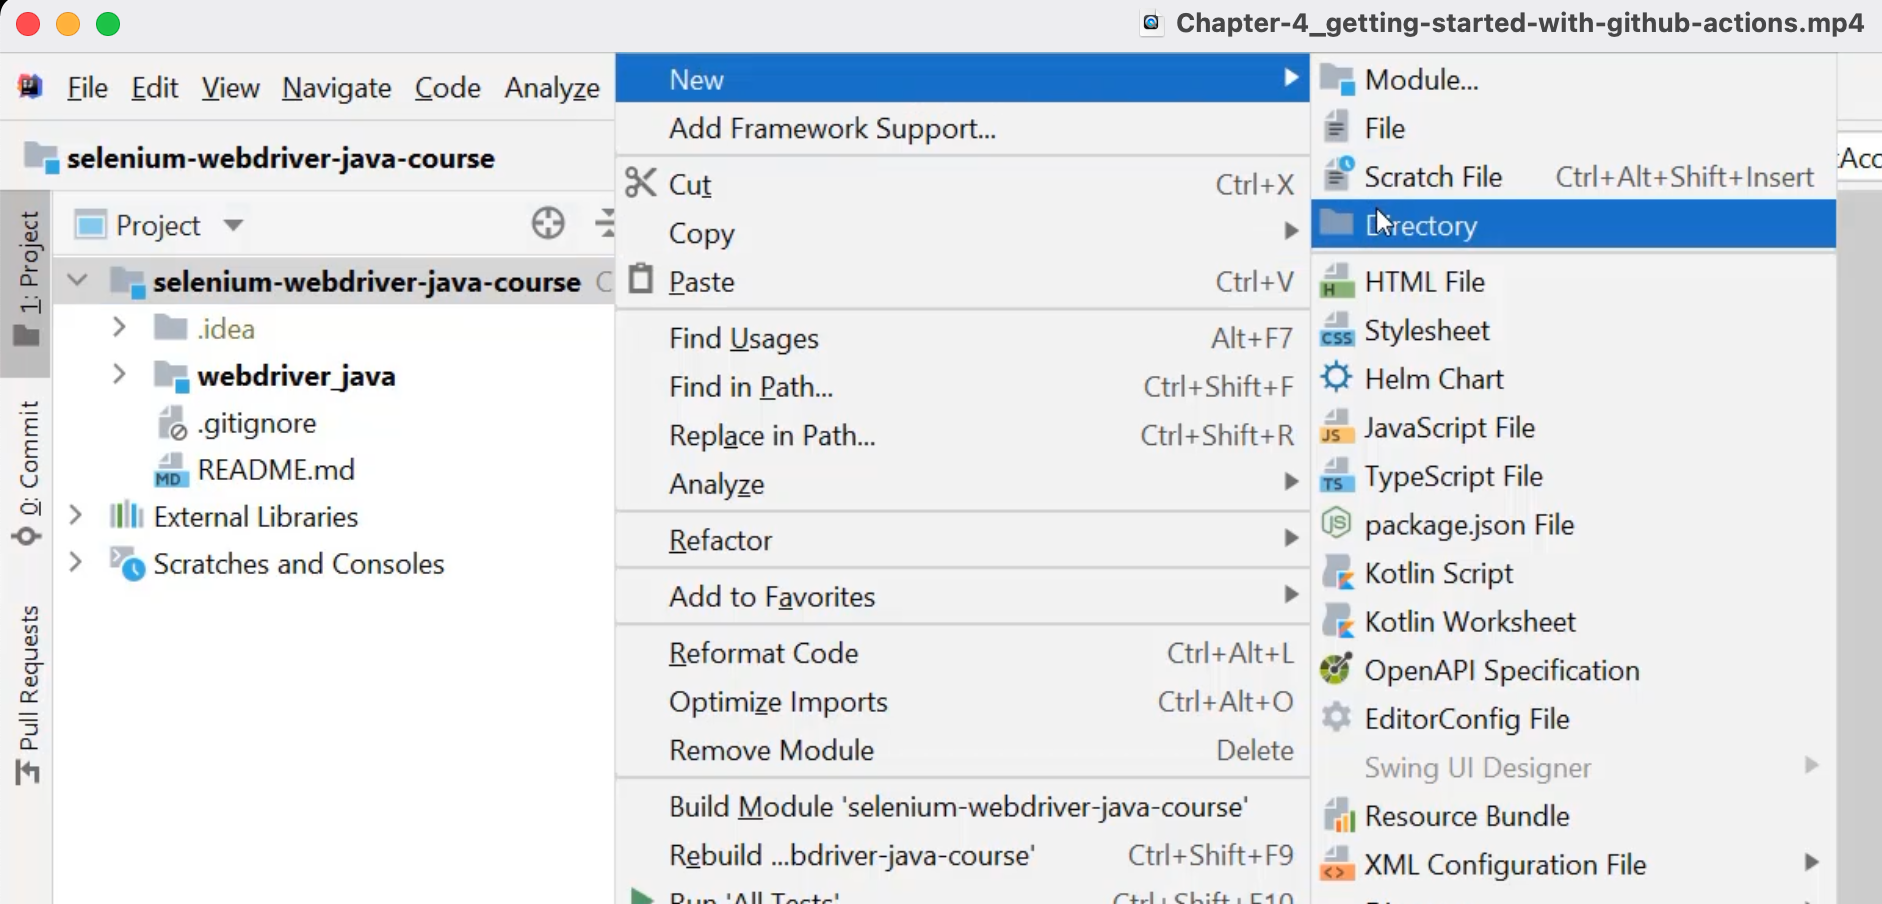
That directory needs to be called .github.
It's very important that you start this with the ., because that is the convention that GitHub looks for.
This is a folder that will allow for GitHub to be configured in lots of different ways.
One of the ways in which it can be configured is to introduce workflows - you do that by introducing another subdirectory called workflows.
This tells GitHub that the contents inside of here are going to be configuring GitHub Actions.
Finally, we need to introduce the file that will be doing the configuration, and it can be really called anything as long as it ends in yaml, so I'm going to call it actions.yaml.
yaml stands for YAML, and it's actually an acronym for "yet another markup language".
YAML cares a lot about whitespace so as you're working with YAML, pay attention to the spacing of your file, because that can get us into trouble.
Once we're in this file, I quite like typing up some "Getting started" steps as comments so that I can start to introduce the necessary code.
The first thing that I think I'm going to need to introduce is an "Event name".
From there, I'm going to need to tell it "When the event should run".
I'm also going to need to tell it "What jobs to execute", and finally, "What steps within each job".
So if I get started from the top here, I want to name this file on_push.
That's because when I go to introduce when the event should run, I'm going to ask it to run on push to a branch, and specifically, to all branches, which you can do with a double star **.
This is correct, but it might be a little bit confusing for people who are not used to this language, so it might be a good opportunity to add a bit of a comment as to why we have this double star.
# Event name
name: on_push

# When the event should run
on:
  push:
    branch:
      - "**" # This will run on all branches and must be quoted to be handled by yaml
From here, I can move on to what jobs to execute.
Jobs can be one or many, so with YAML, I'm going to start a collection with the plural jobs and inside of that, each next item will be a named job.
So for us, our named job is build_and_test.
By being indented by two spaces, this is now being listed as a example job.
It's now time to put our steps inside of here.
We can introduce steps in the same way we introduce jobs by introducing a new list that's plural, and each item underneath this list will be an independent step.
I want to get started nice and easy, so the first thing I'm going to do is make sure that the computer running this CI pipeline has access to my codebase.
To do that I'm going to use a publicly available step, which is called actions/checkout and I'm going to indicate that I want to use version two of that publicly available step.
Speaking of the machine that this is going to run on, we actually have to define that because there are many different options.
For us, we're going to use what is probably the most common option, which is the ubuntu-latest.
# Event name
name: on_push

# When the event should run

on:
  push:
    branch:
      - "**" # This will run on all branches and must be quoted to be handled by yaml

# What jobs to execute

jobs:

  build_and_test:
    runs-on: ubuntu-latest

  steps:
    - uses: actions/checkout@v2
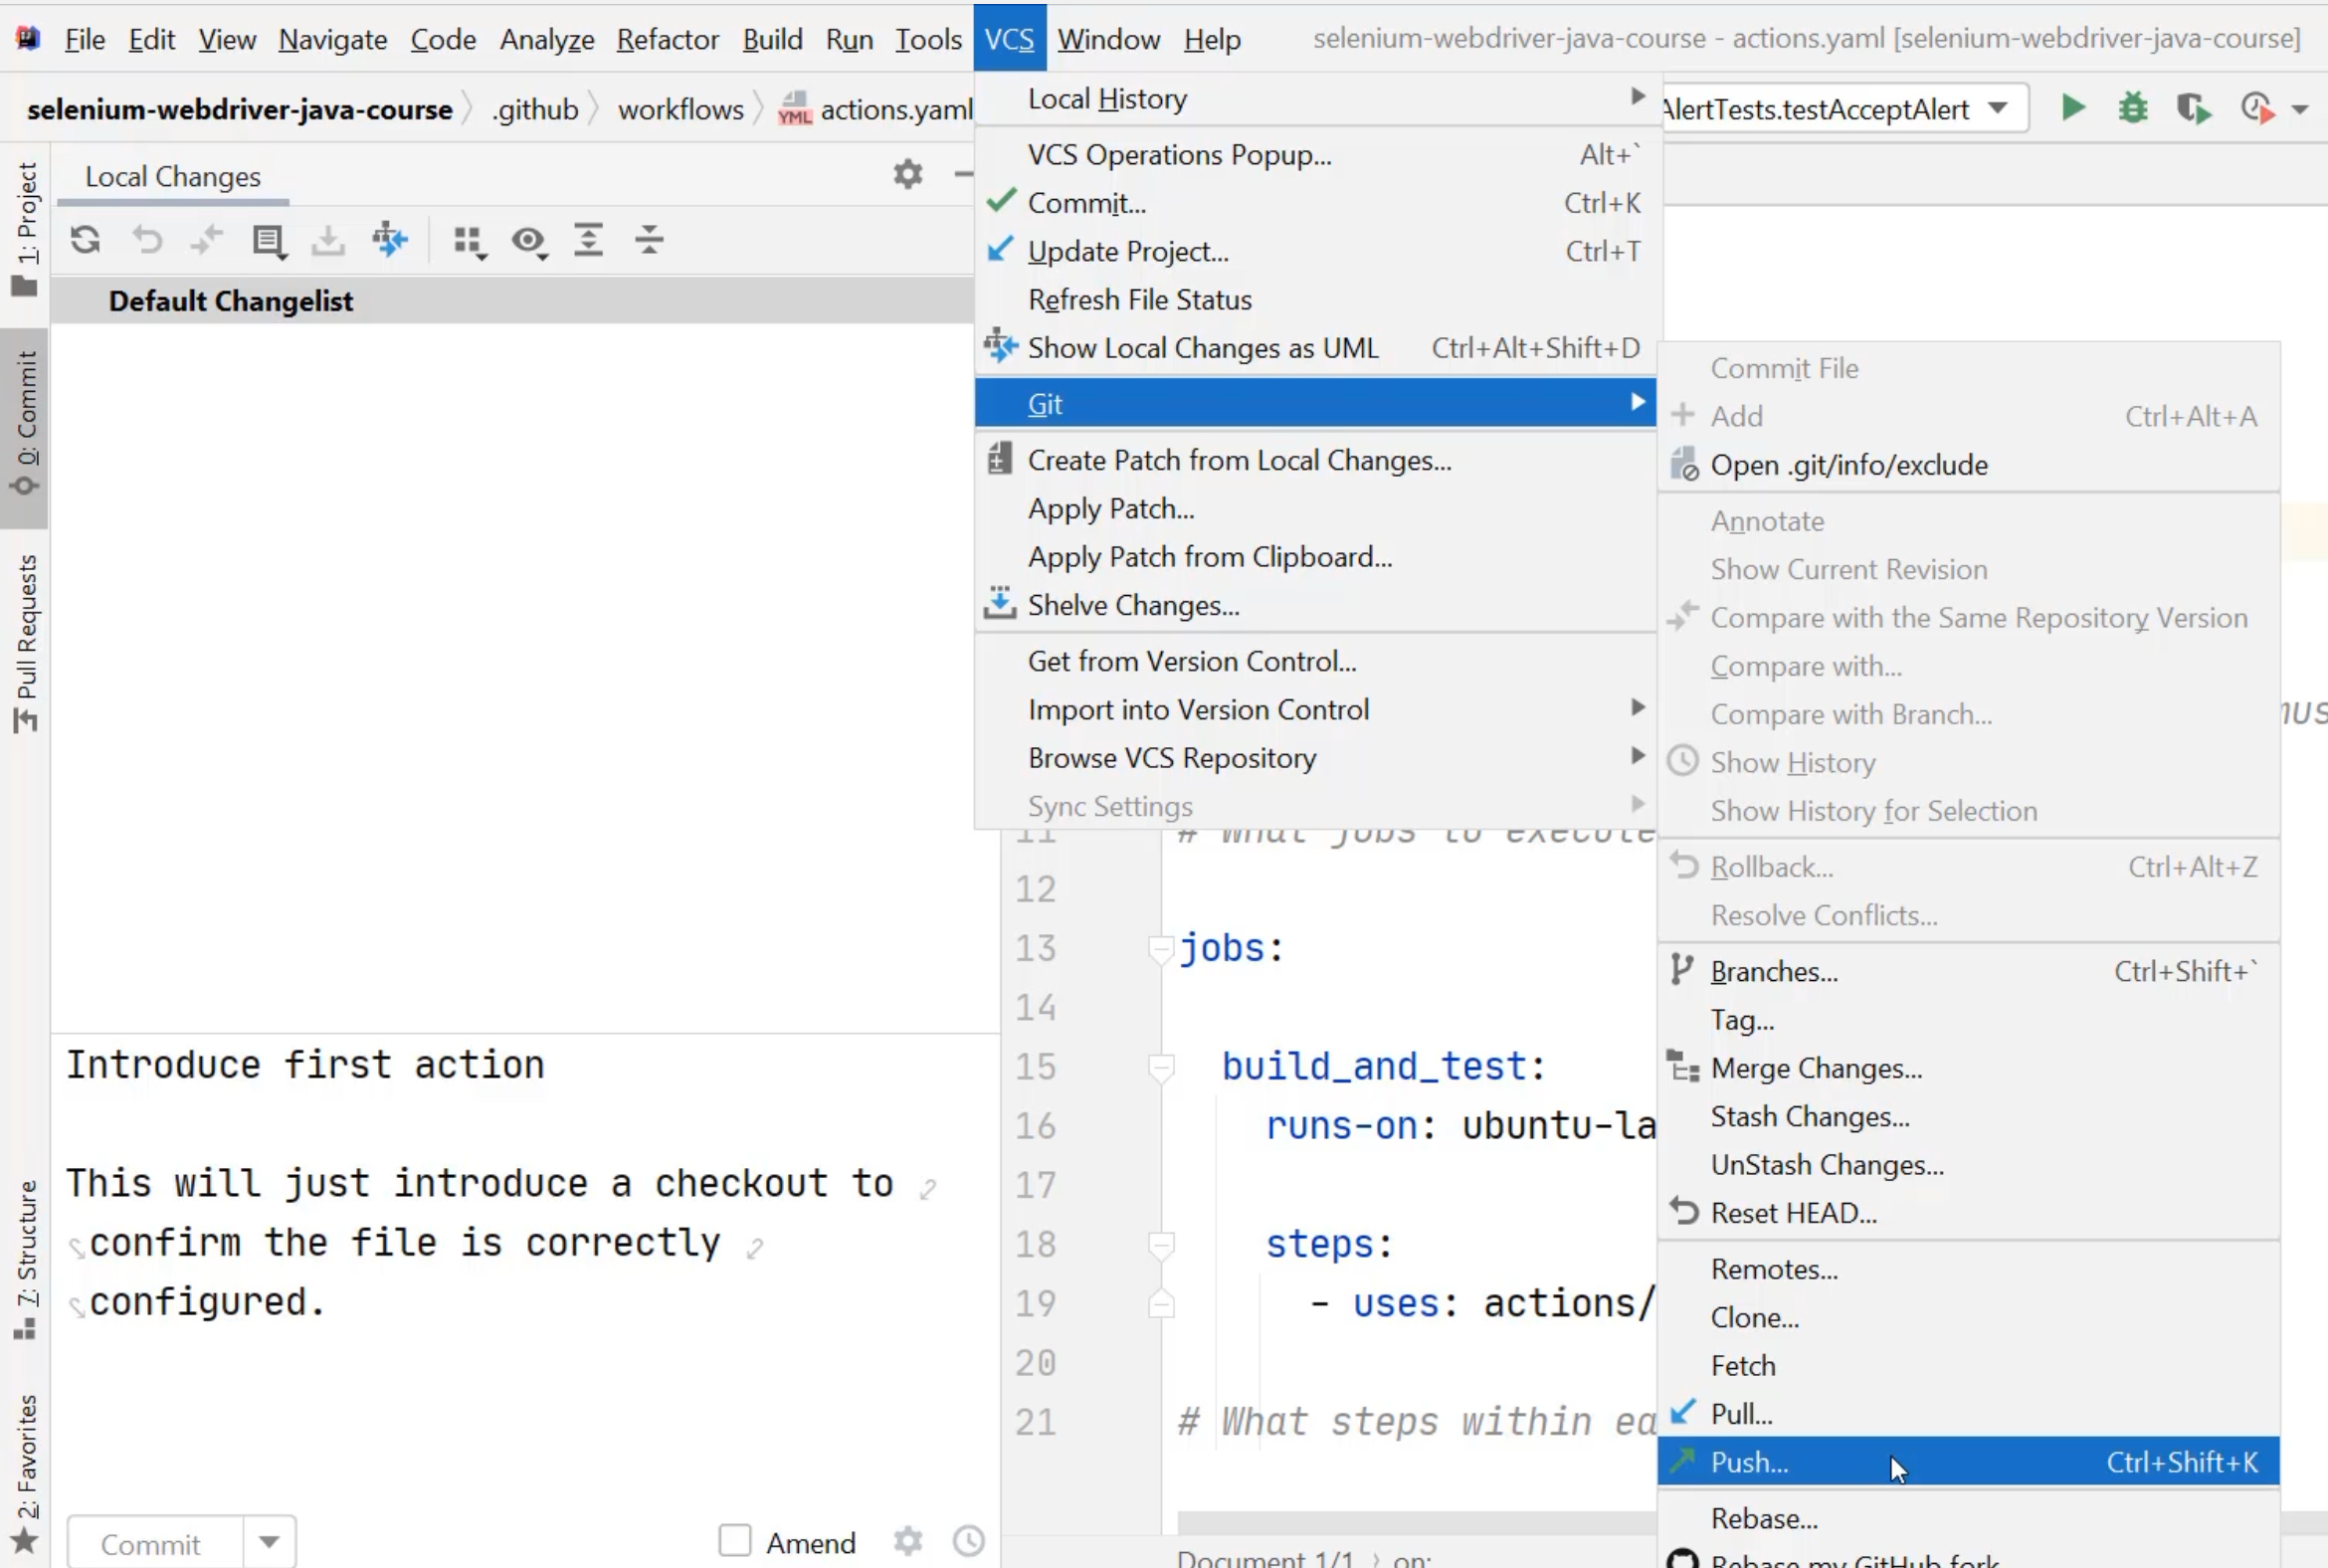
Wth this done. I'm going to now commit this into my branch in order to see that actions has been correctly configured.
You can make a commit in many ways, but one way is through IntelliJ.
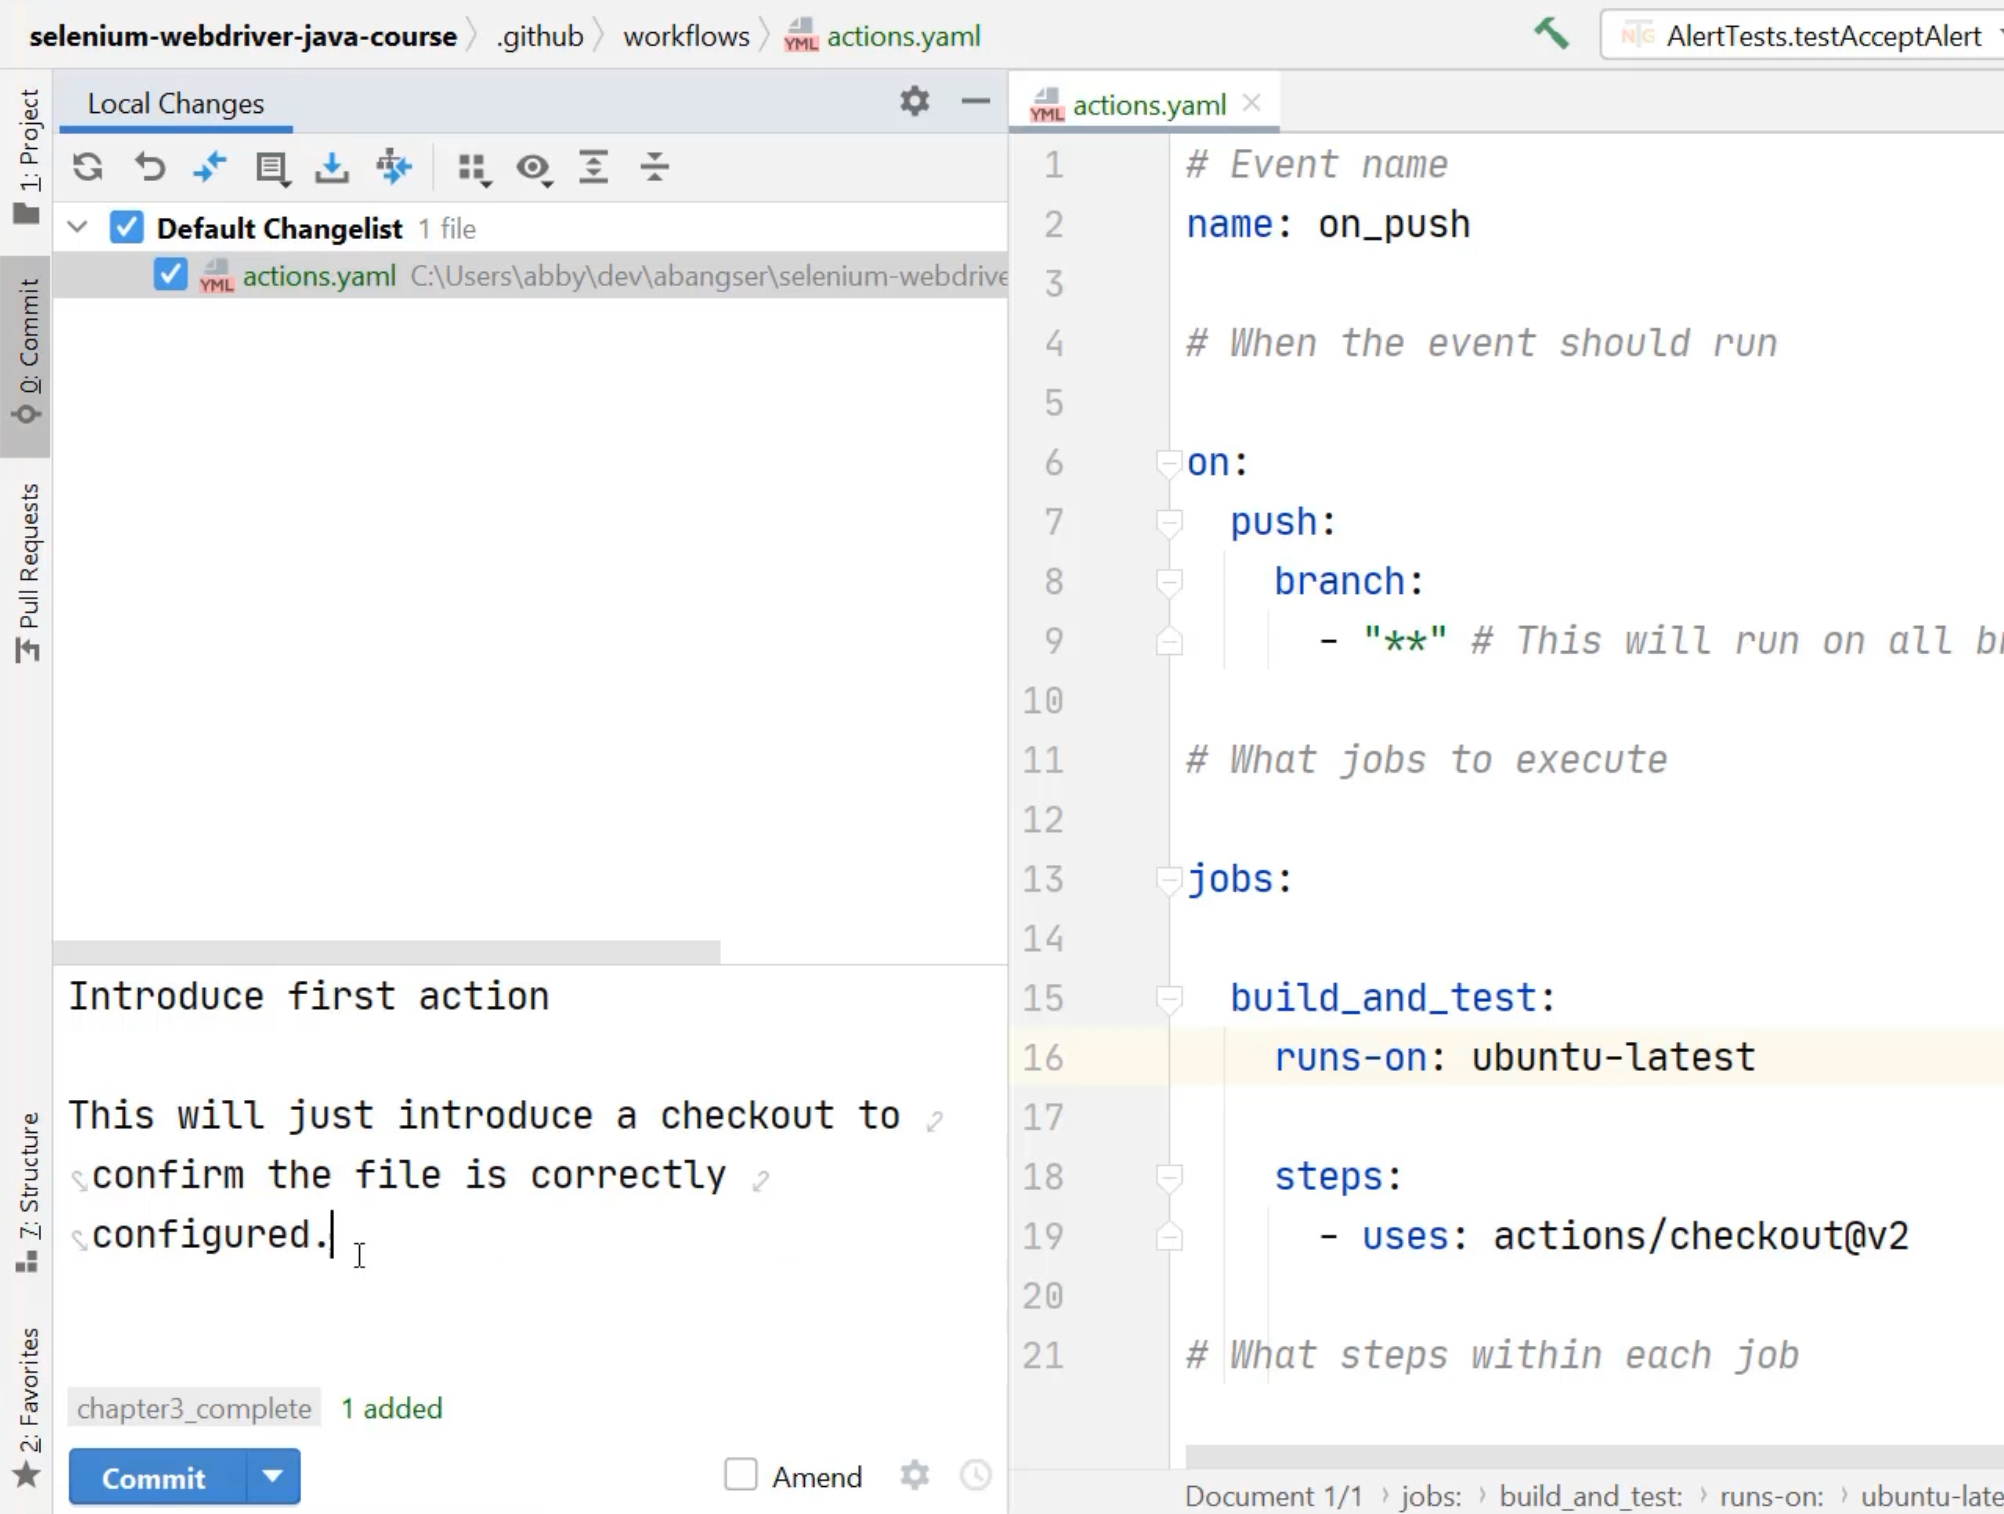
I'm now going to push this to a new branch by doing "Commit" and "Push".
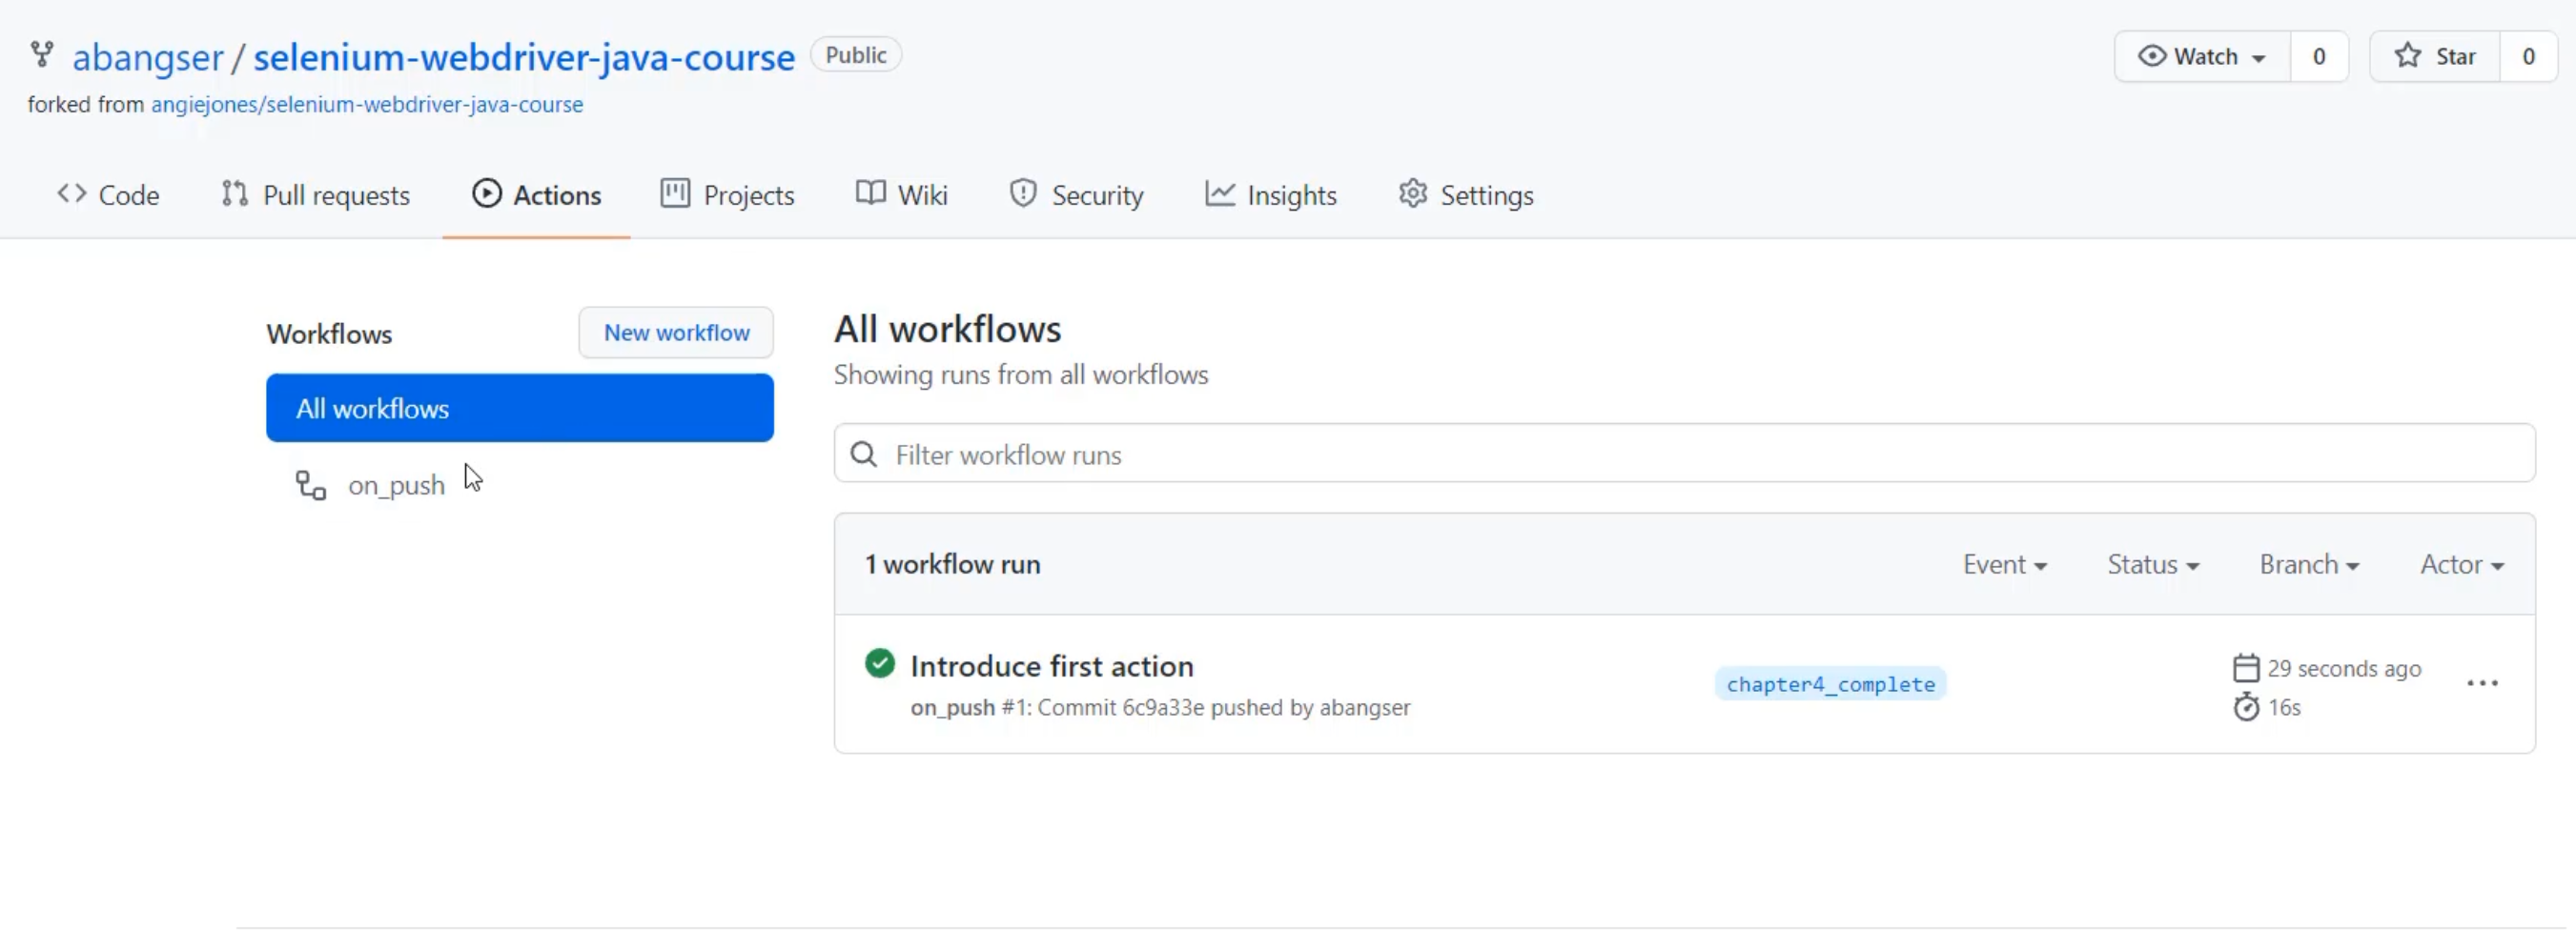
When I open up my codebase in GitHub, I can see that I've pushed to a new branch and I can go to the "Actions" tab and see that I have a workflow called "on_push", and I can see that it has been run based on the commit "Introduce first action".
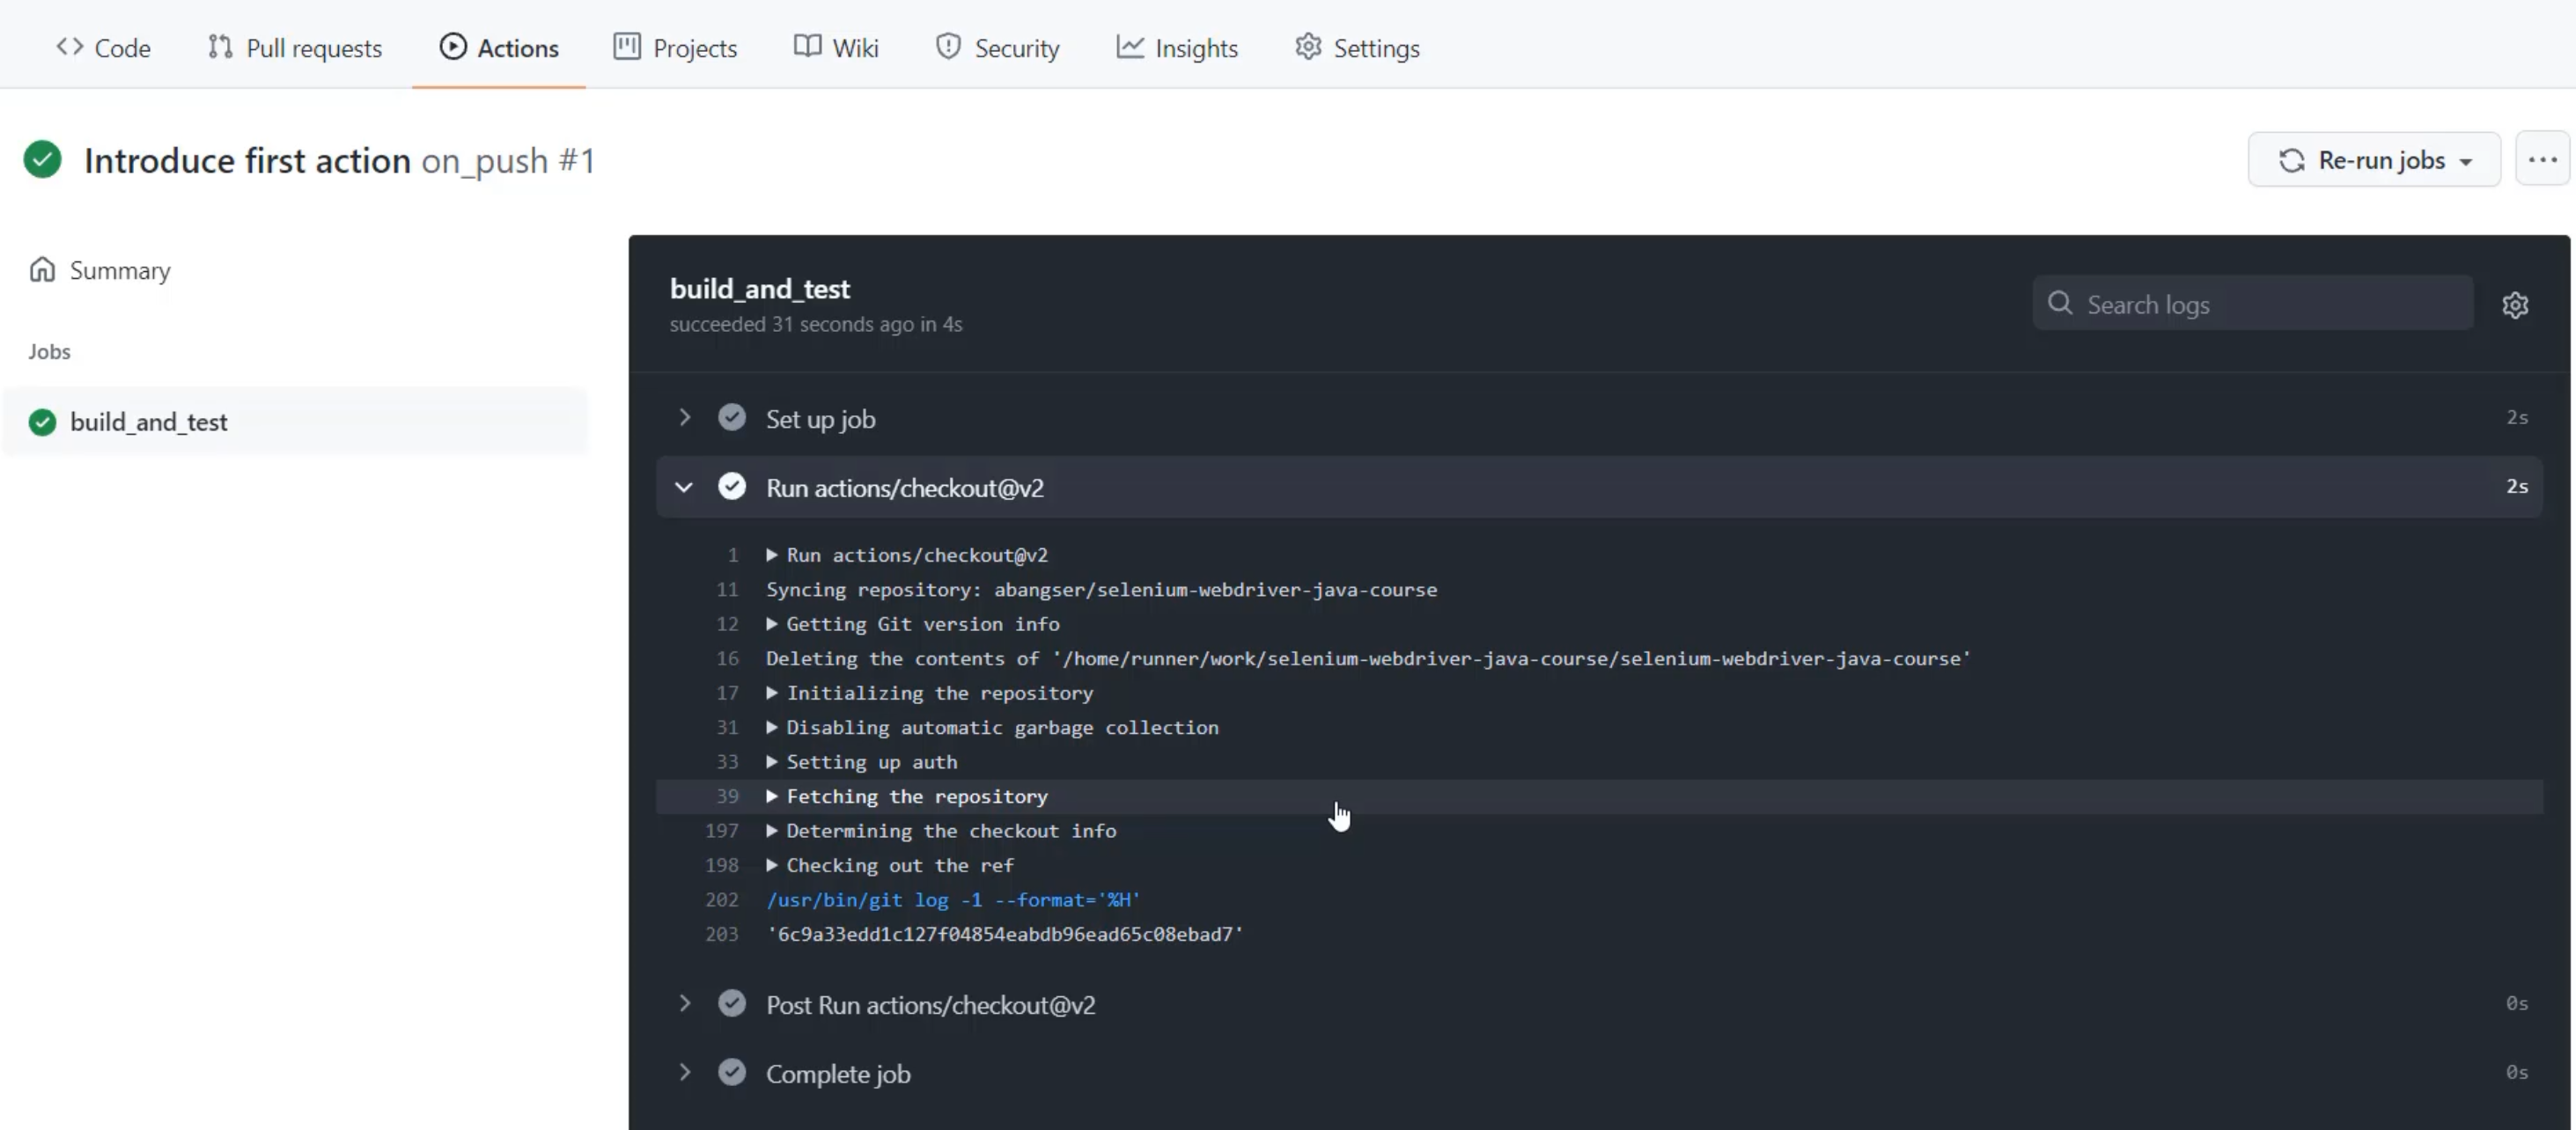
When I click on "Introduce first action", I can see that the job I ran "build_and_test" introduced a step that includes running the action on checkout.
Now it's time to make this a little bit more interesting for my specific codebase, but we're going to tackle that in the next chapter.
