

Hello, and welcome to this course on the IntelliJ Code Editor.
My name is Corina Pip, and I will be your guide in this discovery of this editor that you can use for writing and running your tests.
During this course, I will go over some of the most important features that IntelliJ offers, and I will start with installing the free version called the Community Version.
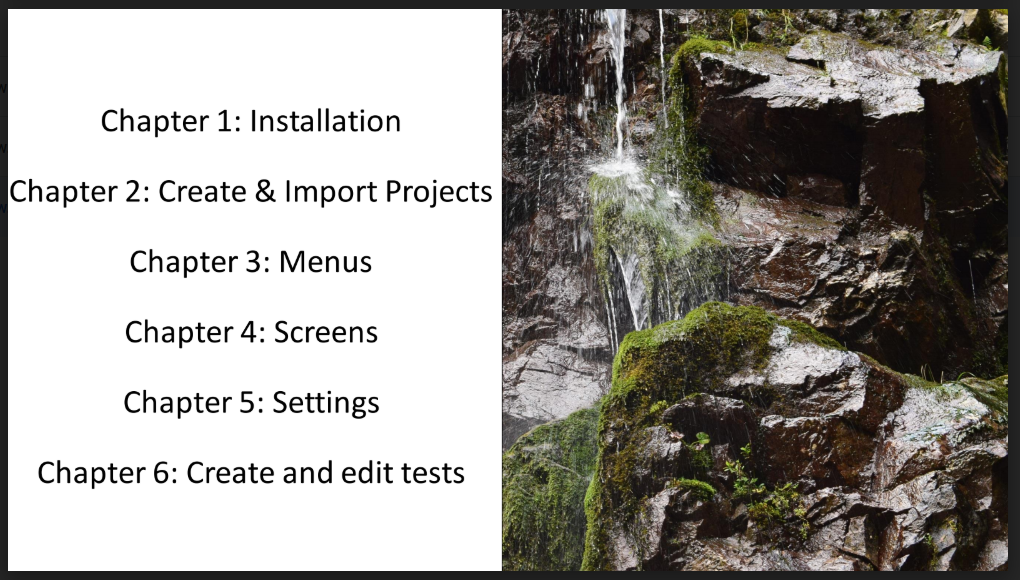
In the second chapter, we will see how to create a Java project and Maven project, but also how to import existing projects, either from your local machine or from a version control repository like Git.
Then I will go over some of the most important menus and screens that you have in IntelliJ in order to set up the editor the way you prefer it and to become more familiar with what you have on your screen.
I will also go through some settings, and then we will start creating some tests and then also editing them.
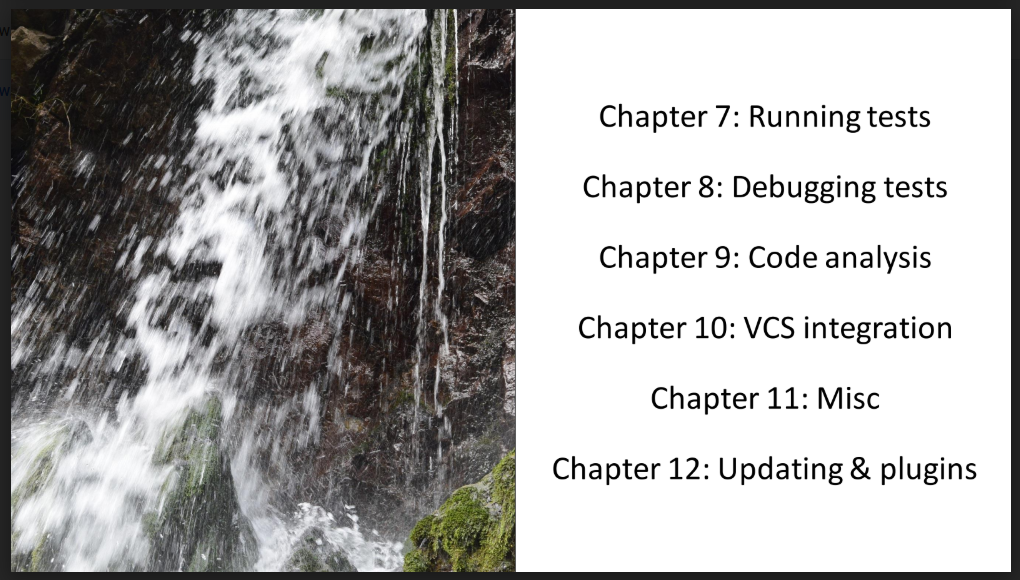
Once we will have some tests in place, we will take a look at how to run them and how to debug them.
Before putting these tests into a repository like Git, we will see how to perform some static code analysis that will allow us to clean up some of the tests we wrote, after which we will see how we can actually make this code available in the version control system (in this example Git).
I will also show you some useful shortcuts and information that you have available.
And then in the last chapter, I will show you a little bit about updating to newer versions, and plugins that you can install to make IntelliJ even more useful for you.
So, let's start with the first chapter. Let's start with installing our IntelliJ instance.
