

Transcripted Summary
The first thing we need to do in order to use IntelliJ is to download it.
The URL where we can download a version corresponding to our operating system is www.jetbrains.com/idea/download.
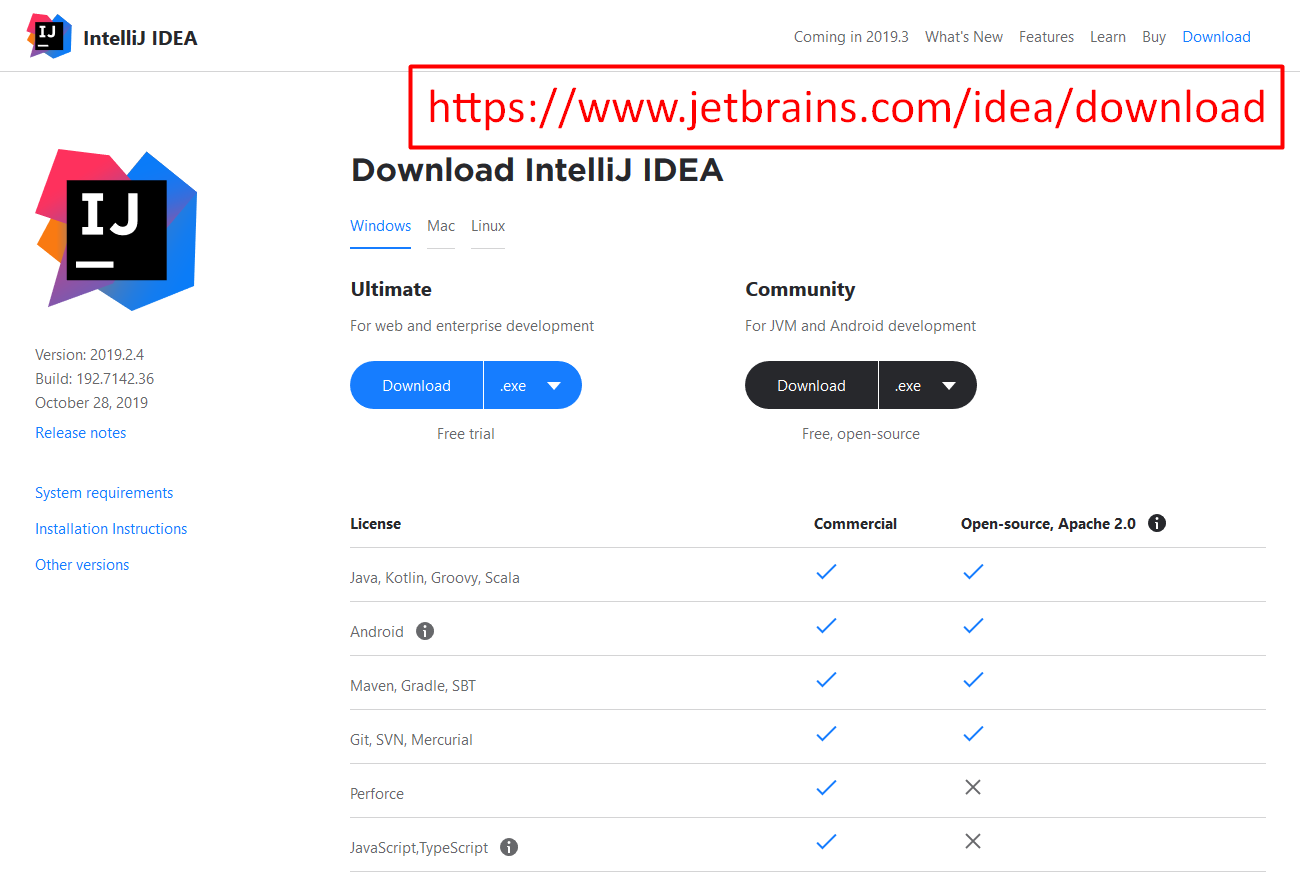
Now, on this page, we have the option to download the kit for Windows, by clicking on this tab here, or Mac, or even Linux.
Once we have chosen the operating system, we have an option to download one of the 2 available IntelliJ download kits.
The one on the left is called the Ultimate, and the one on the right is called the Community one.
There is a difference between them, because the first one, the Ultimate, is a paid version, while the second, the Community, is a free version. Of course, the difference between the 2 is that in the Ultimate version, you have many more features and many more options available to you, but during this tutorial, I will only use the Community version.
Also, this version is very appropriate, and it has all kinds of tools that you need in order to do your testing. In my work and in my experience, I have mostly used the Community version, because it basically has almost anything that I need.
I might need to install some additional plug-ins in order to do some actions or to work with certain languages or frameworks, but the Community version is absolutely perfectly suited for a tester's work.
Therefore, I will start by downloading the Community version by clicking on the Download button.
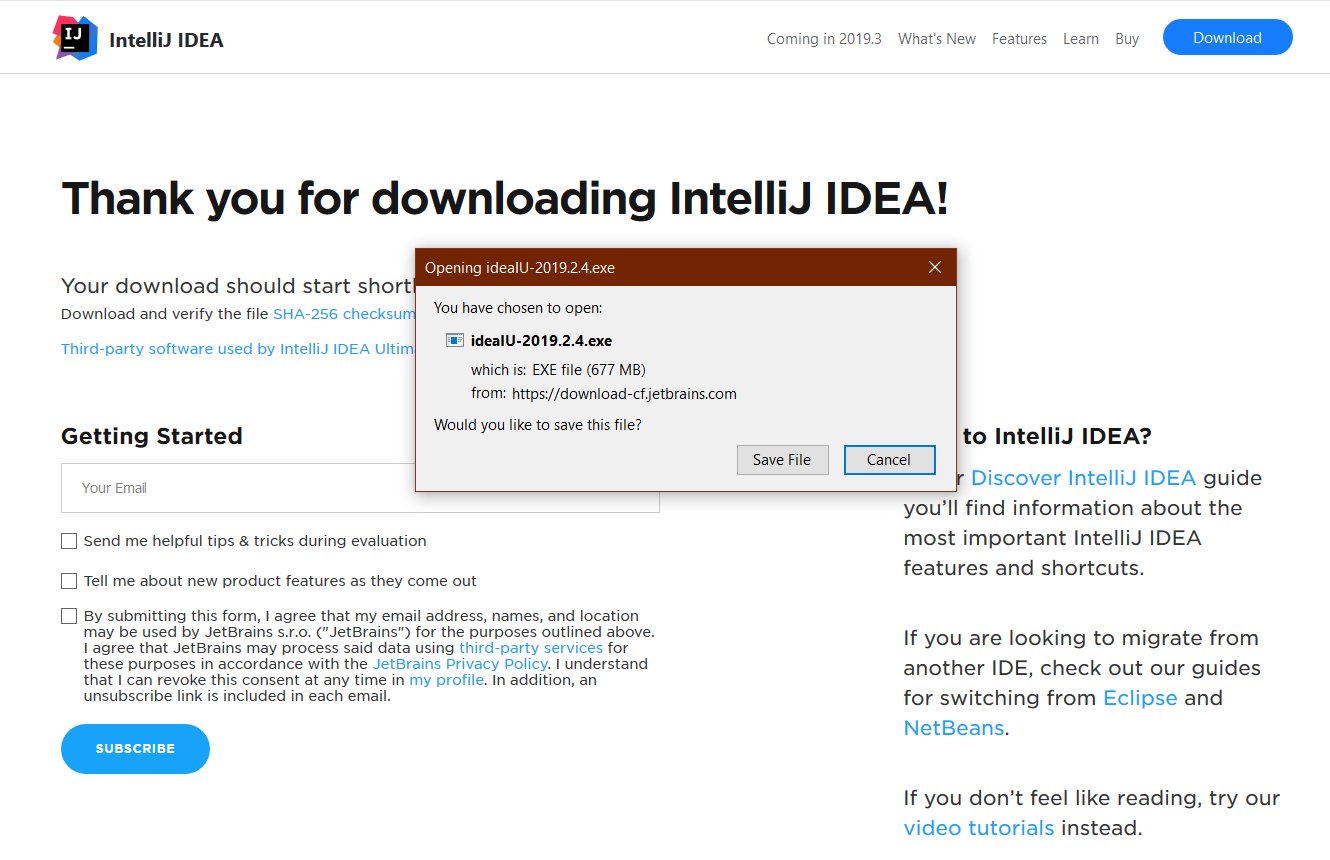
And you will see that I will be redirected to a "Thank you" page, and that on the lower side of my screen, the download will commence.
If you want to know what's new in this version that you're downloading based on what was implemented in previous versions — so what are the new features and what are the bug fixes that this version you're downloading has — you can go to the "What's New" page by clicking this "What's New" link here.
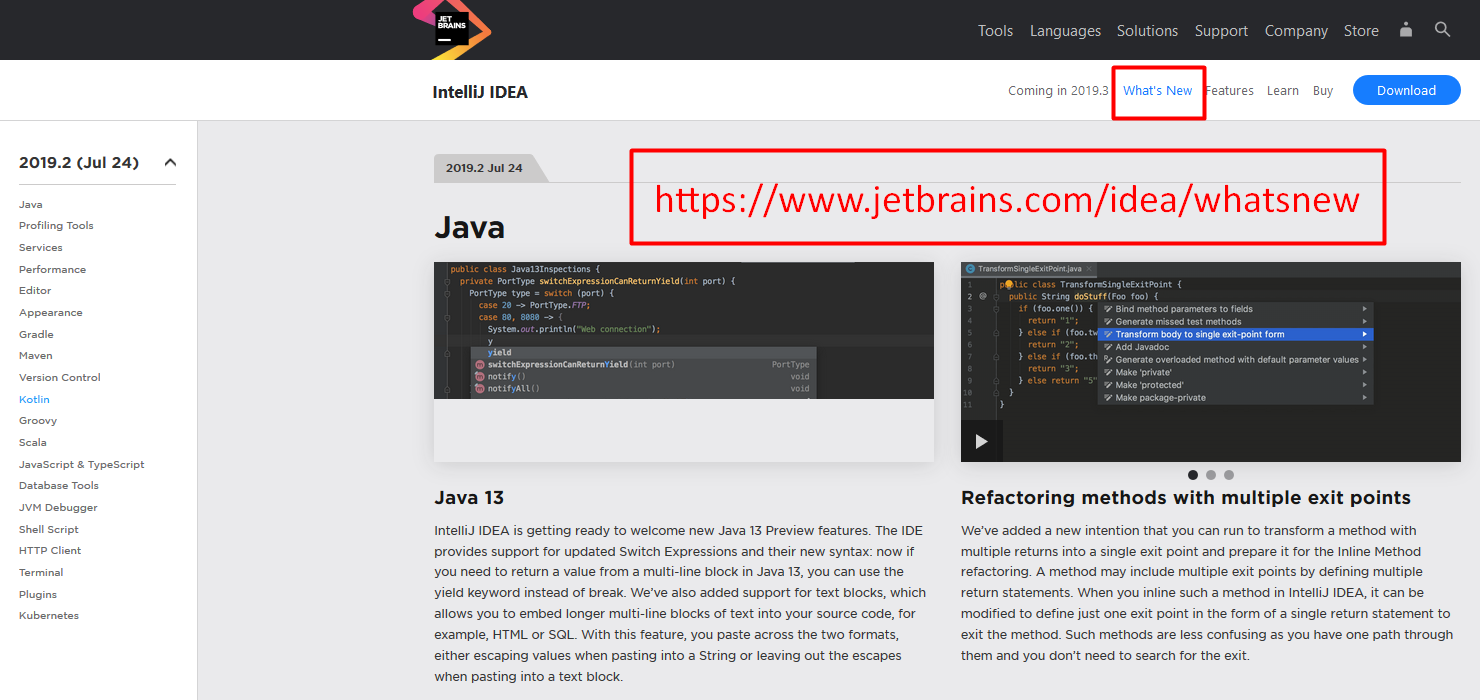
You will see information regarding what is available in this particular version that you're downloading.
They have a lot of updates, and a lot of new features regarding all kinds of programming languages, and support for different kinds of frameworks and tools.
Once the download has finished successfully, simply open the file that was downloaded.
You might need to set some permissions in order to allow for the file to be executed on your machine. Once you have done that and you have opened that file, this will be the first screen that you will see.

This is the welcome screen.
On this screen, you can just click the "Next" button.
You are now taken to the "Install Location" screen, where you are asked what you want the destination folder for this installation to be.
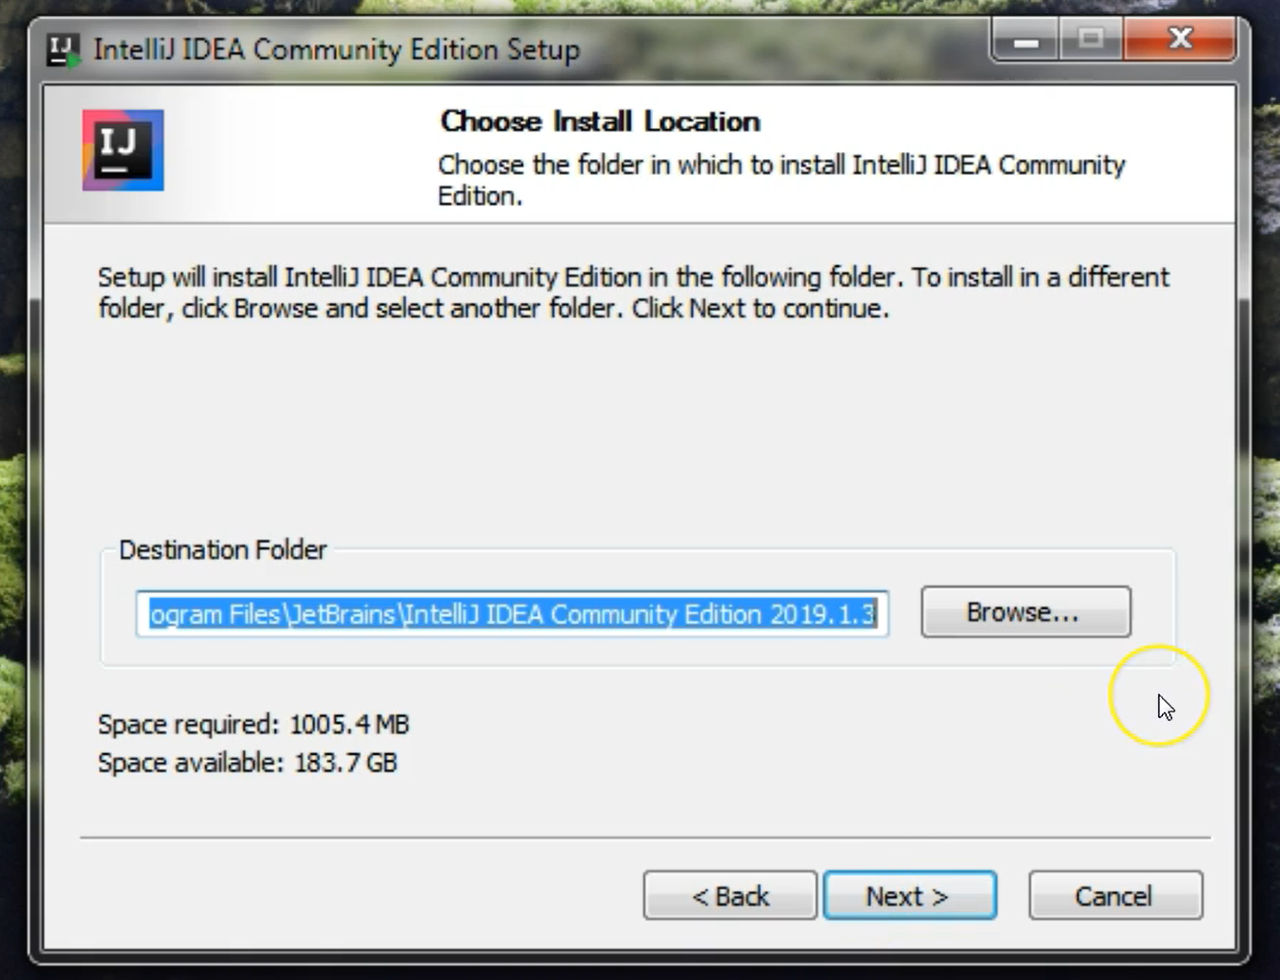
By default, there is already a path here, or you can choose your own location if you don't want to install IntelliJ into the default location.
Notice that the name of the location also includes the IntelliJ version number, therefore you can have several IntelliJ versions installed on your machine. Each will have a corresponding folder whose name will reflect the version that you have installed.
Once you're happy with the destination folder, click the "Next" button.
A new screen appears where you can choose several options.
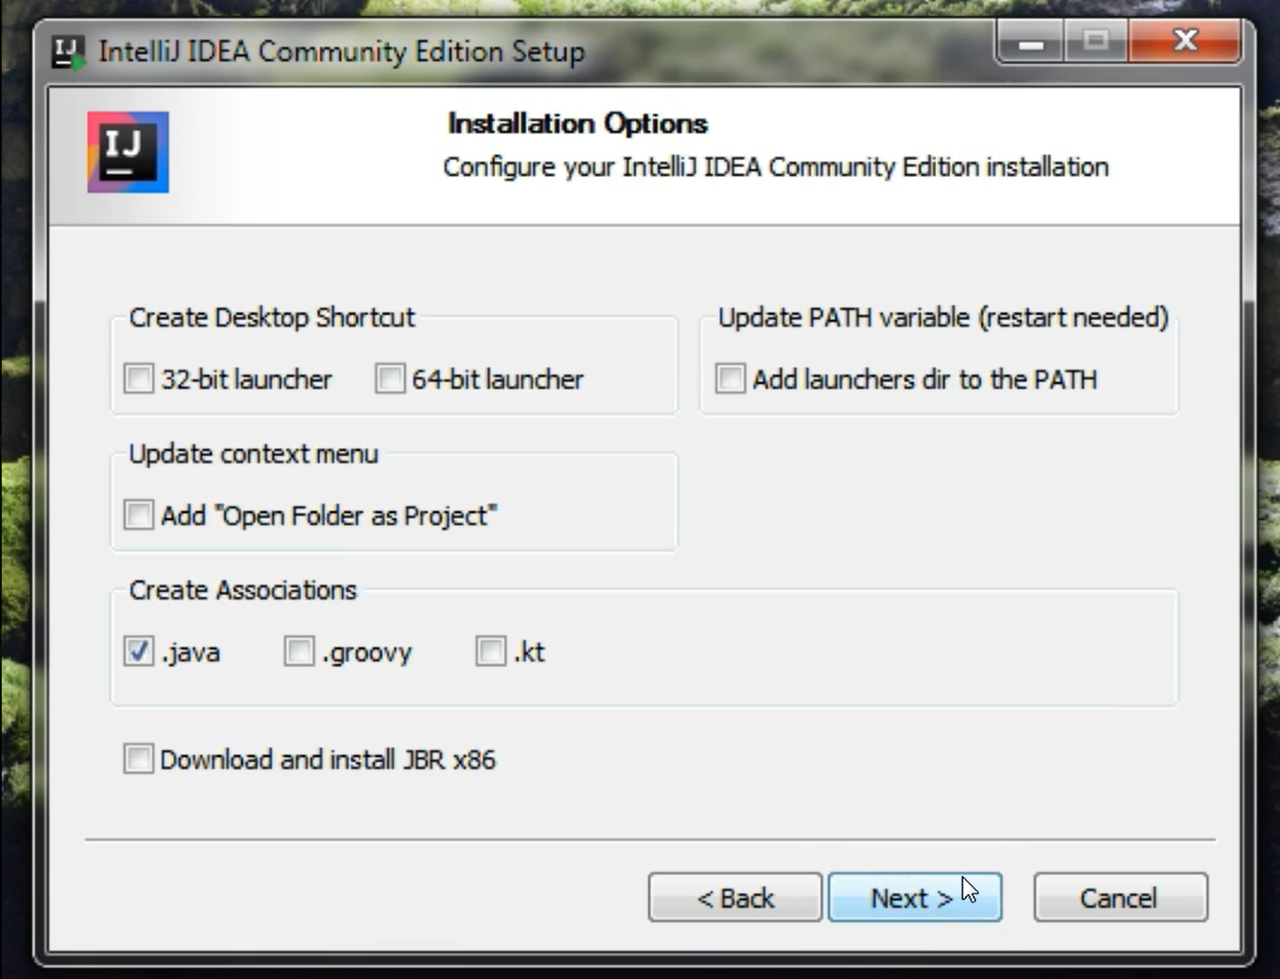
You can choose to create a desktop shortcut if you want.
Or, for example, to create associations with different kinds of files. This means that, if you have .java files that you want to open from your machine, if you just double-click that file and you open it, it will open in IntelliJ.
You can choose any other files from these available to you.
For now, just click "Next".
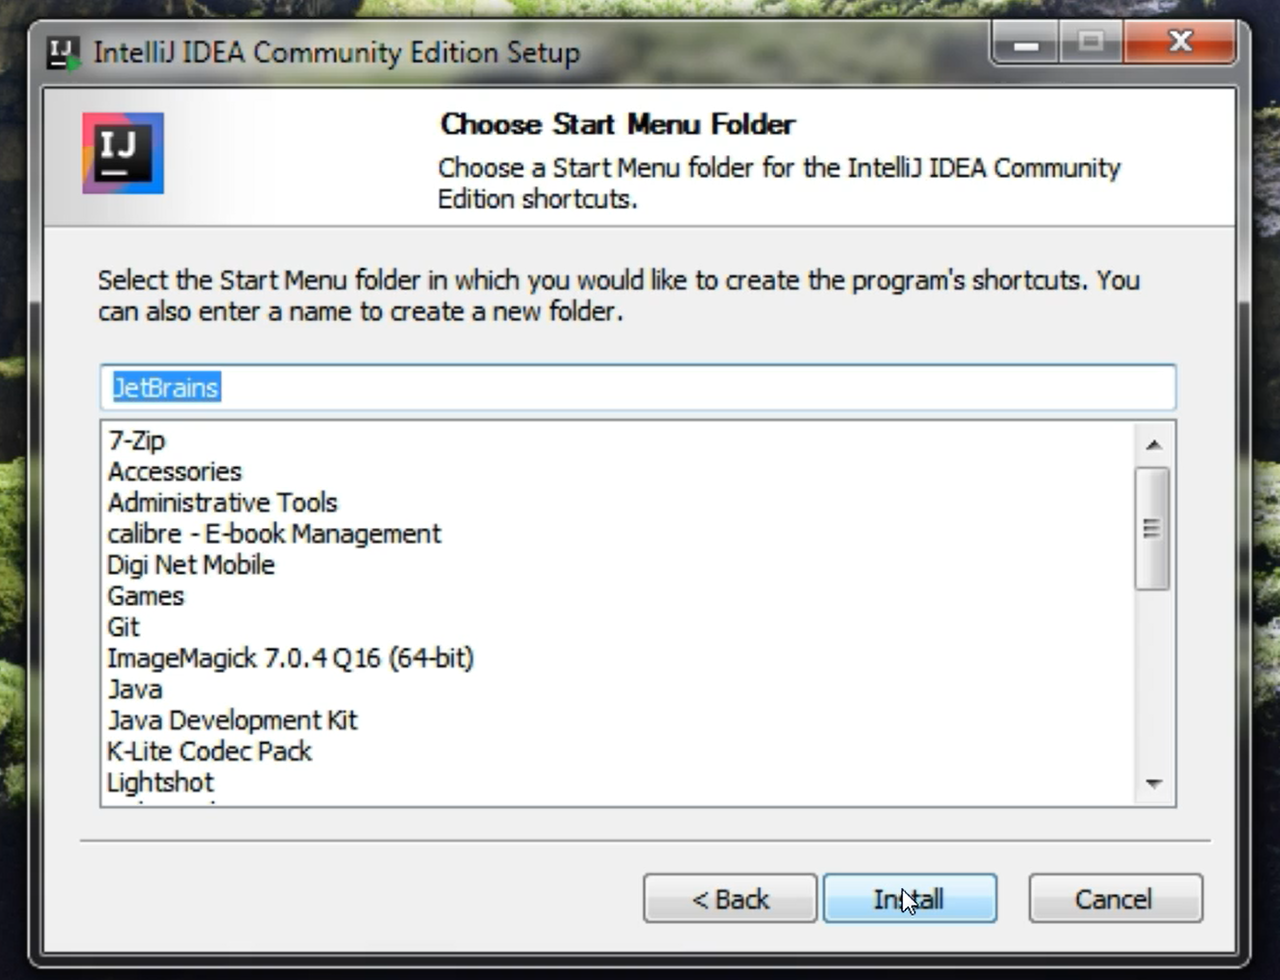
You can also select the Start menu folder in which the program's shortcut will be placed.
I will just leave the default value here, and I will click the "Install" button.
Now my installation has started, and it will take a little while.
Once the installation was completed, you will get this finish screen.
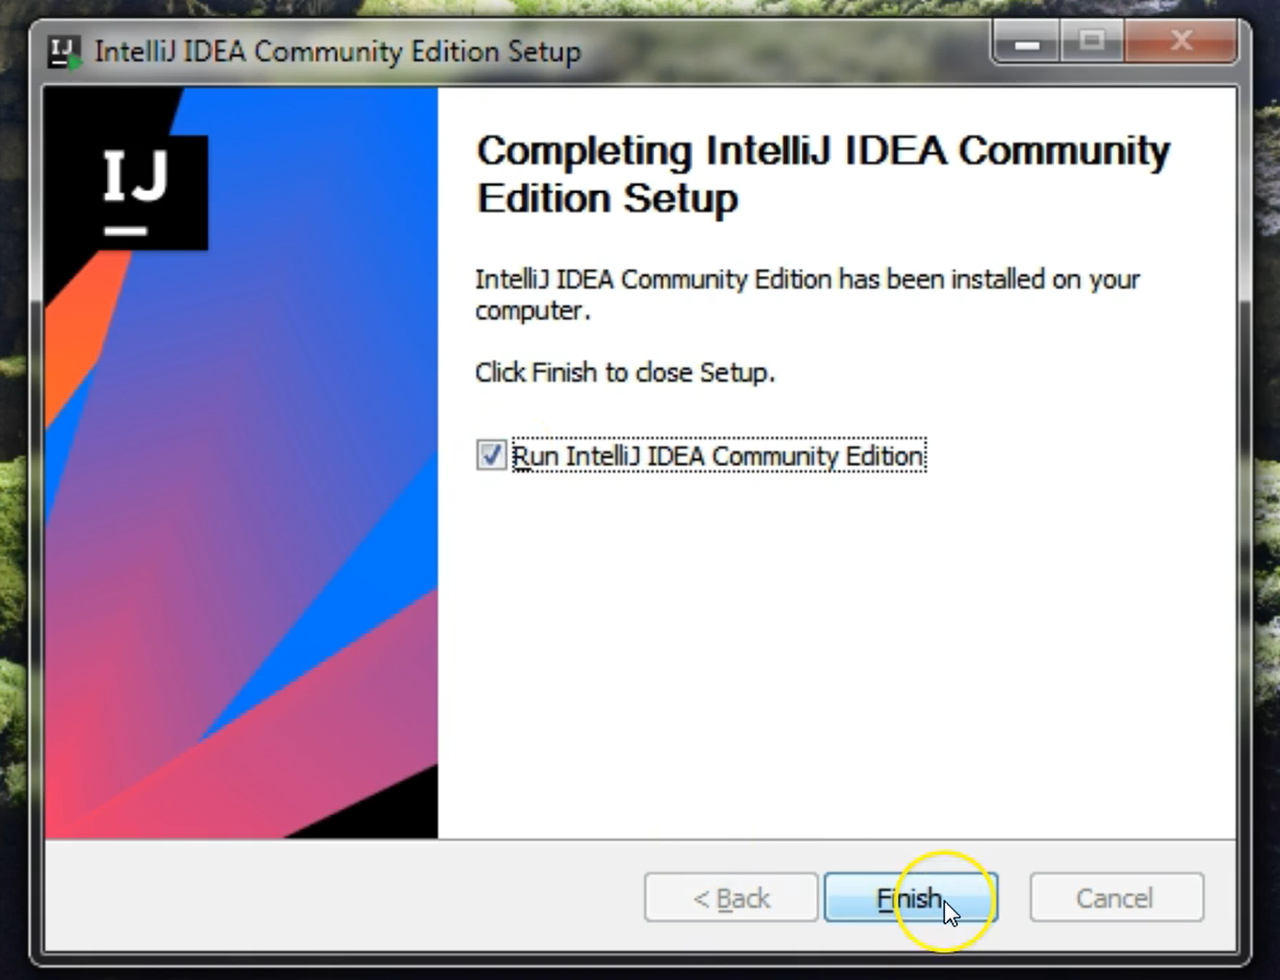
What you can do now is either just click "Finish" without opening IntelliJ, so that you will open it later on when you need it.
Or you can click the checkbox, and it will start up after you click "Finish".
After you click the "Finish" button, you will see a screen which asks whether you want to import settings from a previously installed version from your machine.
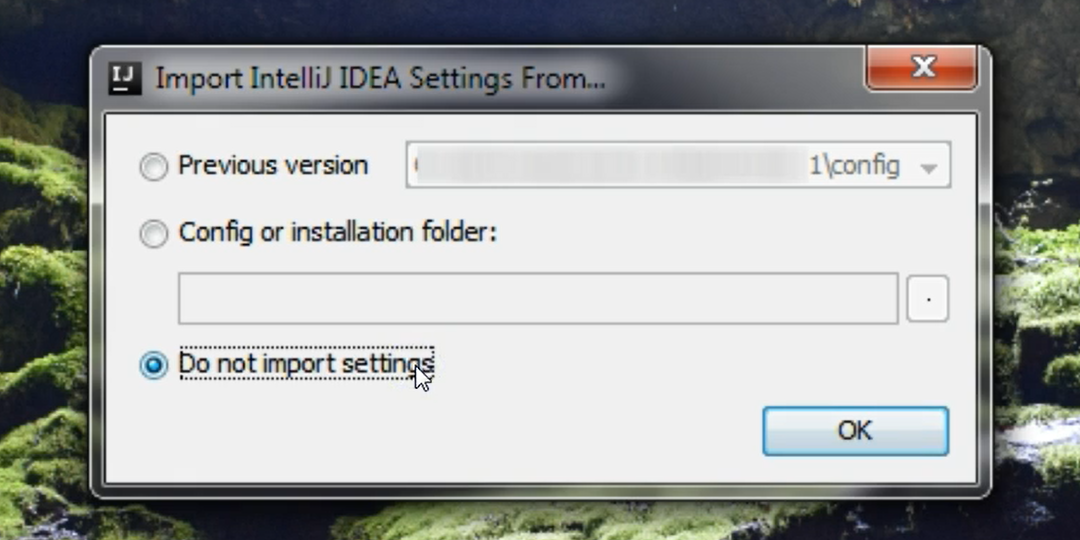
As you currently do not have any previous version, just click the "Do not import settings" button, and then click "OK".
**The first time IntelliJ opens, it will display a customize screen. **
The first screen that you have here allows you to choose the UI theme.
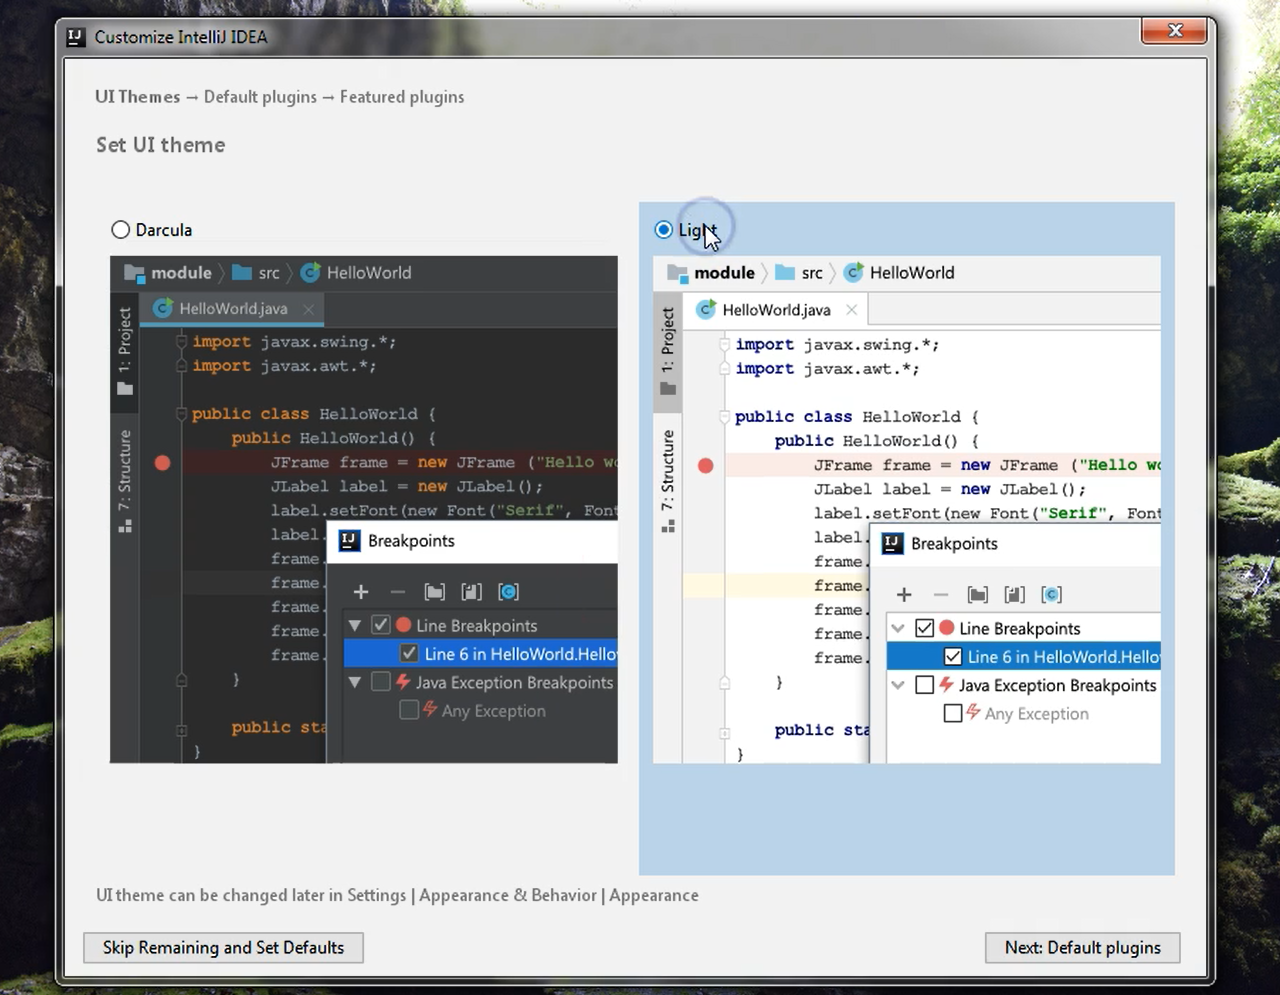
You can choose to have a dark theme, which means you will have darker background, or you can choose a light theme. I will choose the light theme.
And then, in order to have a quick set-up, I just want to click the "Skip Remaining and Set Defaults" button. I don't want to set up any other things right now, as I will do that later on if I need it.
Now, IntelliJ will open.
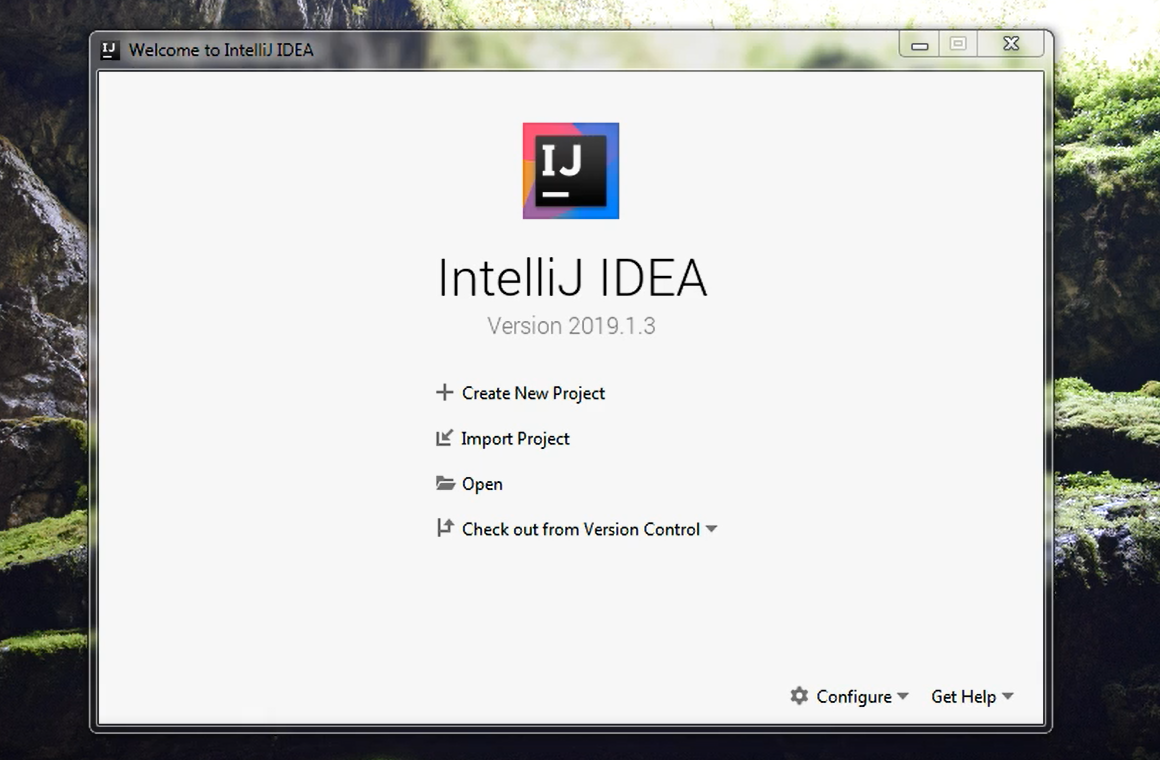
And here we have the welcome screen, where we can start work by creating a new project or importing an existing one.
