

Transcripted Summary
Let us now import another project in IntelliJ, but this time, a project that is not found on our local machine or not a project that we are creating ourselves. But instead a project that is stored somewhere on a remote version control system.
Let's go to File > New > Project from Version Control.

As you can see here, you have several options — you have Git, Mercurial, and Subversion.
Let us choose a project from Git this time.
You will need to supply the URL where the project is stored. This is basically the location on Git from where you want to download the project.
I will just paste in the URL of a project that I have on GitHub.
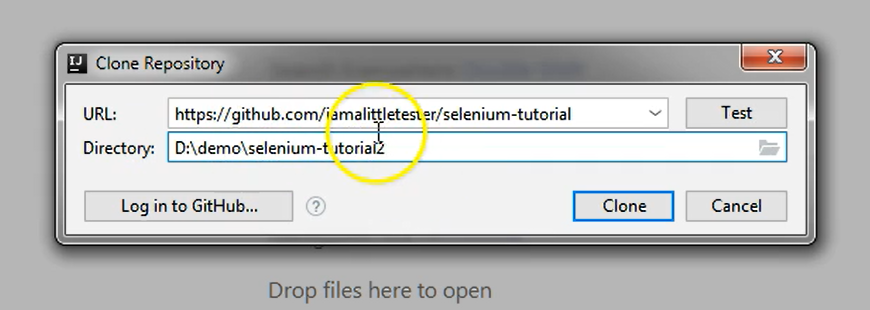
And because this is also called “selenium-tutorial”, I will just change the name of the folder where it will be downloaded to something else (“selenium-tutorial2”) because I had already created a “selenium-tutorial” folder there earlier.
I just want to test the connection, so I want to check that I can actually download the project from that location, so I will click Test here.
And the connection is successful, so this means that I will be able to clone the project from that location.
Now, in my case, I won't need to supply a username or a password to perform this download from GitHub, because I have already set up an SSH key, so I have a different kind of authentication through GitHub than based on username and password.
If you don't have that set up on your machine, you can either set up the SSH way of login [information on how to do this is in the resources] or you should specify the username and password by clicking the login to GitHub button here and putting in your login details.
I don't need to do that, so I will just click the Clone button.
And I will just wait until the project is downloaded and will appear in my IntelliJ instance.
Of course, I get the screen with how many open windows do you want to have at the same time, and I will choose that the new project should be open in the same window because I don't want to open any one at this time.
So now the project was imported.
As you can see on the left-hand side, I have “selenium-tutorial2” from the new folder that I created when I chose to clone the repository from GitHub.
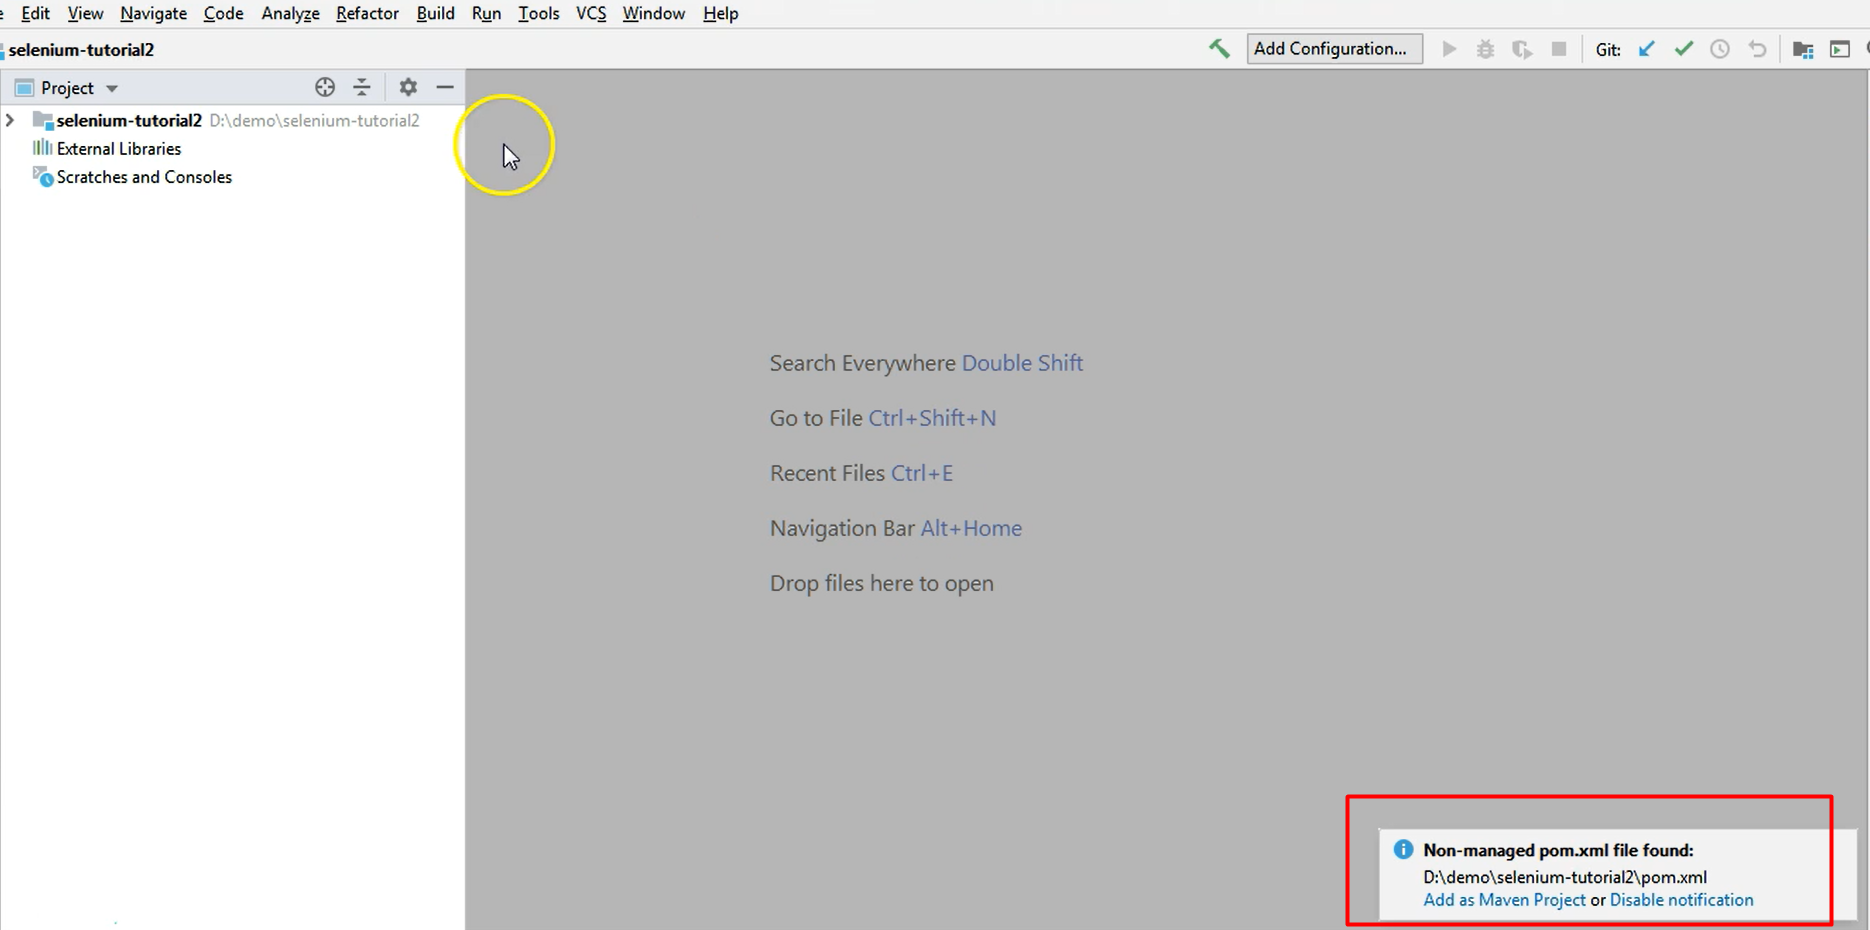
As you might have noticed on the lower right side, we got a notification which says that a non-managed pom.xml file was found.
Here, just click the Add As Maven Project option.
This signals that we have indeed a Maven project. So, IntelliJ detected, based on the existing pom.xml file, that its dealing with a Maven project, and Maven projects have certain specifics and certain features available in IntelliJ.
Having done this, we are all ready and set up to perform work.
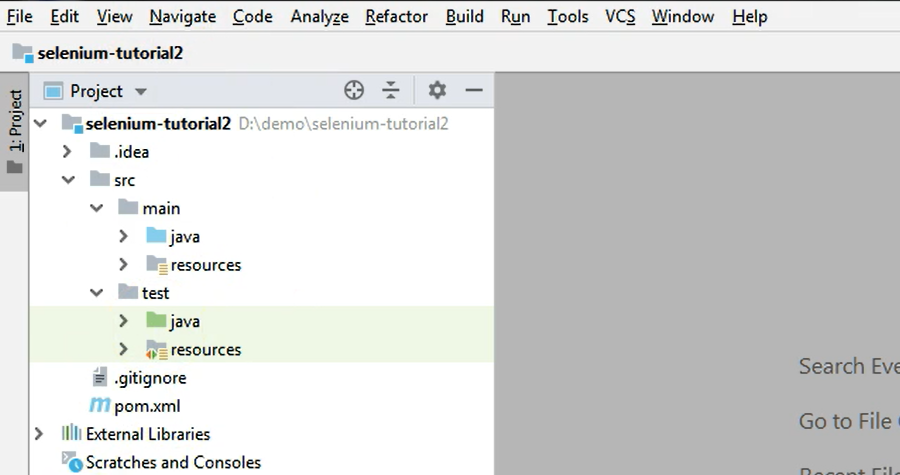
We have the source folder with the main and test folders, the Java and resources folders, so we are good to go. We can start creating tests and running them, and so on.
We have seen several ways of creating a project and importing it into IntelliJ, so just to recap:
We can create new projects ourselves, whether they are Java projects or Maven projects.
We can also import projects from our local machine, if we have some.
Or we can directly download them from a repository, from a version control system, which means that we will clone them onto our machine. They will be downloaded from that external location in, let's say, GitHub, and they will be stored in a folder on our machine. And from here on, we can actually use IntelliJ to commit new files or new changes, to revert and go back to a version from GitHub, and so on.
So, let us now move on to the next chapter.
