

Transcripted Summary
In this chapter I will only go over a few things that weren't covered within any other chapter. These are just some smaller items that I will show you how to use.
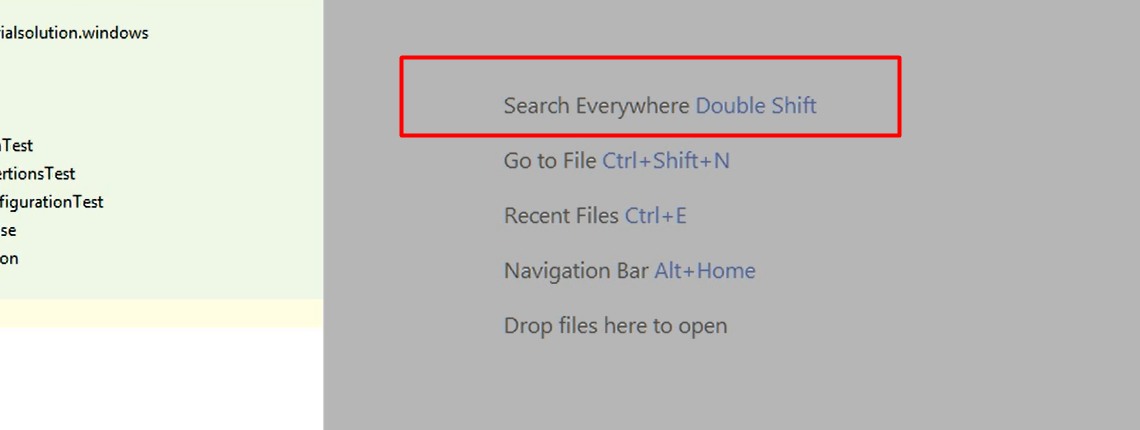
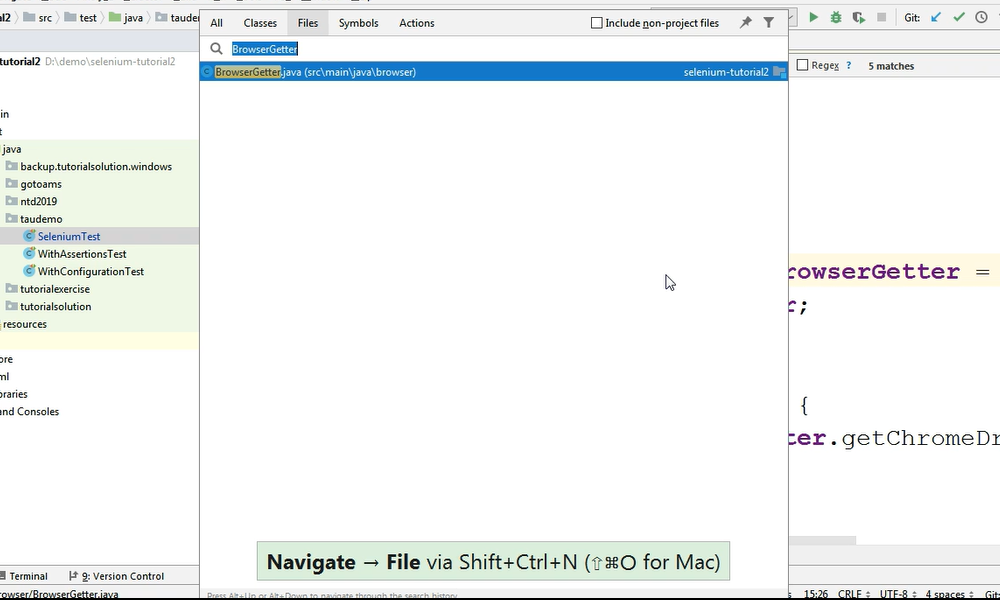
I will start with something you actually see on your screen, which is the Search Everywhere shortcut, which is Double Shift.
If I click_ Shift+Shift_, I get this search screen where I can search for anything in the project.
I can search for classes, or files, methods, variables. Or I can even search for actions. Remember that we discussed actions in a previous chapter.
Let's say that I'm searching for the getChromeDriver method.
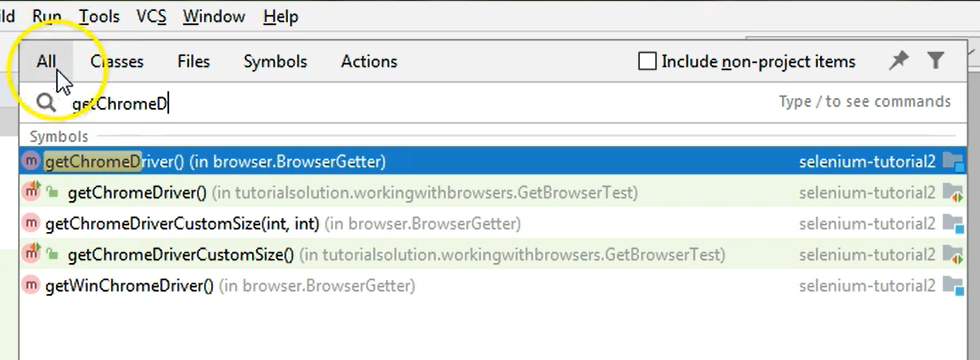
I can find it by setting the tab in the search bar to All as it was by default when I opened it
Or if I am looking for something specific and I want to narrow it down, if I have too many results, I can just go to the corresponding tab in this case Symbols.
I could also search for the action of, let's say increasing the font size and I will see the result here — either in All or in Actions since this is an action.

So, the double shift shortcut is used to open a very useful search box from where you can search for basically anything you have in the project as a code or as actions.
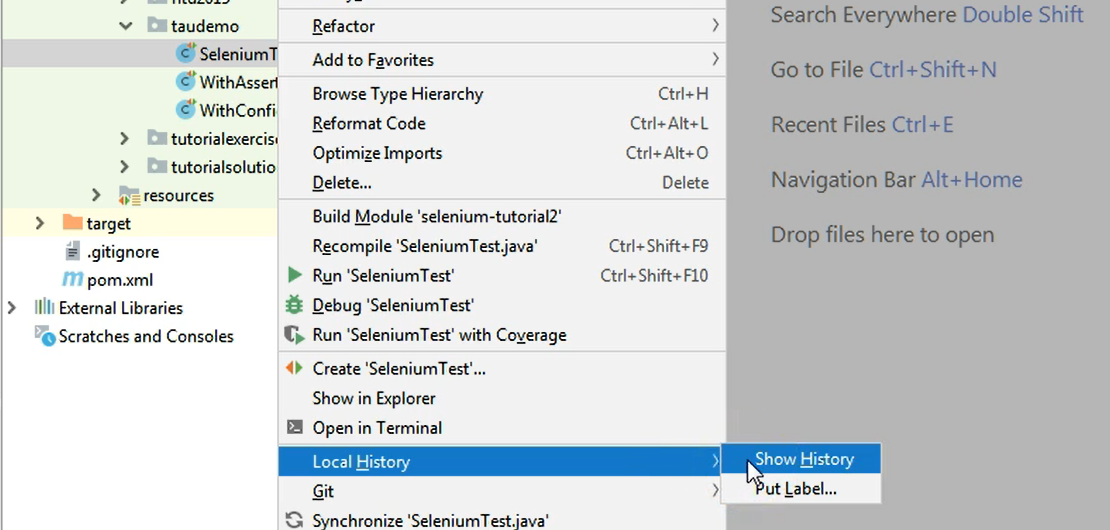
Another useful thing I find is the local history of a file.
When you are typing something into your code, you're making a lot of changes. As you are working on a class, you might add something; you might delete something. And there might be cases when you wouldn't need to go back to a previous state that you know was a good state where the code was working properly.
You can do that by right clicking on the class and going to Local History and here you can see the history of the file.
Basically, it's like a buffer of changes that were made.
It's like a list of previous versions of this file, but this is not the version history from Git. This is just your local changes from your local machine.
If you go to history, you can see everything that was changed on this file.
You can see that, for example, on a particular date some imports were changed.

Or you could see that the test was run, and it was failing at that point.
You can see some changes here where the expected values from the test were changed. You can take a look by scrolling to the right.
This is basically a list of all the file versions that you had on your machine.
If you want, you can even revert to an older one by clicking it and choosing Revert.

At this point, the file is changed.
You can see that it's blue and it's version is an older one.
This is before we even started typing the actual code from the test methods.
I can just go back to Local History and I can choose, let's say the previous file — the one before I made the Revert.
This is what I had some minutes ago. I could click on this file, actually on this entry from the history list. I could just say Revert and that's it.

Currently the file has been taken back to the state where I have all of my tests and they are all okay.
Another useful thing I find is that when you are in IntelliJ and you want to perform a search, let's say inside this file, you don't need to use a command of copying something.
Let's say I want to check where the word “public” appears in the entire class.
I can just select the word public by double clicking it and then without having to type Ctrl+F (and then typing or pasting what I want to search for), I can just go directly to the Find shortcut which is Ctrl+F.
I did not need an additional step. I just selected the text that I'm interested in and I just typed Ctrl+F.
It's the same if I wanted to see, let's say the classes from the project name “BrowserGetter”.
Once I select the word “BrowserGetter”, I can use another shortcut which is Ctrl+Shift+N to find all the classes with this name from the project.
I didn't need to copy the word and type it in here because by default once I had double clicked on it, it was copied to the clipboard.
In case you want to see who made changes on a file — changes which are already present in your GitHub or in your other version control system — you can go to the gray bar of this little screen, right click on it and choose the Annotate option.
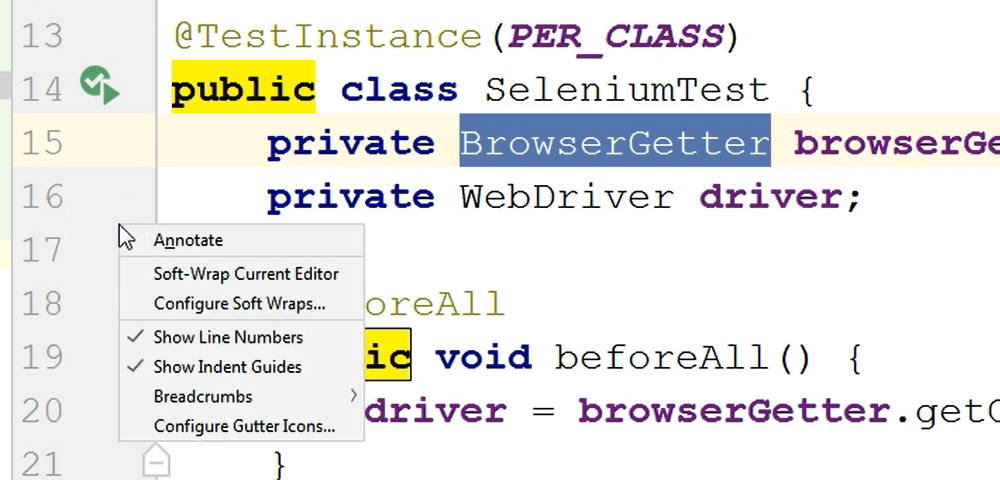
When you choose this, you will see the user of the person who committed this file last in the repository.
If several people are working on the same file and they're making changes, only the last change present in the repository will be marked and only for that one you will see who made that change.
Another useful thing is marking the folders — the special folders, namely the java folders from the main and the test folders and the resources folders.
Let's say you've created the project and in the project, you didn't use Maven as I had here. The structure Java folders and resource folders weren't created by default when you created the project. You created these manually.
In order for the projects to work properly, you will need to mark these folders as what they are.
You could mark these folders according to what they are.
You could mark the java folder as a Source folder from, of course, the java folder from the main folder.
Then the java folder from the test folder as Test Sources folder.
Then the resources can be marked as Resources or Test Resources folders.
You can do that by right clicking on these and going to Mark Directory As and choose one of the available options.
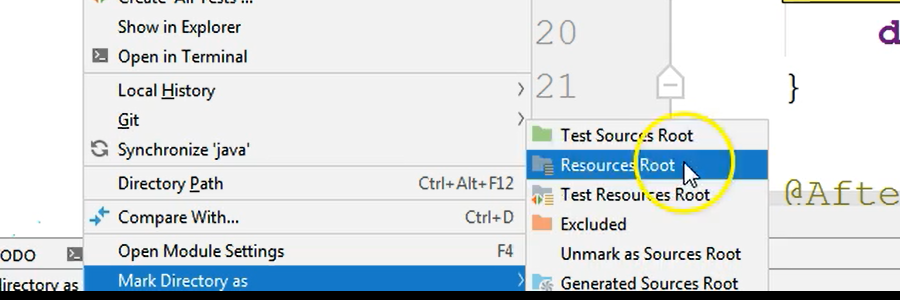
Currently I have selected the Sources folder and I could mark it as something else or I can Unmark as Sources Root.
If you don't have them properly marked in your project, just come to Mark Directory As and choose the corresponding value from this drop down. Mark them according to what they are.
Also, something else I need to mention is how you create comments, Javadocs, and TODO entries.

Comments are easily done by double shifting and typing your comment.
You could also type
/**and Enter. This will give you the Javadoc comment. Here you can type whatever Javadoc comment you want.Or you can add a TODO by typing
//todo.
If you remember in the Commit screen, you had the check box where you could check all of the TODOs you had in your project. TODOs are usually used for marking that you need to do something at a later point in the code so as to forget that you have those.
You could see all of your TODO items by going to the menu bar and clicking on TODO.
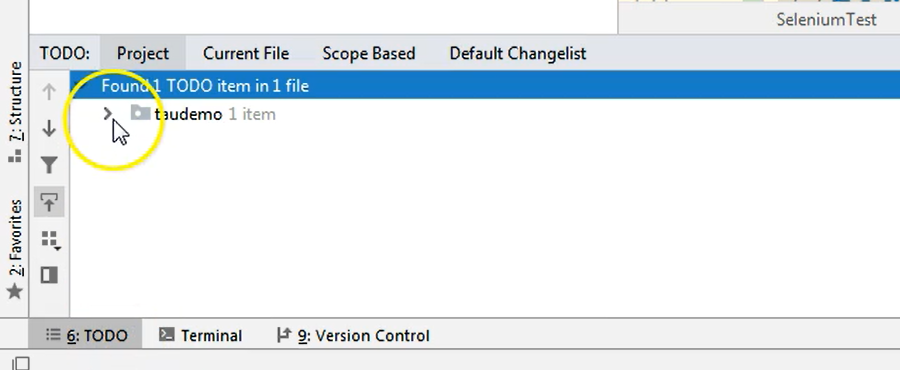
Here are all of the TODOs and they are marked with the line number where you can find them.
