

Transcripted Summary
Let's now go through the list of failed and ignored tests and see if we can fix them.
I will start with the test that was ignored, and I will run only that test by itself.
For that I will just collapse this run screen, and I will go to the left-hand menu to the project screen, and I will open the WithConfigurationsTest.
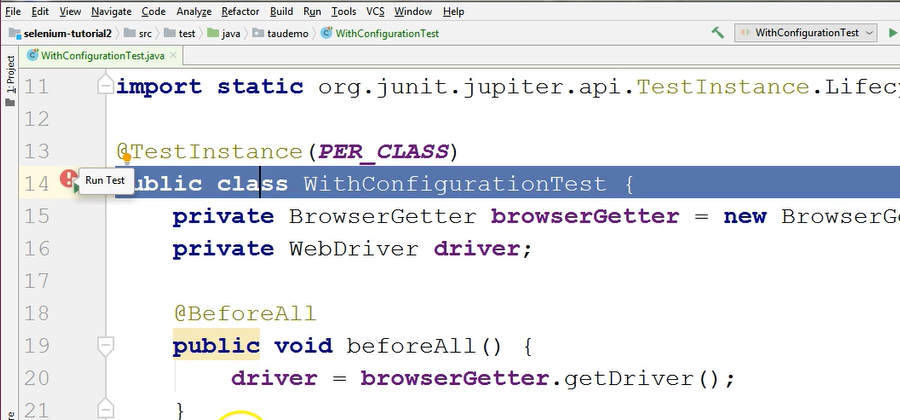
This is the test that I want to work on right now. I will close all the other tabs here, because I want to focus strictly on this one, and I want to only run this test class.
I could run it from the left-hand menu, from the project screen, just as I did with the package, by selecting it and then right-clicking and choosing Run.
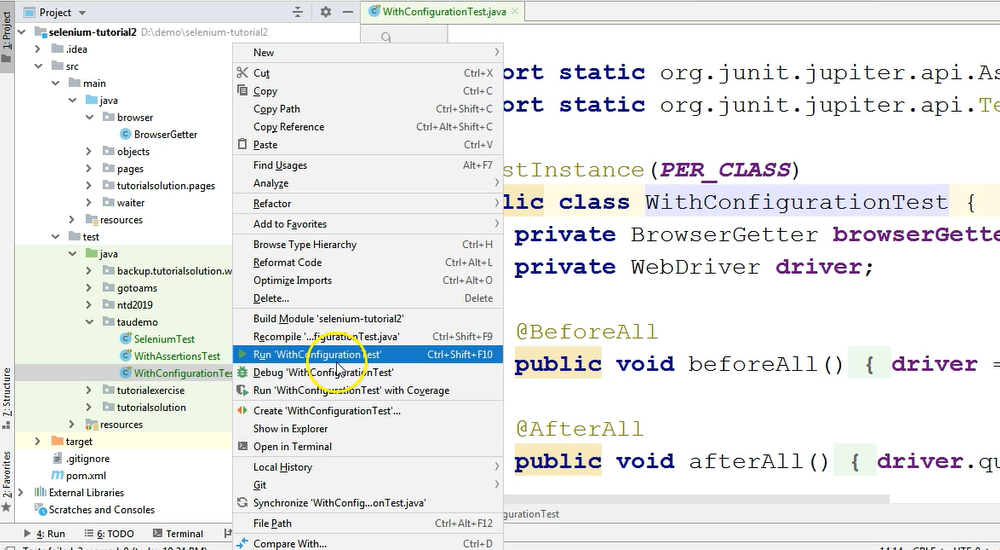
Or I could run this test directly from within the editor.
If you notice to the left of the class name, there is an icon.
If I hover this, I get the message that I can run this test.
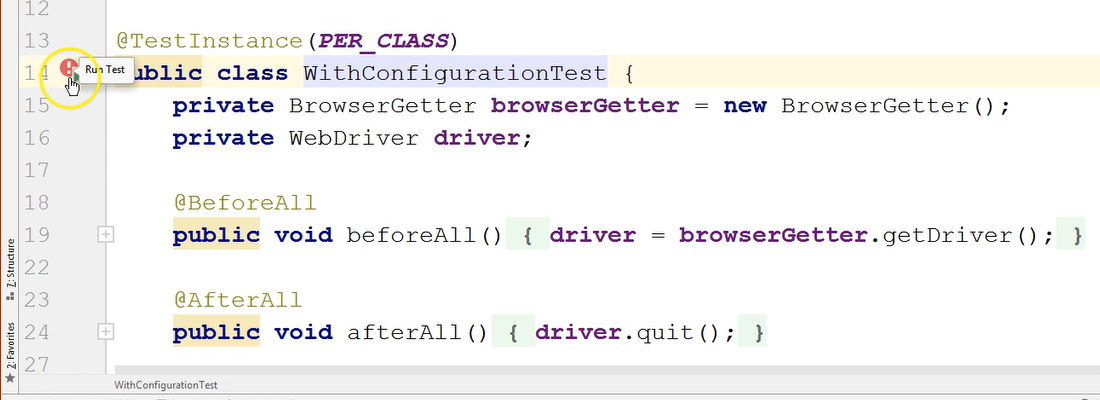
So, if I click on this icon, the entire test will be run.
I will see the options to Run or Debug the test.

I will just want to run it for now, because I want to see what happens when I try to run it.
So, I will click to Run, and then again, the Run screen appears, so you can see that the Run tab is selected in the lower menu bar, and the test has failed.
Where exactly did it fail? Well, let's see.
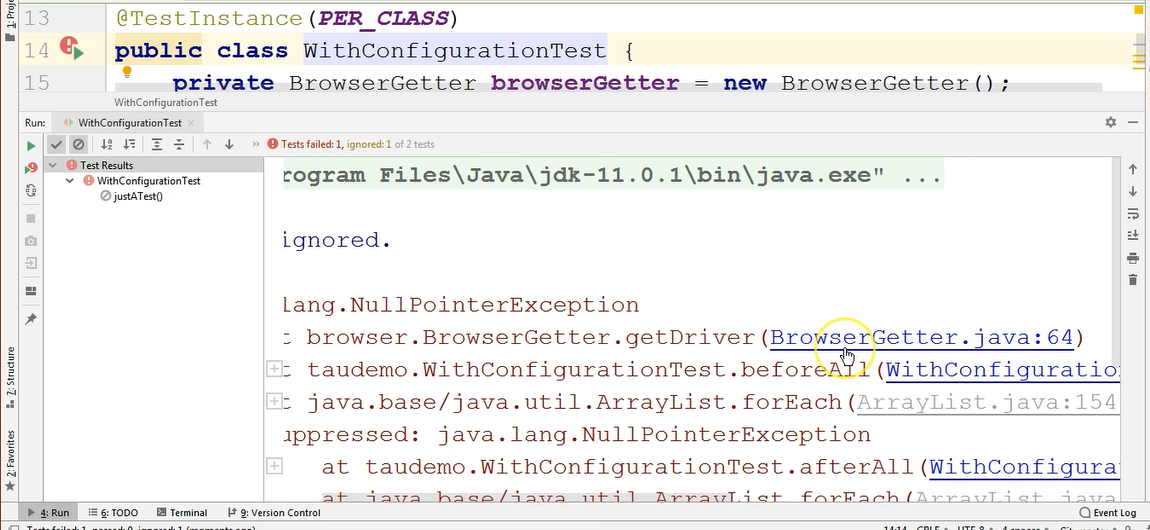
Apparently, it failed when calling the getDriver method.
In the BrowserGetter class, which I jumped to by clicking in the stack trees at this line, a property value was expected.
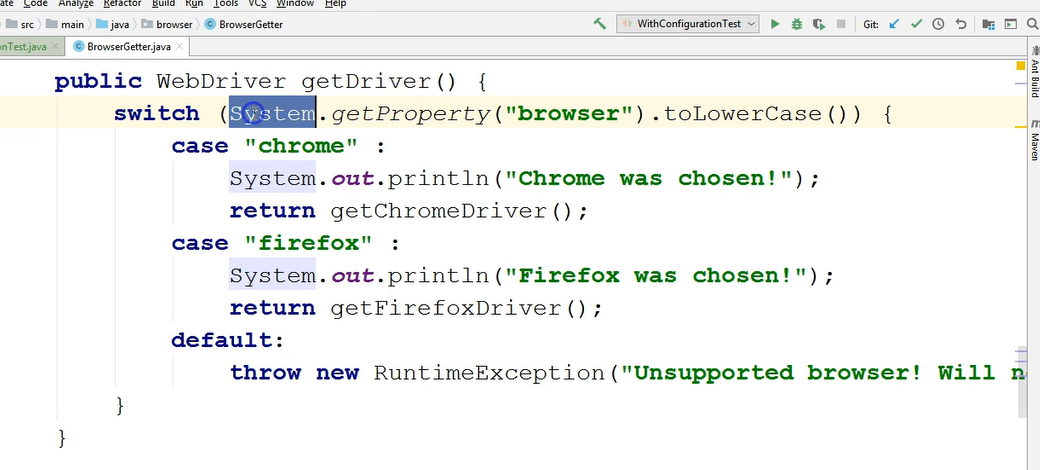
So, this line of code expects a System property named "browser" to be present so that based on its value, it would either open the Chrome browser if the value of that property is Chrome, or the Firefox browser if the value of that property was Firefox.
This is a System property that is required.
Coming back to the test run, I will go a bit lower and I will see that in my test I actually had a NullPointerException in the afterAll method, but for now this doesn't really matter, because the beforeAll method did not run at all.
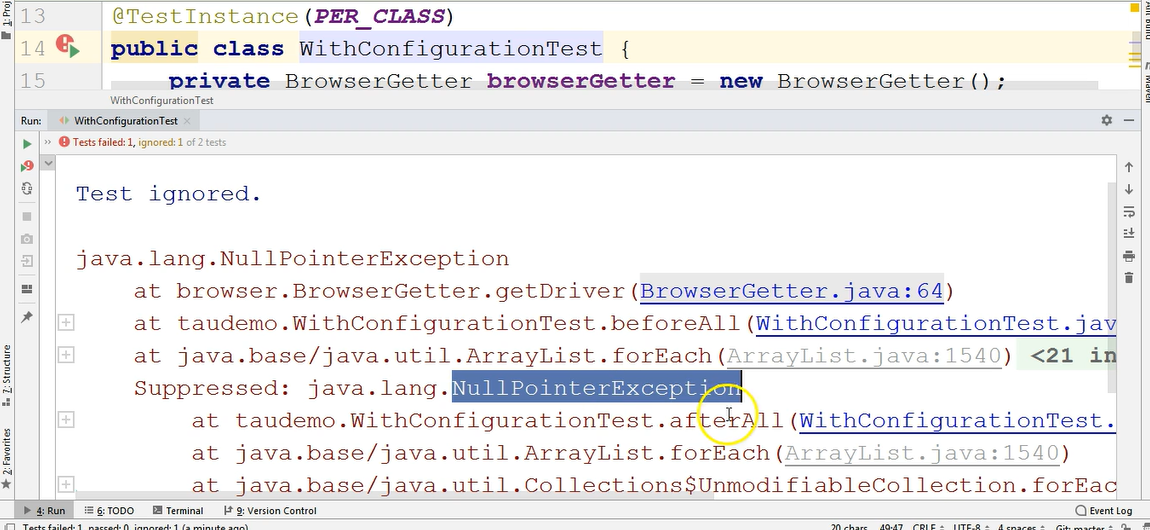
The test failed in the beforeAll method, so we couldn't even start the browser.
Nothing was run from within the test itself, so that the test method didn't get to run because in the beforeAll annotation method, we had a null pointer.
So, we had an error here, because the getDriver method was not able to execute based on the lack of the System property named "browser".
In order to set a system property, we will use the _Edit Configurations _screen.
We will open it from the location where we can see the label with the test's name, and here I can just click on the dropdown.

And I can click on Edit Configurations.
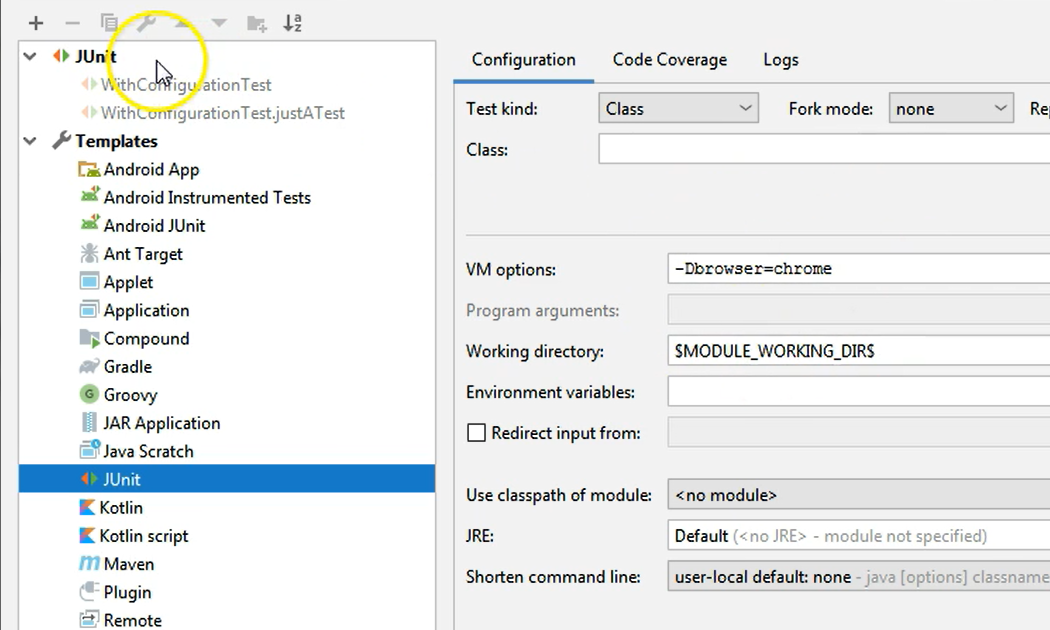
A new screen will appear where on the left-hand side I will have an entry for JUnit and a Templates entry.
Under JUnit for each of the test runs that I had before, I have a new configuration setting.
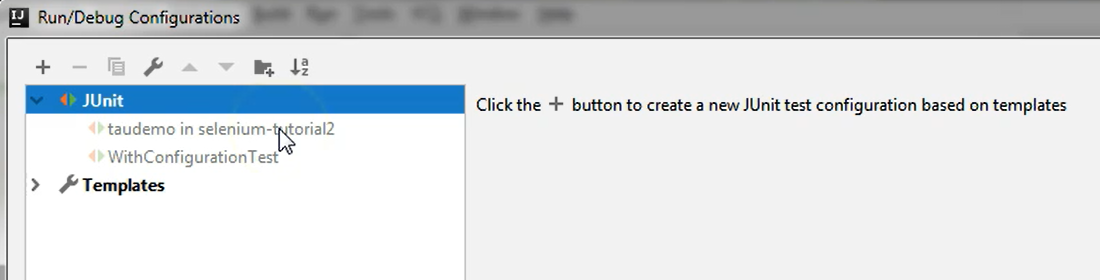
So, when I ran the entire package, I got a new configuration by IntelliJ, which basically we didn't configure at all, so it was just a configuration that we didn't use.
It was the same when we ran the WithConfigurationTest, which is a class, so we also got a configuration for this one, but again, we didn't customize anything for it.
Now, because our test requires a parameter, a System variable, we will delete these entries that we have for JUnit.
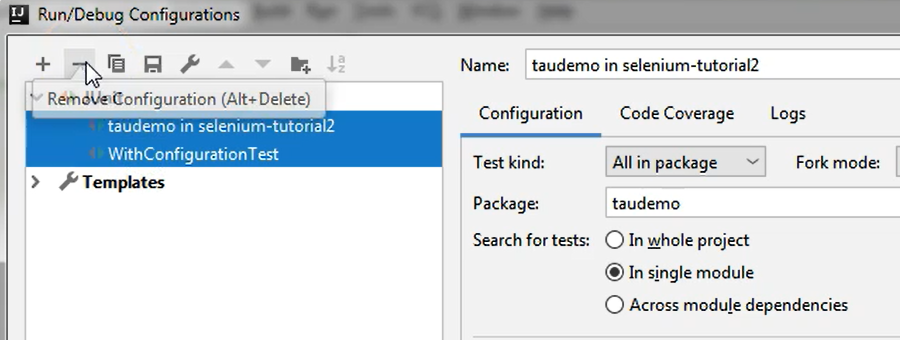
We will delete both of these, by clicking the minus icon.
I will go to JUnit from the left-hand menu, and inside of VM options, I will type "-Dbrowser=chrome".
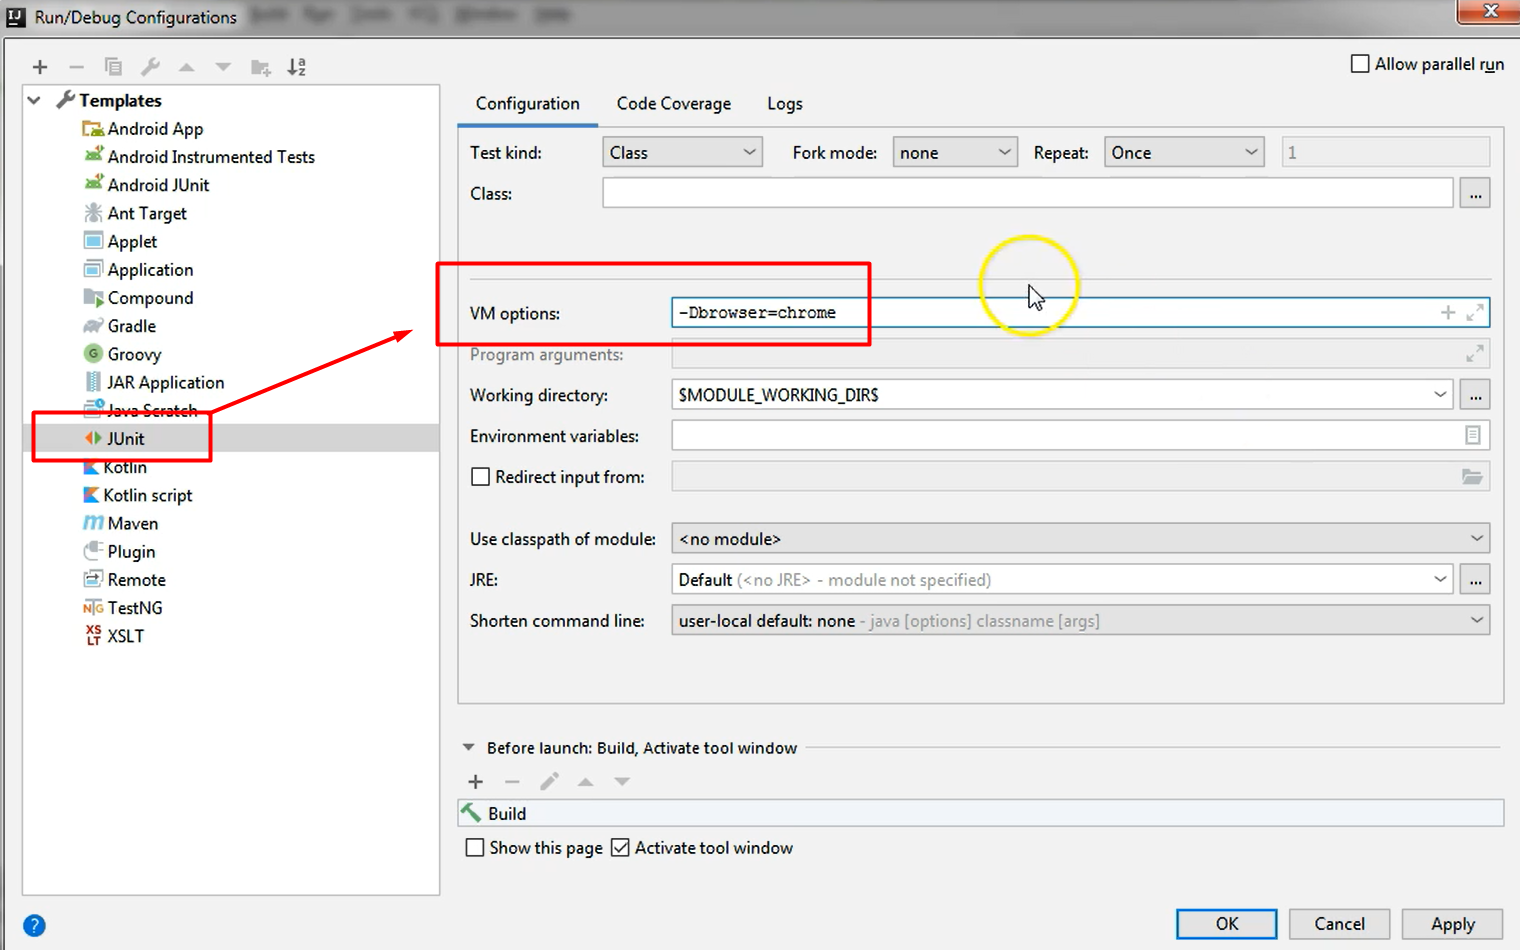
What happens here is that I once set this property, all of my tests, all of the JUnit tests I will run, will have access to a System variable called "browser".
This is just as you would specify from the command line if you were running a Maven test command. If you would need such a property, you would type something like "Maven something test" and then "-Dbroswer=chrome".
So basically, this is how you set the value "chrome" to the property "browser".
I will just hit Apply and OK.
Now I will again run the same class from within the editor by clicking the Run ‘WithConfigurationsTest’ icon next to the class name.
And now the browser is starting, and the test was run. So, in this case, the test is not skipped anymore or ignored.
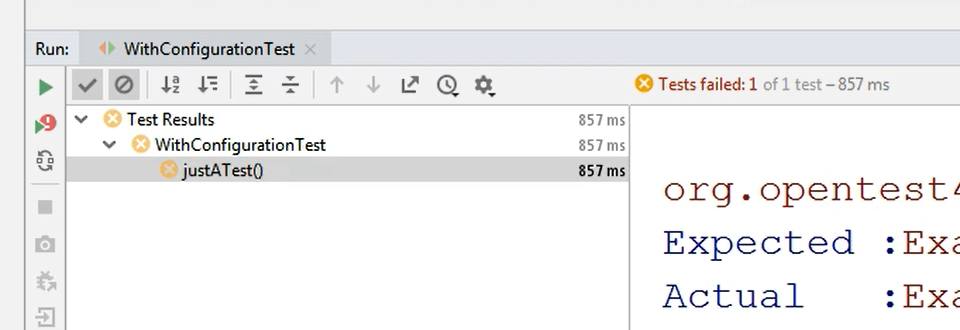
The test is failed because now the test actually ran, so the test method called justATest was running successfully.
However, it failed due to the assertion failure.
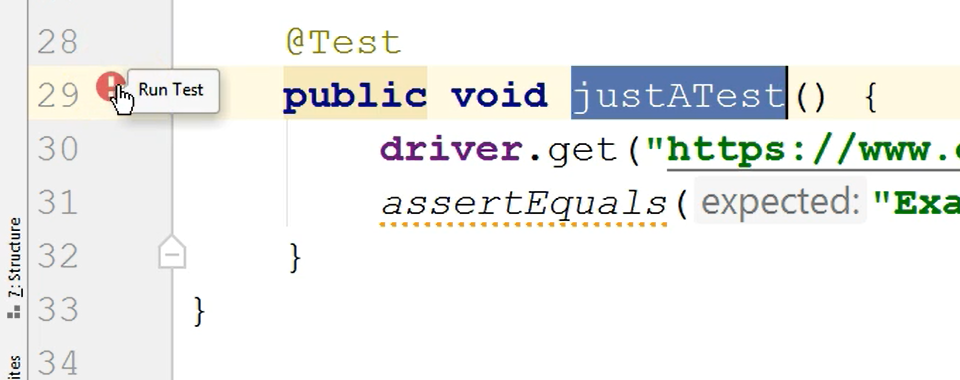
What we can also do is when we have a test inside a test class and there's only one test, we could just run the test from the test method level.
So instead of running the test from the class level, from here via this icon:
We could just jump to the test method, which is this one, and run it from the icon next to the test name.
So, if I run this test right now by clicking this button, I will run the test method.
However, I will also get the beforeAll and afterAll methods executed.
That is simply because the @BeforeAll and @AfterAll annotations guarantee that these methods will be run before any test is run or after any test is run, even if you run the test from the method level.
At this point, we managed to run a class and a test method from within the editor itself.
We also managed to fix an issue that this test had, namely the lack of the configuration, which caused it to not run the beforeAll method and subsequently to have the test marked as ignored.
For now, as I've said, every test run from now on that will have an entry in the configurations entry will also have the parameter set — so by default, this configuration comes from the default JUnit configuration where we set it.
So here in Templates in JUnit we can see that we set “-Dbrowser=chrome”, and all of the test runs from now on will have this parameter set, as you can see in these configurations.
If we want to remove this parameter, we can just delete all of the entries from the JUnit menu item and then just change what is in the Template to whatever we want.
If we don't want this parameter at all, we can just remove it. If we want it to have a different value, we can change it to a different value and hit Apply.
But don't forget to always delete the previous configurations, otherwise your tests will run in a way you might not have expected.
So, this is how you set your configurations.
At this point, if I go back to the package level and I run all the tests. I shouldn't have any more ignored tests, because now all of them will either pass or fail. But they will run.
Let's see the results.
You can see that we have 4 failed and 1 passed, but we only have 5 tests marked here. When we had the ignored tests, we had 6 tests considered as being run.
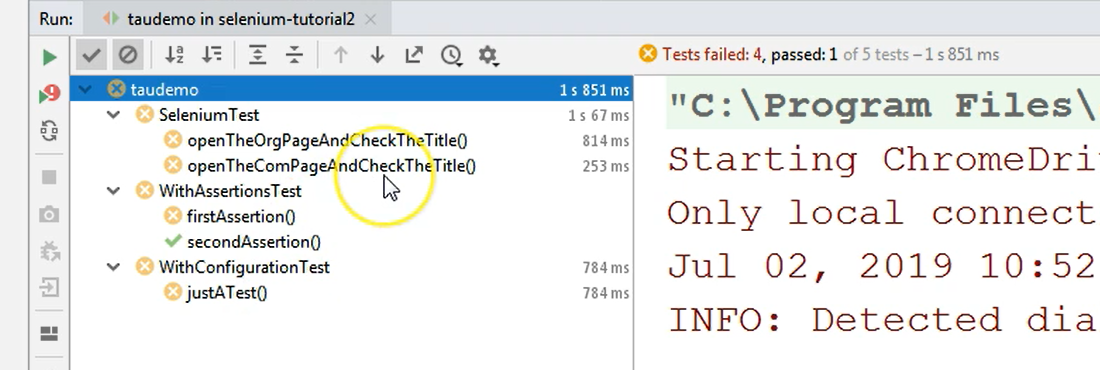
However, what's important is not the number here, but the status on the left-hand side.
If you're looking at this menu, you can easily see which are the tests that are failed, which are passed, and which are ignored.
And at this point, we still need to check out all of these failed tests in order to see why they are failing, so whether we can fix them or whether there is a real issue in the system.
Quiz
The quiz for this chapter can be found in section 7.4
