

Transcripted Summary
Let us now create a new Maven project by clicking the Create New Project option.
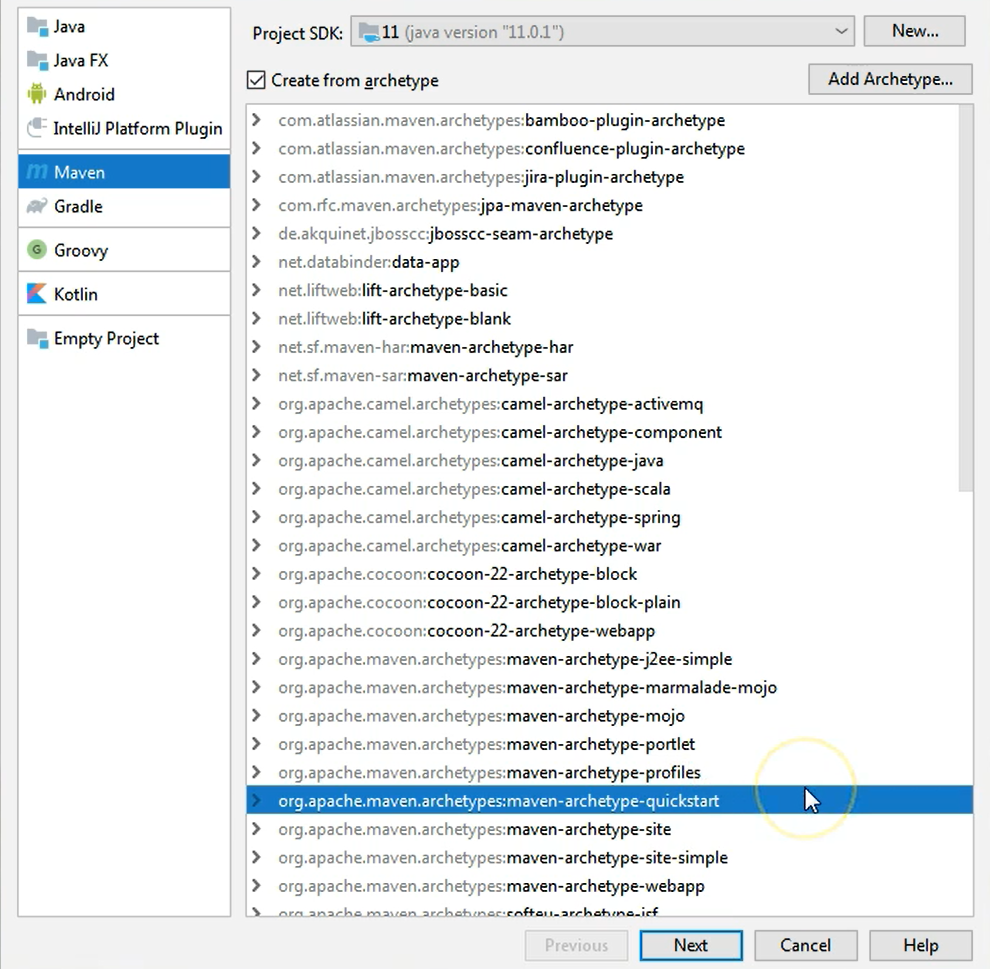
We will get the new project screen again and on the left-hand side — this time we will choose Maven.
On the right-hand side, a list of archetypes is displayed.
An archetype is nothing more than a template
So, if we choose to create a Maven project from an archetype, by clicking this checkbox next to the Create from archetype label, we can choose to create a new Maven project based on an existing implemented archetype.
What we're interested in right now is just to generate a simple project which will be done by using the “quickstart” archetype.
So, we will just select the quickstart archetype and we will click the Next button.
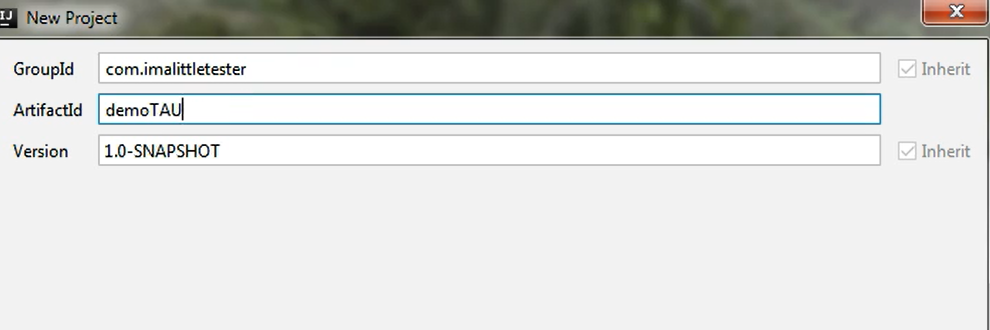
In this new screen, we are asked for a GroupId and an ArtifactId — this is because we are creating a Maven project.
New to Maven?
You should be familiar with what a Maven project is, therefore, I will provide a link with more information about Maven, Maven projects and archetypes, in the resources.
For now, we will just create a GroupId for the project.
We will call it “com.imalittletester” because that is my site, so the group ID needs to have your site in the reversed order
And we will just create an ArtifactId to reflect what we are doing now.
I will just say “demoTAU”.
We will click Next and here we have some options and we can confirm that the GroupId will be “com.imalittletester”, the ArtifactId will be the one that we specified earlier, and then the version and other things here.
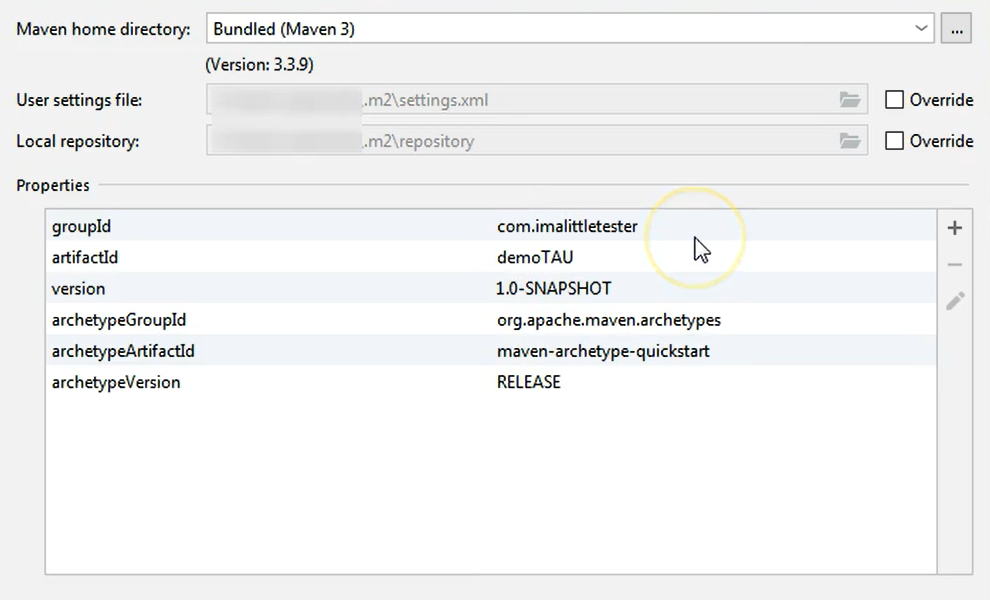
By default, we will use the Bundled Maven version, so we don't need to install Maven separately because IntelliJ comes with a built in Maven version,
So, when we are going to build our project or run our tests with Maven, we will just use the Maven installation which is part of the IntelliJ installation.
Let's click Next now and we will confirm the location where the project will be created.
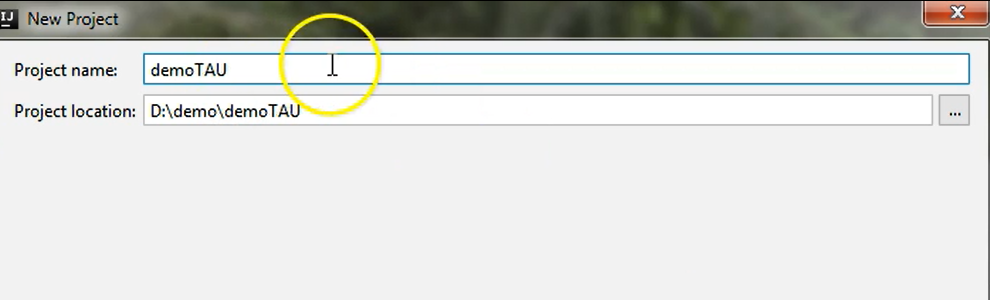
I have nothing to change here.
The project name is the one that I want and it's corresponding to the ArtifactId that I've just written 2 screens ago.
Therefore, I will just click Finish.
The new project is going to be set up and it will open in my IntelliJ Instance in a few seconds.
Because this is a Maven project, a part of the structure for a Maven project has been created for me automatically.
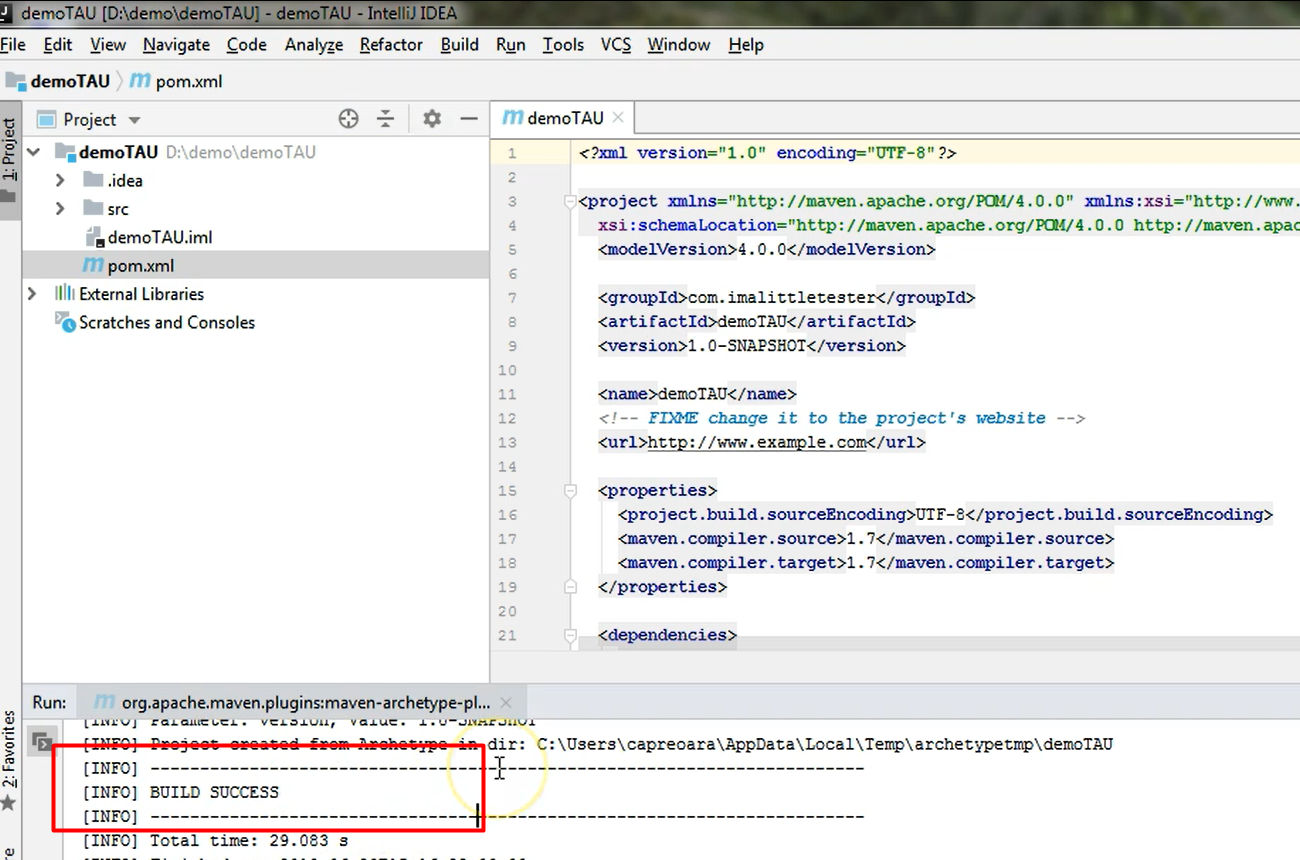
I have a pom.xml file, which you can see on the left-hand side, which is here — the pom.xml file is the core of a Maven project.
Now after some processing is done, you can see that there are some processes running here, the whole structure will be generated.
For now, just wait until you see that you have a “BUILD SUCCESS” here in the terminal.
The build has been successfully compiled, therefore, a new folder appeared here called src.
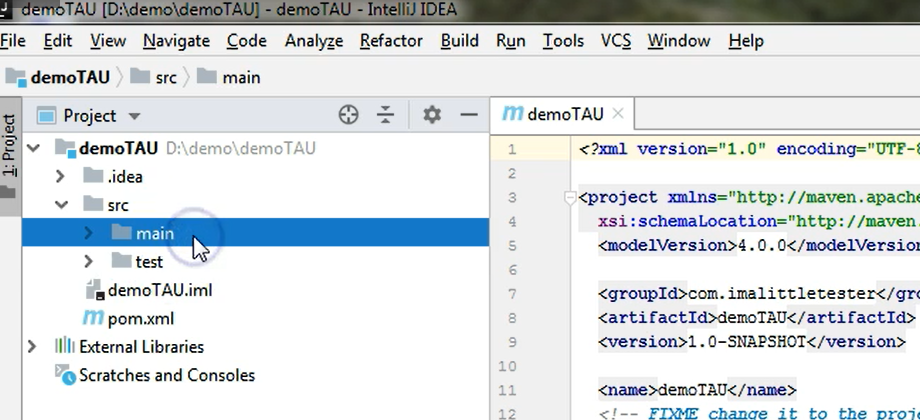
You can see that you also have the .idea and .iml files just as you had previously with your Java project.
These are the ones that IntelliJ uses for managing its workspace.
You will see that the src folder contains two other folders, a main folder and a test folder.
In the main folder, normally the source code for utilities or helper classes is stored, whereas in the test folder, you will create your test code.
Because we have chosen a template, there is a pre-defined structure that was created here in the main folder and also in the test folder.
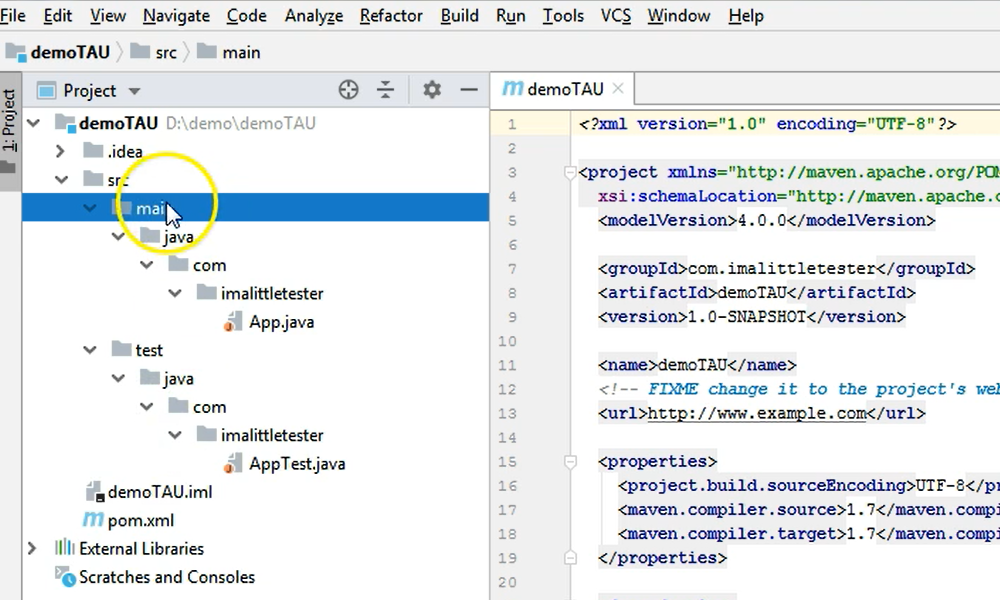
As you can see in the main and test folders, you have a java folder, a com and imalittletester folder, because we specified that the groupId is “com.imalittletester”.
We then have a .java file and we have another .java file, which is basically the test class that you will use. We will go over these a little bit more in depth later on.
For now, we just wanted to see how to create a Maven project based on an archetype.
As you can see on the lower right side of the screen, you also have an option to automatically import changes.
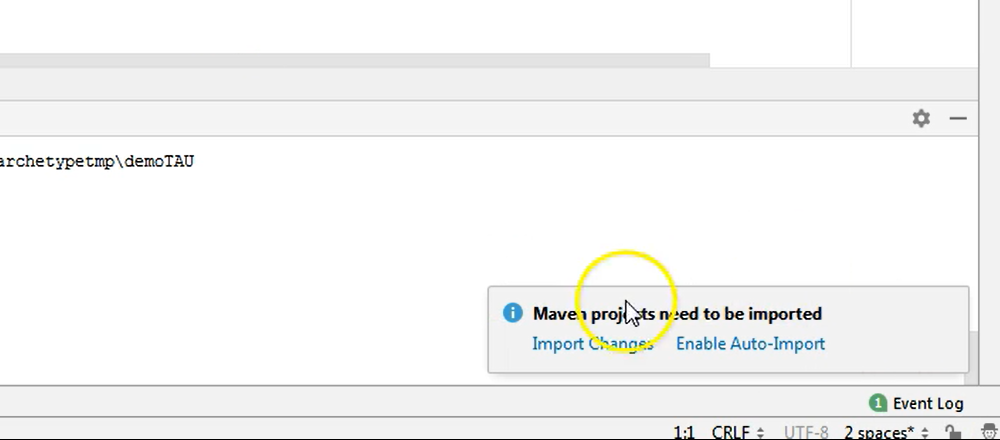
This means that you can Enable Auto-Import so that whenever you are updating your pom.xml file, you won't need to perform a Maven clean install as that will happen for you automatically.
On the left-hand side, in the external library section, you will now see 2 dependencies apart from your Java library.
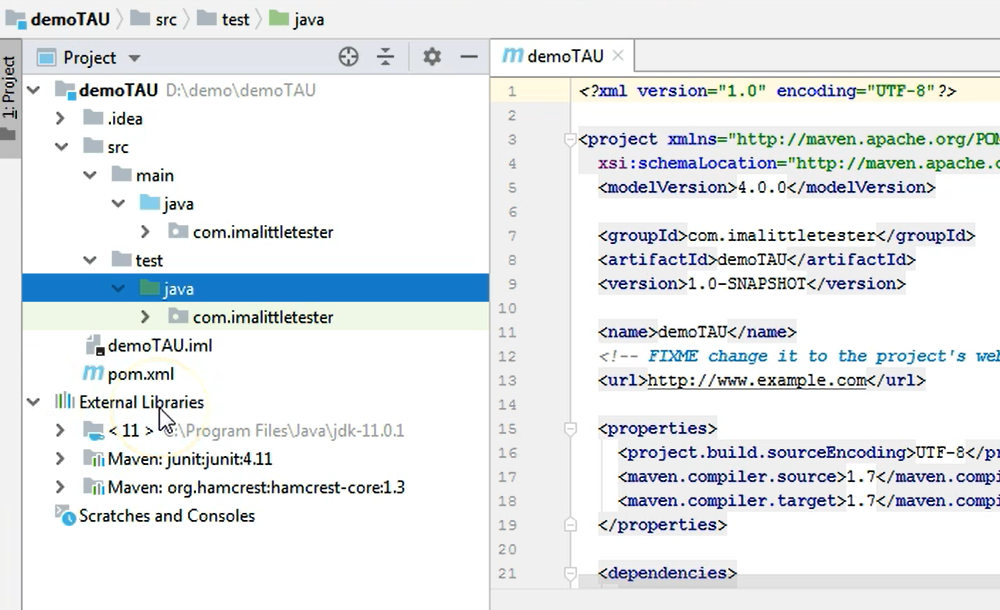
You will have the Junit dependency and a Hamcrest dependency.
This is because by default, this quick start template also provided an entry in your dependencies section, in your pom.xml file, which says to import Junit as an external library.
We have created a very basic Maven project where we can start writing our test code.
For now, we will just leave this project because I want to show you how to import existing projects from your machine or from your version control system.
Resources
Quiz
The quiz for this chapter can be found in section 2.4
