
Transcripted Summary
I will now run the test that needs a configuration in order to properly run, just so that we see the result. I will just run the entire class from the Project screen.
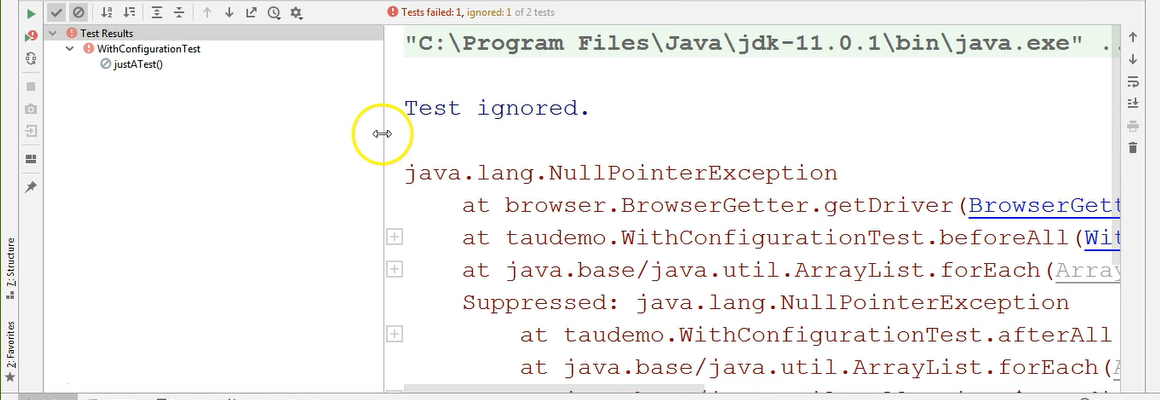
And as you can see, the test is ignored, and the cause is a NullPointerException.
In order to see what is happening here, I could just click on the beforeAll point of failure in the test, and I could add a breakpoint here in order to debug the test and see what is happening, and what kind of data is being exchanged, and so on.
I will left click in this gray area, right next to the line number, and as you can see now, I have a breakpoint.
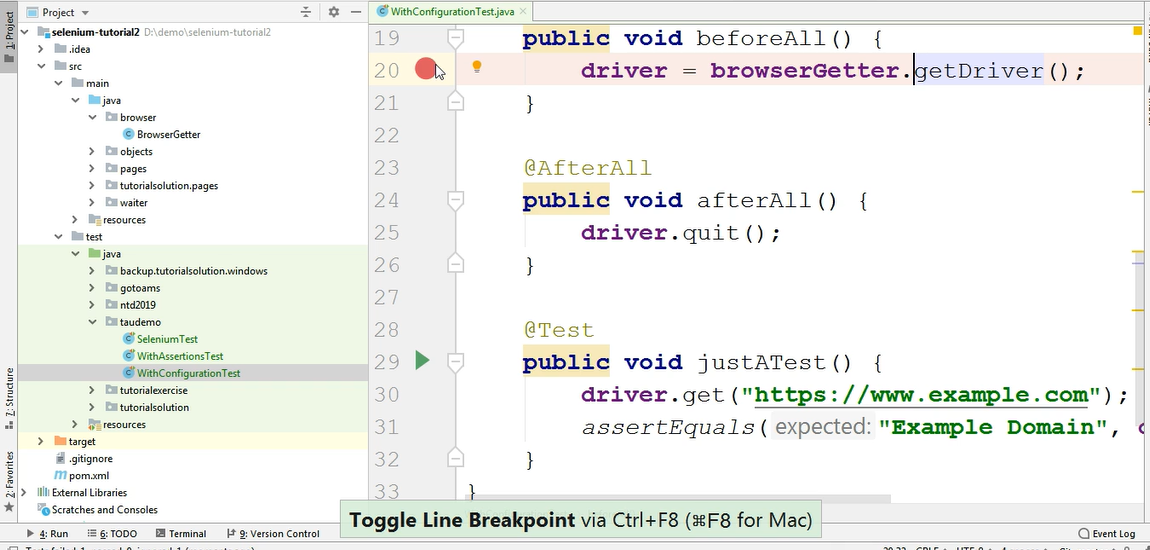
This red circle means that this line is going to be the breakpoint for my debugging process.
So, when I will debug this test, when the line of code will be executed, the execution stops so that we can analyze what is happening.
In order to debug a test, we could debug it by right clicking the class name in the project screen, and selecting Debug.

We're going to do that right now, and we will see what happens.
The test starts running and when this line is encountered during the execution, the debugger will stop the test execution.
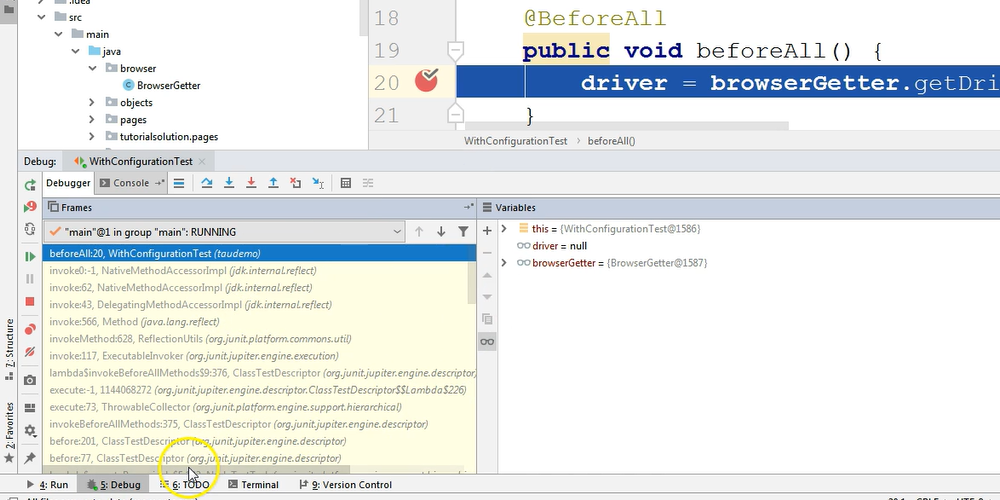
And you can see the relevant information in the newly opened debug screen.
You also have a Console where you can see the output, in case there is any output.
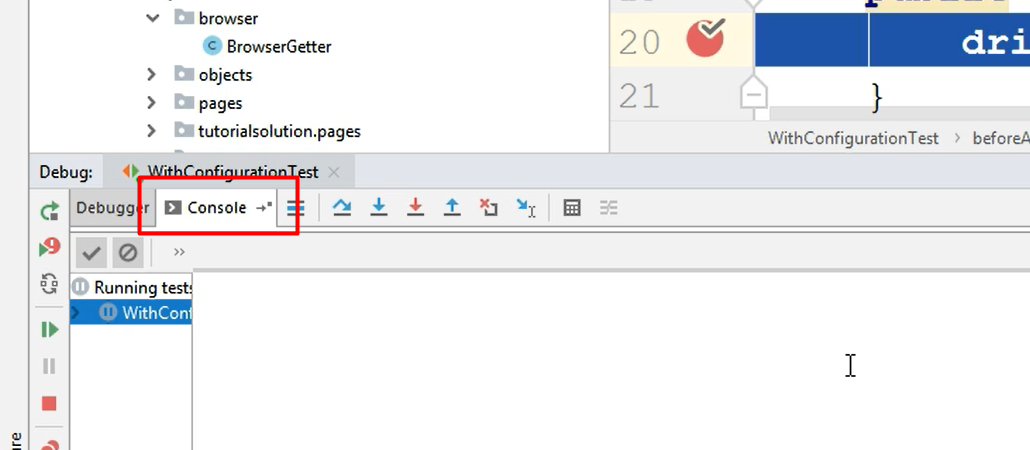
For example, if you type something with system out print line [System.out.println].
Or if, let's say, the browser opened and the startup process of the browser would have typed something to the console, this is the place where we could have seen this output.
But for now, let's go back to the debugger.
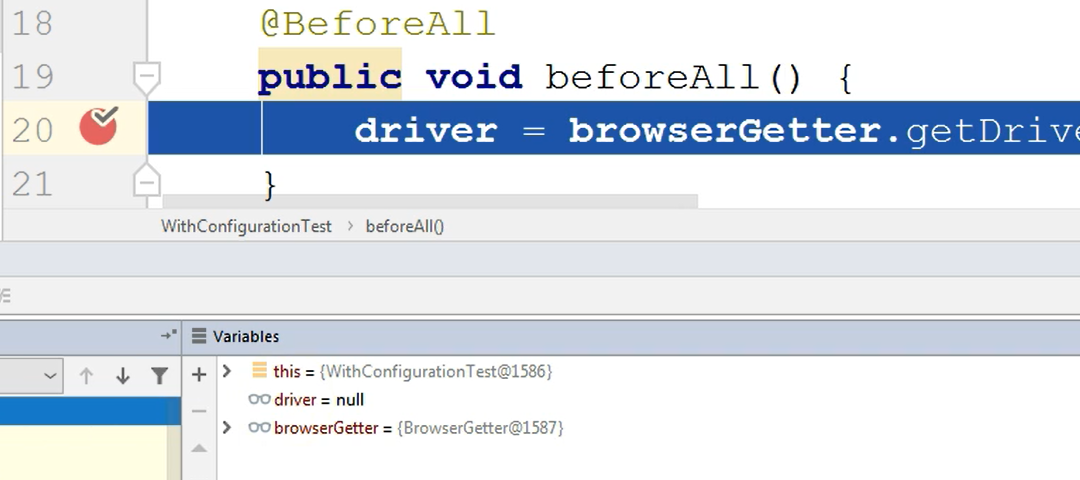
And here we can see that we have a null.
So, in the test run, it showed that there is a NullPointerException somewhere in the code that was executed.
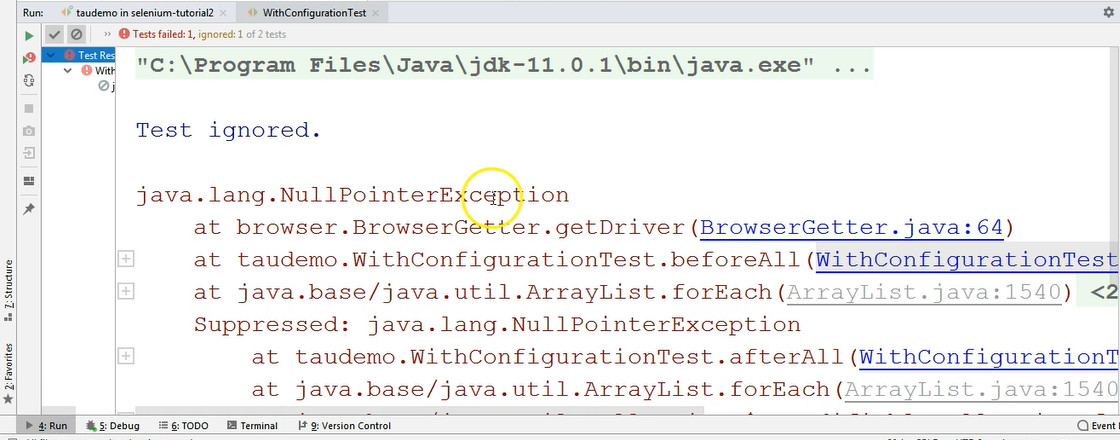
In the debug, we can see that the driver at this line where we put the breakpoint, is currently null.
Why is it null?
Well, we could try to evaluate what is the result of the
browserGetter.getDrivermethod.Or we can just collapse the Project screen and navigate to the right-hand side, just to see what information we have here.
You can see that the driver is null either by scrolling to the right and checking out this output in the debugger screen.

So, the driver is null.
I will just show you how to perform an evaluation.
If I were to select browserGetter.getDriver and hit Alt+F8, I would get a screen where I could evaluate whatever I selected.
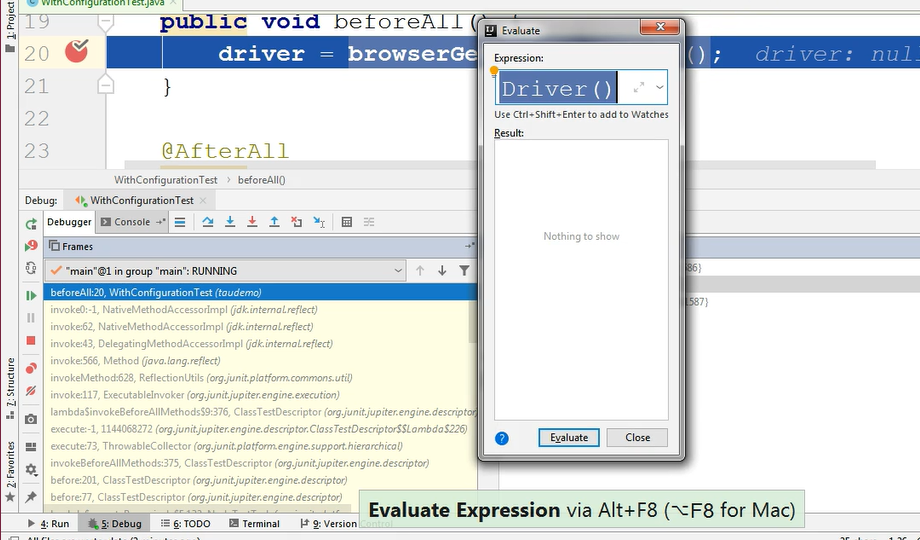
So, in this case I selected browserGetter.getDriver, and I could Evaluate this expression to see what it returns.
At this point, it throws a NullPointerException.
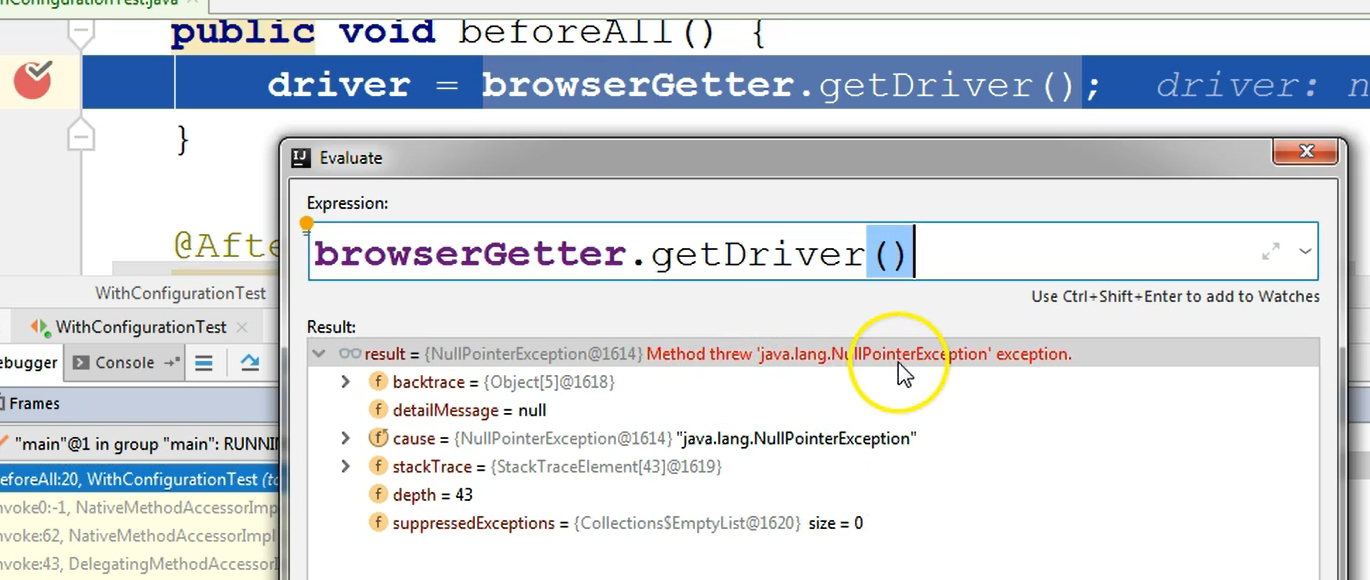
I expected this because if you remember, I mentioned that I need a certain configuration for this test in order for it to pass. I need a browser system variable to be set, and for it to have a value corresponding to the browser that we want to open.
So, since that System property was not set, we get a NullPointerException here.
Okay, so I will close this for now.
I could now go into the getDriver method to see what is happening there by clicking the icon Step Into from the debugger screen.
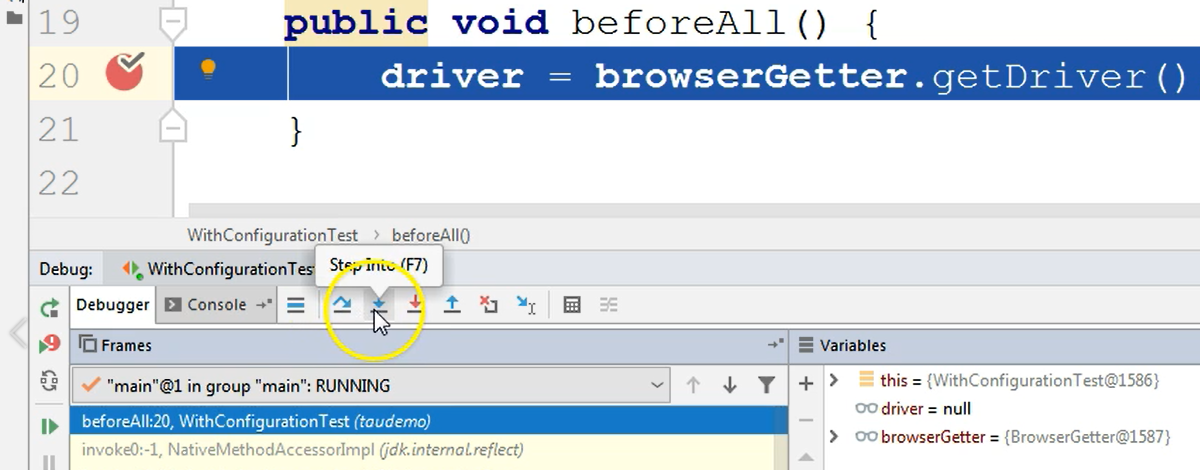
Once I'm in this getDriver method, I could also Evaluate some properties here.
For example, I can check whether the browser property really exists.
I could just select this String — System.getProperty(“browser”) — which represents the way the value of the browser property is obtained. And I can say Alt+F8, and I can just type Enter.
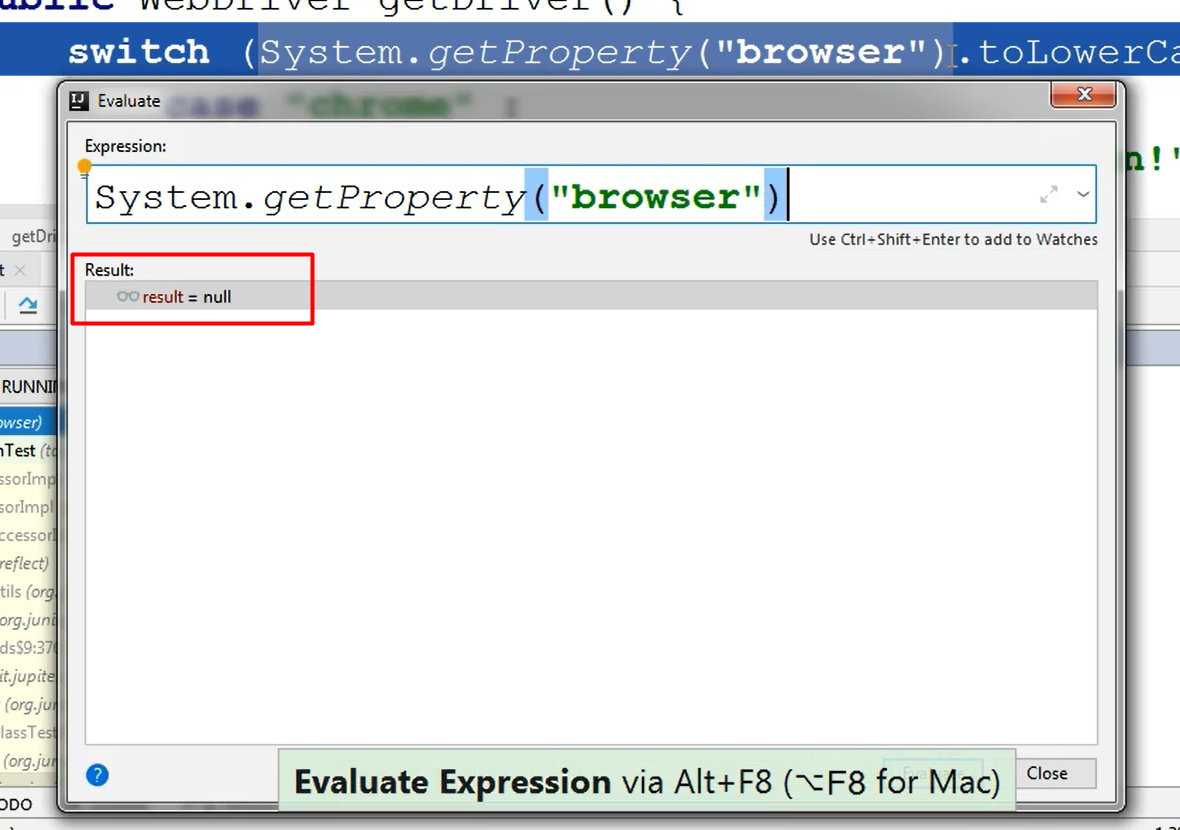
I can see that the result is null.
Basically, because of the lack of this variable being set, the result of calling System.getProperty will be null. So, this is the root cause of my NullPointerException from my test.
What I could do now, because I have pinpointed the source of the problem, is to just let the rest of the test run if I wanted. Or, I could just stop the test by clicking the Stop button.
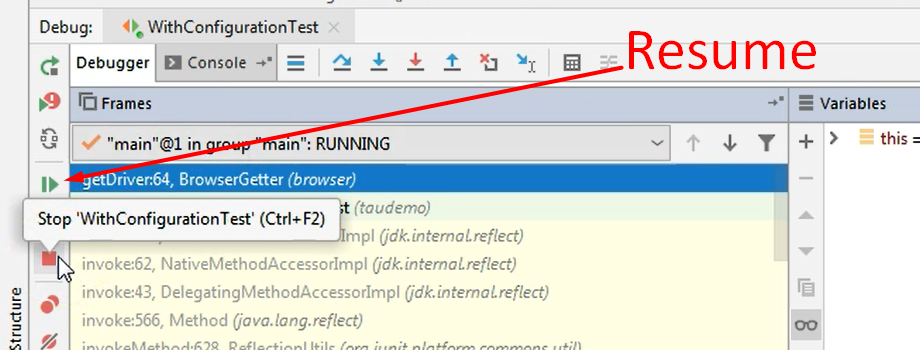
So, it's either:
- resume from the Resume button, or
- stop from the Stop button.
I will stop it for now because there's no point in continuing to run it whilst I figured out what is the root cause.
The test will now stop, and in the console output you will see the result of the test run. So, we have a NullPointerException and we have all of the information regarding where the test has failed.
If I go to the Configurations and I change them in order for the test to have that system property available, I will just go to JUnit and I will say “-Dbrowser=chrome”. Then I will hit Apply and then I would click OK.
And I will debug this test again.
I will re-debug this test by going to the class, and just running debug by right-clicking on the class name and choosing Debug.
As you can see, by right-clicking on the class name you also have the option to Run the tests. This is another way to run the test, apart from doing so from the Project screen or from the left-hand area of the editor.
So, I will debug this test again, and this time we will have the configuration in place.
What happens here is that we still get a null for the driver because the driver will be initialized after this step.
If we go into the getDriver method, we can again, evaluate the system property browser to see if it was set properly.
Let's see what happens.
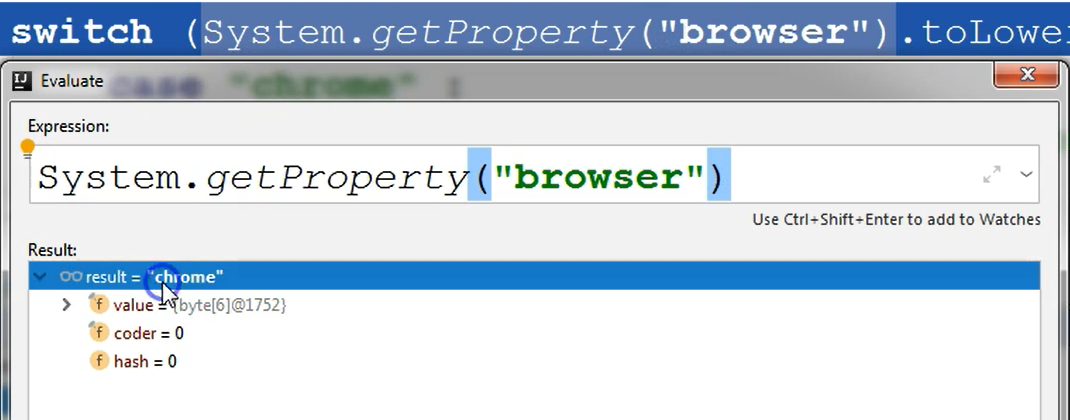
This time the browser is Chrome.
So, this time when this code will execute, it will all be good.
We could add another breakpoint here, for example, to stop the execution here.
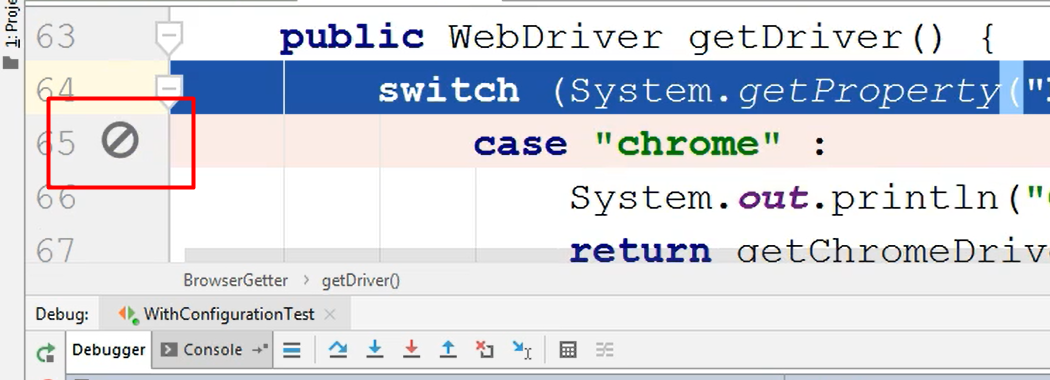
However, this breakpoint will not come into effect until you restart your debugging session.
Note on Adding Breakpoints
If you add a new breakpoint while you are already in debugging, this new breakpoint will not be in effect. The next time it will do a debug from the start. That's when this debugging step will actually be executed. So, that's when the execution will stop, at this point that you have created here.
I will click the Resume button. And the test has finished successfully.
We can check the console log to see what happened.
And here we can see that the test has passed.
So, in this debug mode, once we set the expected system property browser, the test was successful.
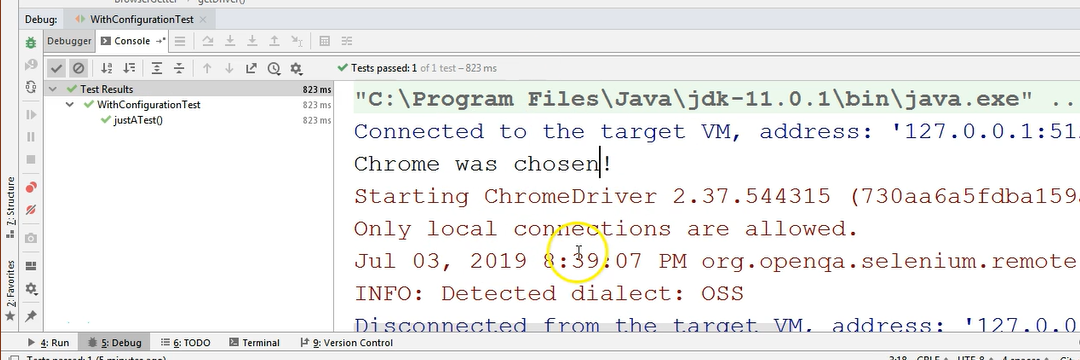
And you can see, in this console, the output from the test, meaning the fact that the browser was started.
This is pretty much everything regarding debugging, these are the most relevant things you need to consider.
You need to add a breakpoint in order to stop the execution at a certain step.
And then you can step into, step out of, and so on, inside the execution of the code.
I will also provide a link with more information about stepping into, and over and so on.
So, this concludes the chapter on debugging.
