

Transcripted Summary
When we write our automation code, we need a project to store it in. That project will automatically end up in a version control system so that everybody has access to it, and anybody can edit it.
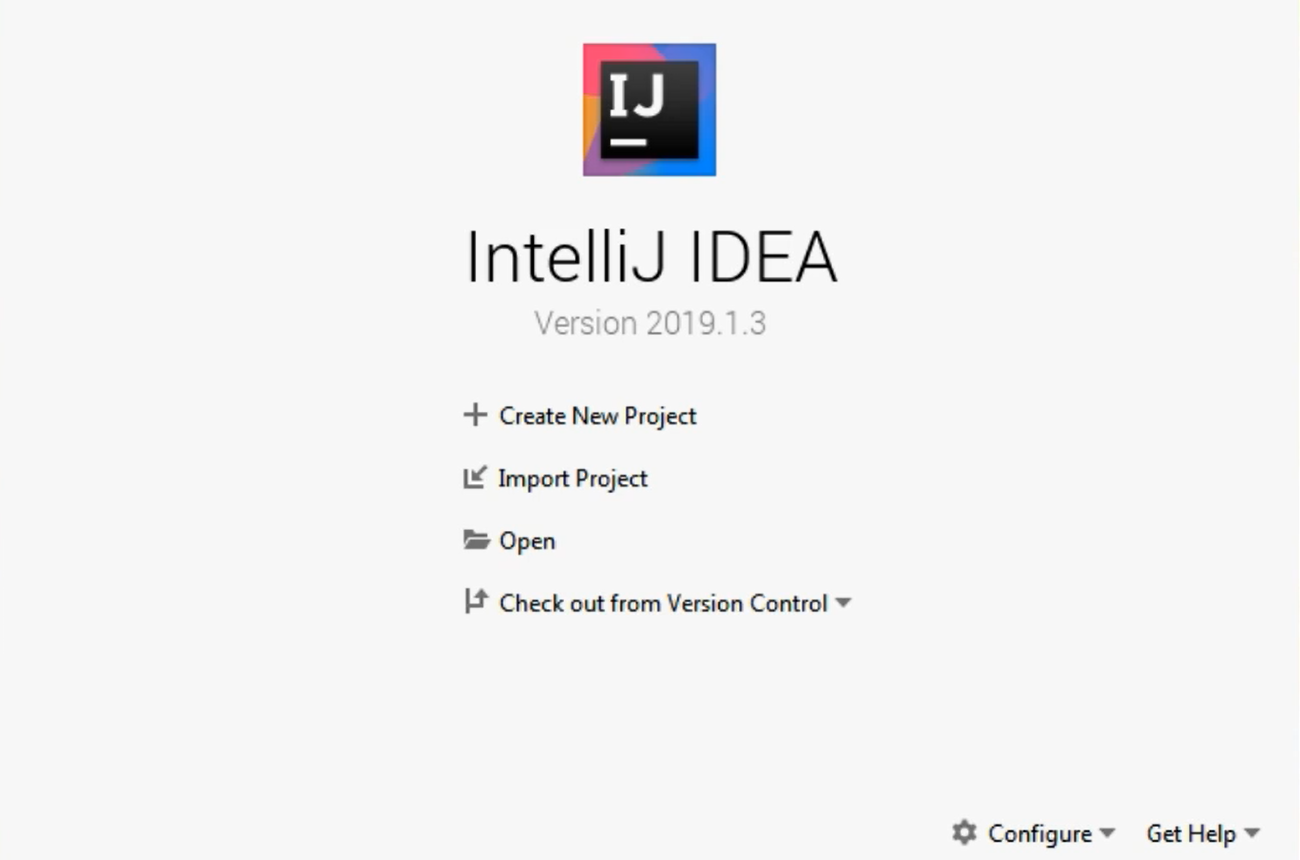
IntelliJ allows us to either create a new project in case we don't already have one, import an existing project from our machine, or check one out from a version control system, like Git or Subversion.
Let's go through these options one by one.
Let's start by creating a brand-new project by clicking the Create New Project link.
IntelliJ supports several types of new projects to be created. Some of them are a Java project, an Android project, a Maven project, or a Kotlin project, depending on what you want to do.
# Creating a Java Project
Let's just start by creating a simple Java project.
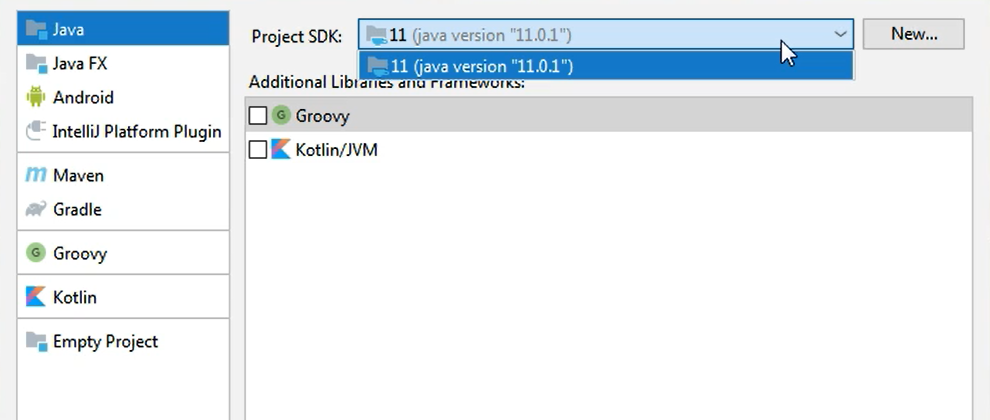
As you can see, the Java option here is already selected. And on the right-hand side of the screen, I just need to select the SDK (the Java SDK that I want my Java project to use).
In case I have several options, of course I can choose from them in this drop down. I only have one Java JDK version and that is selected by default.
I don't want to add support for any additional libraries and frameworks here, therefore, I will just click the Next button.
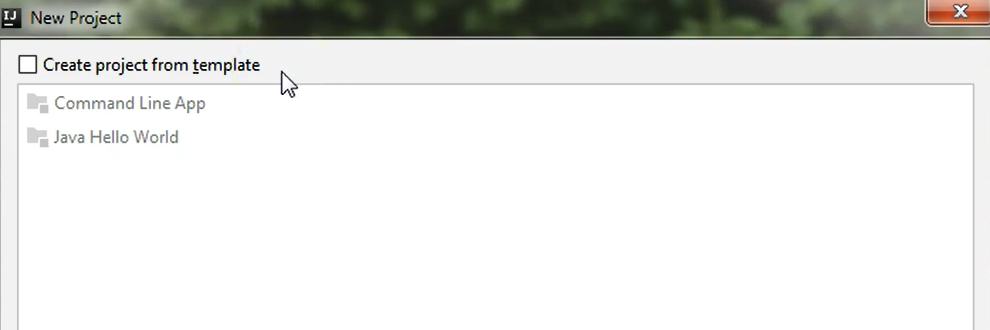
I could also create a project from a template that IntelliJ offers but I don't want to do that right now.
I just want to create a simple blank project so I will click the Next button.
I need to give this project a name, therefore, I will call it “demoJavaProject” and I will choose a location for it. I just need to specify the path where I want this folder with the project to be created.
Then I will just click Finish.
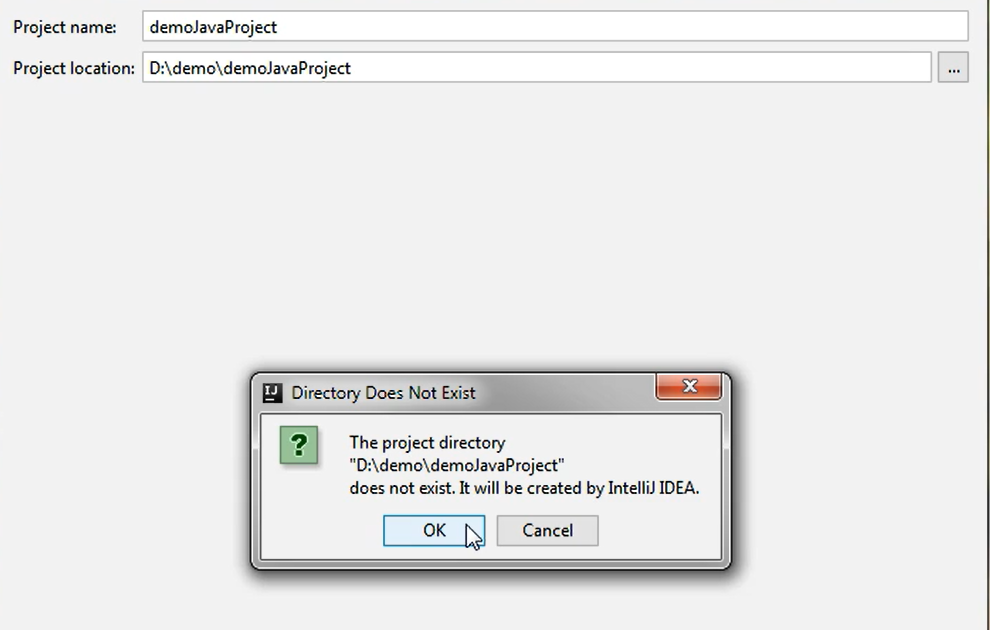
Of course, IntelliJ will prompt that this directory that I've chosen does not yet exist. It will be created by IntelliJ, so you don't need to create the folder yourself.
You can just click OK here and the folder will be created automatically.
Now you need to wait a little bit until the project is being created but, in a few seconds, IntelliJ will show you the newly created project with its structure based on a Java project.
Now since we just installed IntelliJ, we will receive all kinds of tips.
IntelliJ Tip of the Day
If we want to see these tips every time IntelliJ opens, we can just leave this screen alone — we can just leave the “Show tips on startup” checkbox checked. If we don't want that, then we will uncheck this.
For now, I will just leave it as it is, and I will click the Close button.
As you can see in the lower part of the screen, an _Indexing _label is displayed.
This means that currently the structure is being generated and it takes a little bit of time for the project to be finished. We just need to wait for this indexing to be done and by that time the project will be loaded in our screen.
Now that the project has finished loading (I will first maximize this screen for a better view), let's take a look at what we have here.
On the left-hand side, you can see a project area where you can see the name of the project that we just created.
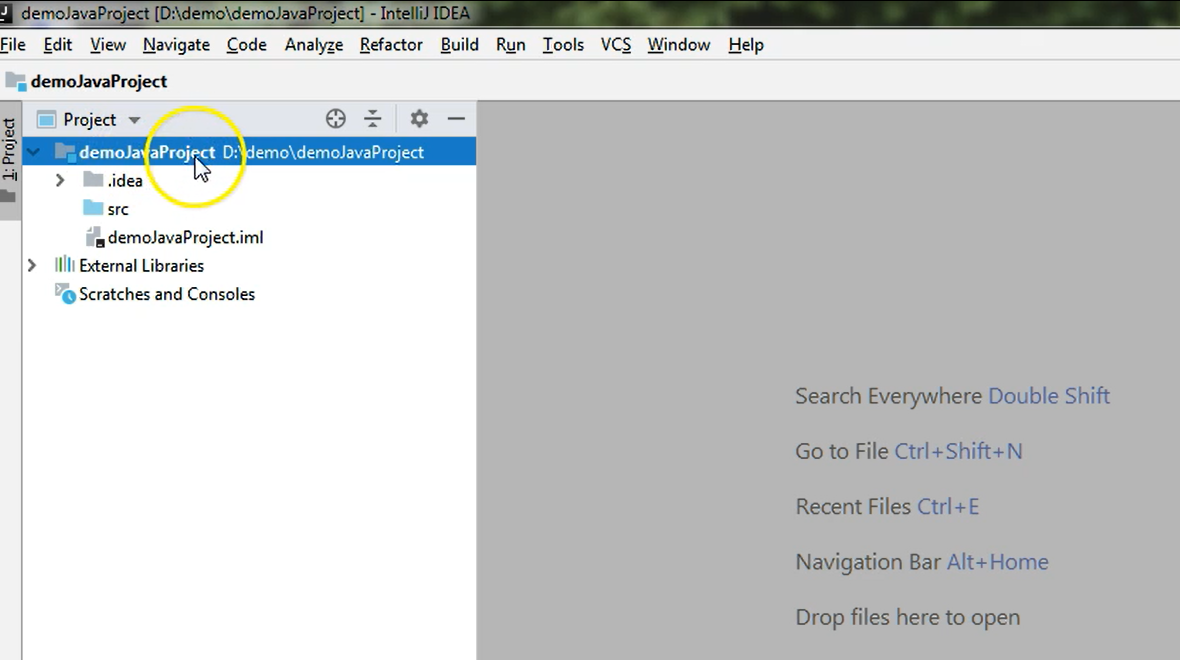
IntelliJ created a package which has a corresponding folder on your machine where this project is stored.
The location of this project is the one you specified when you created the project. In this case, it was D:/demo/demoJavaProject.
In this package, a .idea folder with some files contained inside it and a .iml file were created.
These were created by IntelliJ for it to manage its workspace, so the workspace where you are going to write your code.
You will never need to work with these files so you can just forget about these. These are not part of your code project, so to say, so they don't need to end up in your version control repository once you put the code there.
Always remember not to commit the .idea and the .iml files and folders.
Apart from that, you will also see that you have a .src folder where you can start creating the packages and the classes and the test methods that you are going to work with.
You will also see that you have an _External Libraries _drop down here which currently contains only the Java library because when you created this project you decided to create a Java project — so by default this Java project comes with this external dependency.
The project is all set up for you and you can start creating your tests if you want to.
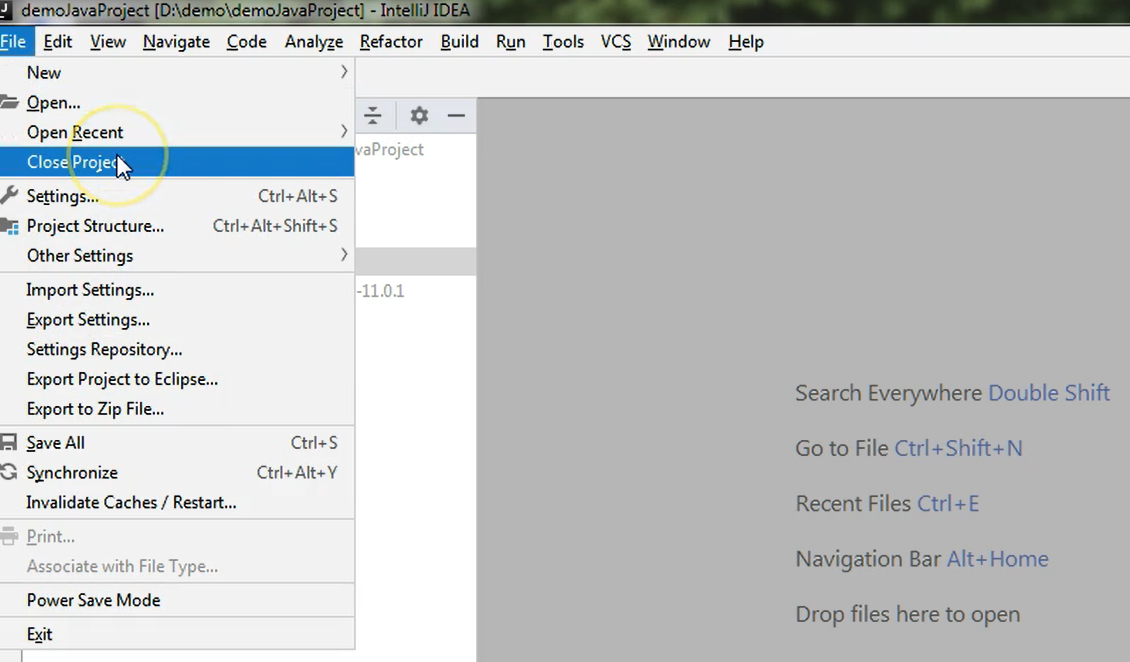
If you don't like this kind of project and you would prefer a more structured one, you can create a Maven project from this screen from where we initially created the Java project.
In order to get there, I will first close this project by going to File and clicking on the Close Project option.
Now you can see that we have the initial screen but additionally, on the left-hand side, we have an entry which reflects that we created a Java project earlier.
If we click the project on the left-hand side, it will open again in IntelliJ so the screen that we're looking at right now will close and we will again see the project that we created initially.
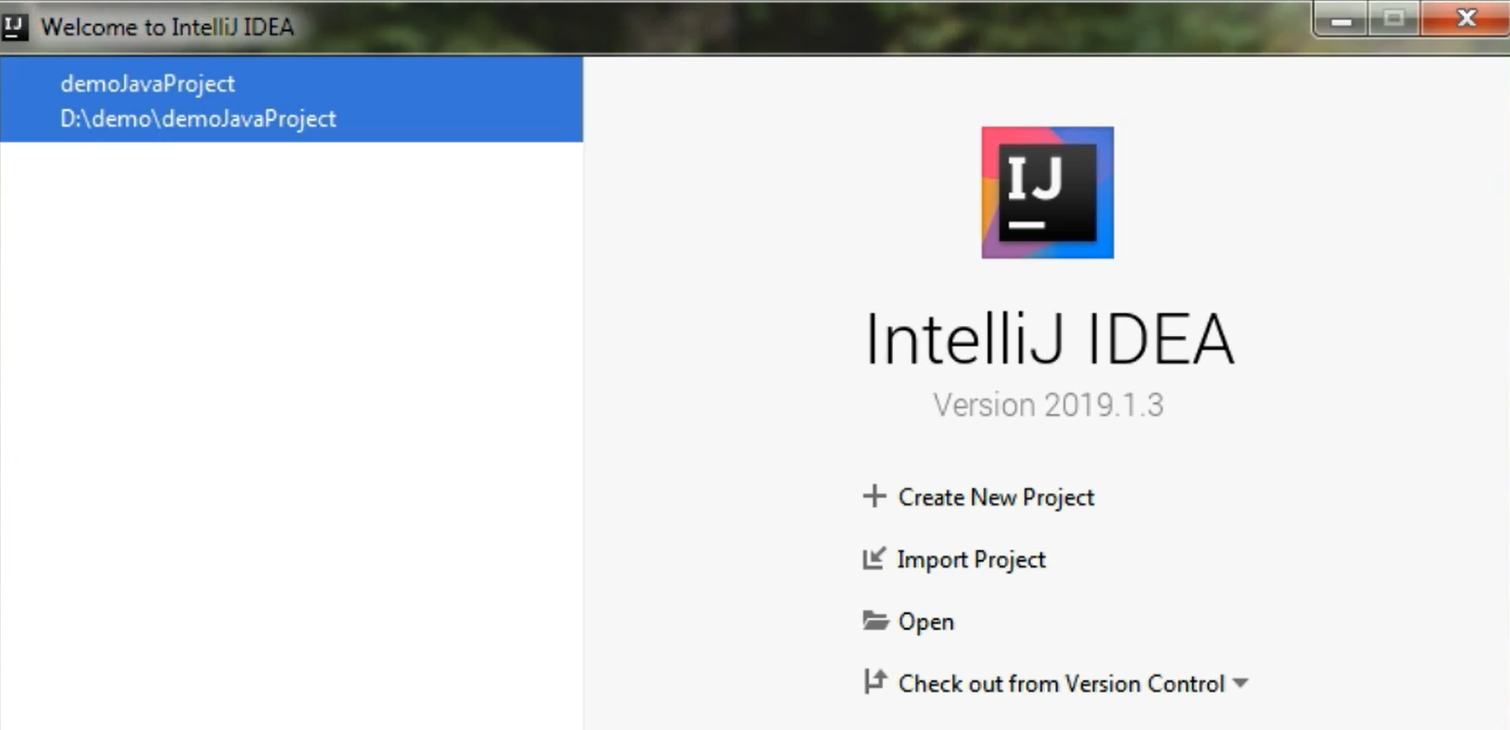
But for now, we will leave it as it is because we want to create another type of project from this screen.
Quiz
The quiz for this chapter can be found in section 2.4
