

Transcripted Summary
After we created our free account with Applitools, now it's time to learn how to add Eyes-TestCafe to our existing test cases.
To download Eyes-TestCafe or the Applitools Eyes SDK for TestCafe, we can open the NPM, or Node Package Manager website, and you will find Applitools Eyes-TestCafe.
Here we can check the installation steps for installing it.
We can just get this command:
npm i -D @applitools/eyes-testcafe
... and copy it.
This is to install Eyes-Testcafe as a local development dependency in our project.
Here we are working with a project from existing demos where we are using the page object model and data-driven.
Inside the Applitools demo, we can just run the command we copied.
In package.json we can check that after installing Eyes-TestCafe, we can find it here in the devDependencies.
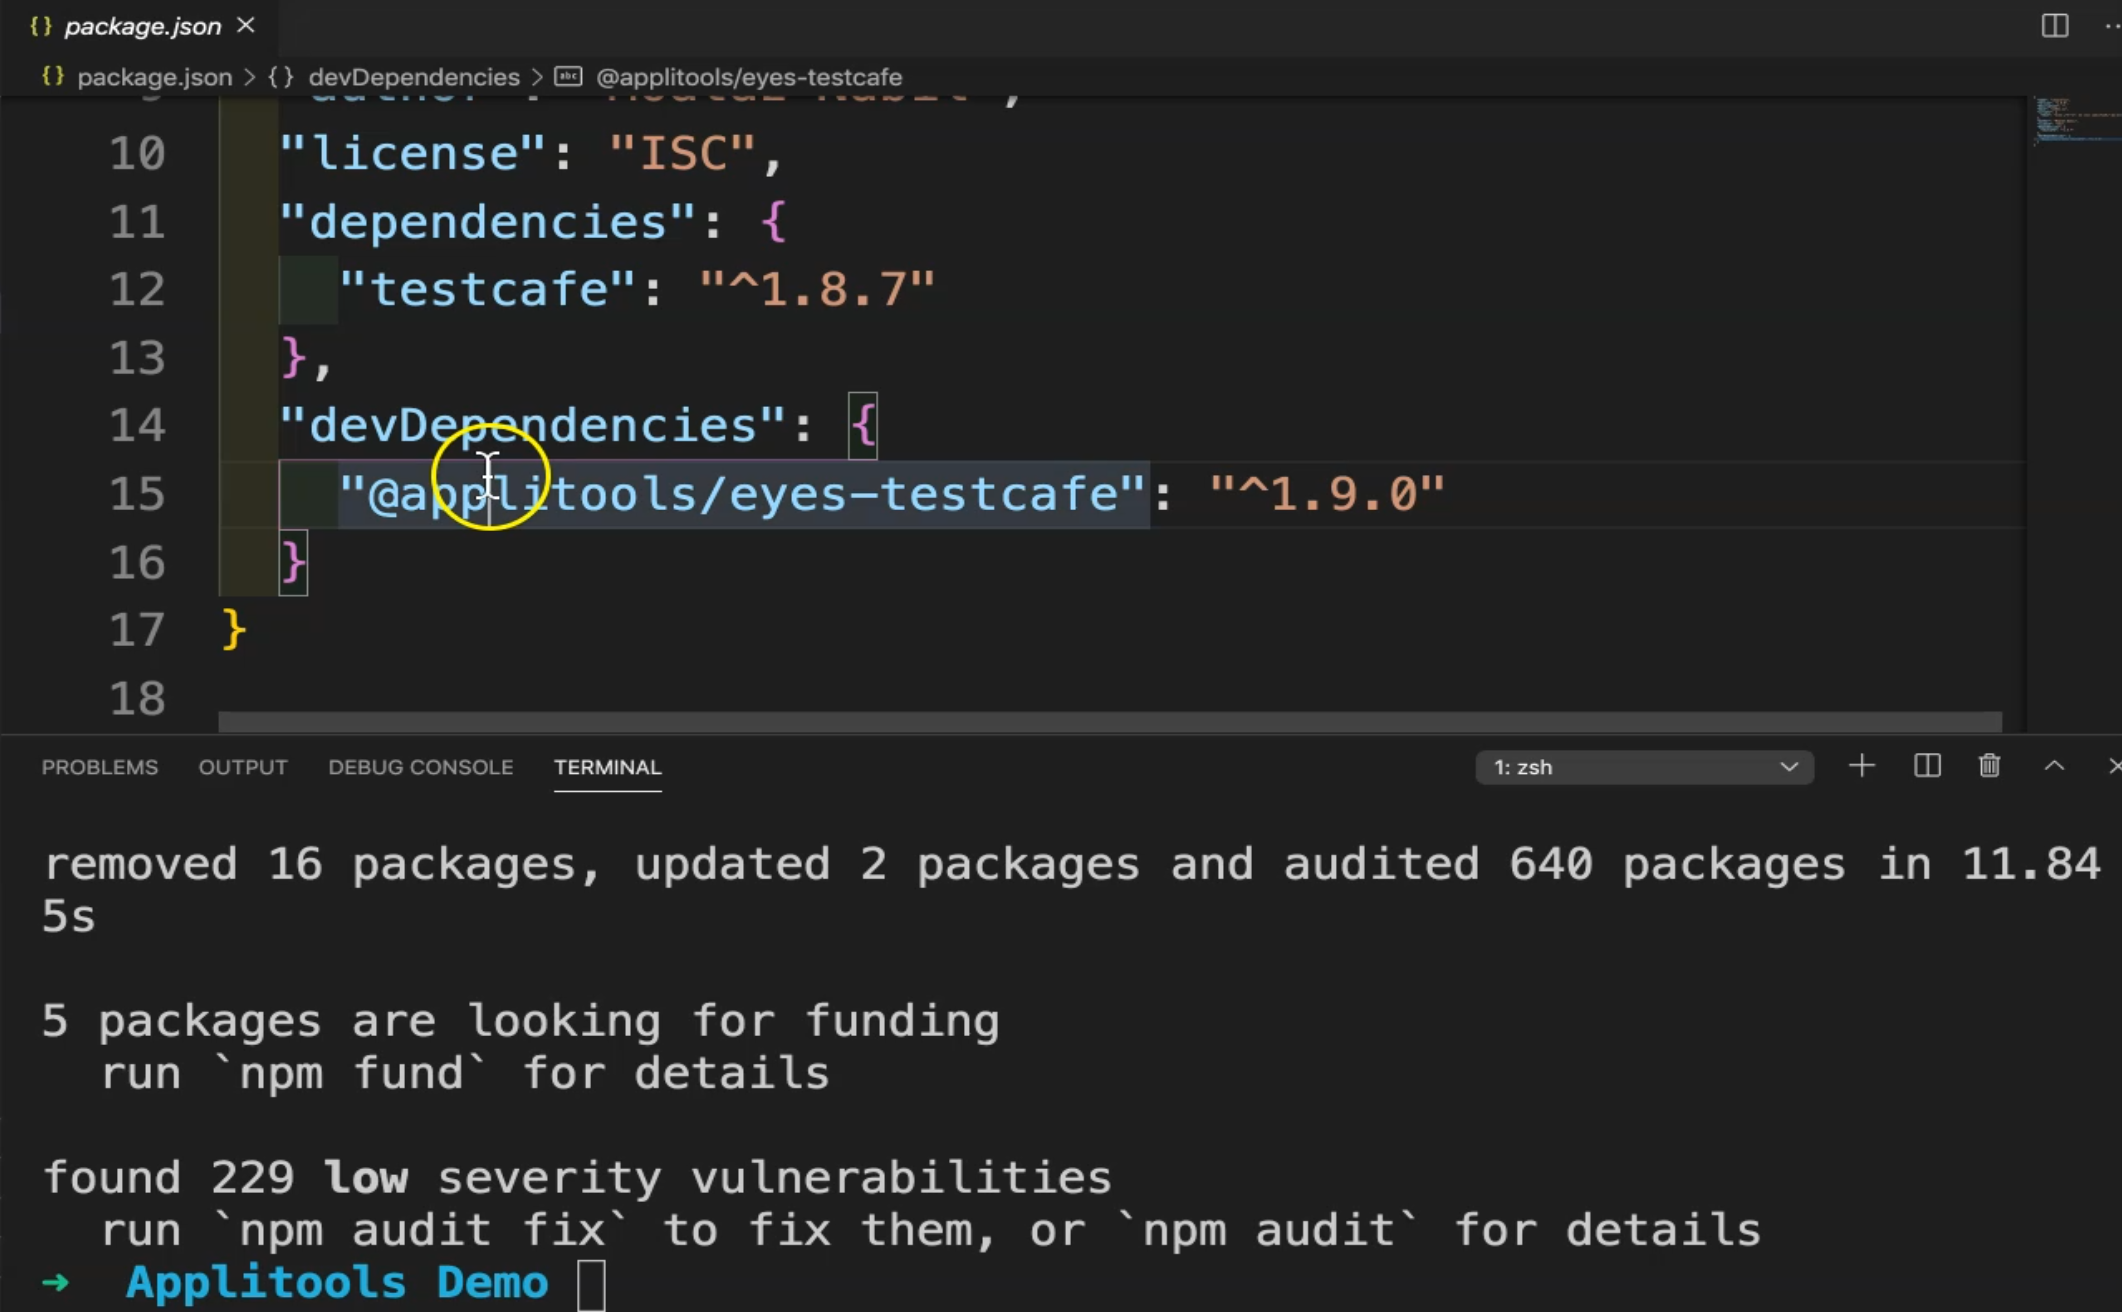
So here we have the TestCafe dependency with Applitools and the version for this plugin.
Then we will continue with our configuration with Applitools.
Here we can find the first step is installation, we are using npm and we already did this step.
Then this is talking about the Applitools API key and to authenticate with the Applitools server, we need to send the result via Applitools server.
You should have API keys, and we already copied it and created our account in the previous demo.
After that, you can set it as an environment variable using the export, if you are using Mac OS or Linux.
In Windows, you can set it with the command line set as Applitools.
And also you can have Applitools config.js and add the API key in this JavaScript file.
We will start with the Usage.
Here is one example of using Applitools with TestCafe. And for example, Applitools 'Hello World', this is a URL, afterEach, and using TestCafe.
Let's go to our demo and we just need to copy this import line:
import Eyes from '@applitools/eyes-testcafe';
Then for our demo, we will be working with the RegistrationTest.js and here in the registration, we can add the import.
After that we can create one const for TestCafe:
const eyes = new Eyes();
We will use it in all the steps or in the verification steps that we need to send to TestCafe and Applitools dashboard.
After that, we need to add in the fixture afterEach and after each test, we need to close the connection with the Applitools server.
And after all the fixtures, we need to wait for results to be uploaded to the Applitools dashboard.
So we can copy these two lines and add it after .page(URL) at the end of the fixture Registration Fixture:
  .afterEach(async () => eyes.close())
  .after(async () => eyes.waitForResults(true));
So afterEach, we need to close eyes, or we need to close the connection with the Applitools server.
And after, we can just wait for a test result and I think we can also pass true.
So this is in the fixture and this will work with each test under the fixture because, as we know from previous chapters is that we have afterEach and we have after, and also we have beforeEach and before.
So this is just for closing the connection between the server and our test cases.
Then we need to add this to the test:
 await eyes.open({
      appName: 'Hello World!',
      testName: 'My first JavaScript test!',
      browser: [{ width: 800, height: 600, name: 'firefox' }],
      t
  });
This is for adding the connection and we need to add the application name and the test name.
Inside the test, we can, for example, work in the "User Registration and Login Test" test.
Inside test, before starting in our test script, we can insert this code.
So we are opening the connection here with the Applitools server.
For appName, for example, we can say 'TestCafe Demo' and the testName is 'User Registration and Login Test'.
We can also add the browser with width and height and the name, or we can remove the browser from here if you wanted to use the configuration file with Applitools.
We will leave it now for the first demo with Applitools.
After that, we can change it and remove it, and edit it in the JSON or JavaScript file.
And then, so this is just for opening the connection.
After that, we can add another await and add eyes.checkWindow - this function generates a screenshot with the current page and adds it to the Applitools test.
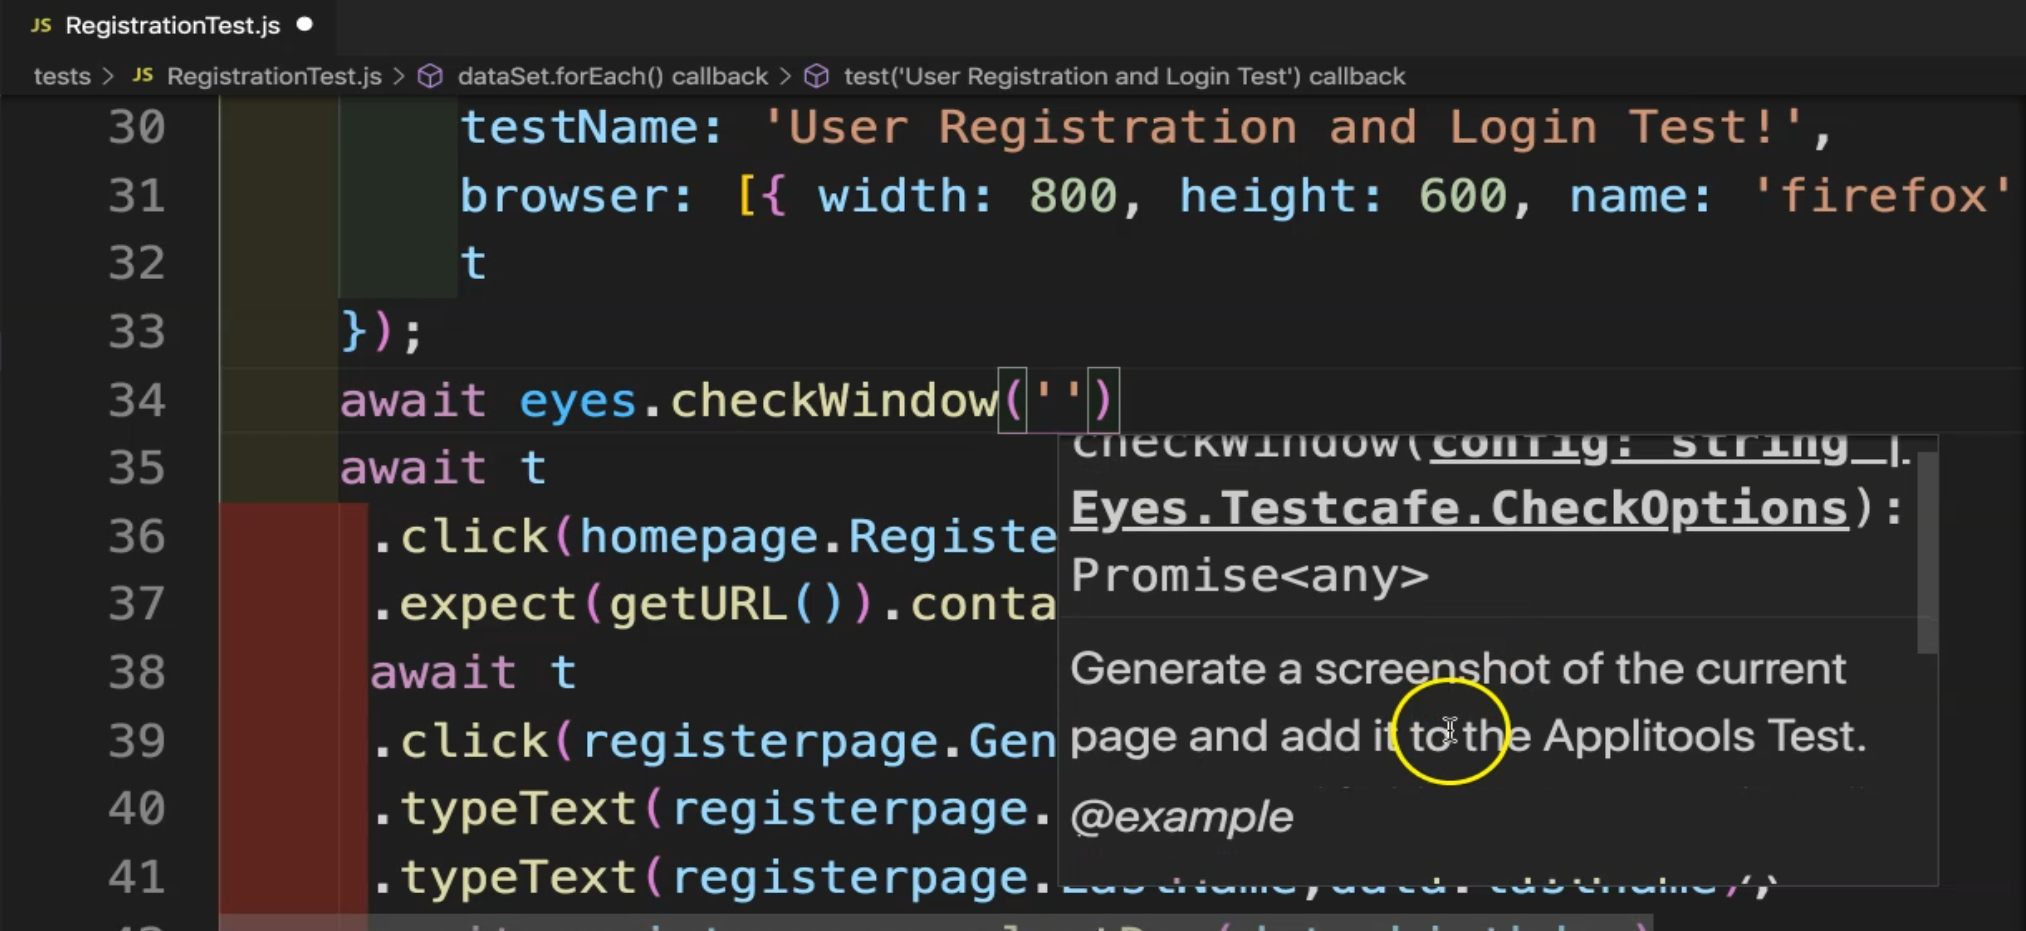
So we will name it, like for example, we need to search that or verify that we are in the 'Home Page'. And add a semicolon.
Then we can copy this or this line because we will use it again.
After we redirect to the register link, maybe we can add one additional command that we are in 'Registration Page'.
Then we can also copy this one and go through to the registration steps, and after we click the register button, we can add another that we are on the 'Success Page'.
So we have three different checks for three different pages or three different steps with Applitools.
In the beginning, we add an open the application and the configuration for the application and the browser name and after the fixture or the test will finish, we will close that server with Applitools and wait for the results to be uploaded to the Applitools server.
After we configured Applitools and installed it in our project, now it's time to run our test with Applitools and to check the results in Applitools.
If you open the Applitools URL on npm, here we can find that we need to first export the APPLITOOLS_API_KEY key as an environment variable.
In the command line, I can run:
export APPLITOOLS_API_KEY=<your_key>
And pass my generated API key.
So now it's exported, and then I can run:
testcafe chrome tests/RegistrationTest.js
After we run our tests locally and on Applitools, we will find the registration fixture and the screenshot because we have one error.
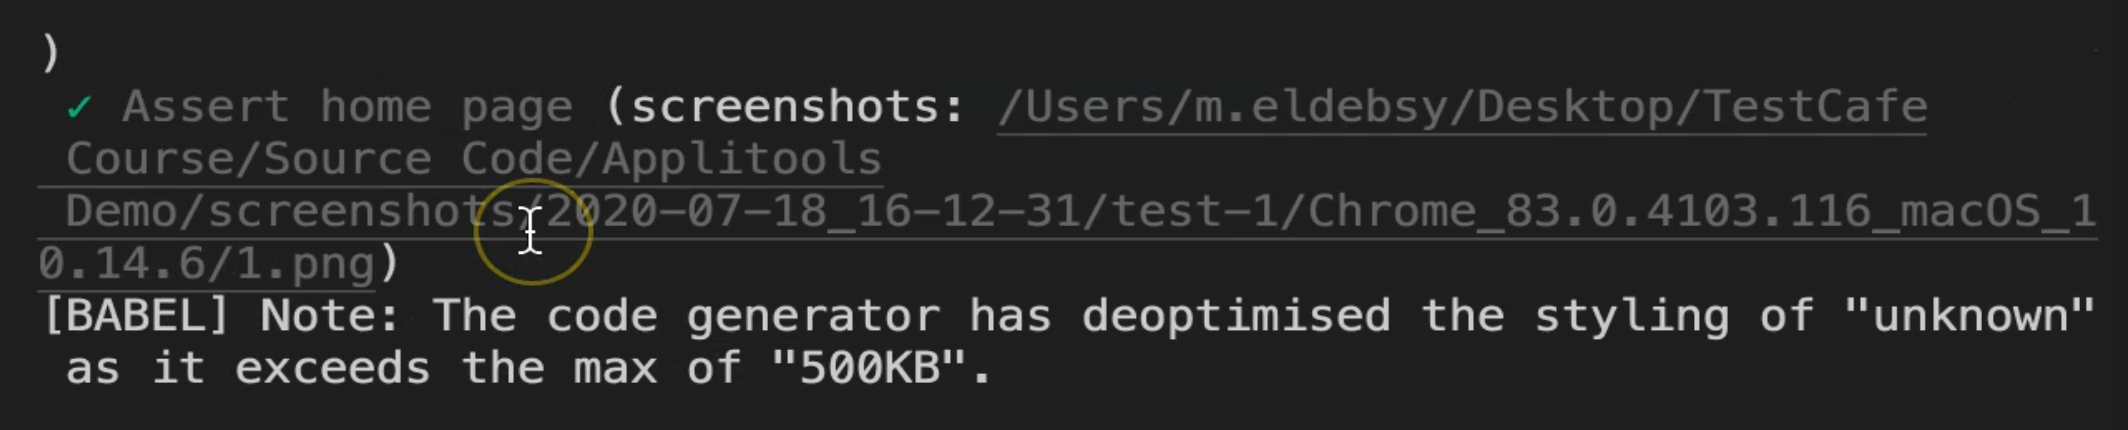
After that, here we have the eyes test result because we are sending the result to the Applitools server.
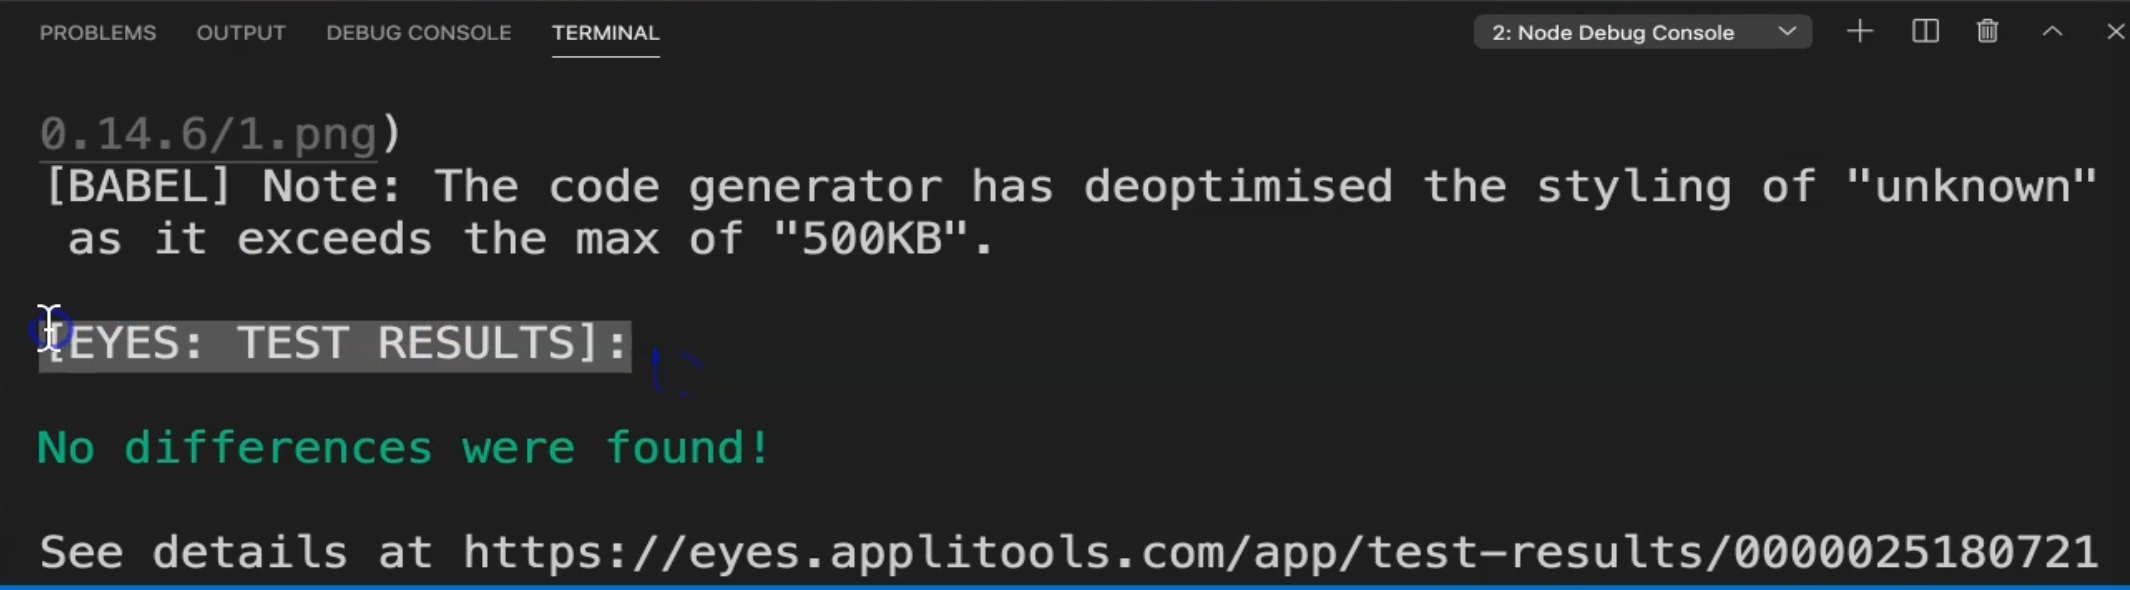
So as a first message, is that "No differences were found" because this is the first run that we are using, and there is a link to see the details.
I can click on this link and open it.
For example, I can open it from the Visual Studio Code directly, and it will open the Applitools dashboard.
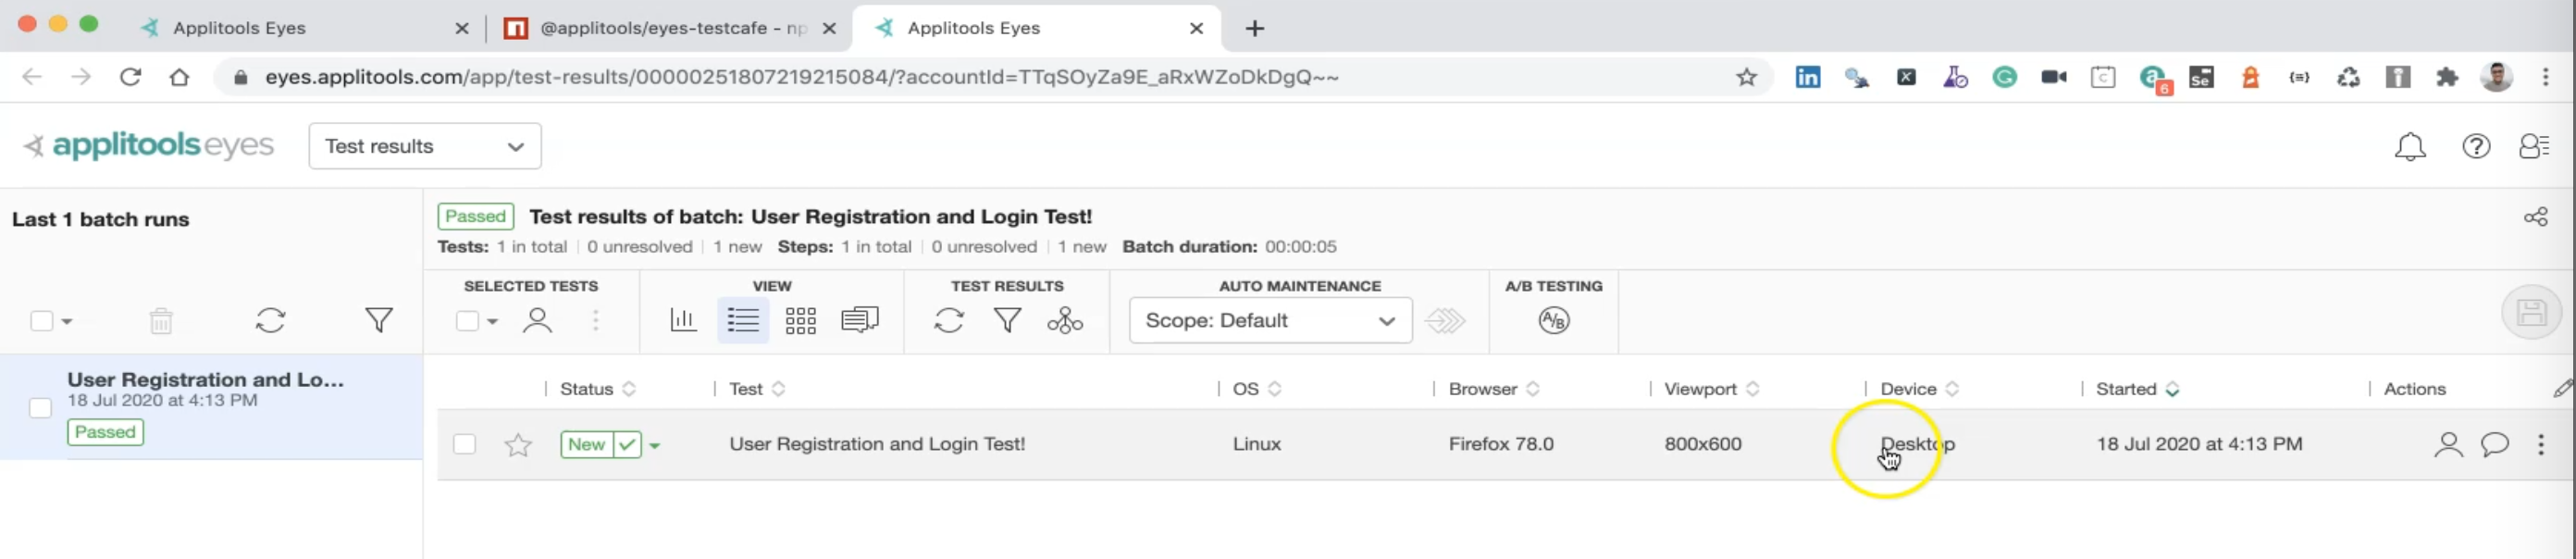
So here the test case is passed and here is the configuration - the operating system is Linux, the browser is Firefox as I configured, and this is also the dimensions - with the height and the width - and the device is desktop.
I can click here and find that I already have a screenshot and I can also zoom in or zoom out of the test result.

So this is a run - let's continue and check what else is in the test result.
We have here an important notice that your Applitools visual test is currently running on one concurrency because we just mentioned that we need to run only on Firefox.
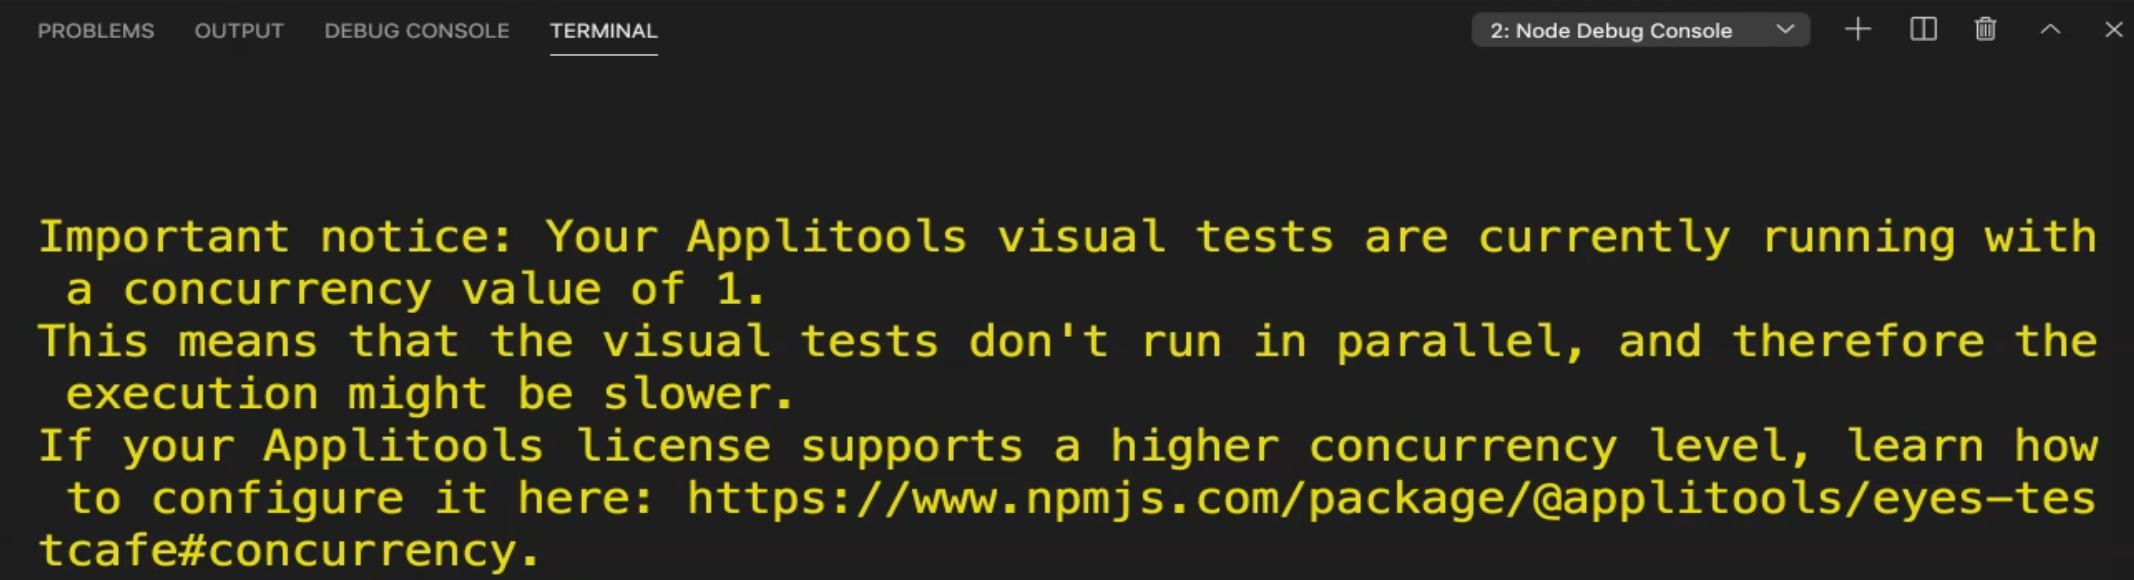
This is one browser only and if our account or license with Applitools supports a higher concurrency level, we can run in parallel with Applitools and TestCafe.
After we trade Applitools integration with TestCafe with one browser, now it's time to try to run our test embedded with different browsers and different operating systems with Applitools.
We will open the browser and go to the Applitools documentation or tutorials and click on the TestCafe tutorial.
Here we can find that we have examples, and you can also follow the steps from here.
We can find the applitools config.js file and we can copy it - and it should be in the root directory.
So in the root directory here, we can create a new file with applitools.config.js, and after that, we can copy the configuration and paste it in our project.
module.exports = {
    apiKey: 'APPLITOOLS_API_KEY',
    //
    browser: [
        // Add browsers with different viewports
        {width: 800, height: 600, name: 'chrome'},
        {width: 700, height: 500, name: 'firefox'},
        {width: 1600, height: 1200, name: 'ie11'},
        {width: 1024, height: 768, name: 'edgechromium'},
        {width: 800, height: 600, name: 'safari'},
        // Add mobile emulation devices in Portrait mode
        {deviceName: 'iPhone X', screenOrientation: 'portrait'},
        {deviceName: 'Pixel 2', screenOrientation: 'portrait'}
    ],
    // set batch name to the configuration
    batchName: 'Ultrafast Batch'
}
So this is the batch name, for example, "Ultrafast Batch".
We can use this new feature from Applitools that we can run in different browsers and different operating systems, but first, we should add Applitools API keys here in the module or this config file.
We will copy it from the Applitools SDK environment variables and put it here.
This is our, or this is my key, and this is browsers and different viewports.
For example, I need to run on Chrome, Firefox, Internet Explorer 11, Edge Chromium, and Safari.
And also this is for a mobile emulation device - so I need to run an iPhone X for example, and Pixel Two.
This is the batch name - you can change it, for example, to Ultrafast TestCafe.
And we just need to change one additional thing - we need to remove the browser because the browser will be in the configuration file.
Here we open Applitools with the registration account.
After that, check that we have different tests and we will read the data, or the configuration will be overridden from this one, and we will get the result from here.
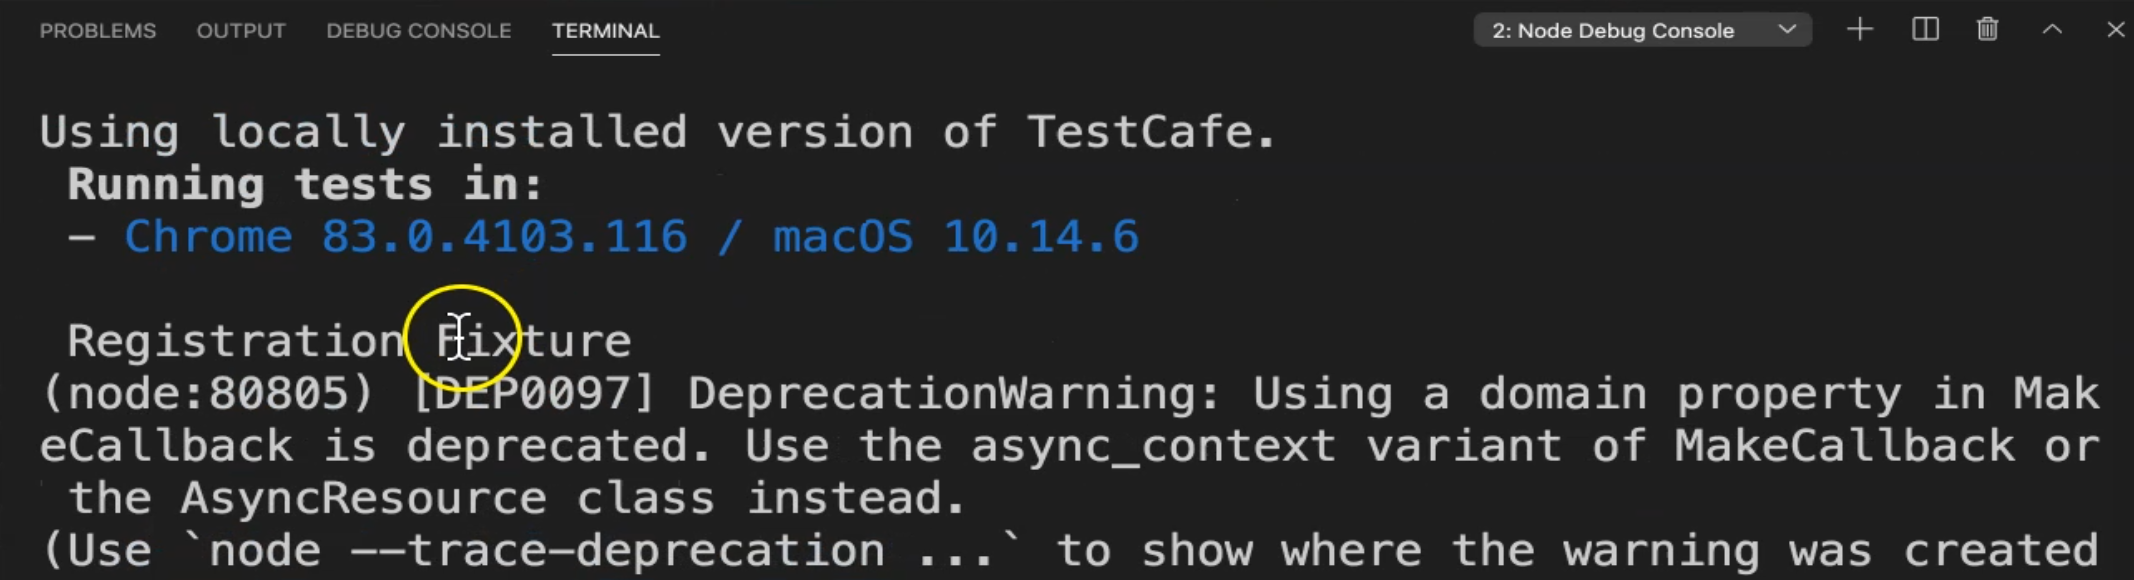
Let's just clear our terminal and for example, also, we can run on headless Chrome test registration and we'll check what happened during our test.
testcafe chrome:headless tests/RegistrationTest.js
Now we are running the local version of TestCafe with headless mode, and also we are running on Applitools.
If we go back to the Applitools Eyes, until now, we just have one registration and we don't have any results yet.
So we will wait until our test finishes to be able to check the new test result here.
It's loaded automatically with the latest batches.
So we will redirect here to our code and wait until we finish that.
Here we will notice that we have an "Ultrafast TestCafe" - this is the name of the batch - and if we click on this link, it is still running so we can't open the running test.
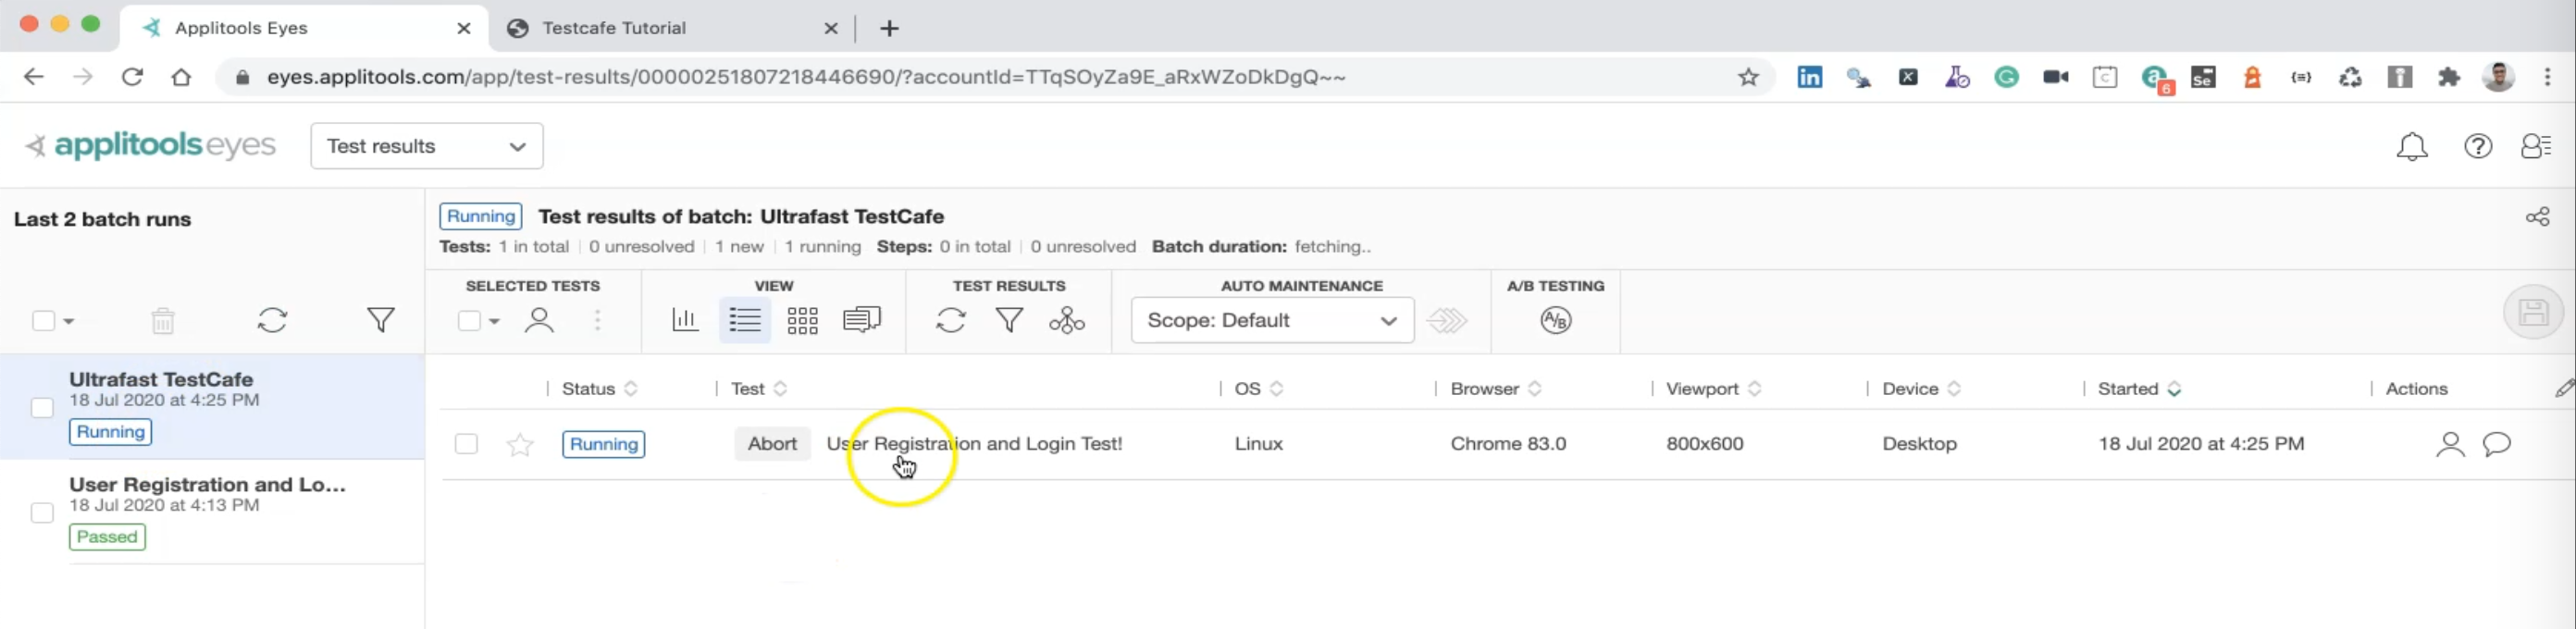
Because of that, we need to wait until the test is finished.
Our test batch is finished now, and the result is passed, and we can just refresh the view and here we can go to the registration test or we can just refresh the page to check the test result with a different browser.
Here we have all the browsers - all the configurations that we configure in our project.
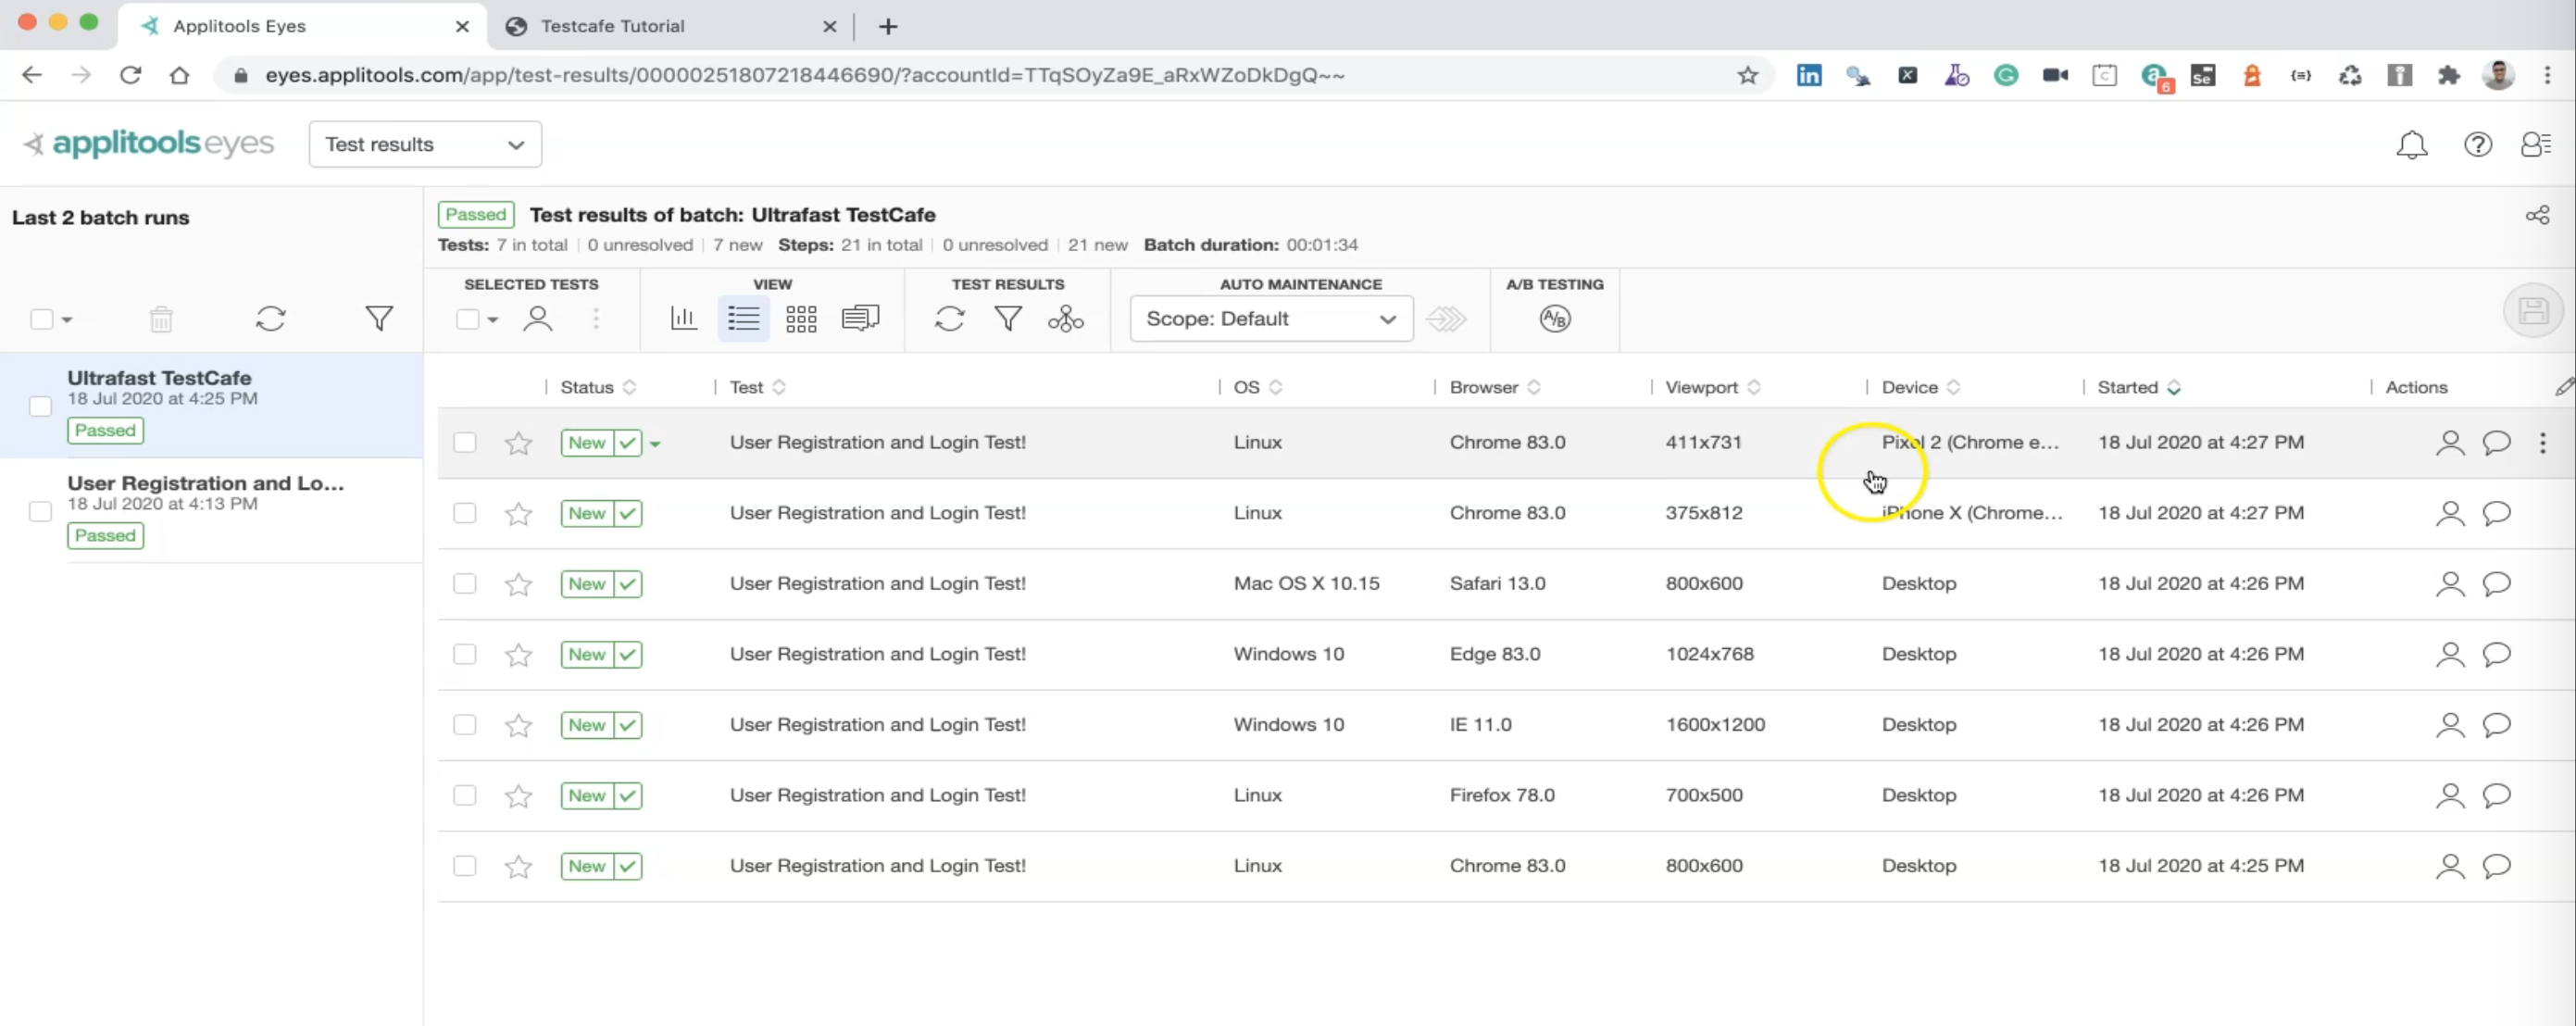
For example, here we have Chrome with Linux, with Pixel 2 because we are using a Chromium version or emulation - with the Pixel 2 and iPhone X.
And this is a version for desktop with Mac OS, with Safari, with Windows 10 and with Microsoft Edge and Windows 10 with Internet Explorer 11.
And Linux with Firefox and Chrome.
Here, for example, we can click on a test and we can check that we don't have any problems, or if we do have any problem in the test, Applitools can display the result here.
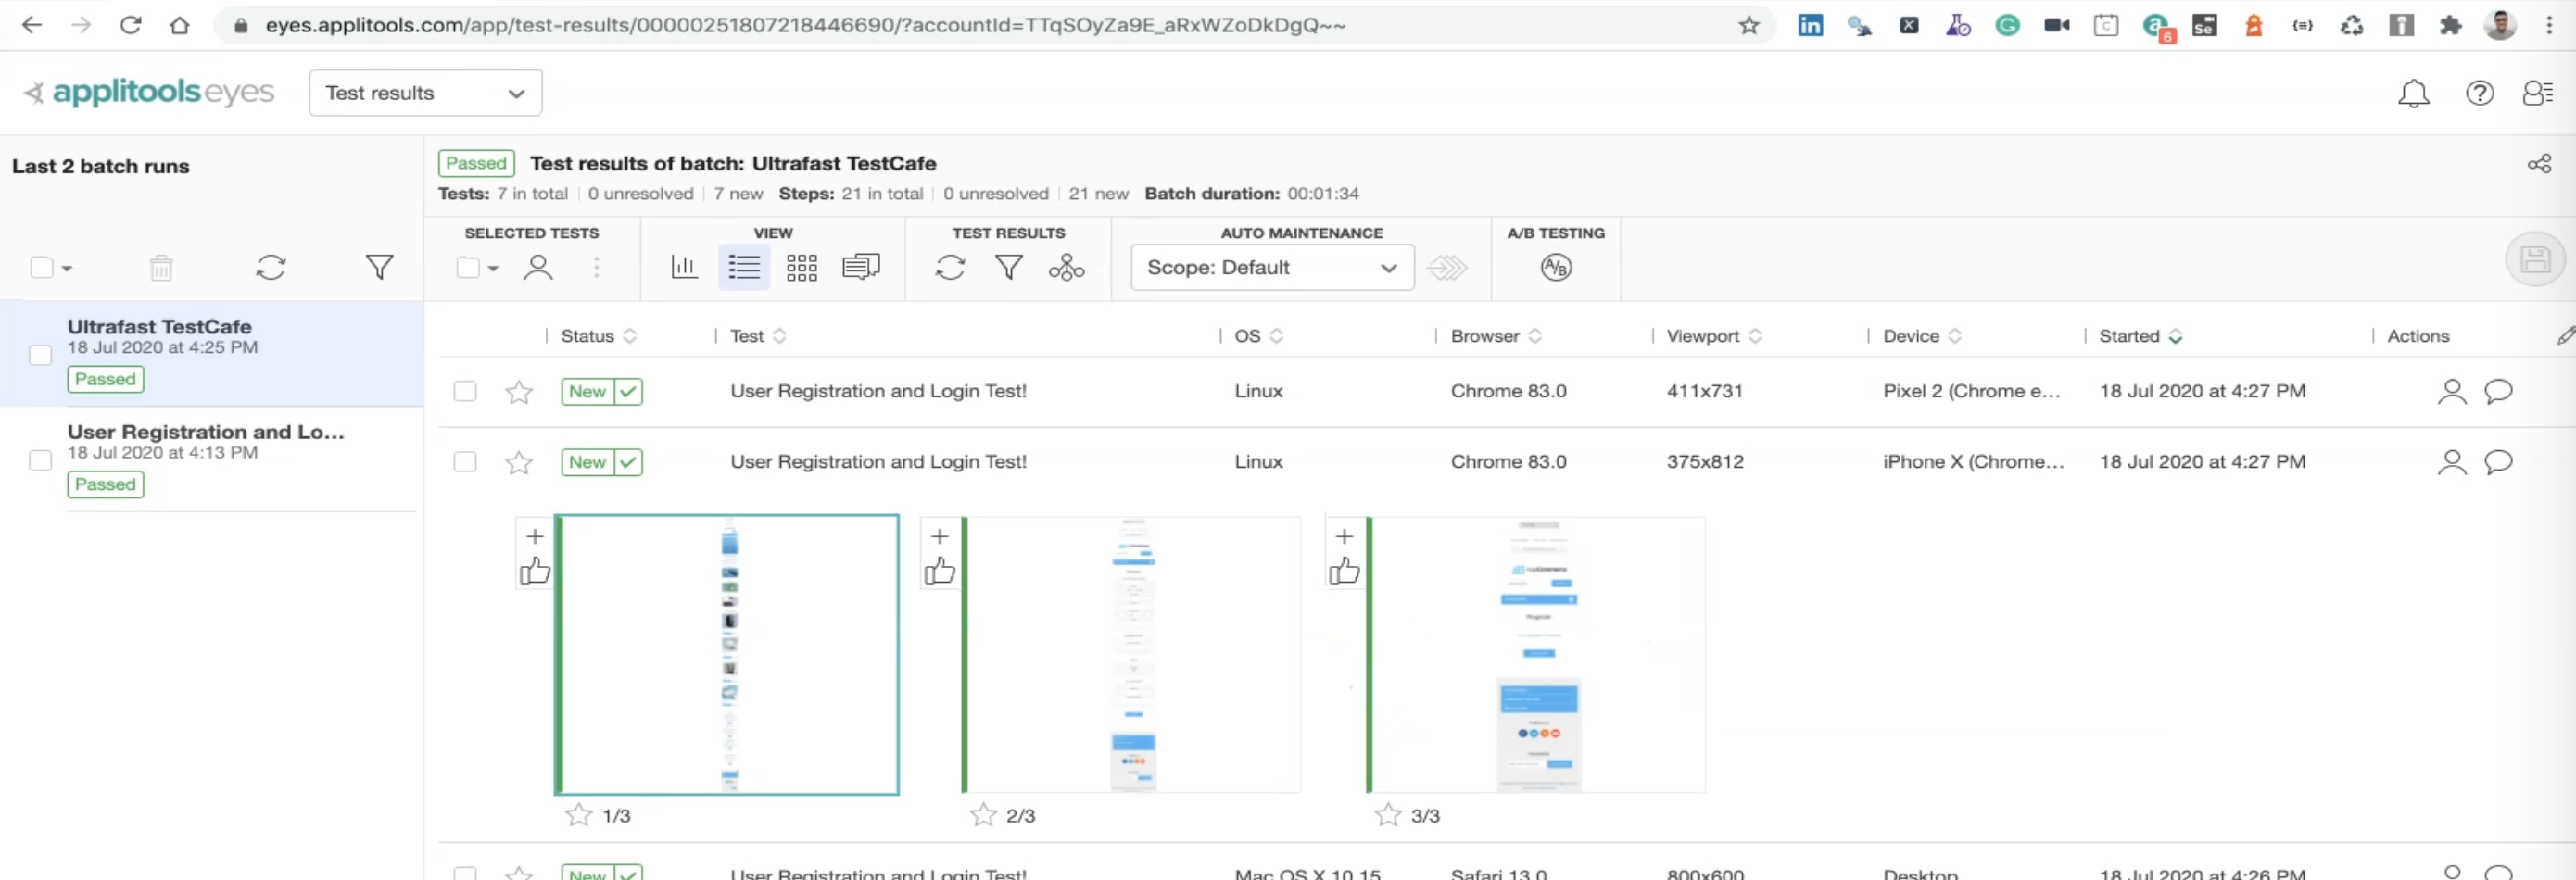
So here we have the registration page, the register page itself, the success page, and this is a homepage and we are taking a screenshot for all the pages.
If we open on Internet Explorer to check the view of the website, we have a different view because it's a desktop, not mobile.
If we open Firefox on Linux, we have the view here and we have the screenshot.
This is the main idea about how we can integrate Applitools Eyes or Applitools Eyes SDK with TestCafe and running our test to check the visual validations and to check the difference between our test cases, and we can check if we have any problem in our web application or our website.
