

Transcripted Summary
After we covered the User Registration and User Login in our previous demos, now it's time to add:
Change currency
Search about product
Add the product to cart
Checkout with the registered user
Place order
So let's do our end-to-end scenarios and check what page objects that we need to add for these functions.
In our next test case, we need to start by searching for a product.
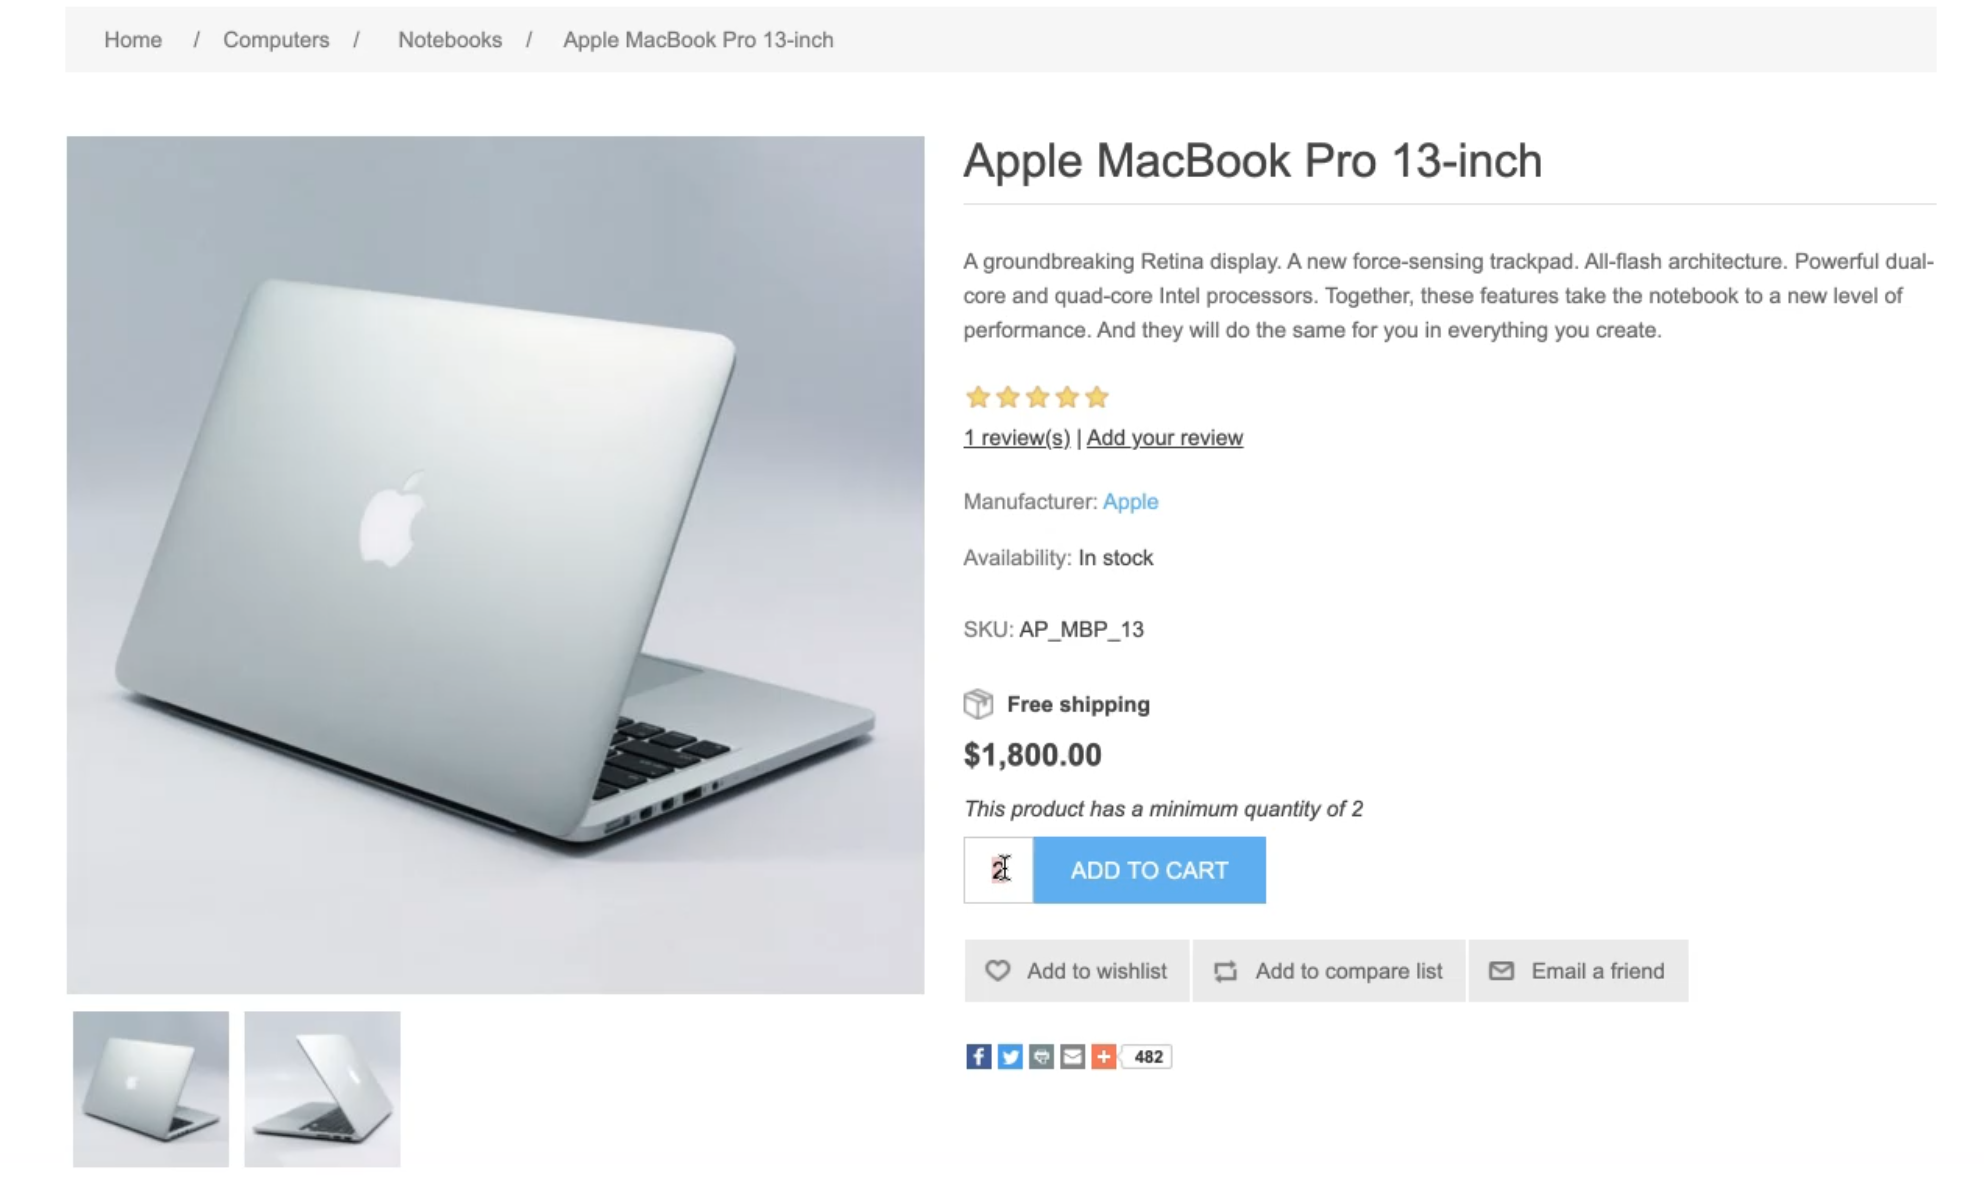
For example, here we will search for "Apple" and then we can select the "Apple Mac Pro".
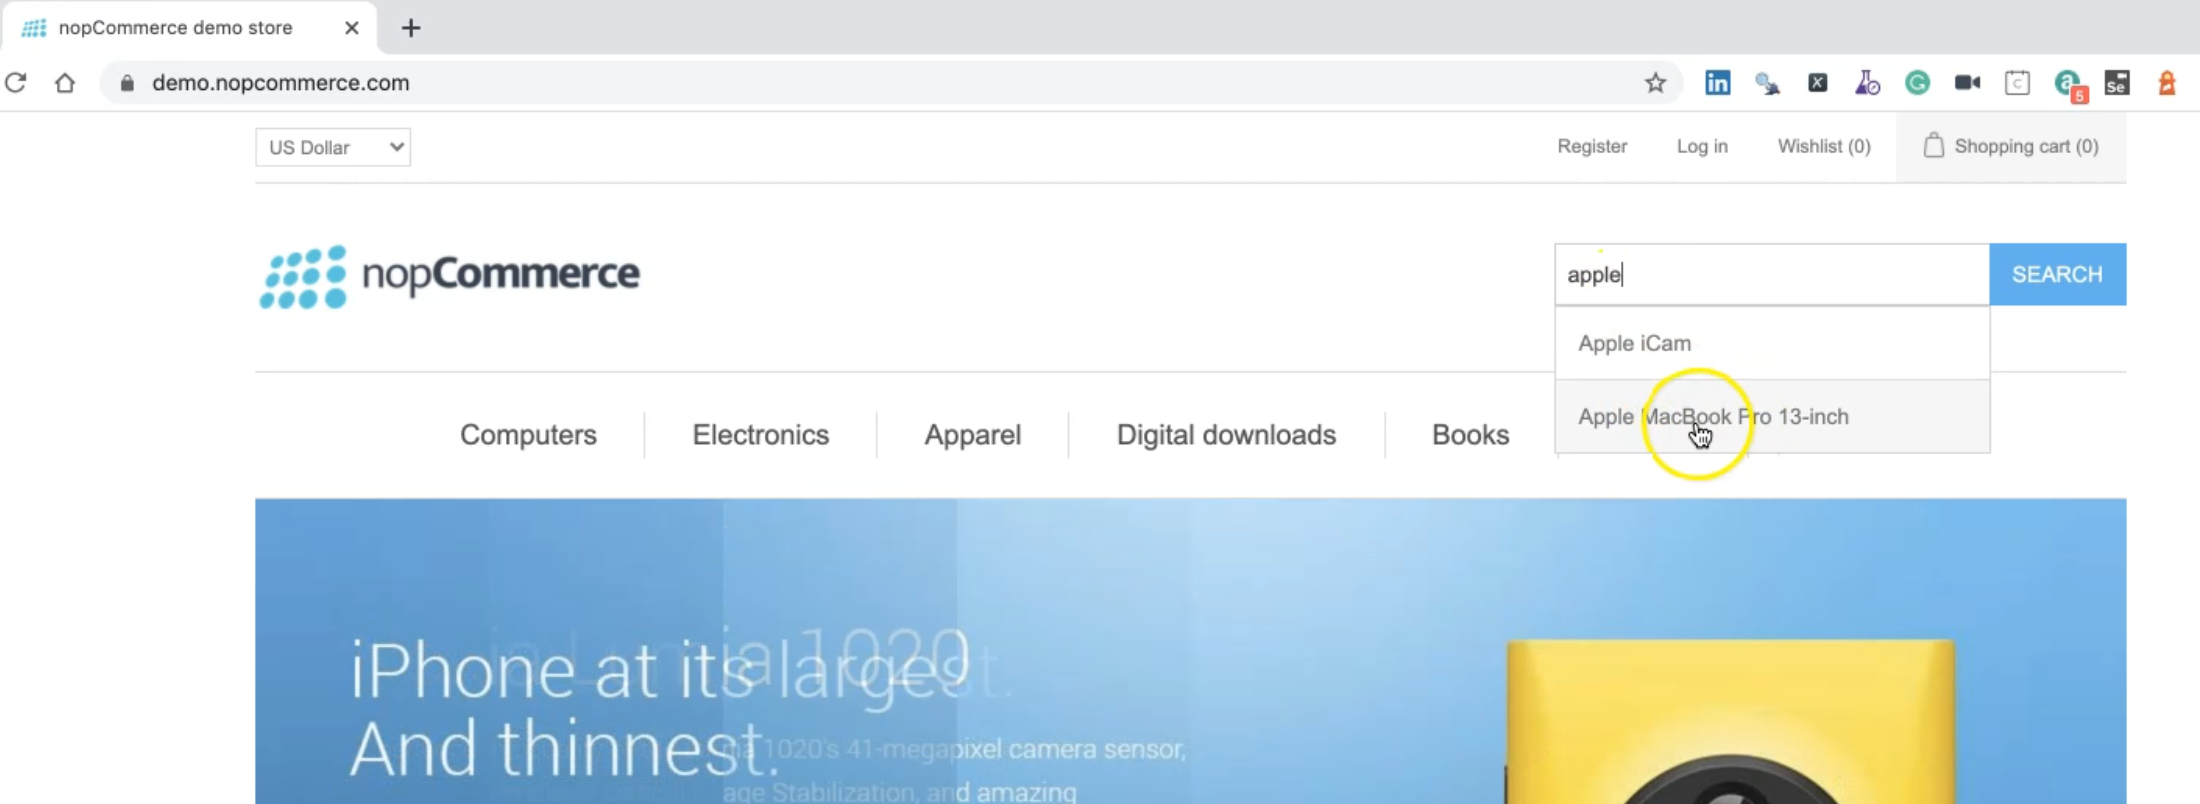
After that, we can go to the product details page.
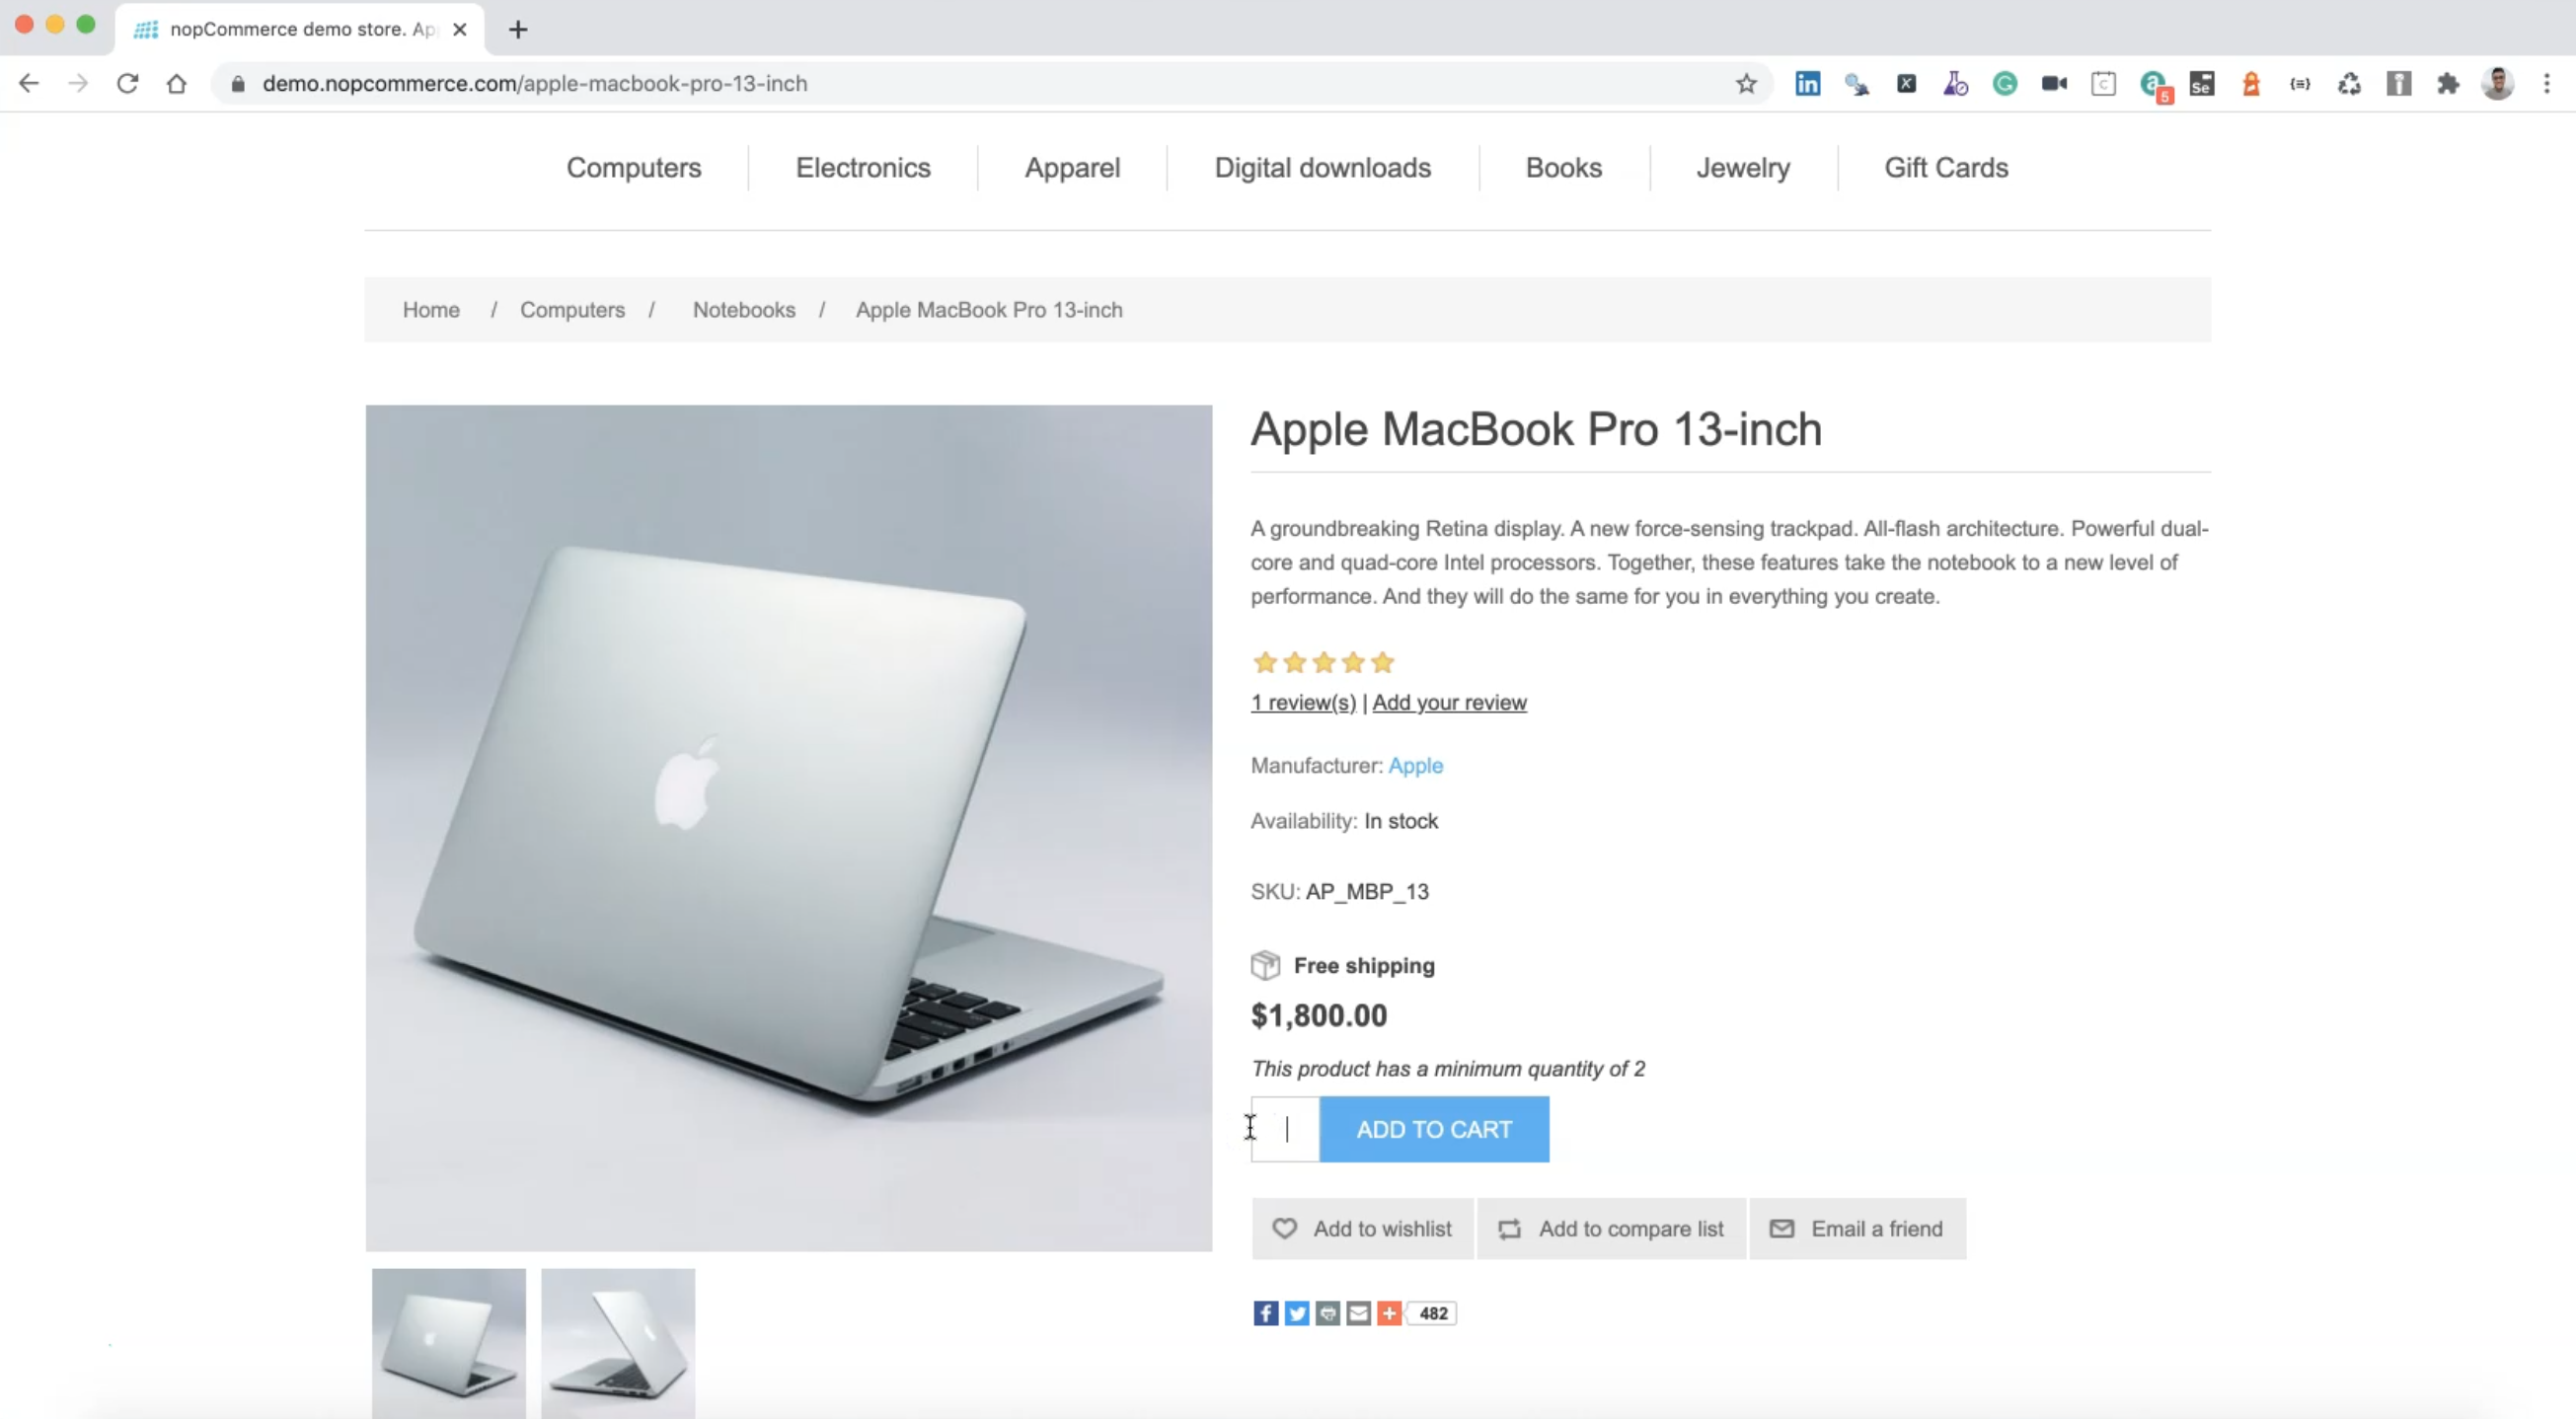
We can remove items and we can add, for example, 3, and then we need to click on "Add to cart".
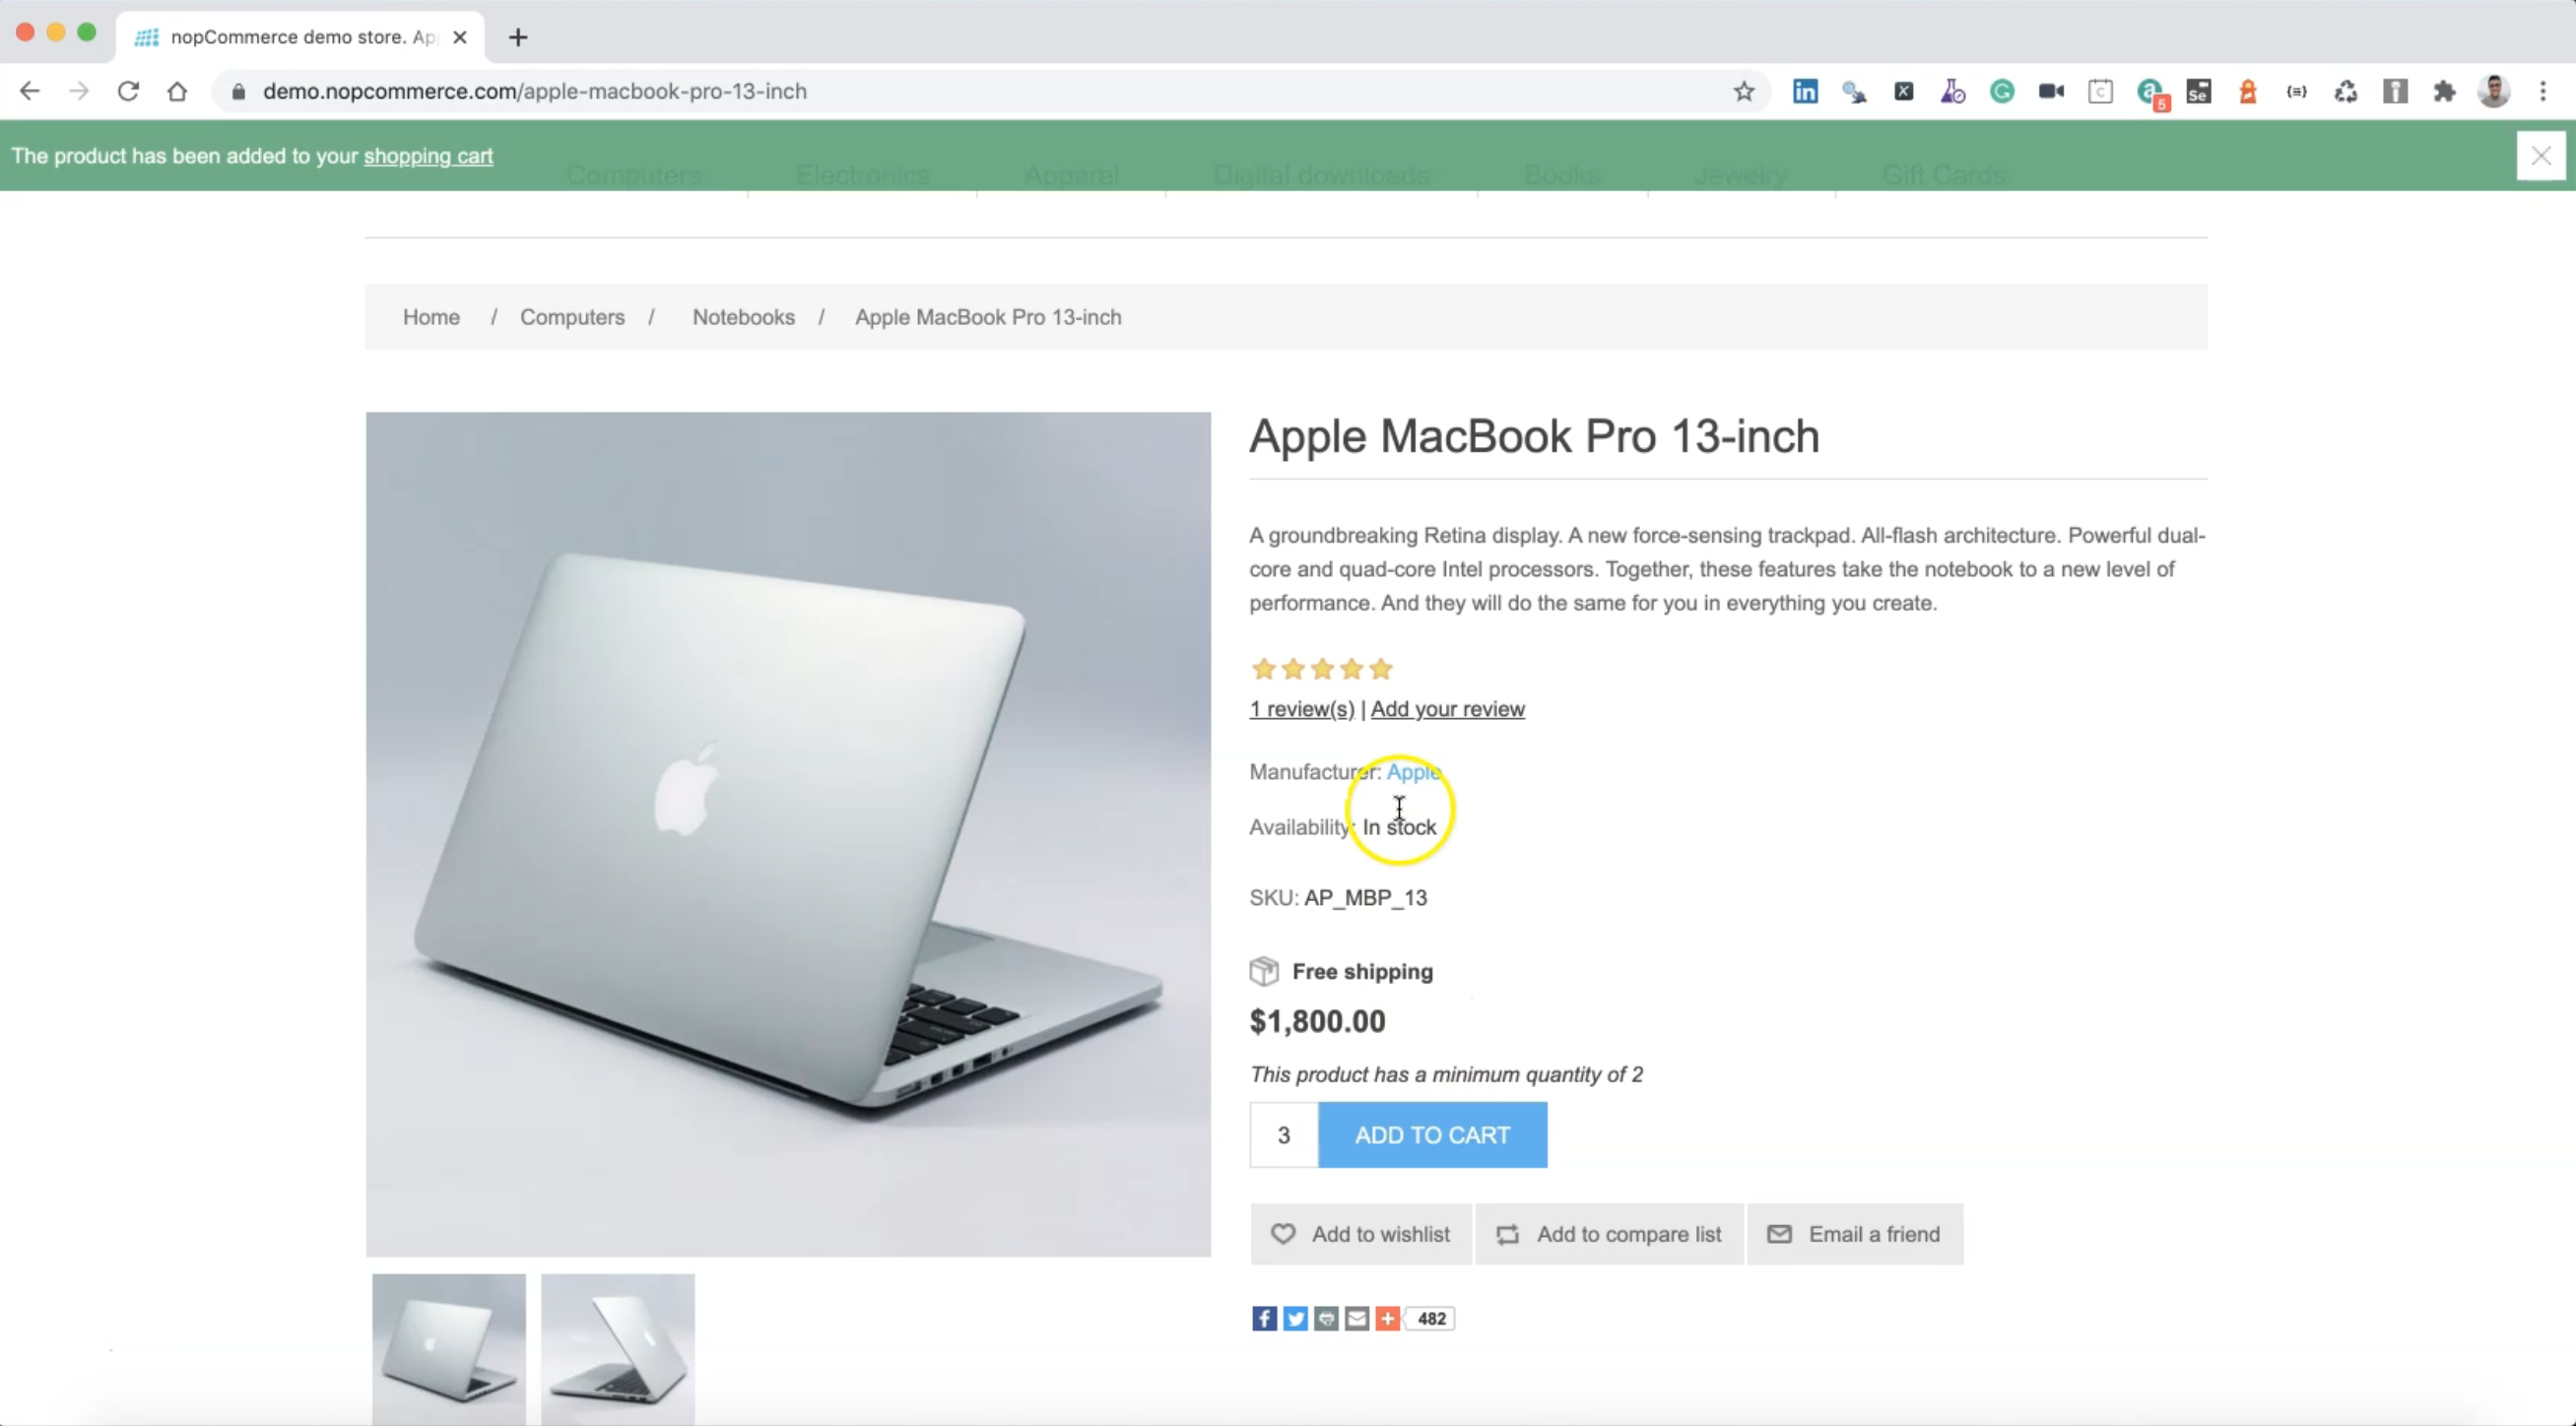
After that, we need to wait until this notification is displayed or not displayed or dimmed, and after that, we can click on the shopping cart.
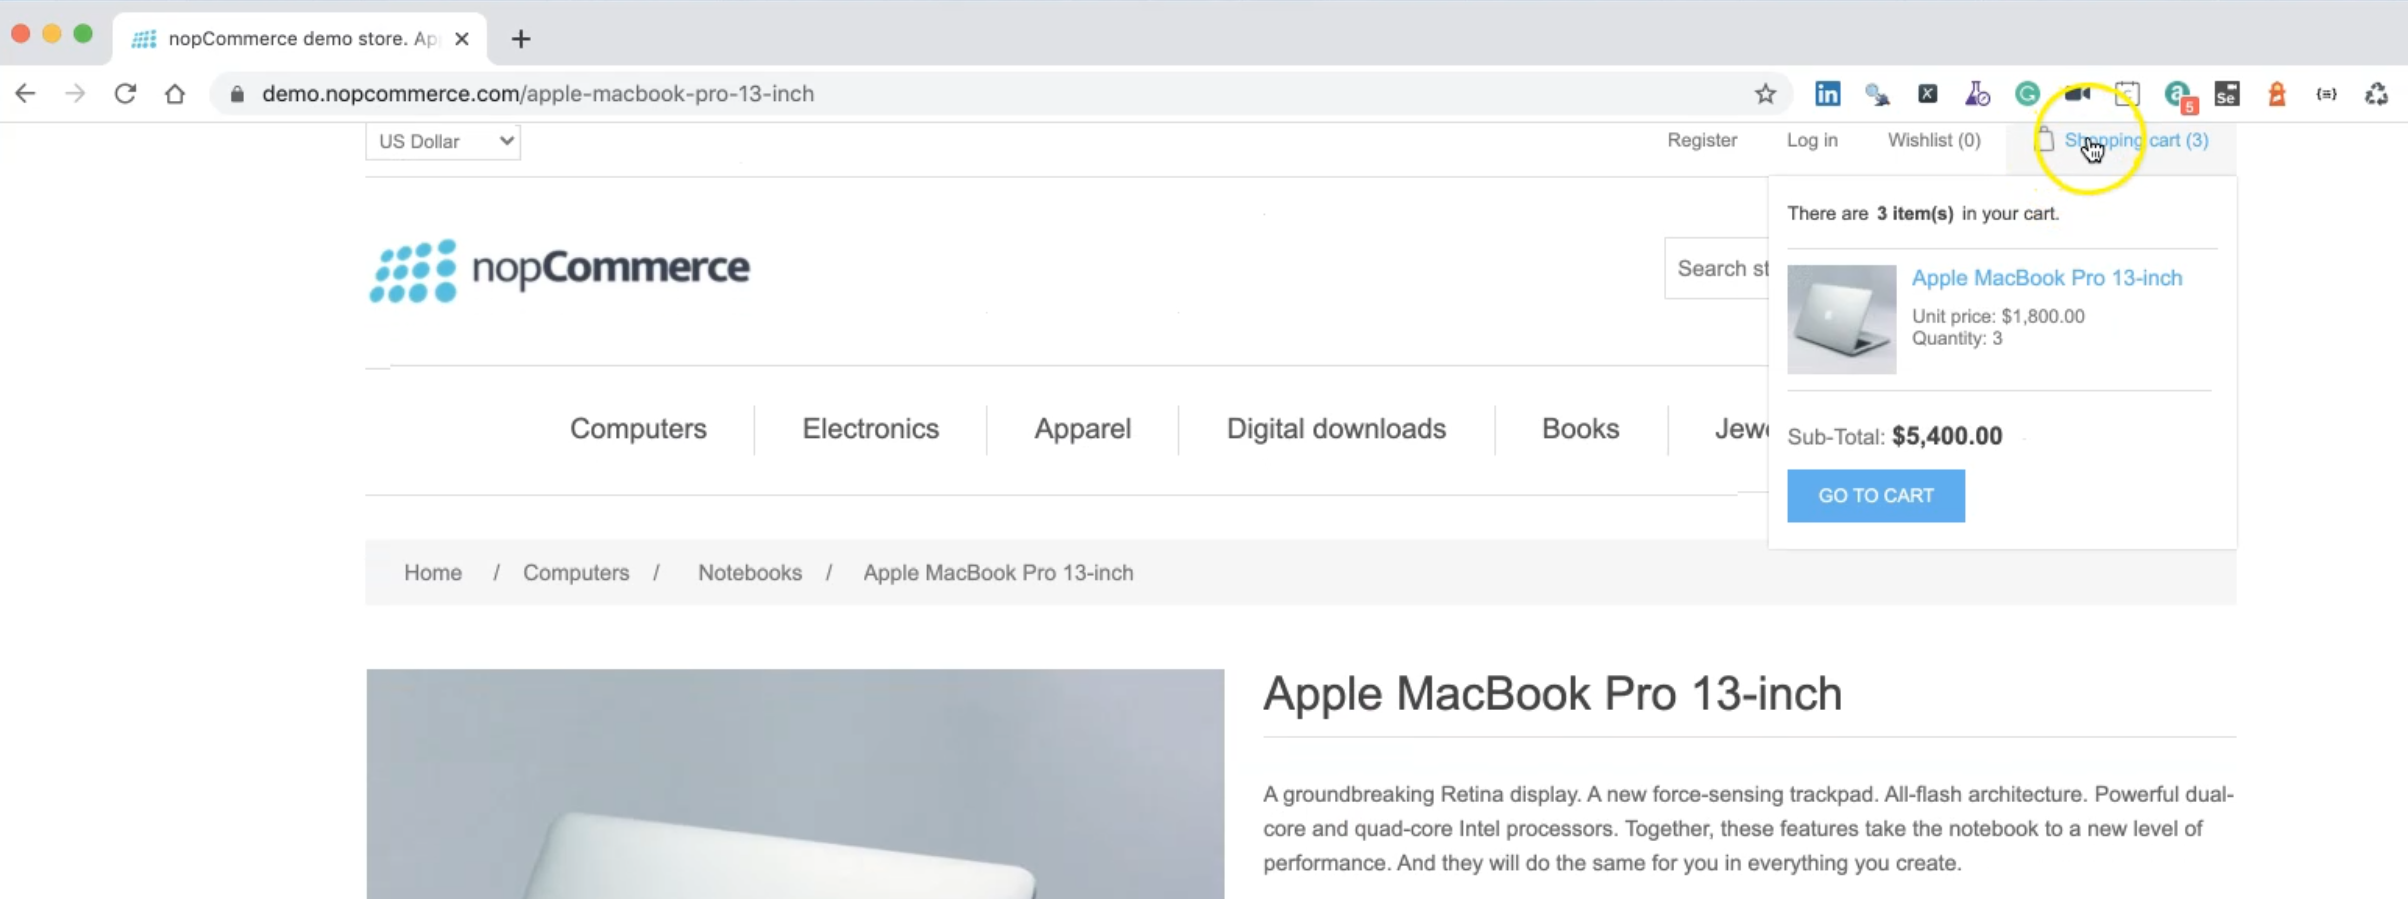
We can click on the shopping cart from the notification or we can just close it and click on the "Shopping cart".
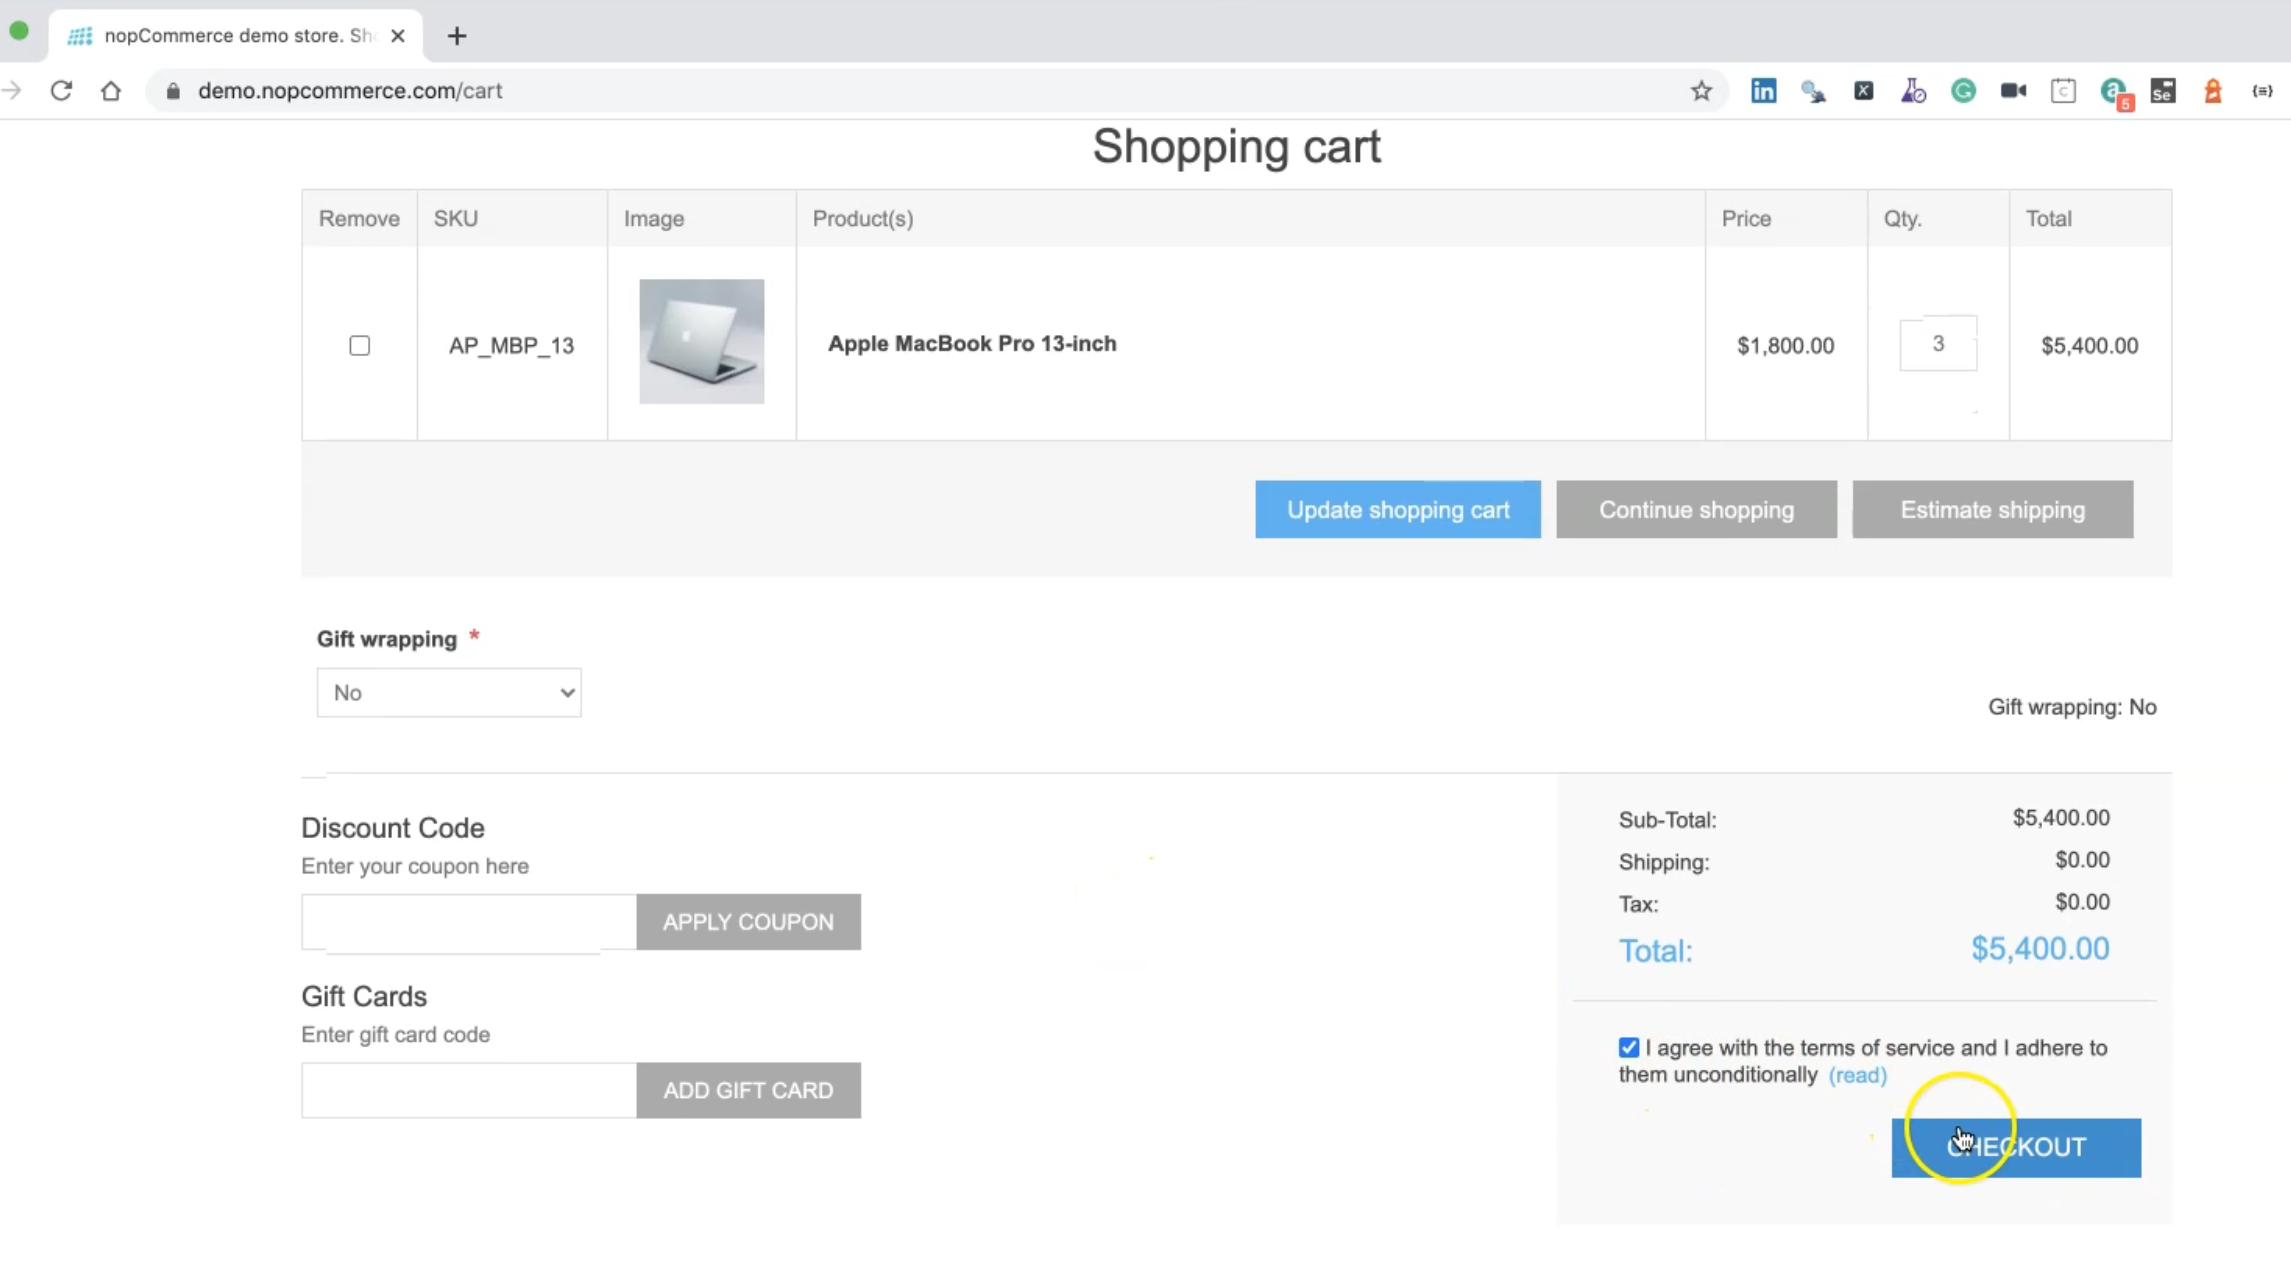
After that, we can continue to the checkout, click on the "Agree terms" and then click on "Checkout".
But with the checkout, we need to be registered or we can continue with a guest.
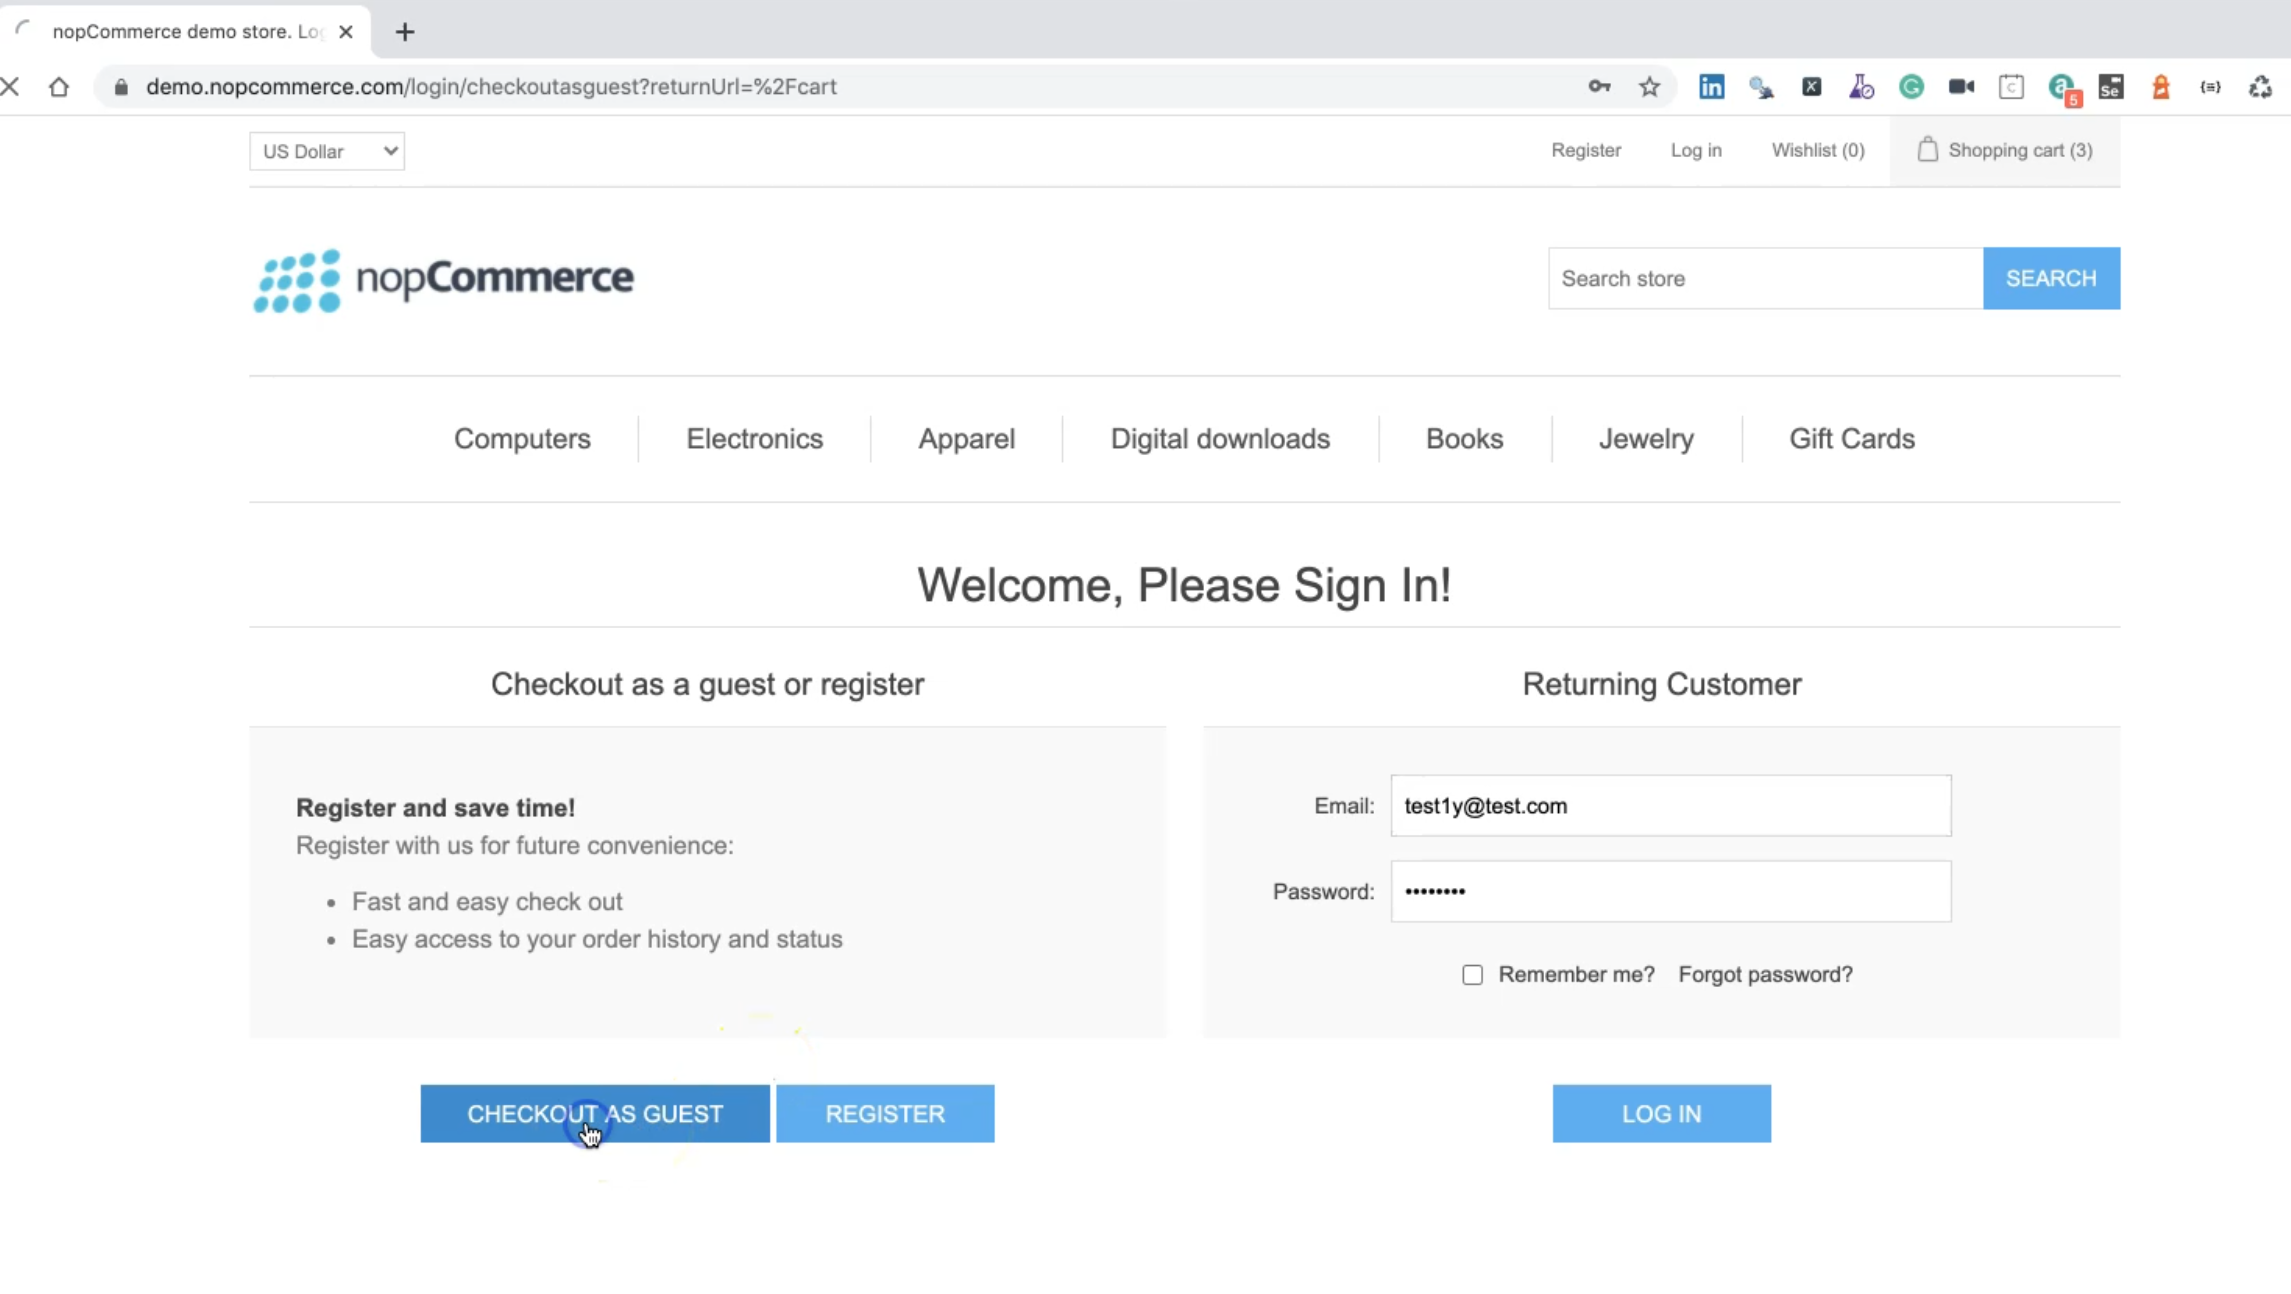
If we checkout as a guest, we need to find what is the page "Checkout".
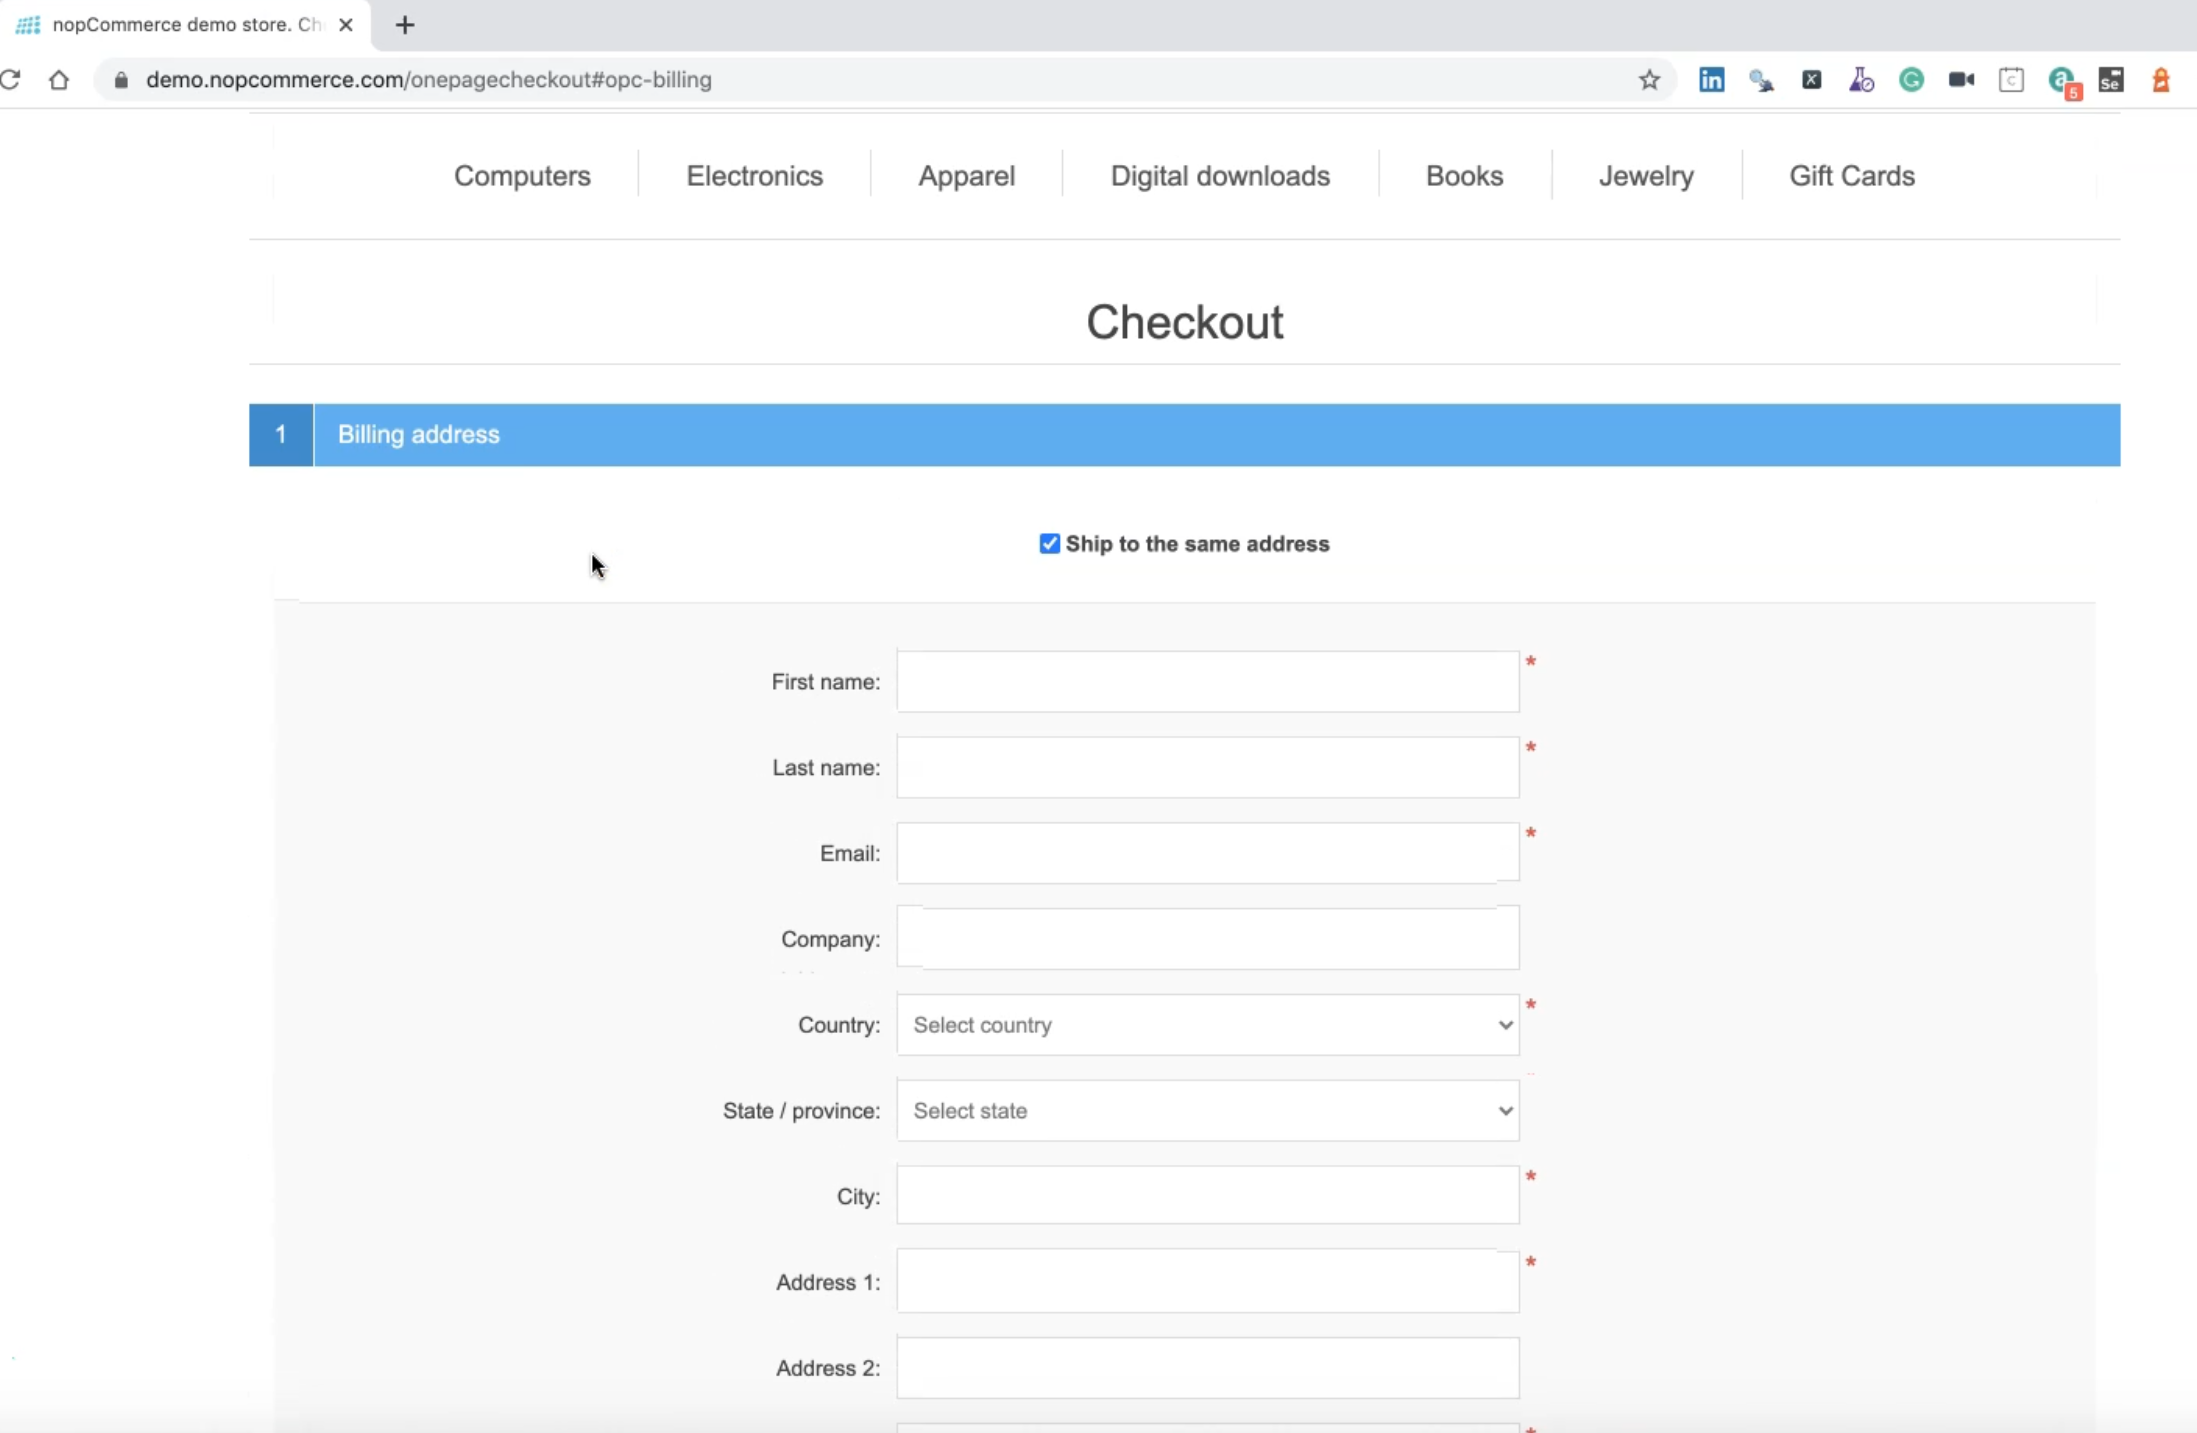
Here we have different data and we need to fill all the required data during our checkout page.
We have the billing address, shipping address, shipping method, payment method, payment information, and confirm the order.
These are the pages that we need to work with. For example, we need to go to the product details, checkout page, and after that, continue with the placing order.
# ProductDetailsPage.js
We will start with the product details page object.
In our project, under pages, we will create our new page named ProductDetailsPage.js.
Then we can start adding our data.
What do we need from this one?
We need to check that the price is displayed correctly.
We need to find the textbox for the product quantity, and we need to change the value or remove the value, and after that add our value.
We need to find the "Add to cart" button.
In our test case, these are our elements.
import { Selector } from 'testcafe';

class ProductDetailsPage{
    constructor() {
        this.productPrice = Selector("span[id='price-value-4']").withText('$1,800.00')
        this.prductQuantity = Selector('input#product_enteredQuantity_4.qty-input')
        this.addToCart = Selector("input[id='add-to-cart-button-4']")
        this.successMessage = Selector('div.bar-notification.success');
      }
    }
export default new ProductDetailsPage();
We are importing as usual - import { Selector } from testcafe.
With class ProductDetailsPage, we have a constructor.
We have the product details or productPrice, with a span with the price value withText() to assert or verify that the number is displayed correctly.
Then we have a productQuantity with a Selector input#product_enteredQuantity_4.qty-input and we have an add to cart button and we have a successful message after we add the product to the cart.
So we have a notification bar that includes the success notification.
So this is our product details page.
Then we need to remove the quantity value and add 3 and add to the cart.
Then this is a notification and we need to go to the shopping cart.
# CartPage.js
The second page will be the cart page, so in our test case, we can add just one additional page and name it CartPage.js, and inside the cart page, we can find all the data inside the cart.
In the cart page, we don't need to change anything here, just we need to click on the "Agree" checkbox and after that, we can click on the "Checkout" button.
import { Selector } from 'testcafe';

class CartPage{
    constructor() {
        this.termsLabel = Selector('input#termsofservice')
        this.cartTotal = Selector('td.cart-total-right')
        this.checkoutBtn = Selector('button#checkout.button-1.checkout-button')
    }
}
export default new CartPage();
Here we can just have three things.
So we are also importing Selector.
In CartPage, we have the termsLabel and we just need to check or click on these terms.
We have the cartTotal, so we can just have the cart total amount here.
And we have the checkoutBtn to be able to continue with the checkout, because if we click checkout, so we will find the message that we need to accept the terms of the service, to be able to continue with the checkout.
Let's go through the checkout, but with our test, "Welcome, Please Sign In!" will not be displayed because we will be already registered with our account since we will continue with the registration test case, but let's continue with the checkout page.
Here we can find all the elements that we can find.
We need to fill the data in Step 1 to be able to view the rest of the data. So here, we can add any data - select the Country, select the "Other" for the State/province, we can add the first name, last name, and email.
Let's try to continue.
Here we have the shipping method.
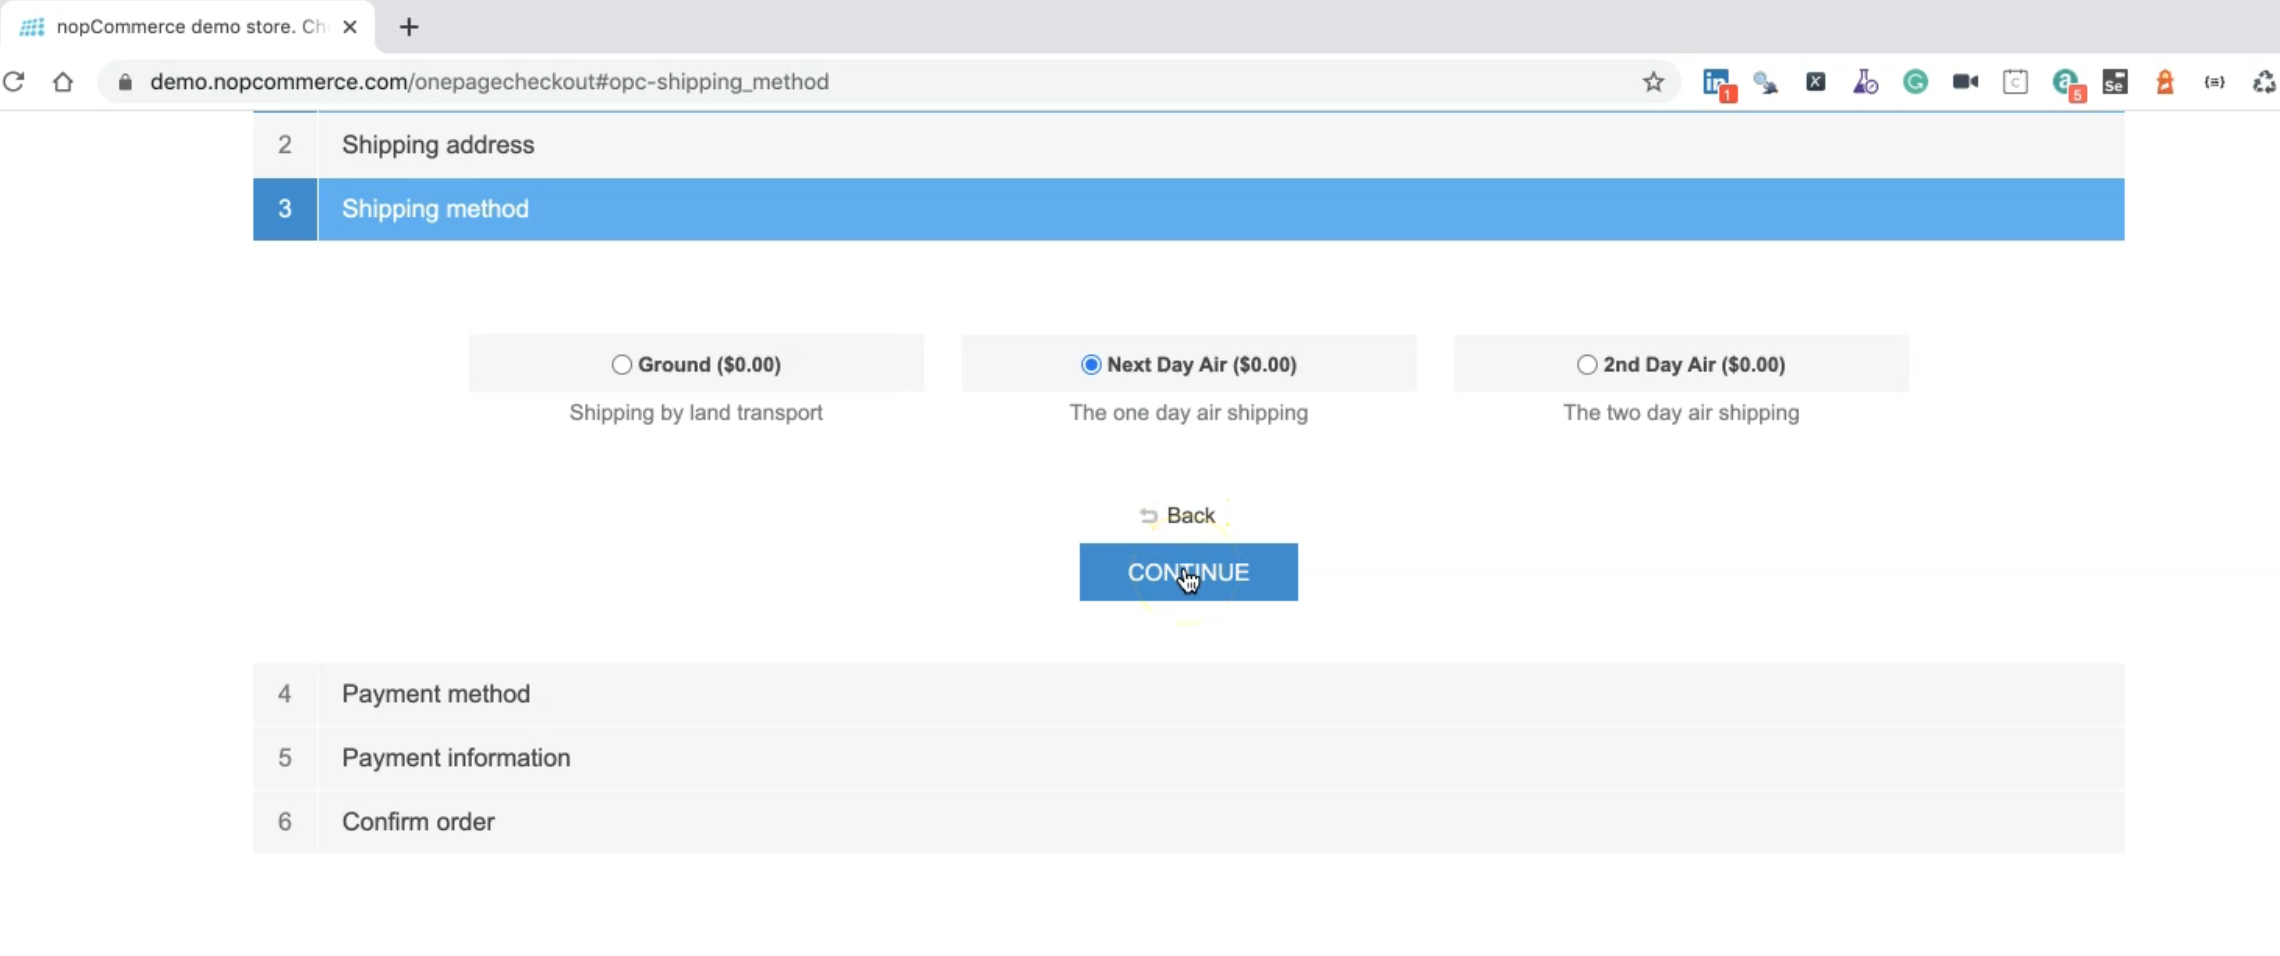
By default, we can leave "Ground" or we can click on "Next Day Air".
Then after that, we can click on the "Continue" button.
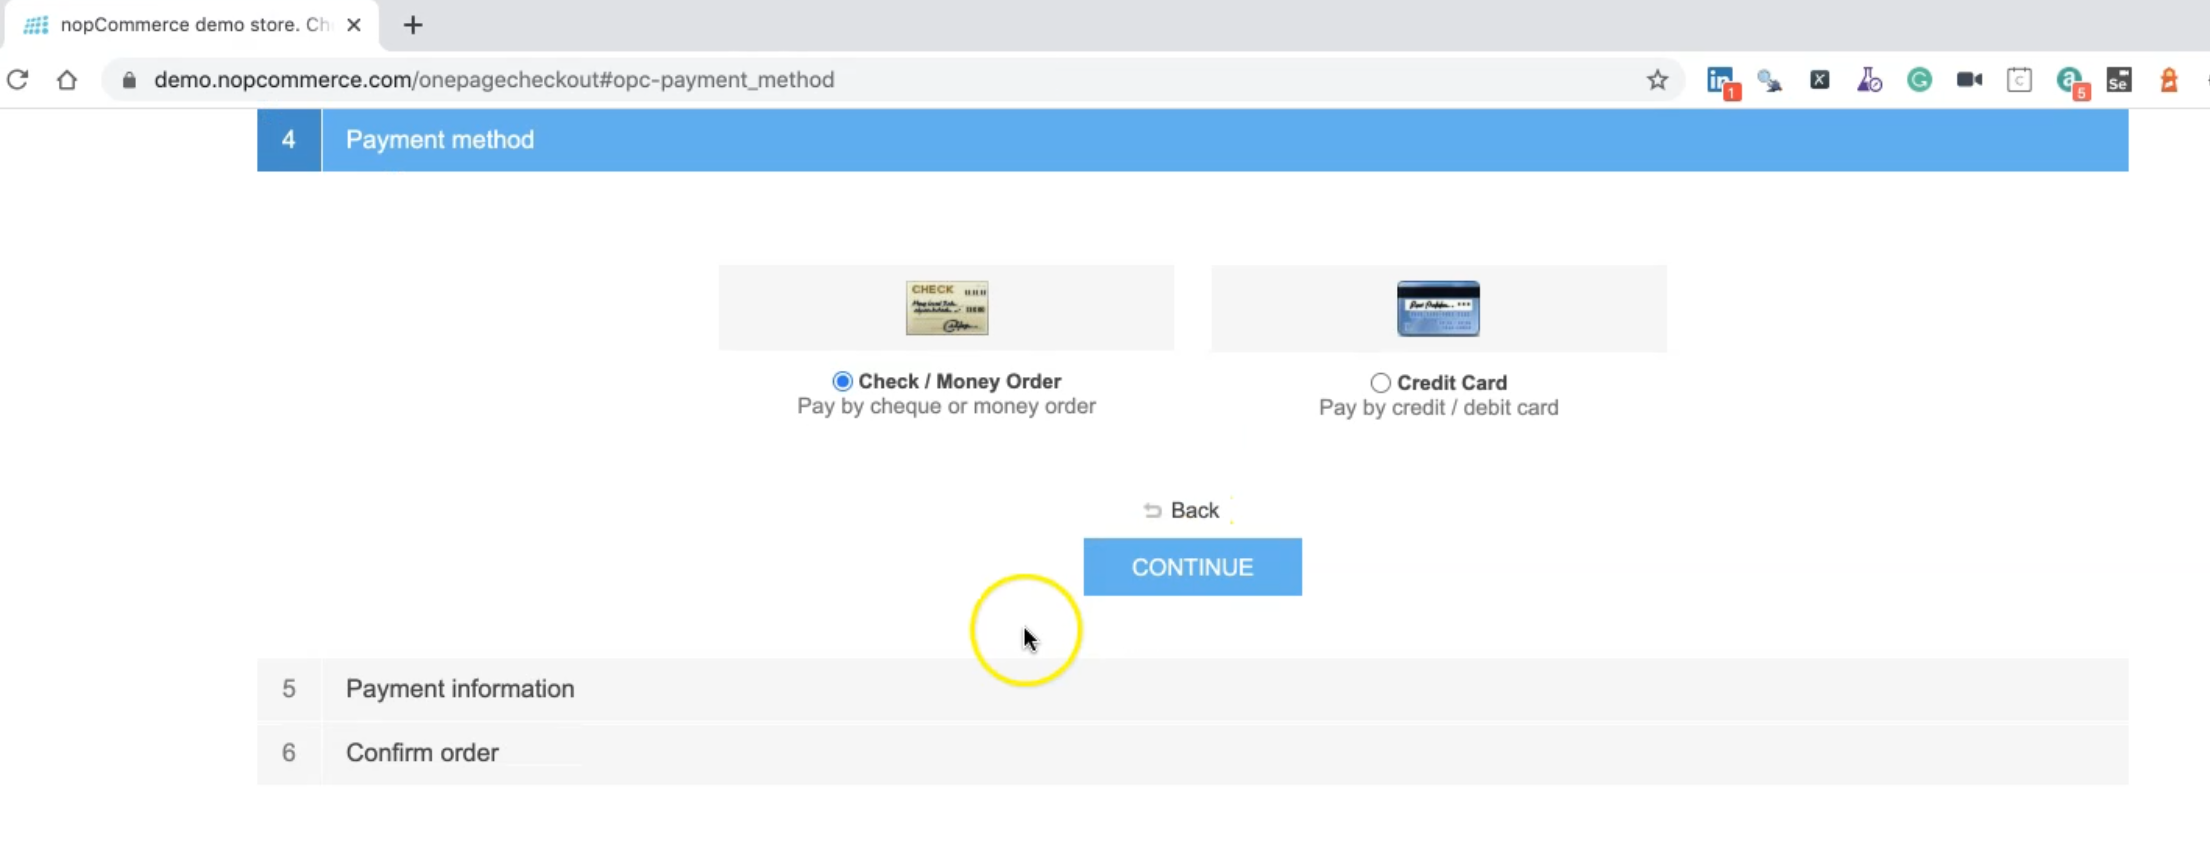
Then we can leave the "Payment method" as "Check / Money Order" details and after that, we can "Continue" to the "Payment information".

Then after that, we can click on the "Continue" button.
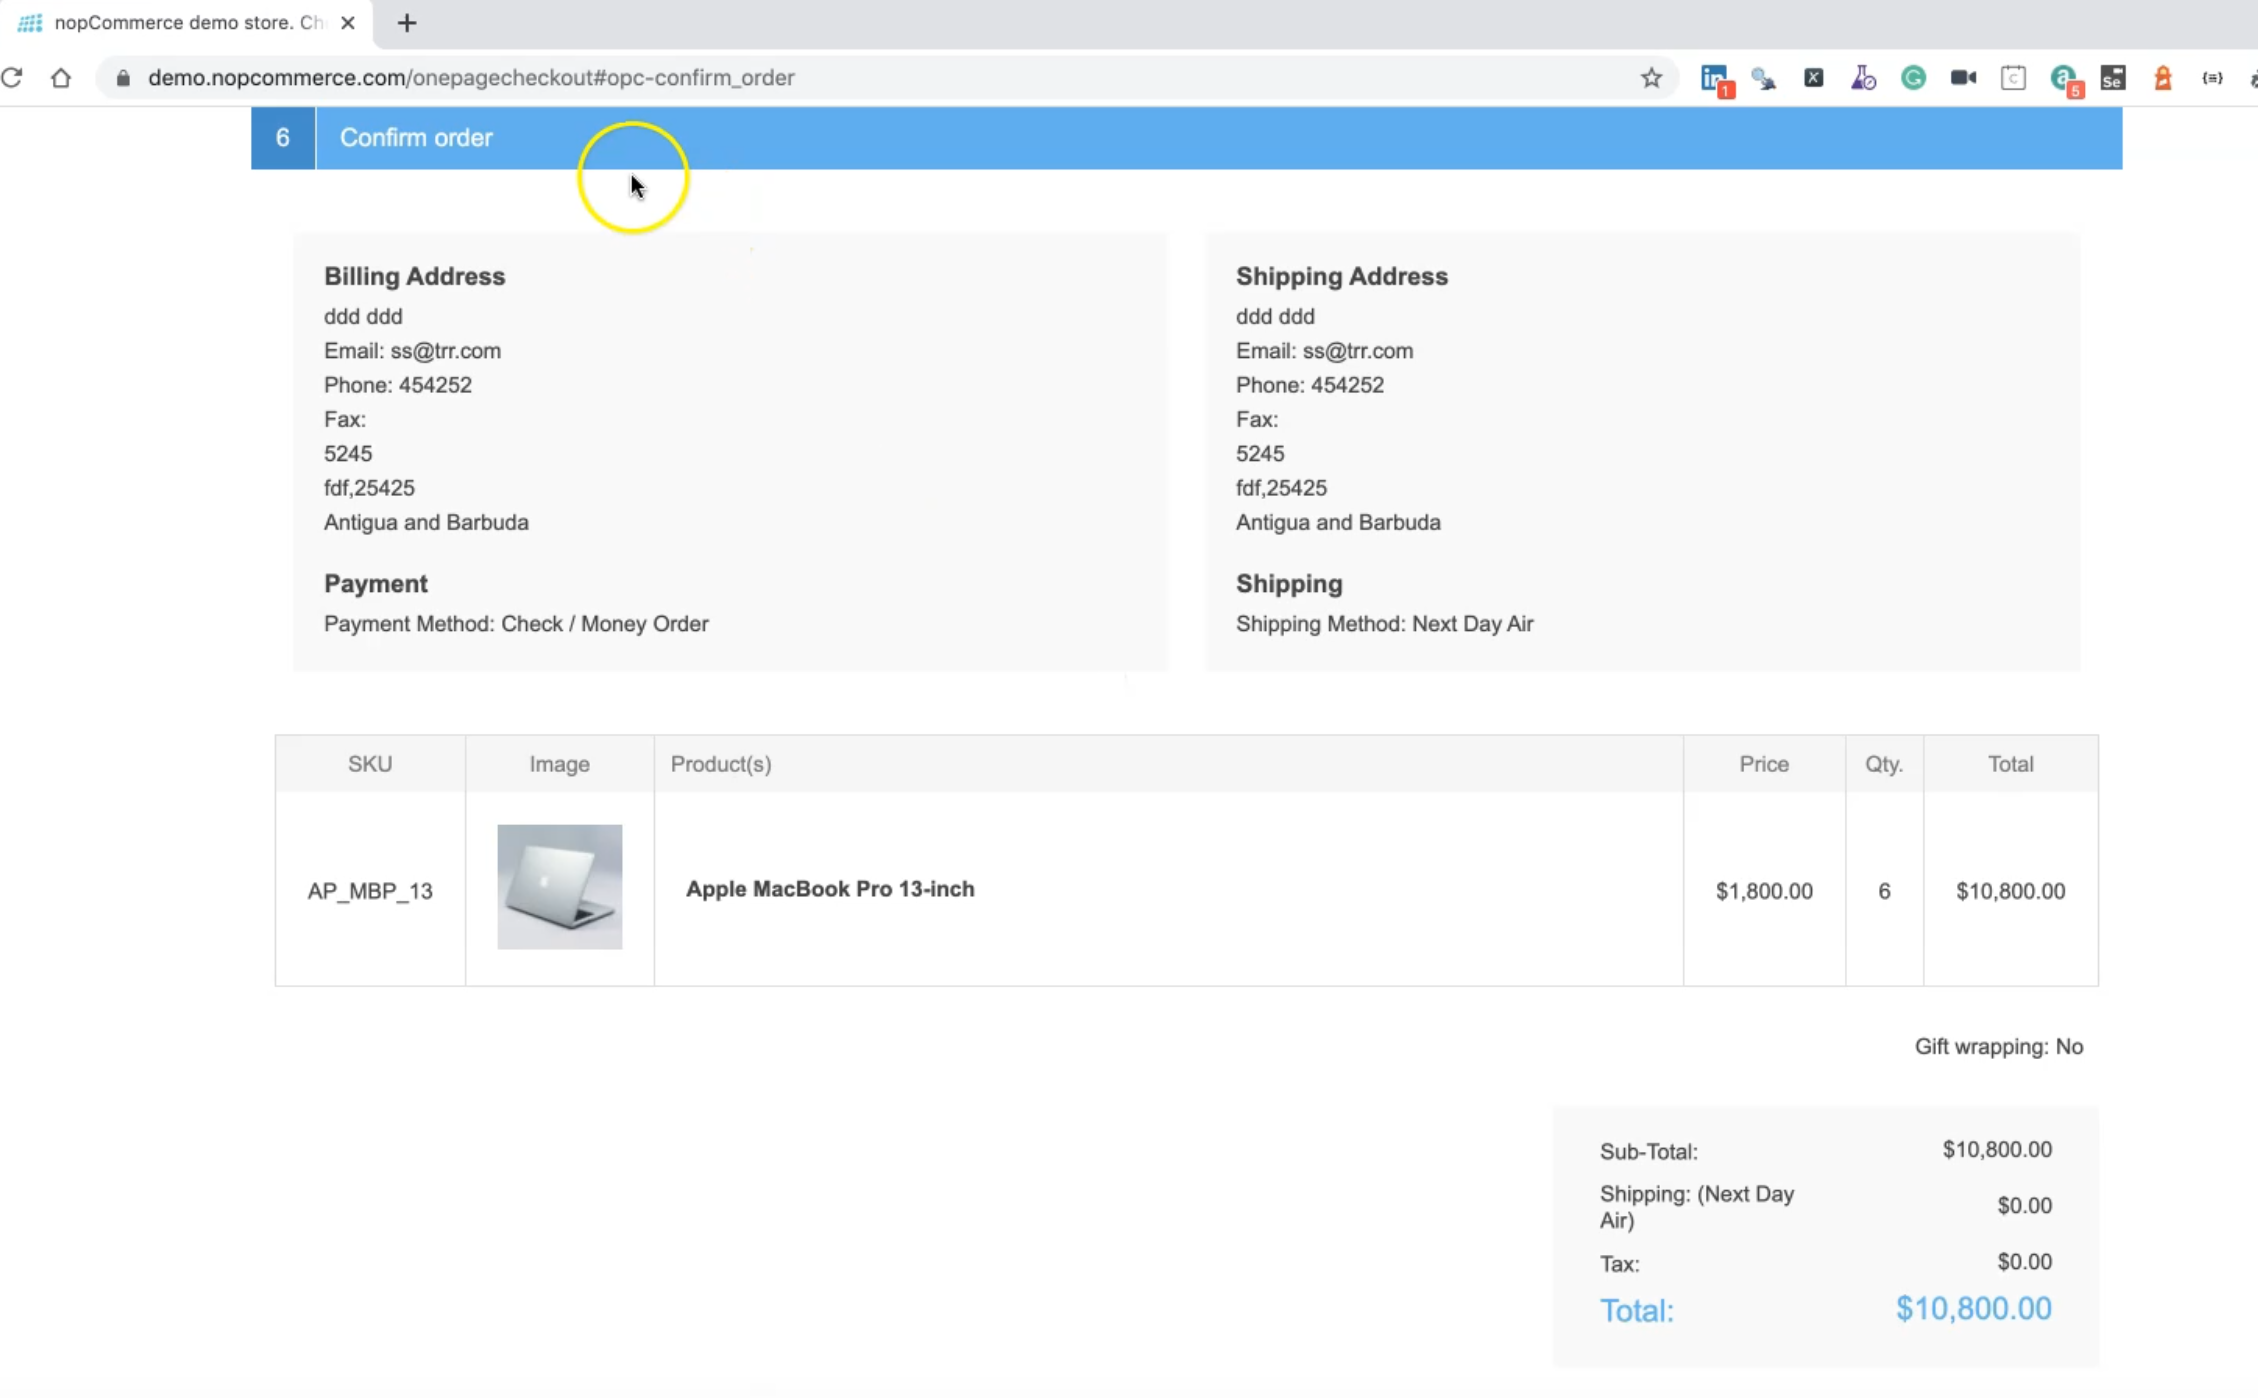
So we need to find all of these elements in our cart page or place an order. After that, we can click on "Confirm" to place the order.
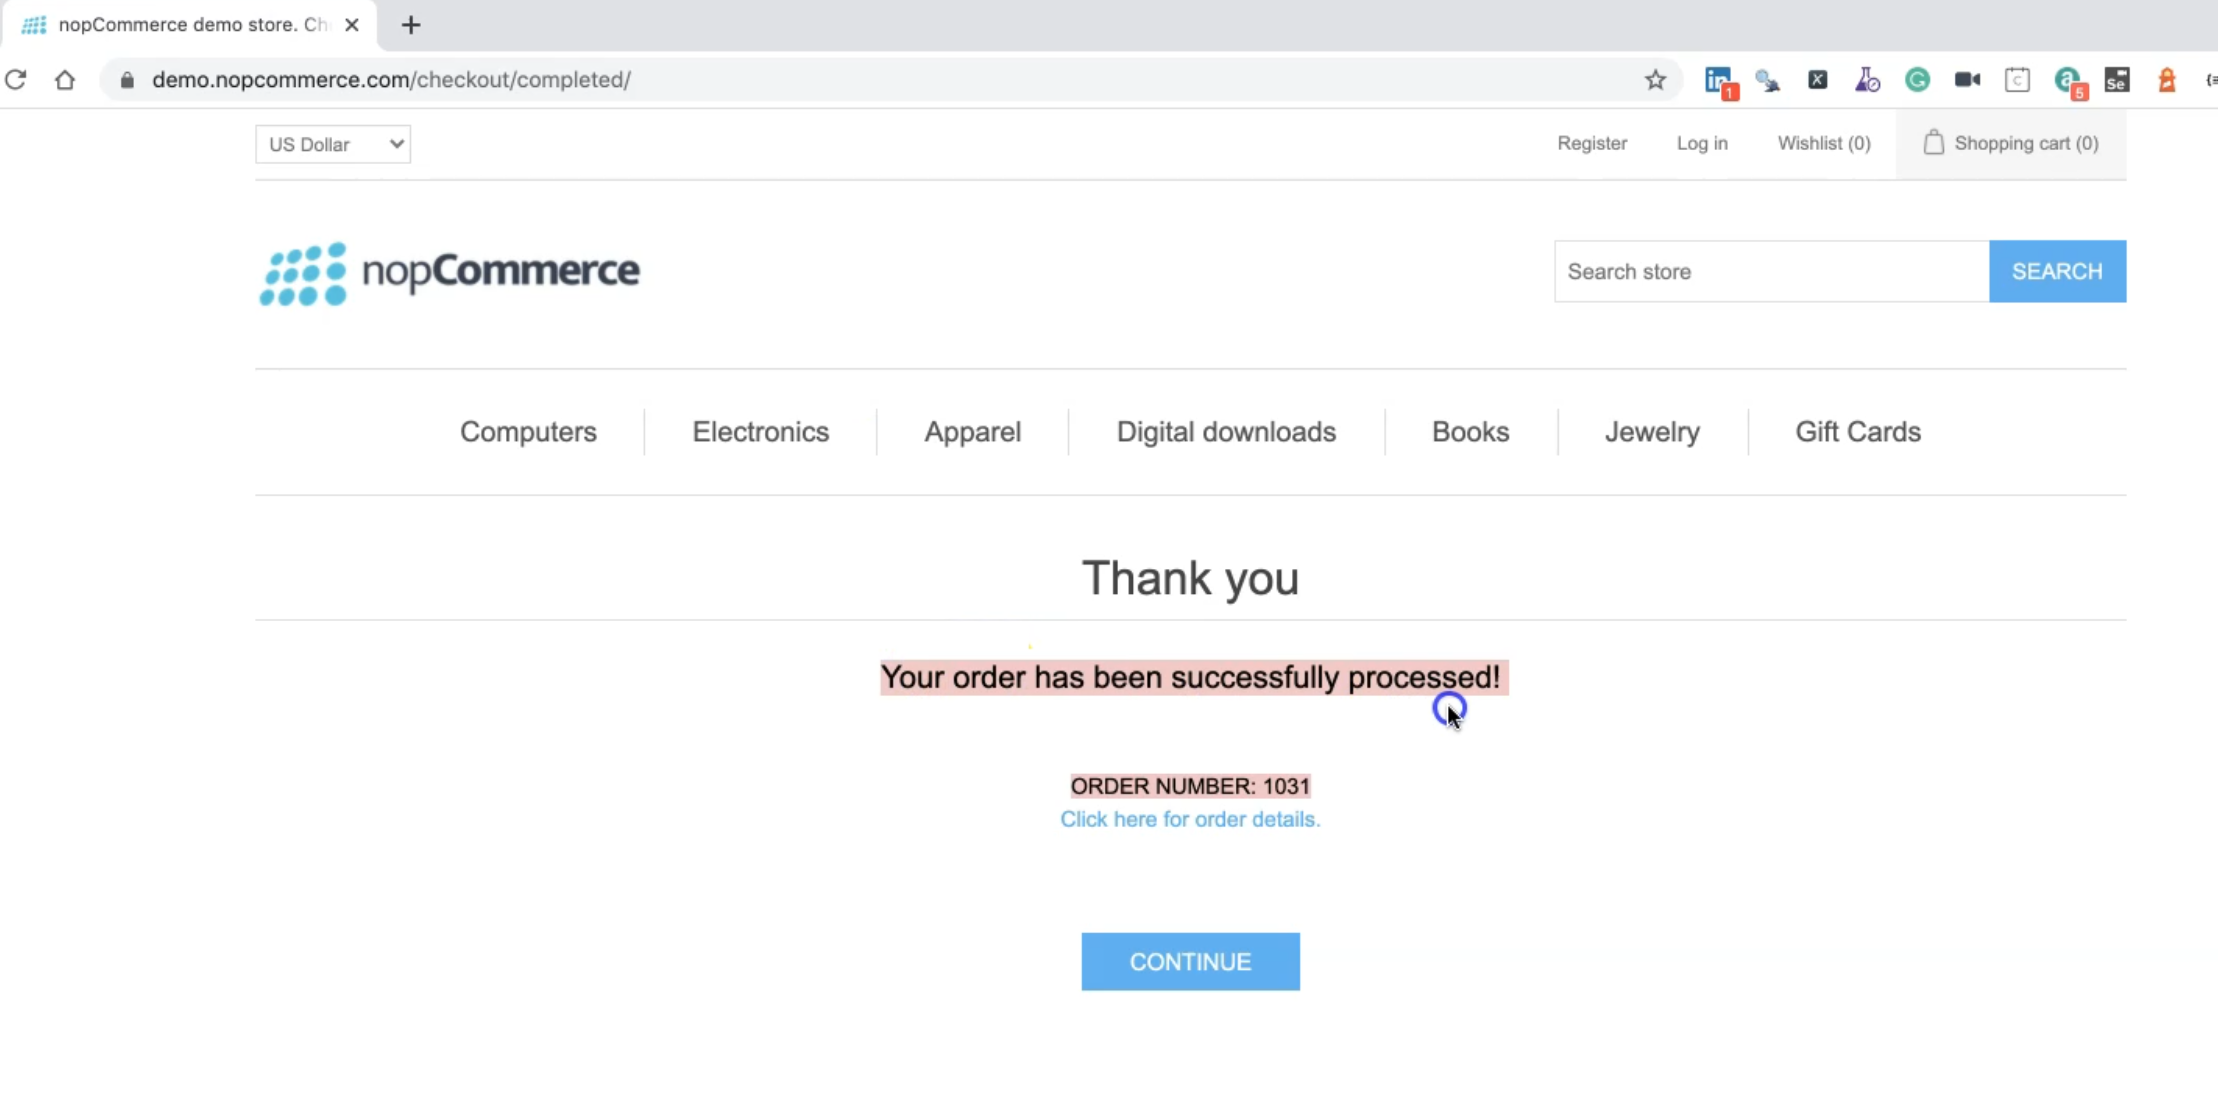
Then we can go again to "My orders" inside our account and check that this message is displayed. And in my account, I can find the order is displayed.
In our pages folder, we still have one page object left.
We need to add one for the checkout page - we can just name it, CheckoutPage.js, and then inside CheckoutPage, we can find all the elements.
import { Selector,t } from 'testcafe';

class CheckoutPage{
    constructor() {
        this.countryList = Selector("select[id='BillingNewAddress_CountryId']")
        this.cityTxt = Selector("input[id='BillingNewAddress_City']")
        this.addressTxt = Selector("input[id='BillingNewAddress_Address1']")
        this.zipTxt = Selector("input[id='BillingNewAddress_ZipPostalCode']")
        this.phoneTxt = Selector("input[id='BillingNewAddress_PhoneNumber']")
        this.continueBtn = Selector('input.button-1.new-address-next-step-button')
        this.nextDayOption = Selector("input[id='shippingoption_1']")
        this.nextShippingBtn = Selector('input.button-1.shipping-method-next-step-button')
        this.nextPaymentBtn = Selector('input.button-1.payment-method-next-step-button')
        this.nextConfirmBtn = Selector('input.button-1.payment-info-next-step-button')
        this.confirmOrderBtn = Selector('input.button-1.confirm-order-next-step-button')
        this.orderConfirmationMessage = Selector('strong').withText('Your order has been successfully processed!')
        this.viewOrderDetailsLink = Selector('a').withText('Click here for order details.')
    }

    async selectCountry(country){
        const countryOption = this.countryList.find('option');
        await t
        .click(this.countryList)
        .click(countryOption.withText(country));
    }
}
export default new CheckoutPage();
We can import the Selector and t.
Inside the constructor in the CheckoutPage, we can get the countryList because we need to fill in the address. cityTxt, addressTxt, zipTxt, phoneTxt, continueBtn, nextDayOption, nextShippingBtn... these are all the elements that are required to be clicked in our place order form and confirms the order.
After that, we have the orderConfirmationMessage, which contains "Your order has been successfully processed".
Then we have viewOrderDetailsLink and we can find the 'Click here for order details' page. So this is just to verify that we already placed the order on our page.
So here we have completed our page objects, and now it's time to write our test case for placing an order with TestCafe and the page object model.
Resources
Quiz
The quiz for this chapter can be found in 7.7
