

Transcripted Summary
In this demo, we will create our first test case using TestCafe and JavaScript.
After we prepared our project by installing TestCafe using NPM and adding node_modules in our project, and also the package.json that includes TestCafe in the dependencies file.
It's time now to start writing our first test.
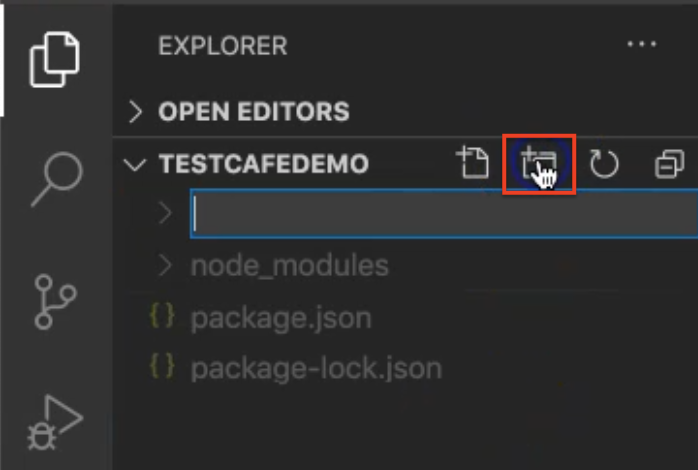
But at the beginning, we will start creating a new folder by clicking on this icon and we will name it tests.
Under this package or folder, we will create a new file. For example, we will name it firstTest.js because we will be using JavaScript for writing TestCafe test cases.
Then we will start by writing - as we mentioned in our slides - by writing the fixtures. So, here we can say fixtures, and here we have auto-suggestion. This is one benefit from Visual Studio Code - that we have auto-suggestion for our code snippet using Visual Studio Code.
We will add fixture and after that, we will pass the name.
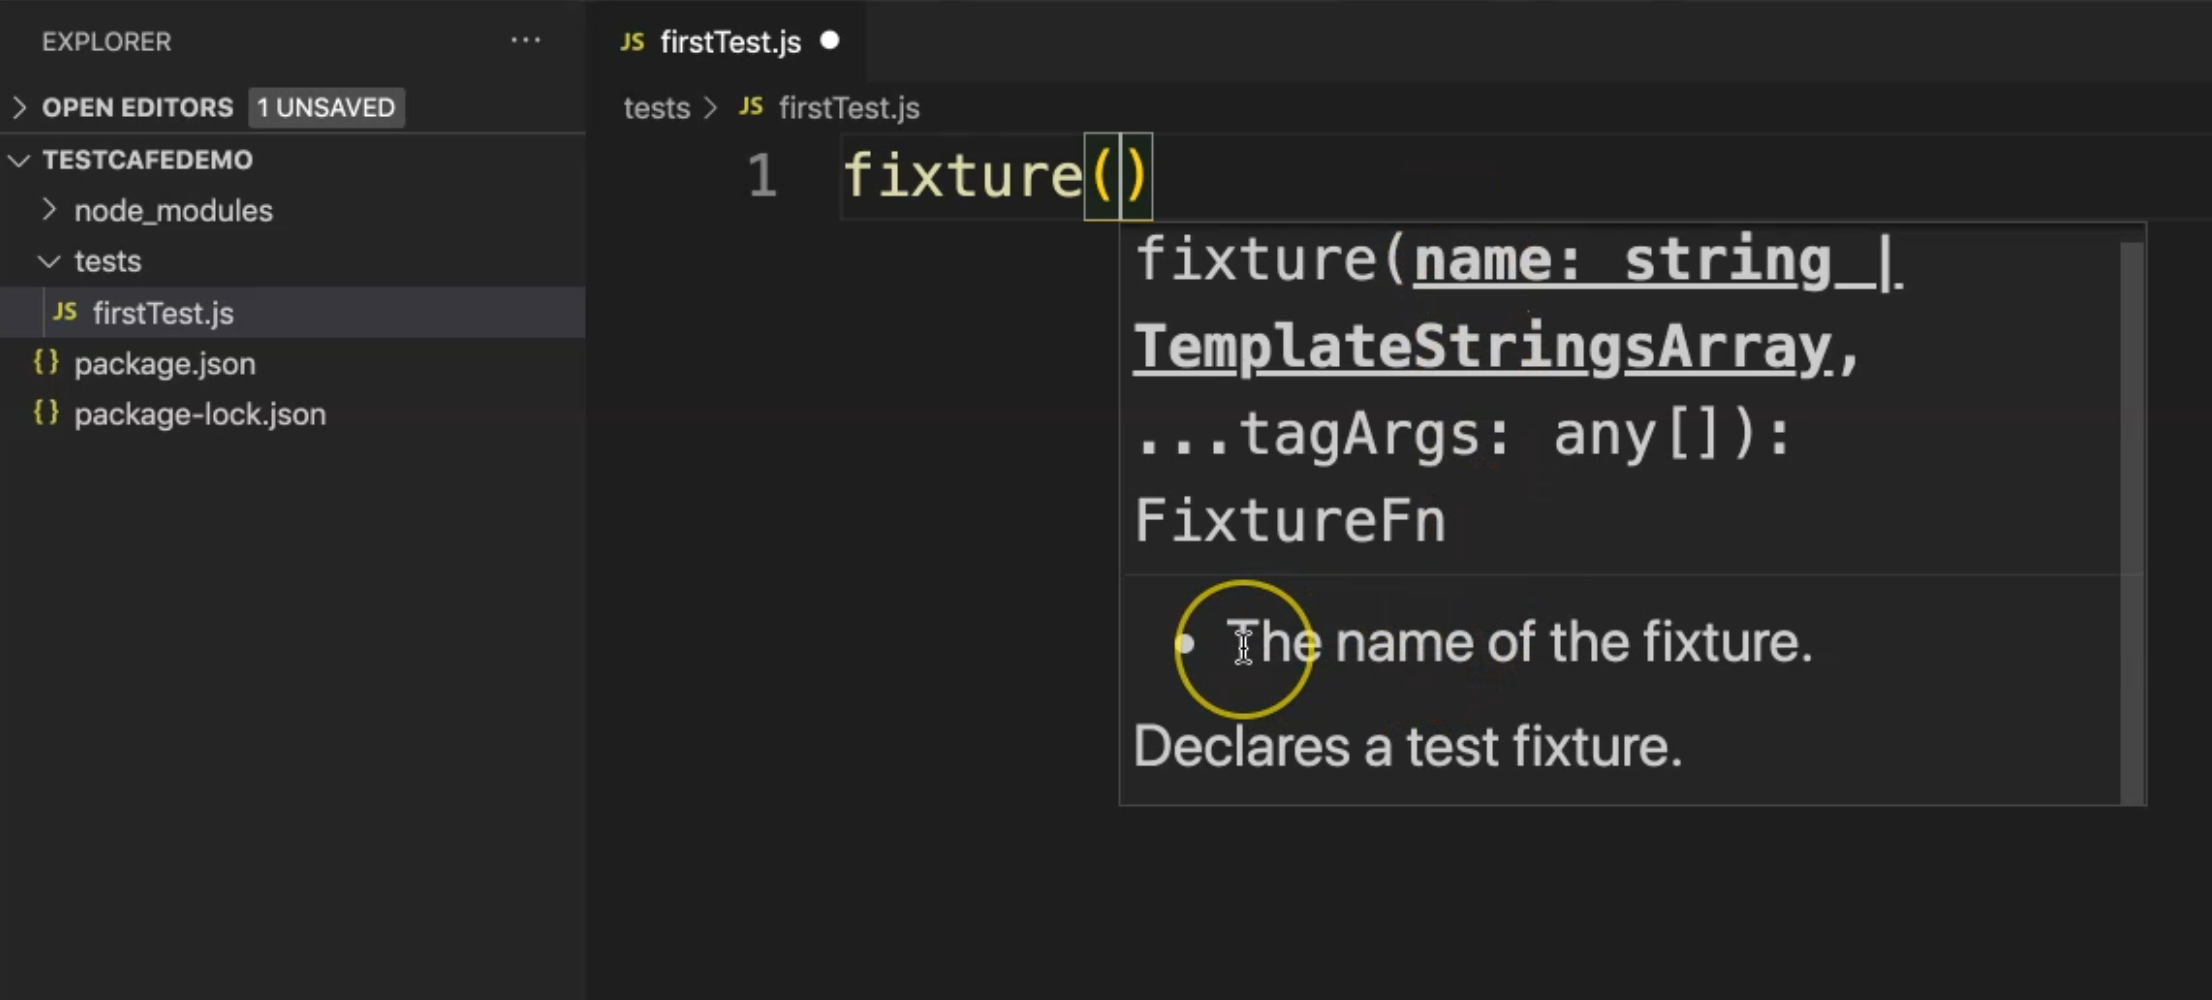
So if we open this, this is a fixture and the fixture is taking the name as a string parameter. And there's a description of the name of the fixture.
So for example, we will write the name as "The first Fixture" and then inside this fixture, we need to add our URL or our application under test.
fixture("First Fixture")
So here we will add .page, and we will select page. Then in page, it takes the URL as a string. So here's the URL of the webpage where the tests start.
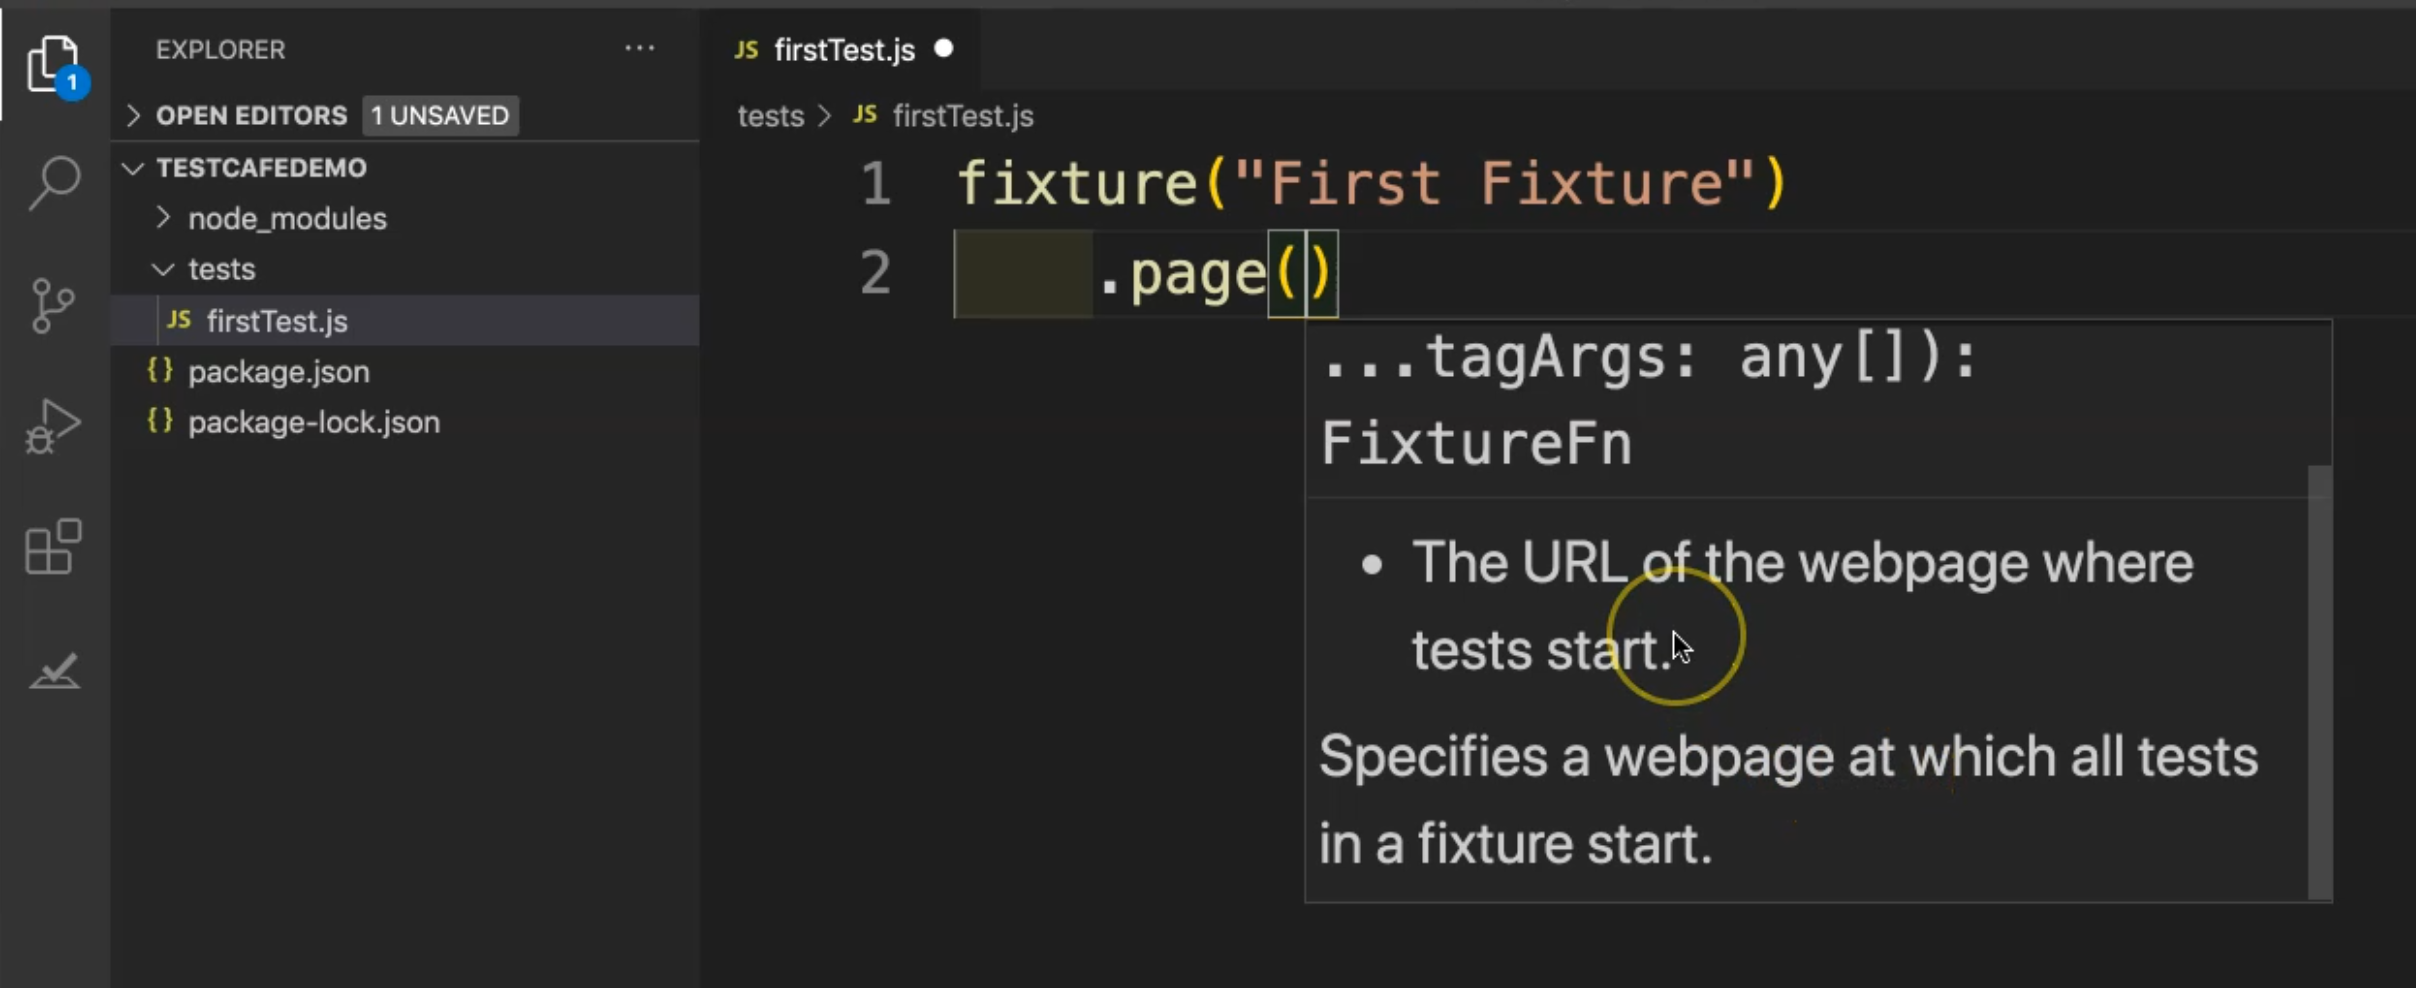
So again - specifies the webpage at which all the tests in the fixture starting. So here we can add our URL, which is our example from TestCafe that we were using in the first example.
fixture("First Fixture")
    .page("[https://devexpress.github.io/testcafe/example/](https://devexpress.github.io/testcafe/example/)")
Then after that, we will write test, and this is our first test. test is also taking the name as a string, and here we will write "First Test".
Then the test takes two things. The first one is the name as a string and we already added it.
The second one is the test controller is an asynchronous function that contains the test code. So, because of that, we need to add async, which stands for asynchronous, and then we need to add the test controller with async t.
Then, we will add this => as a promise or function. Then, we add curly brackets {}.
fixture("First Fixture")
    .page("https://devexpress.github.io/testcafe/example/")
test("First Test", async t => {

})
And this is our body for the first test case, or the first test submitted in our fixture.
After we prepared our fixture and our test function, we need to inspect the elements that will be used in our test case.
So this is the example page from TestCafe, that includes different elements - text box, dropdown list, checkbooks, radio buttons, and submit buttons.
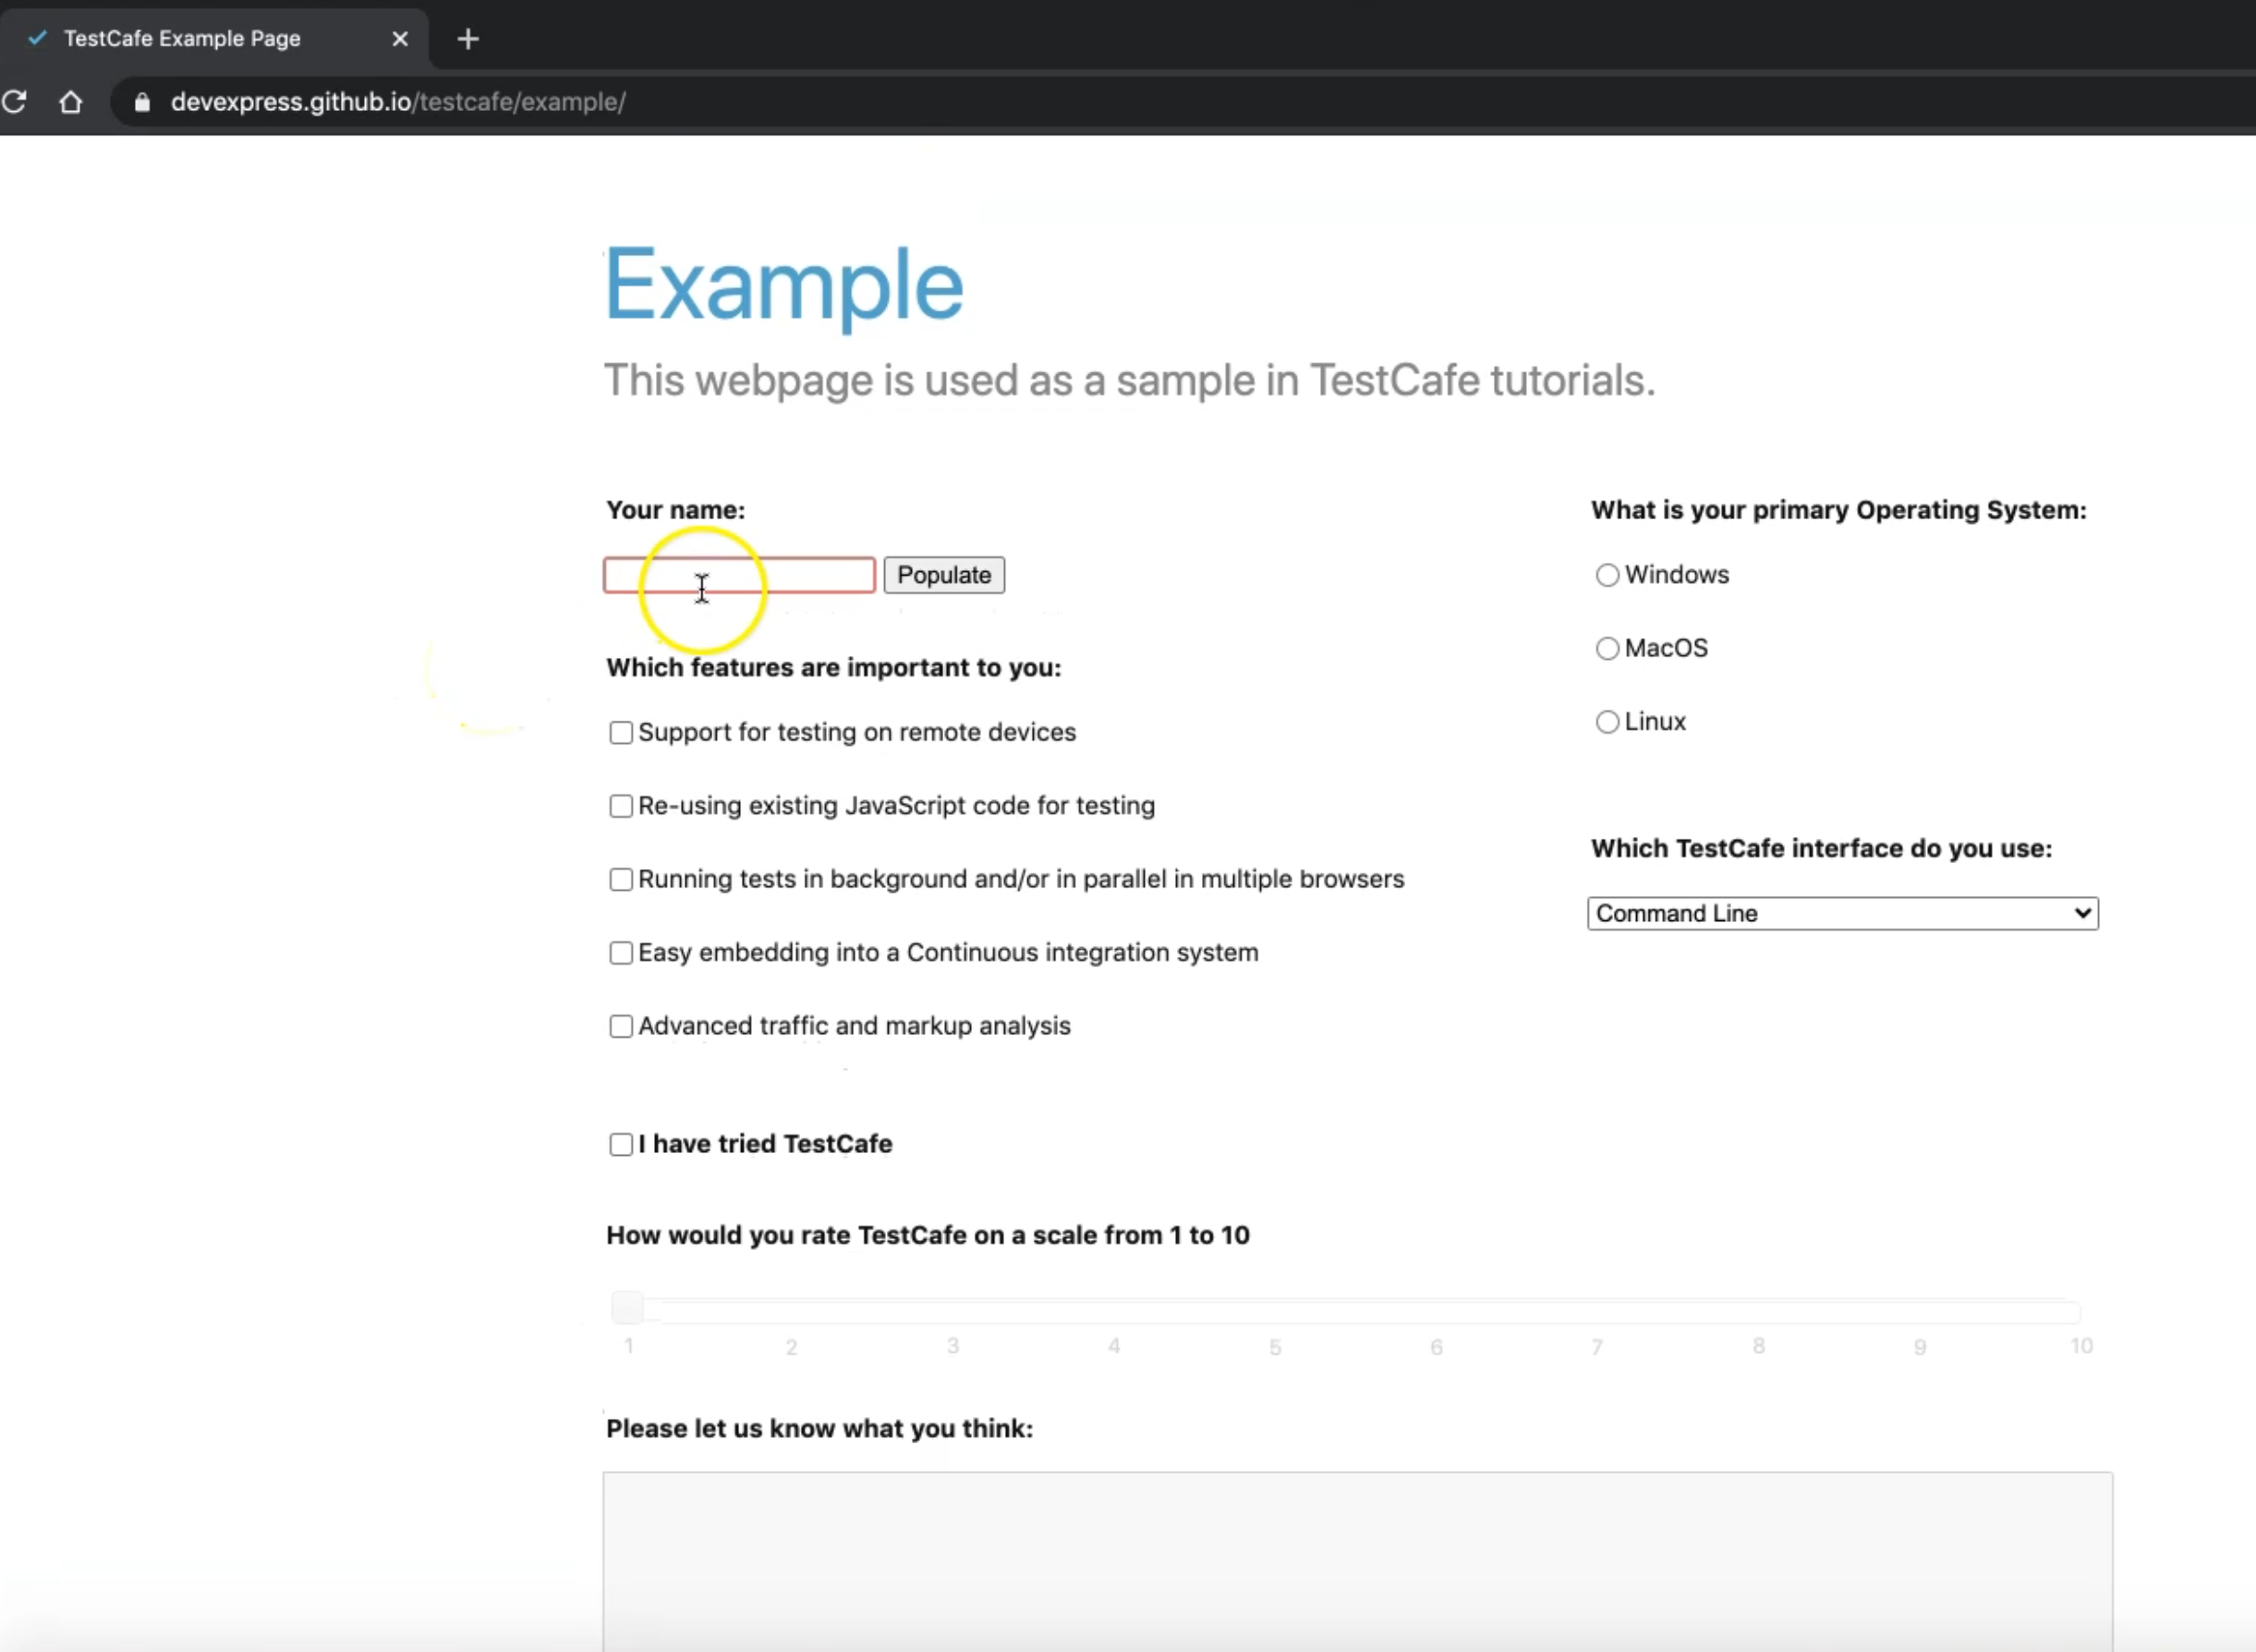
So we will start with "Your name". After that, we need to select the operating system and click the Submit button.
So here we can right-click as we usually do with Selenium WebDriver or anything that using selectors. Click on "Inspect".
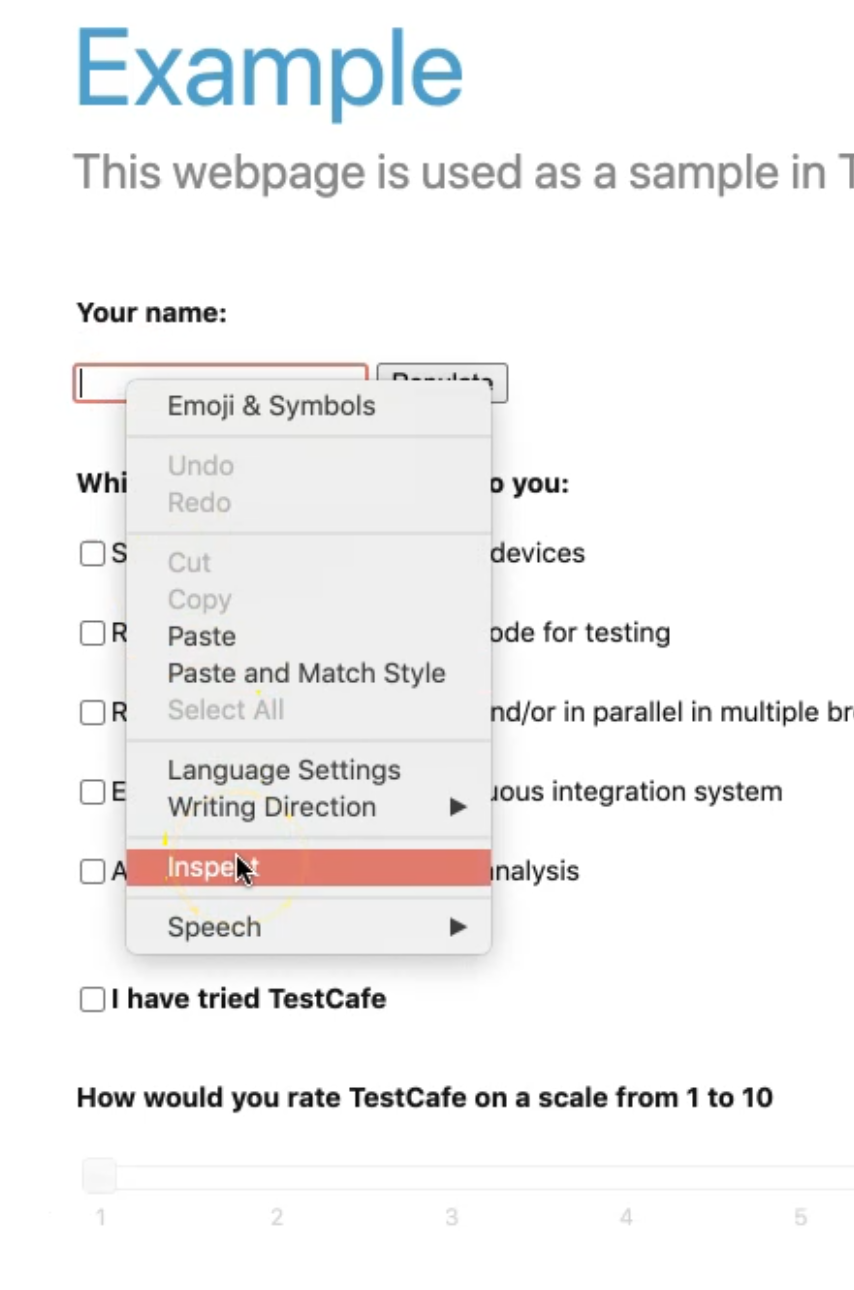
Here we have developer-name, but in our case, we are using - as we mentioned in the slides - that we are using CSS selectors. Because of that, we'll be using #developer-name.
So we will take this ID and open Visual Studio Code, and here we need to add something before we add our inspectors or our selectors.
We will add await and await helps us when we are running in parallel, or when we are running our test scripts using TestCafe, which is using the 'await' mechanism for our elements.
So await t - our test controller - and then after that, .typeText() because we are using a textbox in this example, so .typeText() and this is the action.
.typeText() takes a selector as a string. And after that, it will take action or take the value for the text after that.
So the selector, in this case, is #developer-name, and then we will add a comma and then add the text as a string. So here we need to add something like "TAU", or Test Automation University.
fixture("First Fixture")
    .page("https://devexpress.github.io/testcafe/example/")
test("First Test", async t => {
    await t
        .typeText('#developer-name','TAU')
})
So this is the first element we will save our file.
And then we will go back to select the operating system. After that, we need to click on macOS and view it in the inspector.
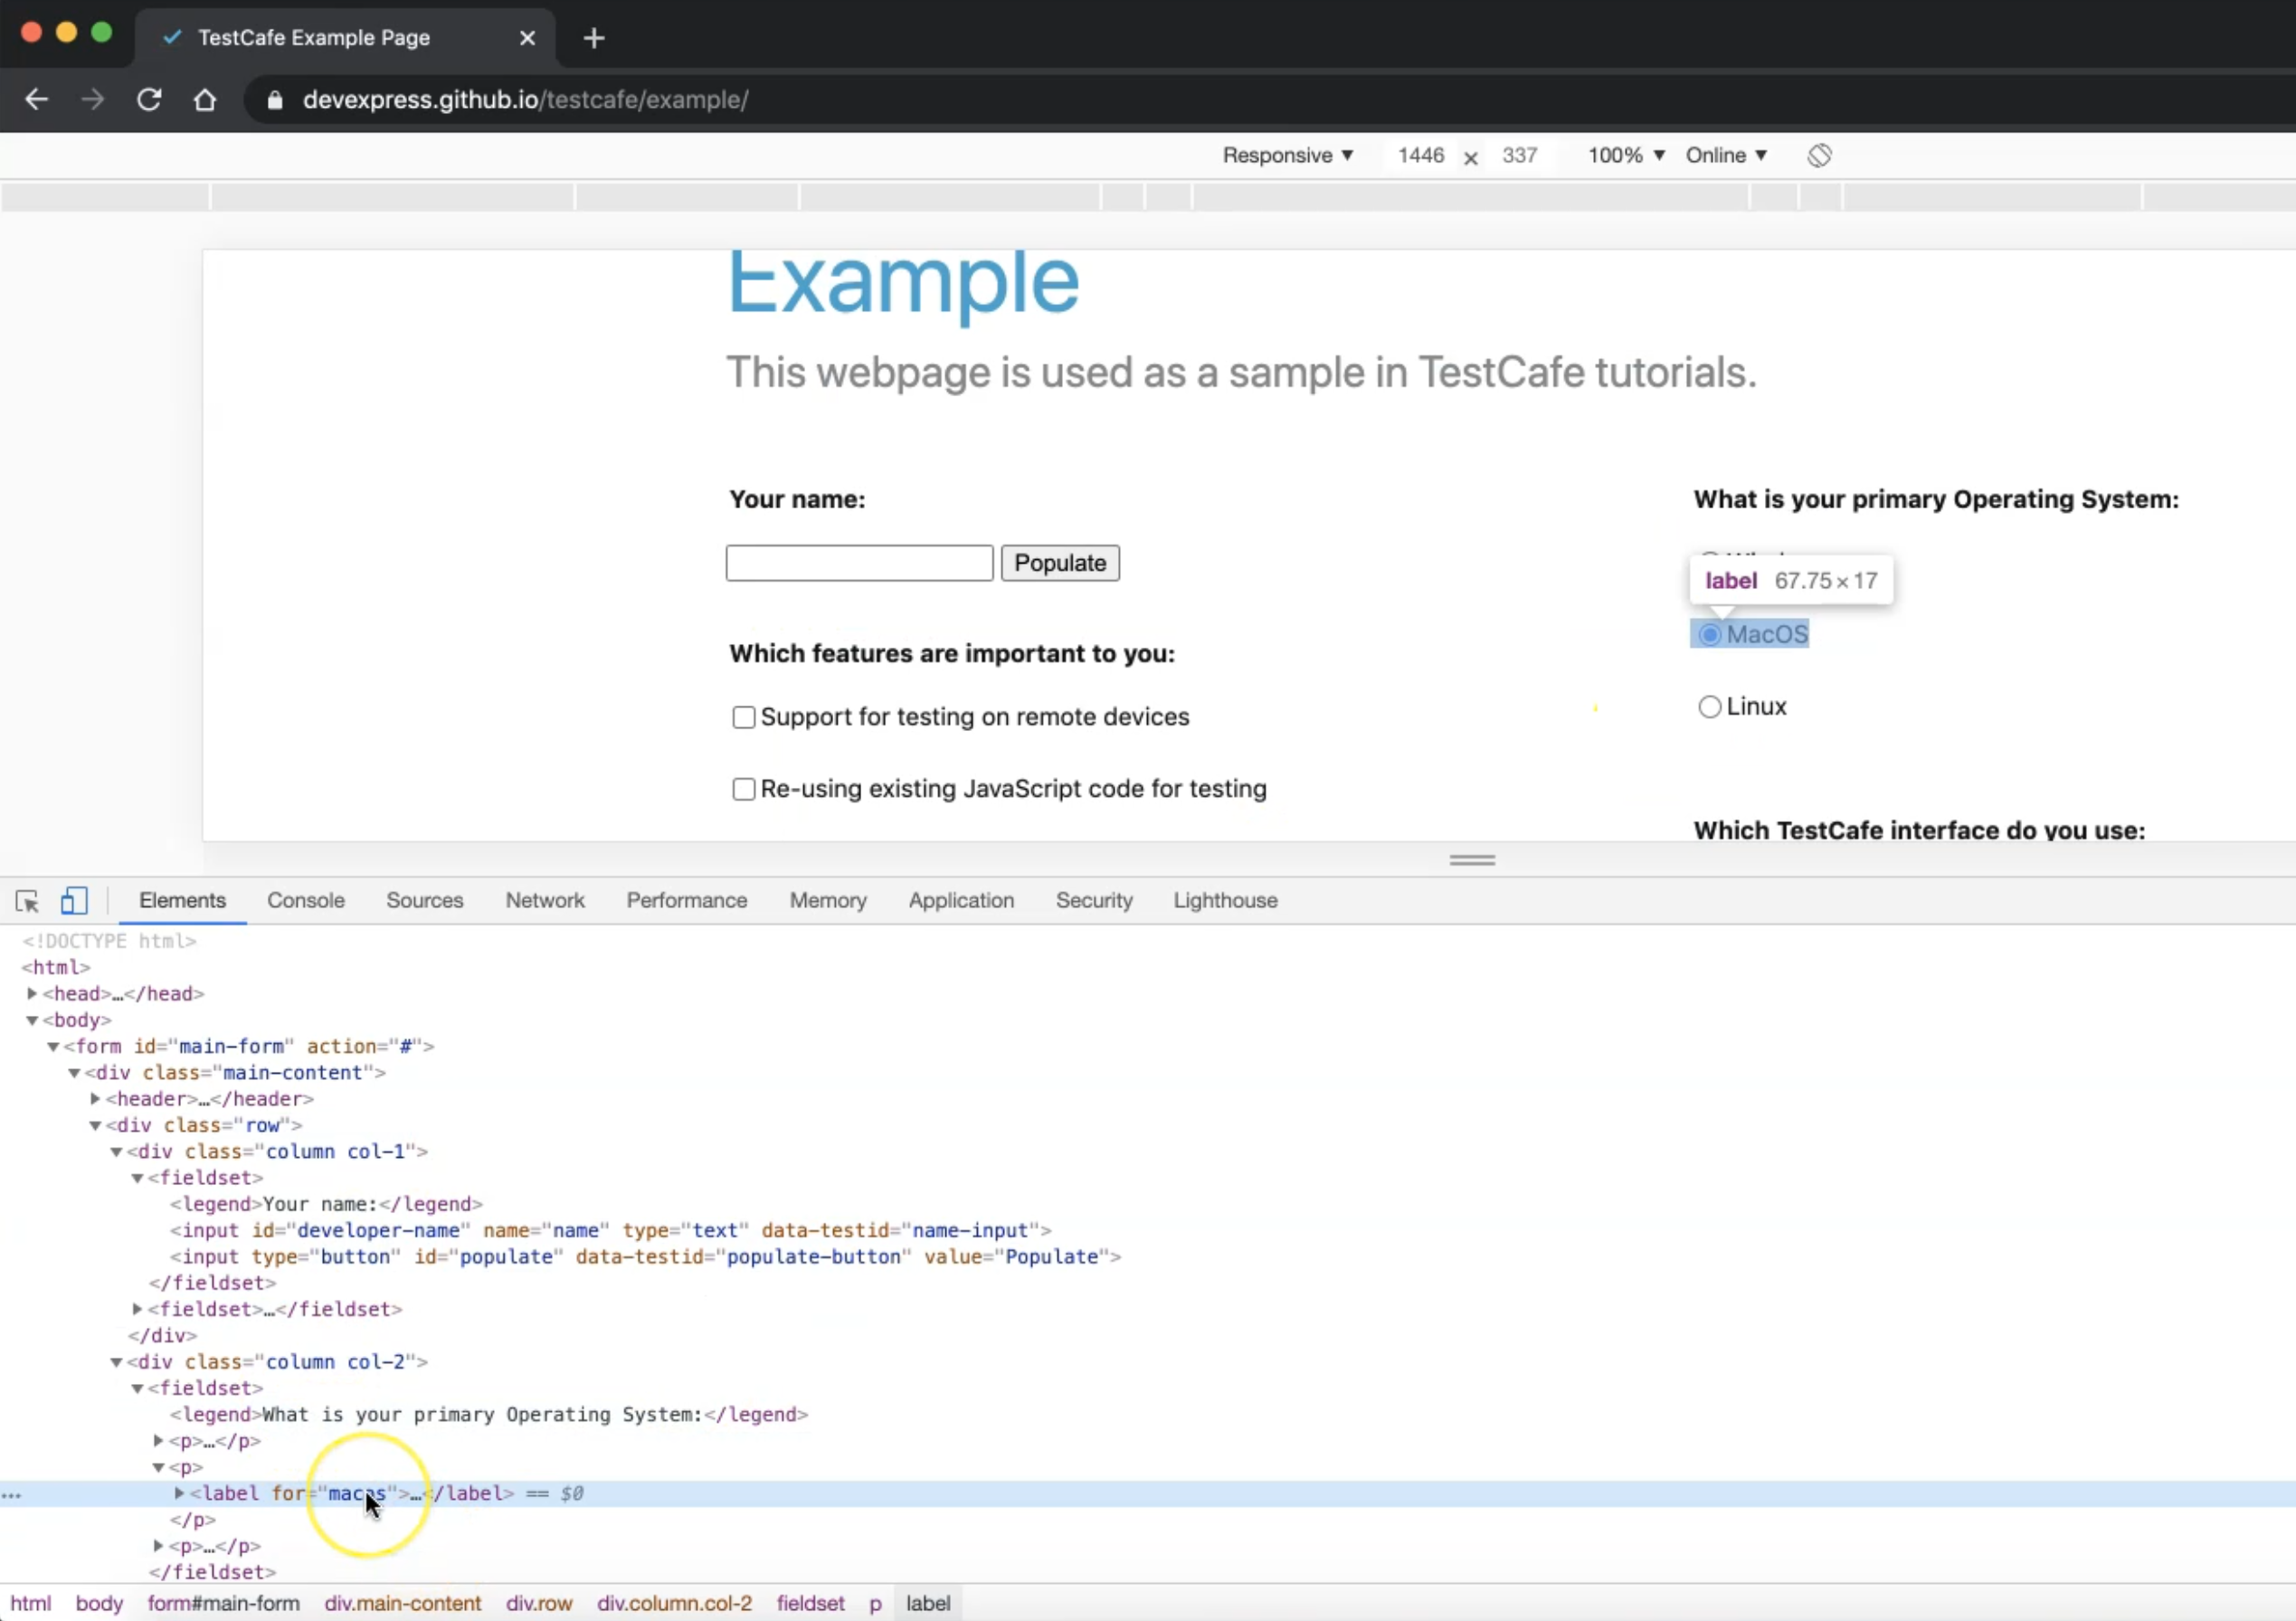
So here's the label for macOS and all of them are labels - so we need to find something to identify it. Inside the label is input with an ID macOS so the selector for the input is #macos.
So now we need to add another action - it will be 'click' because we are clicking on the radio button. Then we need to add the element that we need to use - #macos.
fixture("First Fixture")
    .page("https://devexpress.github.io/testcafe/example/")
test("First Test", async t => {
    await t
        .typeText('#developer-name','TAU')
        .click('#macos')
})
After that, we need to finish our test with the last button or last command. We need to click on the "Submit" button and inspect this element. The ID is the submit-button.
We'll add another action, also click, and we will perform the click on #submit-button.
Then we will add a semi-colon at the end because the t or the test controller will be used for all the elements or all the actions that we are using in our test. And then we can add one semi-colon at the end of the file, and one after .page() and save our changes.
fixture("First Fixture")
    .page("https://devexpress.github.io/testcafe/example/");
test("First Test", async t => {
    await t
        .typeText('#developer-name','TAU')
        .click('#macos')
        .click('#submit-button');
});
Then we need to try to run our test and to check if we have any problems, or if the test will run, so we will check it in the browser.
So for running our test, we are using TestCafe. And after that, we are using the browser name - for example, we will use Chrome. Then we will select the test - the firstTest.js file inside the tests folder.
testcafe chrome tests/firstTest.js
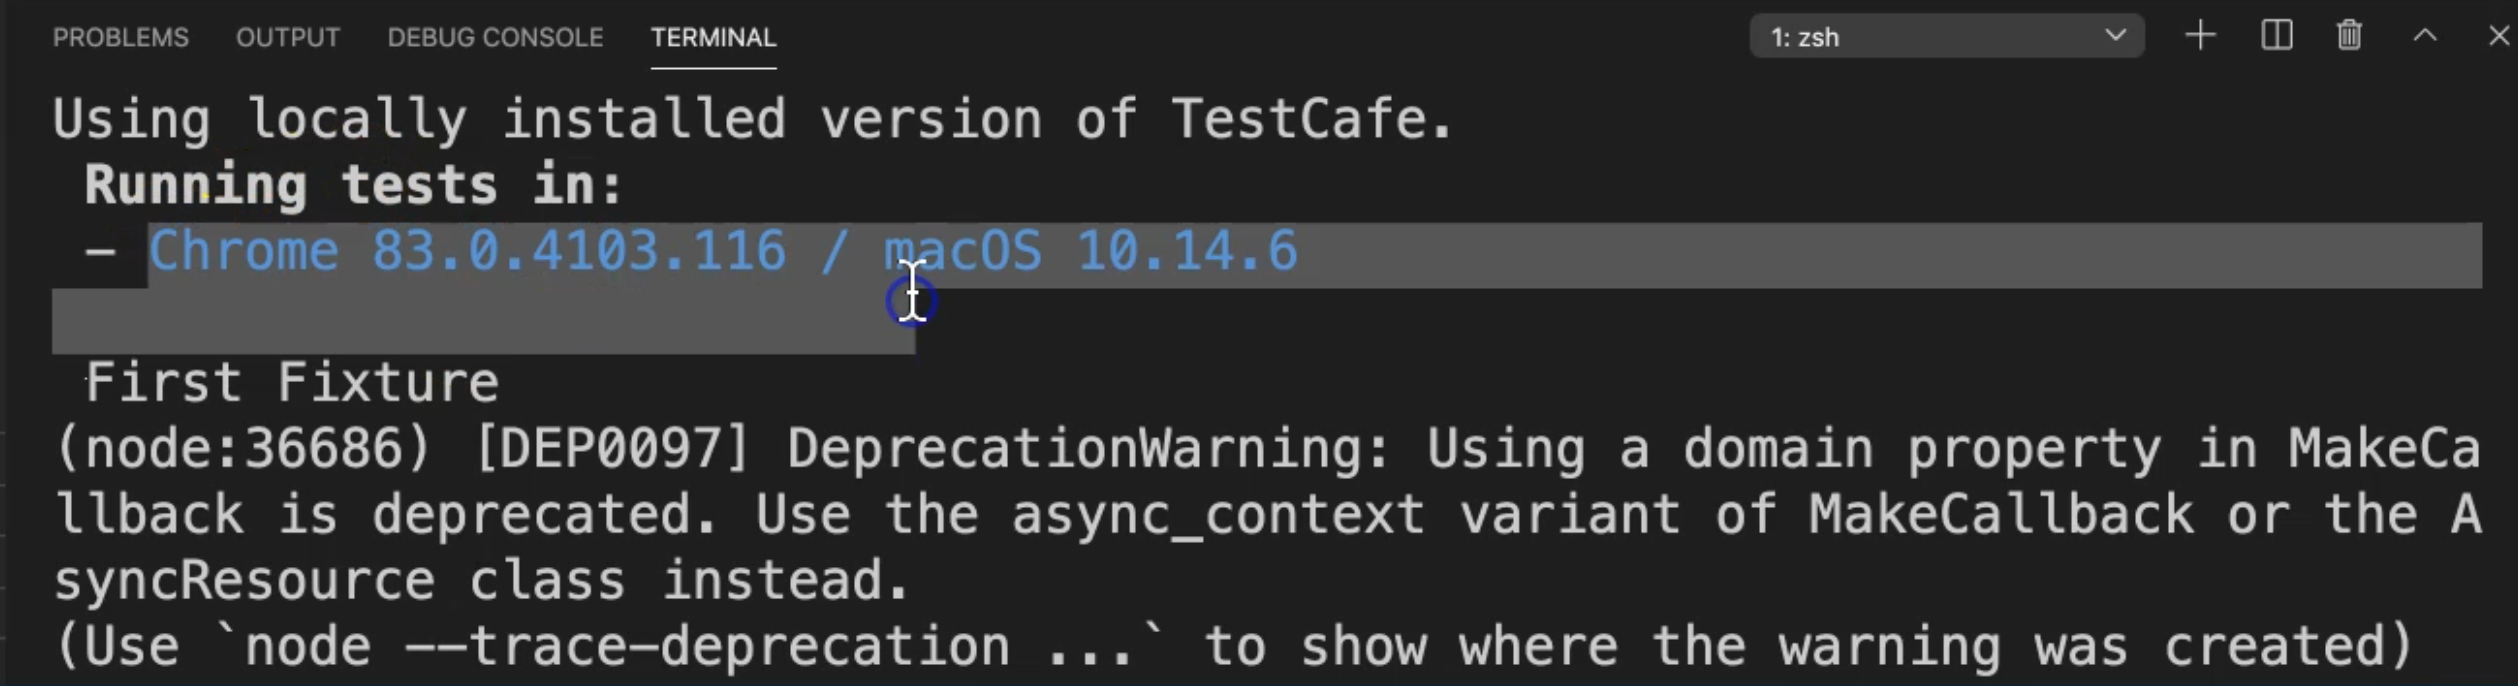
Then we can click enter and here it is using a local install version of TestCafe.
TestCafe starts running. It will open the custom server.
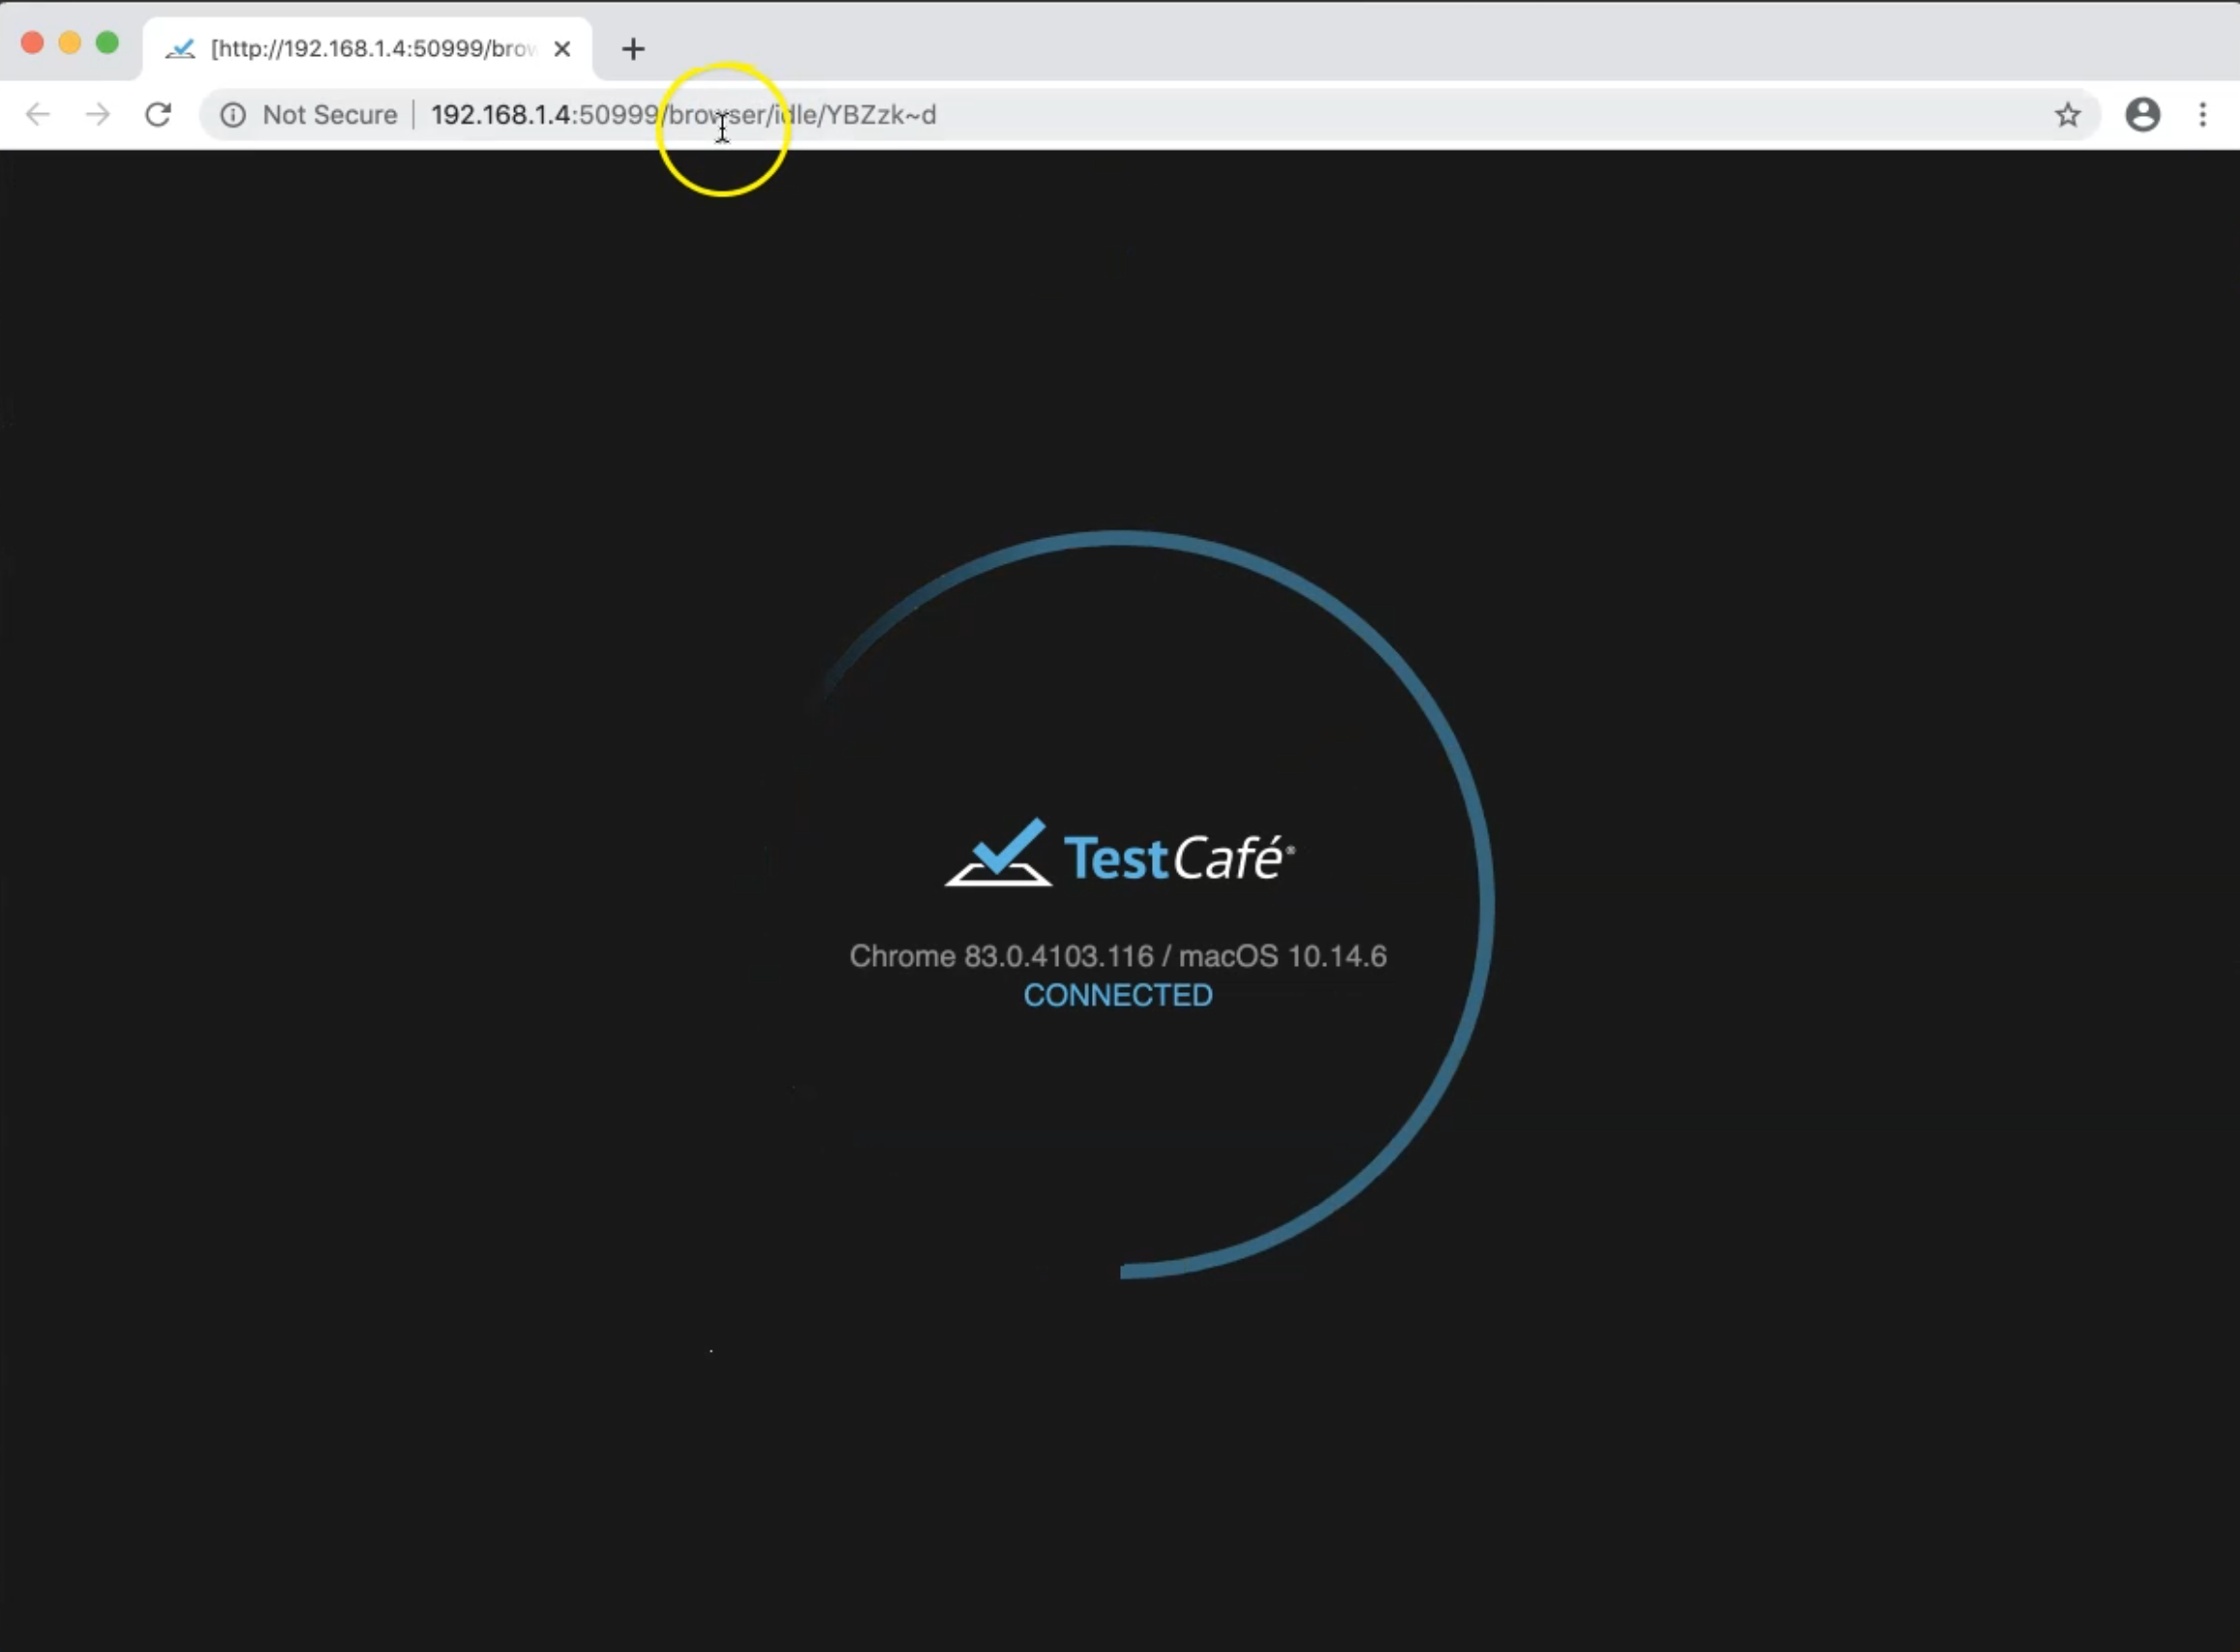
After that will redirect to the URL, and use our selectors.
Here is the result:
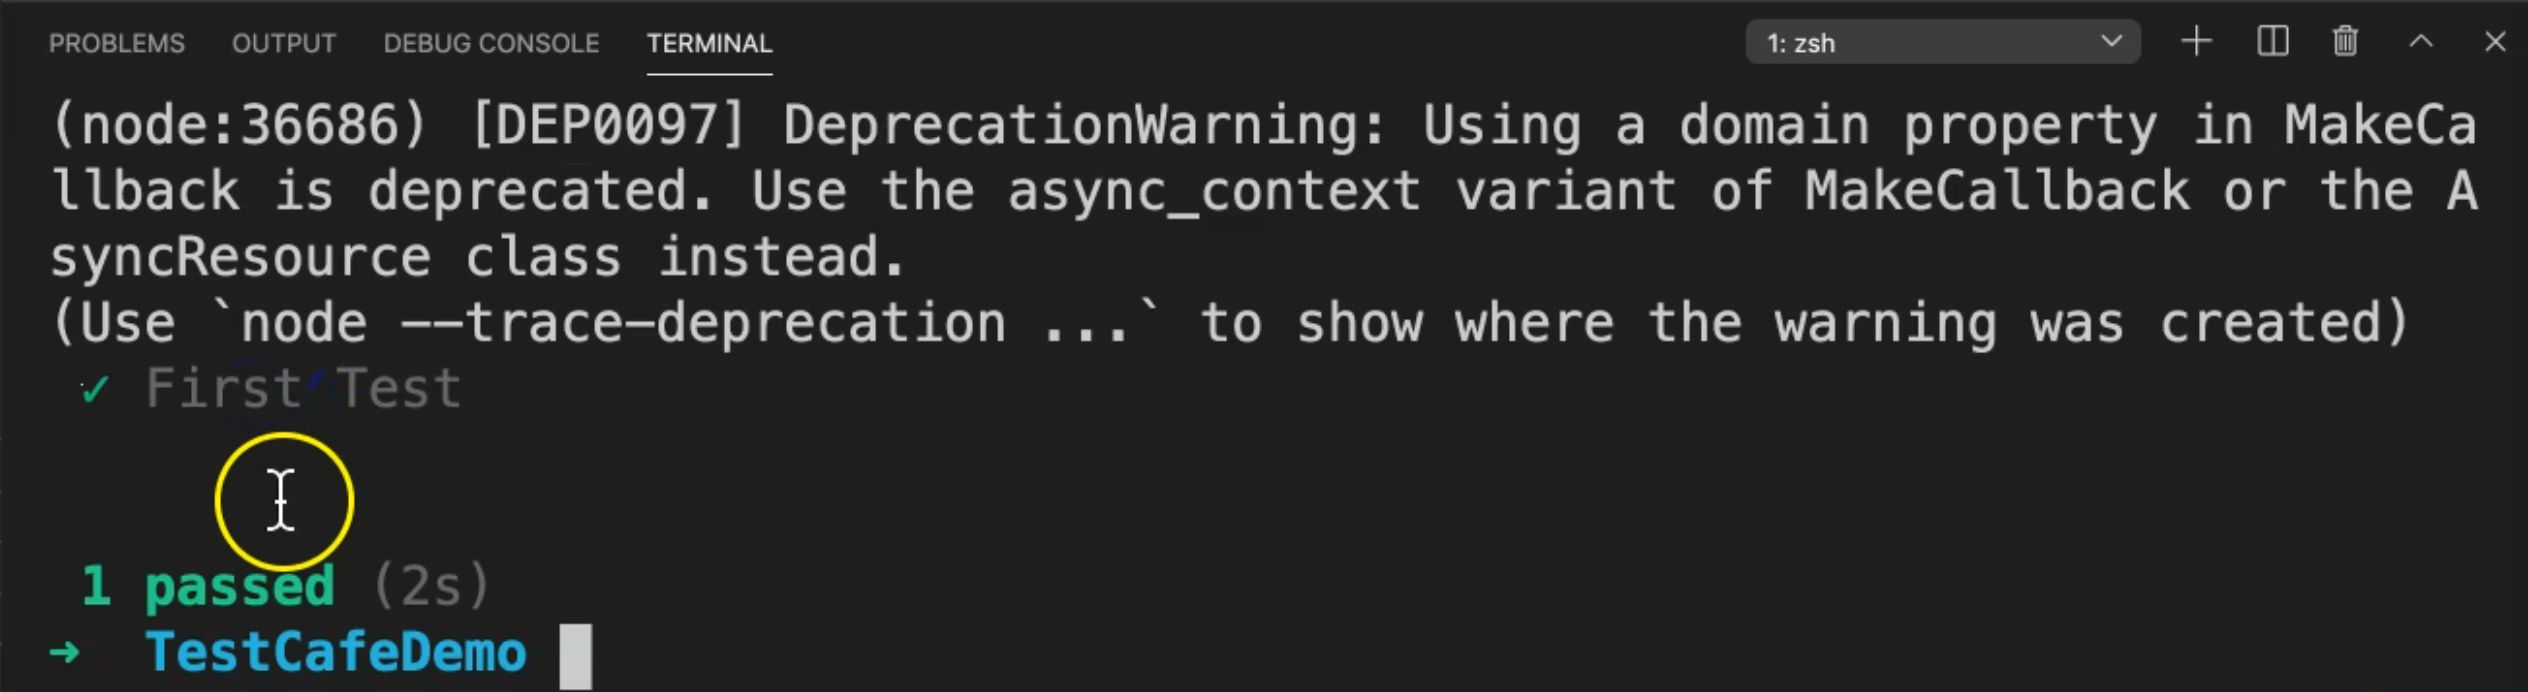
Our first test passed and took two seconds.
So here we finished and here is the info about our Chrome version and our operating system version - we are running on Mac OS, and we are running on Chrome version 83.
So this is our first script using TestCafe, we started with the fixture and adding the fixture name, passing it the page or the URL, or the application under tests that we will use.
Then we are writing our first test with a test name and asynchronous test controller. And after that, with the test controller, we are using 'await' to be handled or to automatically handle the ways for the element to be displayed or to be initialized in the DOM, with a type of script action for the text box, with the click with the radio button, and the click for the submit button.
Resources
Quiz
The quiz for this chapter can be found in 3.3
