

Transcripted Summary
# Take Screenshots
In this video we will be talking about:
The prerequisites for screenshots with TestCafe
Screenshot options
How we can disable the screenshots
# Prerequisites for Screenshots
TestCafe allows you to take screenshots on the tested webpage at any moment during a test run or automatically whenever a test fails.
Screenshots required .NET 4.0 or newer install on Windows machines.
You can take screenshots at any time or any moment during this test.
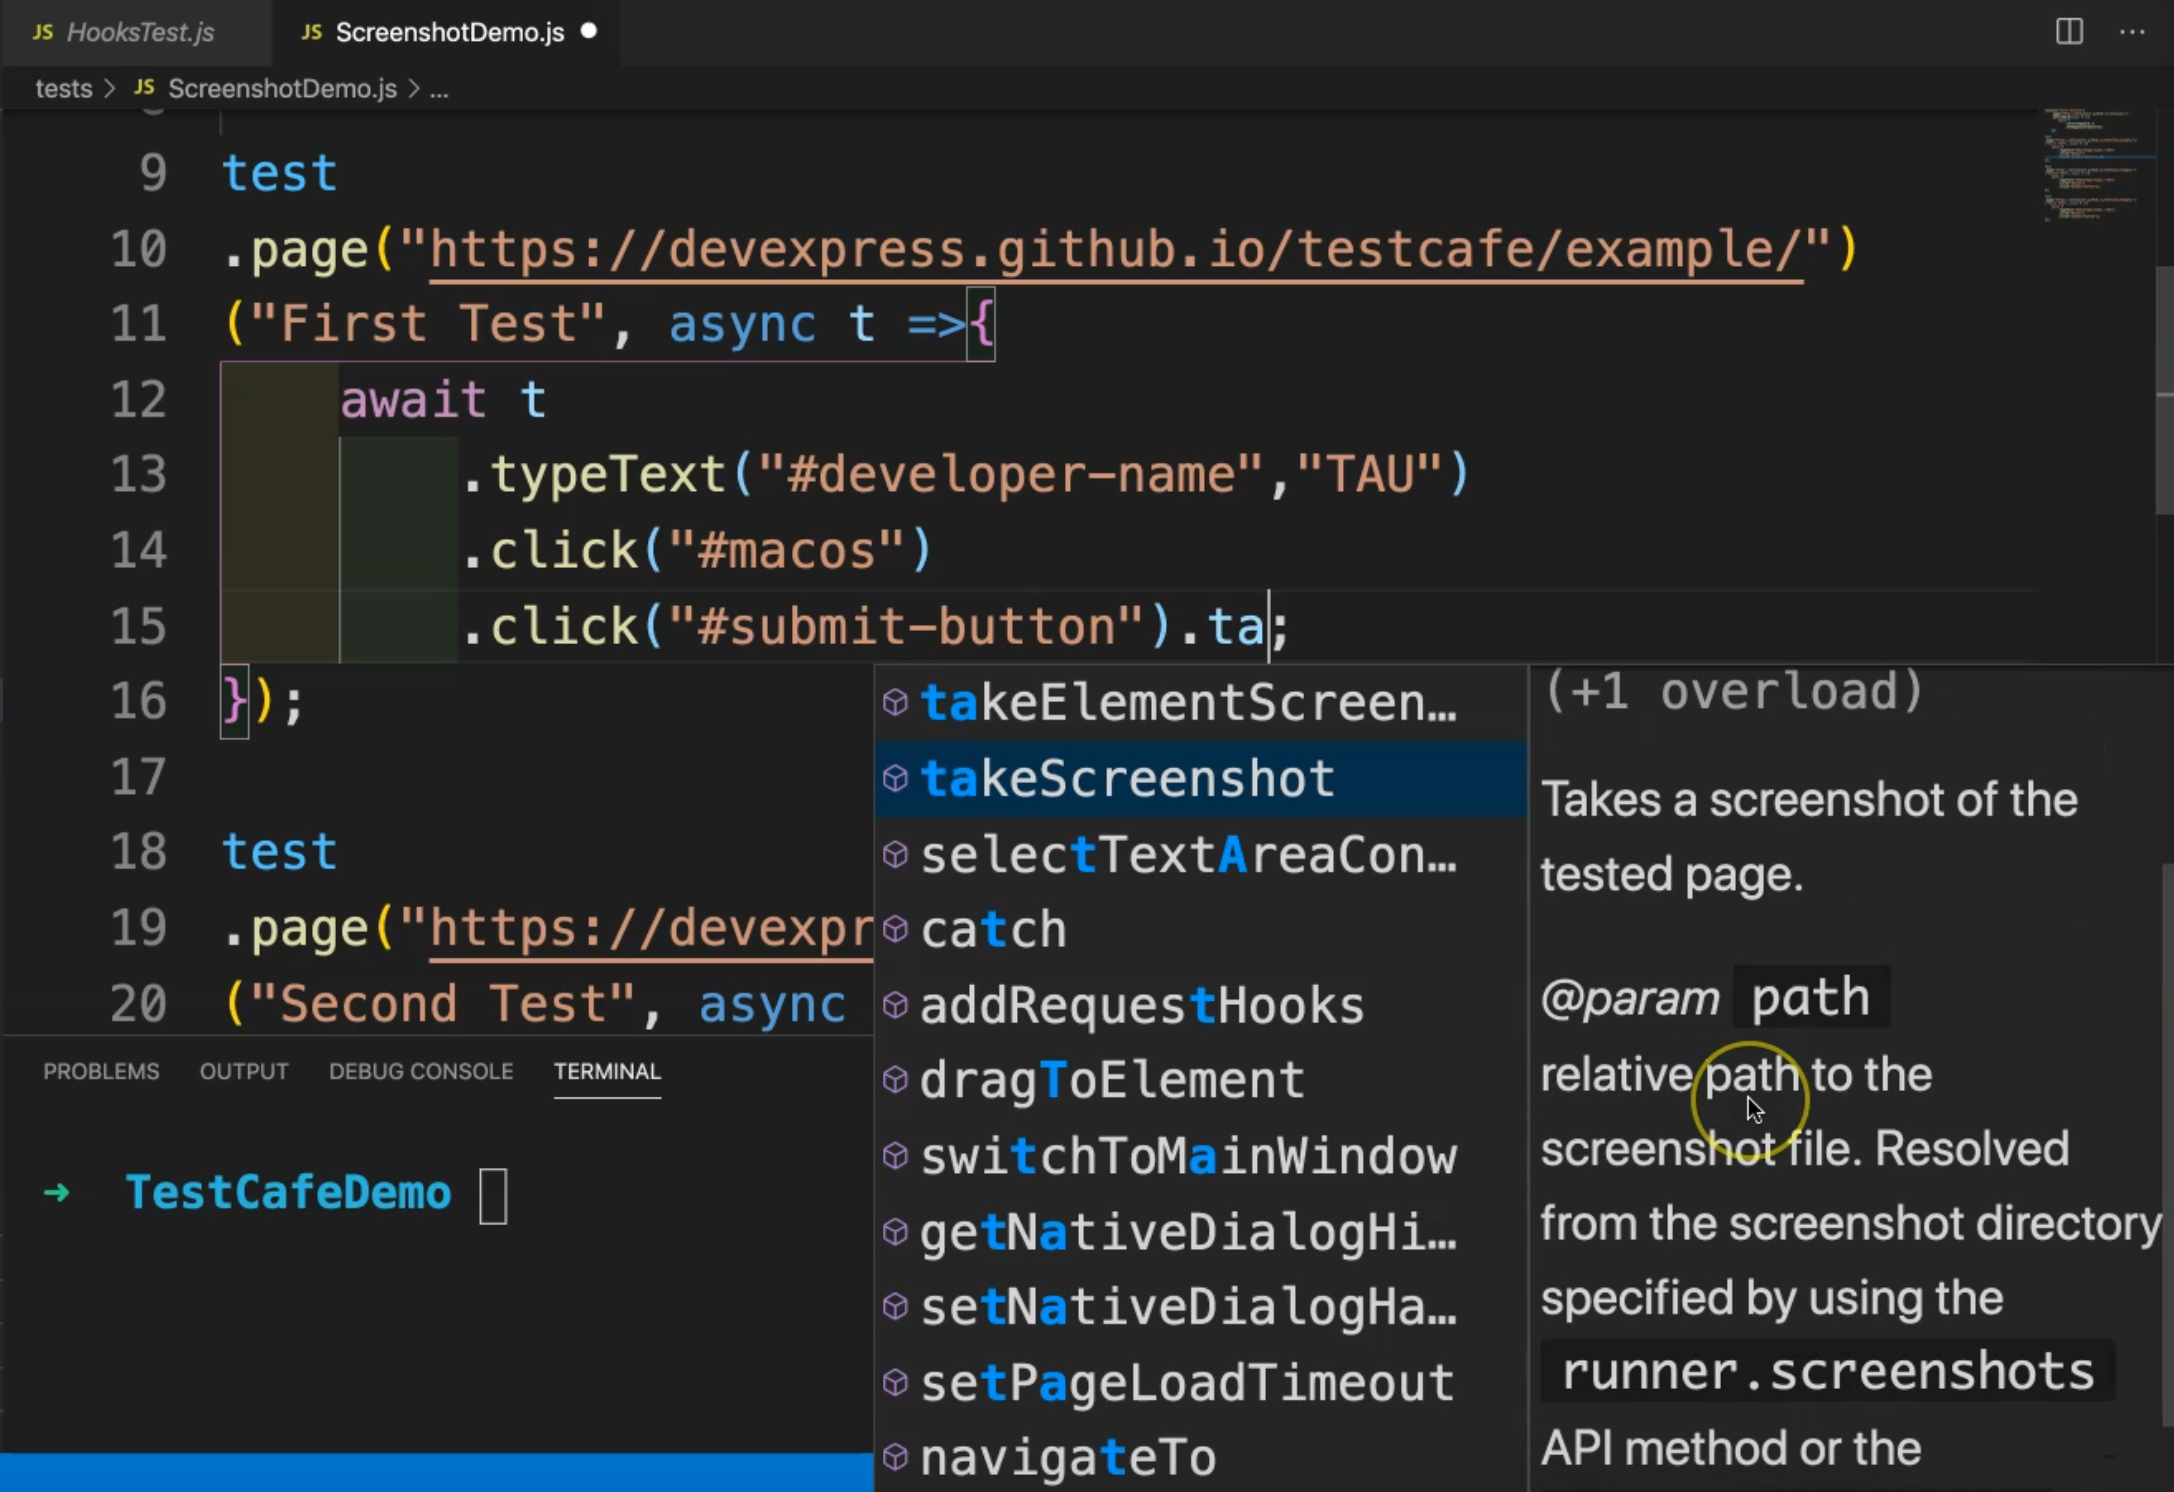
Use t.takeScreenshot to take a screenshot of the entire page, or t.takeElementScreenshot action to capture a particular element.
Remote Browsers
One additional note - screenshots are not supported when you run tests in remote browsers.
For example, in this code snippet:
fixture `My fixture`
    .page `http://devexpress.github.io/testcafe/example`;
test('Take a screenshot of a fieldset', async t => {
    await t
        .typeText('#developer-name', 'Peter Parker')
        .click('#tried-test-cafe')
        .typeText('#comments', 'I think TestCafe is awesome!')
        .takeElementScreenshot('#comments')
        .click('#submit-button')
        .takeScreenshot();
We are taking a screenshot of the page and the element.
For example, here, when we are starting our test normally with await, the test controller, we are typing text in the textbox, clicking on the button, typing text again in the comments, and then takeElementScreenshot of the comments.
So in this case, we are taking a screenshot of this particular element.
After that, we are clicking the submit button, and then we are taking a screenshot of the entire page.
So this is the difference between how we can take a screenshot of a specific element and how we can take a screenshot for the entire page.
# Take a Screenshot Demo
In this demo, we will learn how we can take a screenshot with our test cases with TestCafe.
With taking screenshots we have two functions - take a screenshot for a specific element and take a screenshot of the whole page.
So let's just start with the whole page and after that, we can try the second one.
For example, here with HooksTest.js, or we can select an example and maybe we can just copy it and create a new one and rename it with ScreenshotDemo.js.
In our first test after we finished everything - so after we click the submit button - maybe we can add one additional takeScreenshot function.
The description is "Takes a screenshot of the tested page" so for the whole page, and also you can specify the path for the screenshots because by default the screenshot is posted in the root of the folder.
So we can take a screenshot and that's it.
So for example, here, we can take a screenshot from the first test, and also in the second test we can take a screenshot after click("#macos") and then here we can take a screenshot also after the last test.
So this is our file:
fixture("First Fixture")
    .page("http://devexpress.github.io/testcafe/")
    .beforeEach(async t =>{
        await t
            .setTestSpeed(0.1)
            .setPageLoadTimeout(0);
    });

test
.page("https://devexpress.github.io/testcafe/example/")
("First Test", async t =>{
    await t
        .typeText("#developer-name","TAU")
        .click("#macos")
        .click("#submit-button")
        .takeScreenshot();
});

test
.page("https://devexpress.github.io/testcafe/example/")
("Second Test", async t =>{
    await t
        .typeText("#developer-name","TAU")
        .click("#macos")
        .takeScreenshot()
        .click("#submit-button");
});

test
.page("https://devexpress.github.io/testcafe/example/")
("Third Test", async t =>{
    await t
        .typeText("#developer-name","TAU")
        .click("#macos")
        .click("#submit-button")
        .takeScreenshot();
});
Let's run our test with:
testcafe chrome tests/ScreenshotDemo.js
Let's check what happens during our test.
Then we will run our server with TestCafe and redirect to the URL and just start our test.
So here we are going to the first test - enter the name, go to the selector or the second element, and after that click the submit button
So, here we finished, and then we're going to start the second one and the third one. Also the third test or the last test in our test file. So click on Mac and also submit.
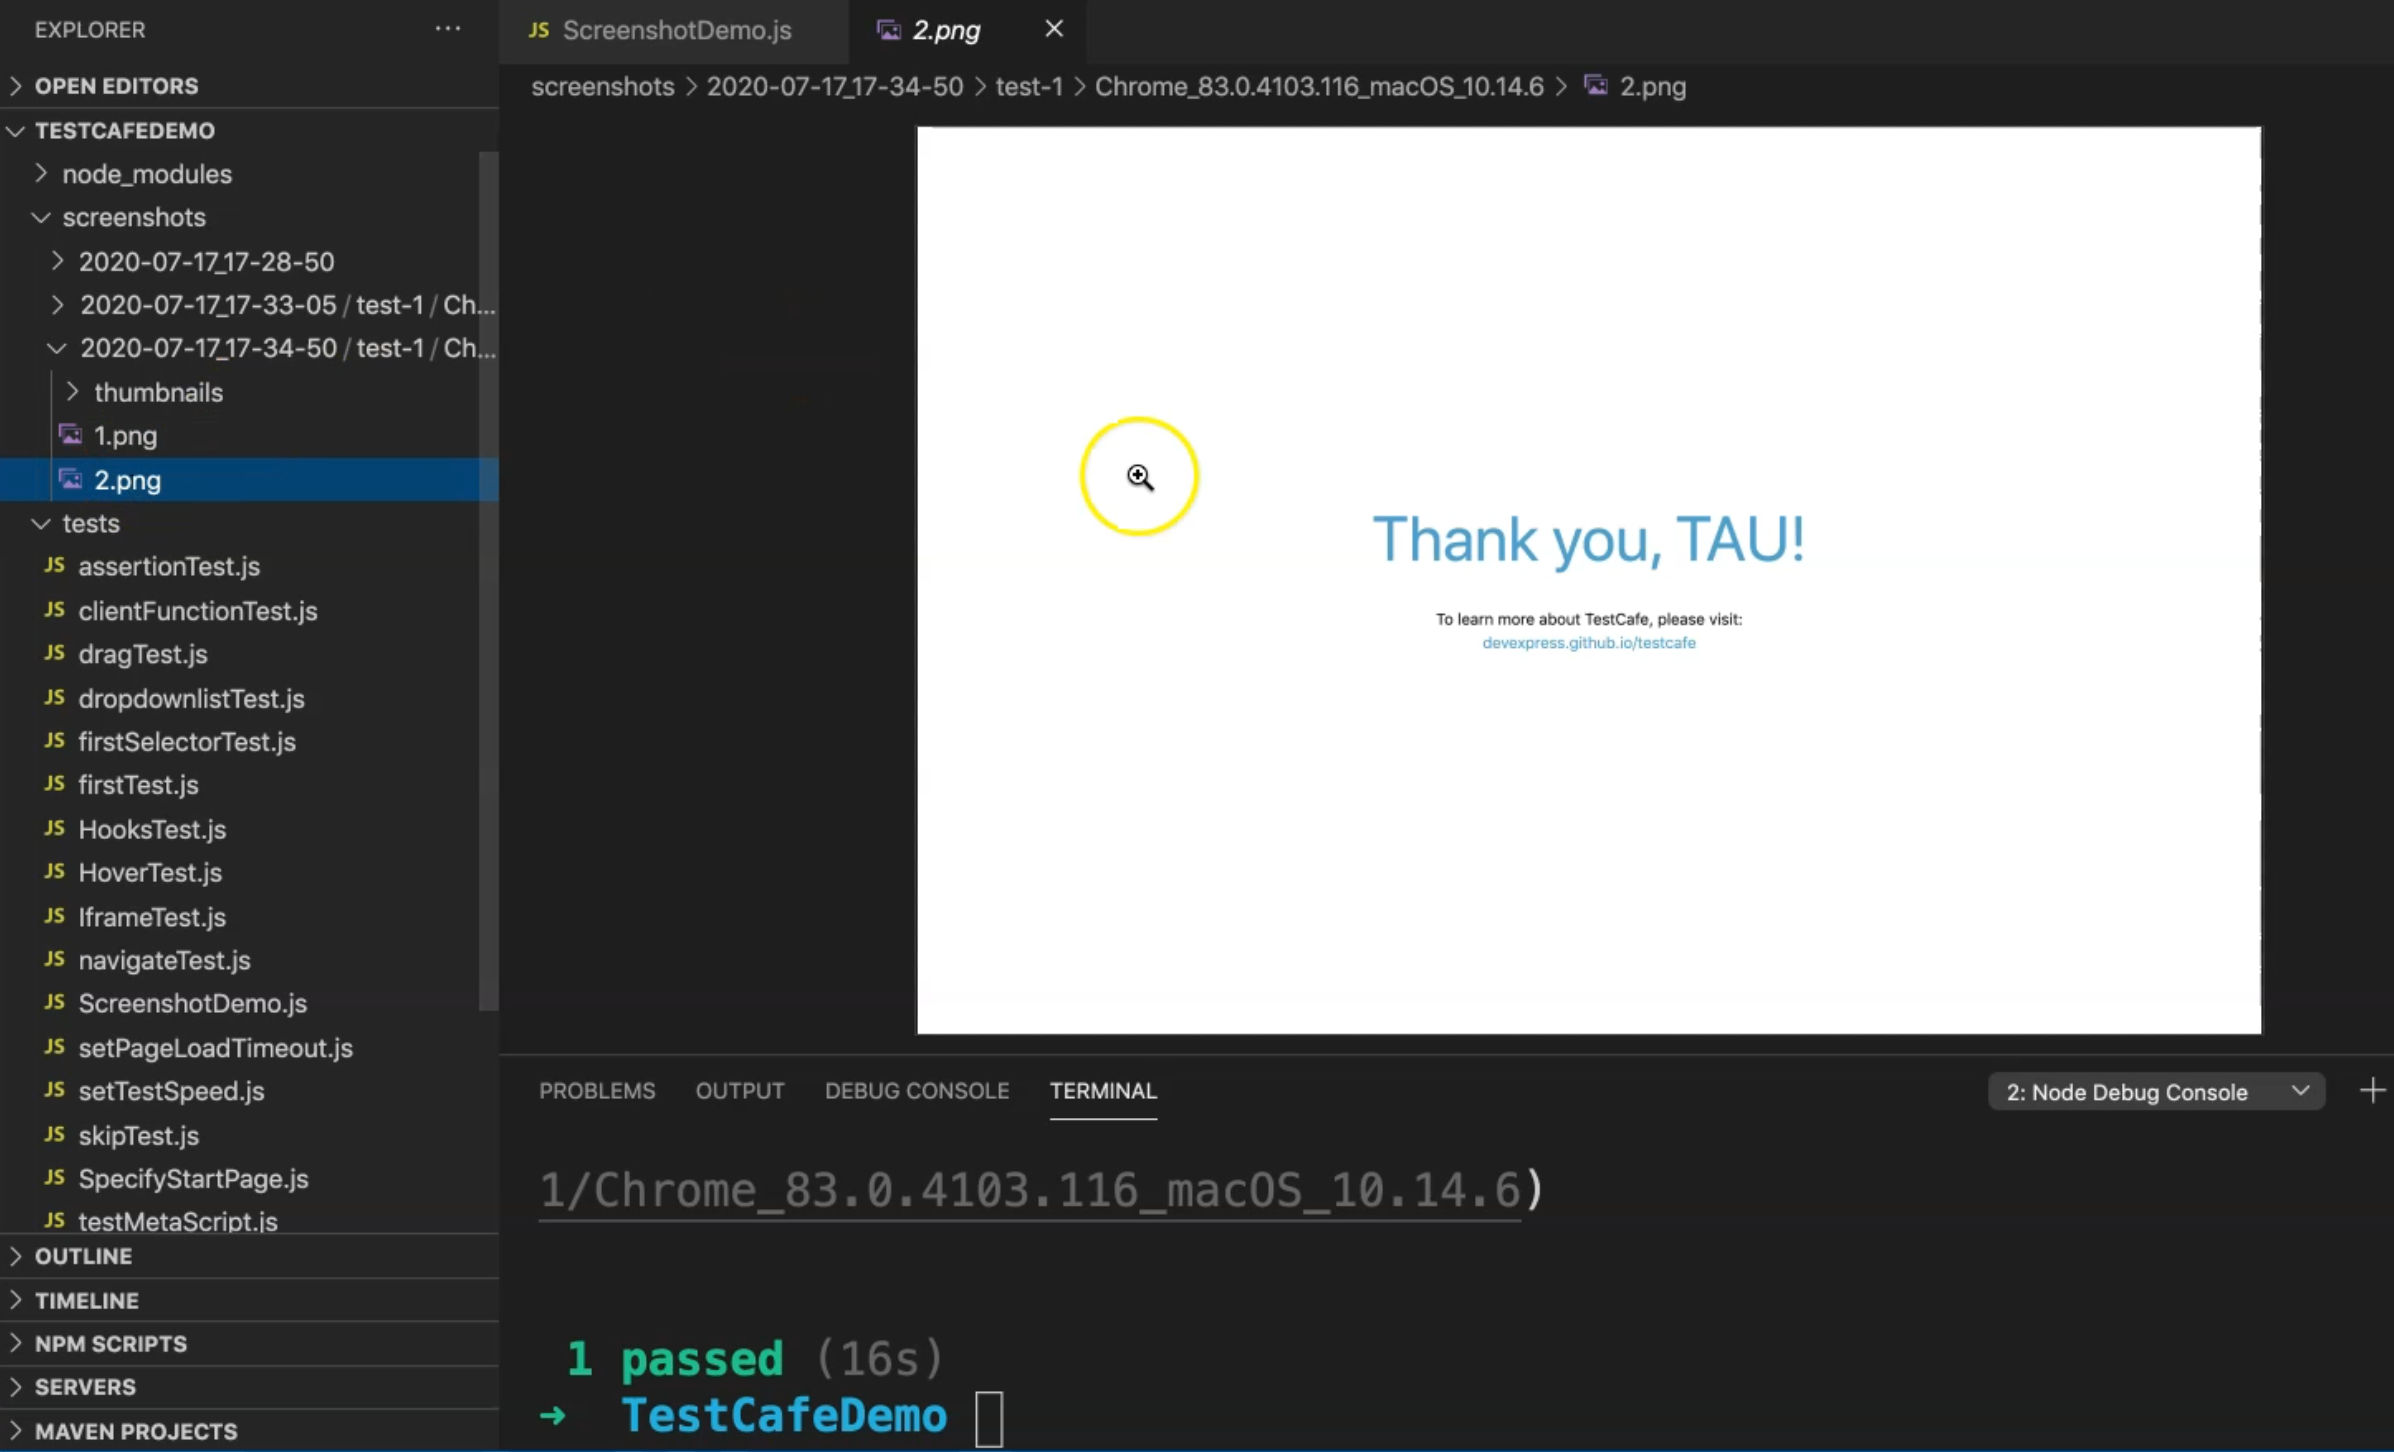
Then we finished - we have three passed test cases and here we can check something.
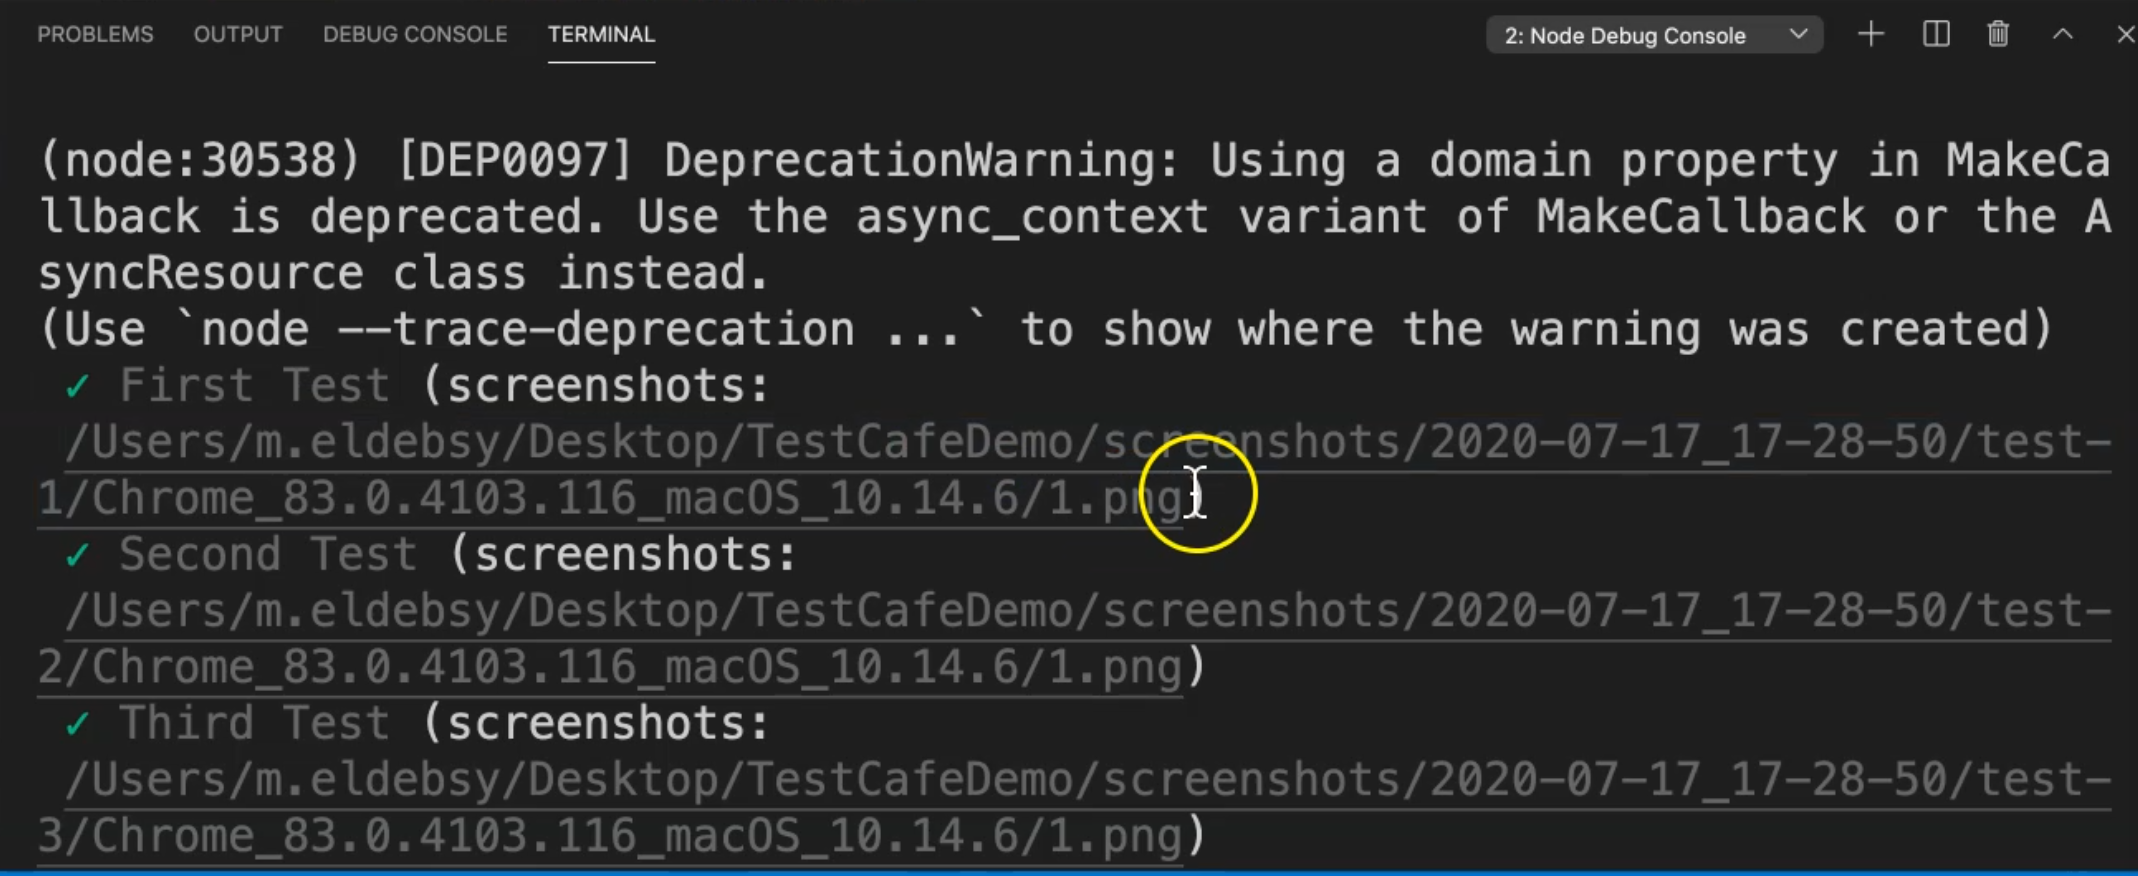
If we open the terminal, we can find that the first test is already creating one screenshot with .png extension in this path under screenshots with the date, time, and the test name - and also here for the second test and also for the third test.
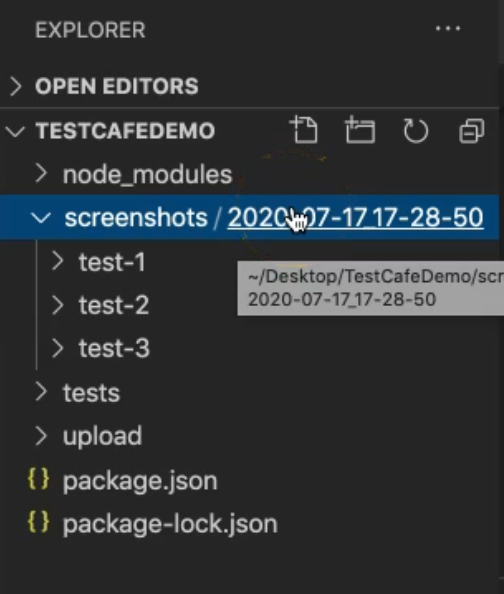
Also, if we go to the root of our application here, we can find screenshots is including a folder with the date and the time.
Inside this folder, this is for example for our run, because we have one run inside this folder.
And here, we have test-1, test-2, test-3 without any additional parameters or without any additional library, we just need to take a screenshot with TestCafe calling the function takeScreenshot.
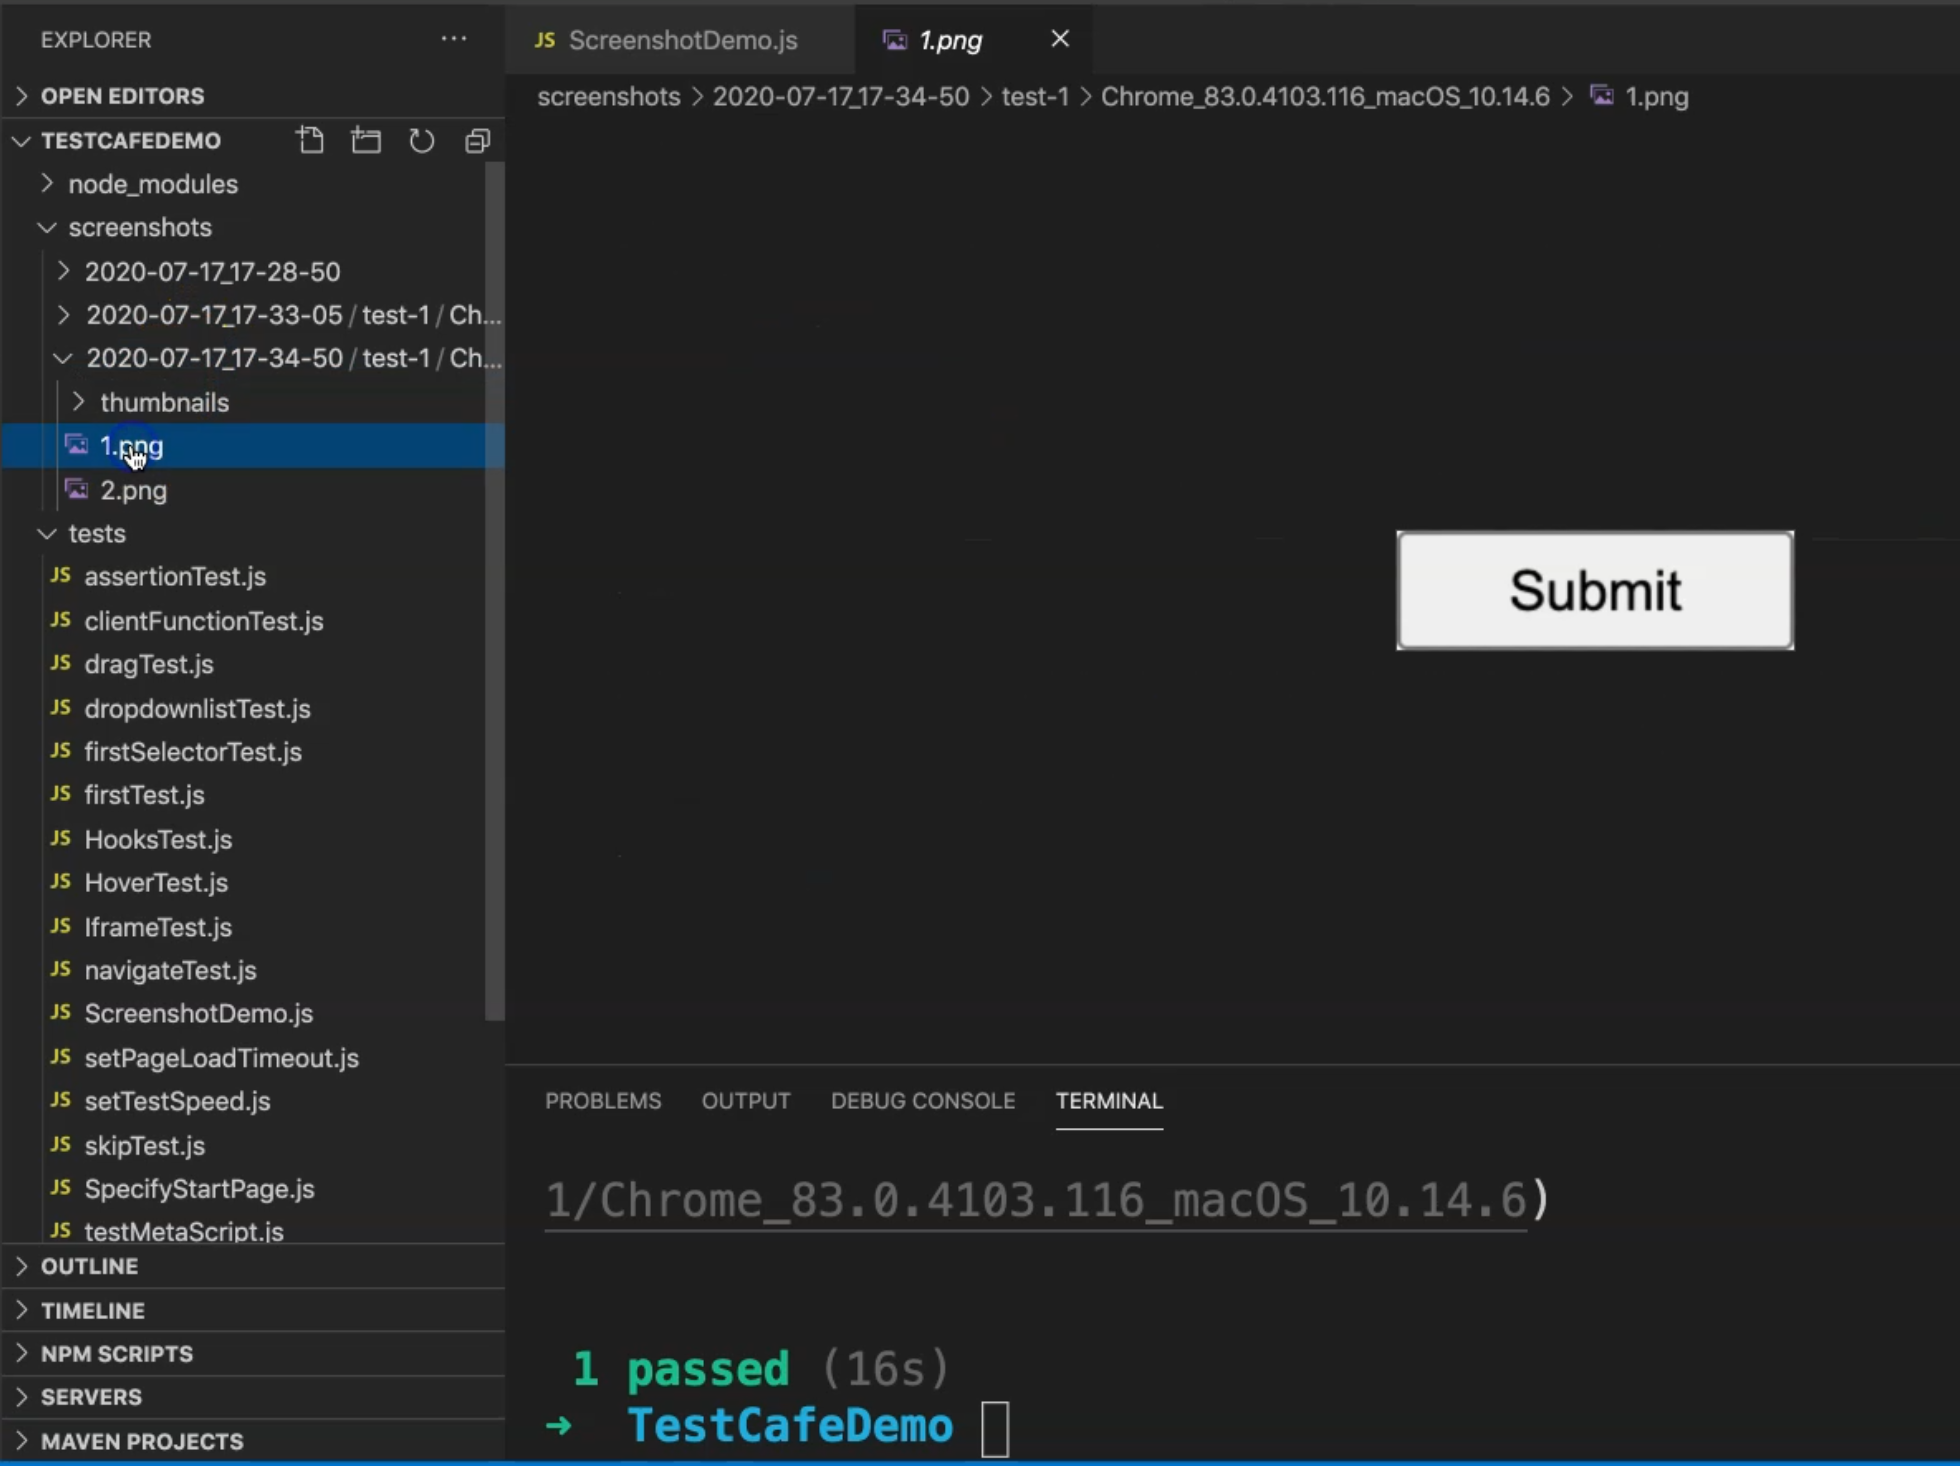
With test-1, we have the picture and we also have thumbnails for this image. So here we have 1.png and then in test-2, we also have 1.png.
This is a different image because we add a screenshot in a different step after we click on this radio button, and for test-3, it will be the same - 1.png - because we selected it here.
So with taking a screenshot, you can just use the takeScreenshot function or method with TestCafe and that's it. It will put it in this directory with the date and with the time that we are running in our test.
# Take a screenshot for a specific element
The second option is to take a screenshot for a specific element.
For example, if you wanted to ensure that the submit button is displayed correctly or is displayed in the page, so after clicking on this button (#macos), for example, or before clicking on this button, we can just say, take a screenshot, but here we'll say takeElementScreenshot.
For takeElementScreenshot, this is for taking a screenshot for a specific element and we usually pass a selector for this element.
And the selector is, for example, we can take the "#submit-button" selector and that means that we need to take a screenshot for the submit button.
fixture("First Fixture")
    .page("http://devexpress.github.io/testcafe/")
    .beforeEach(async t =>{
        await t
            .setTestSpeed(0.1)
            .setPageLoadTimeout(0);
    });

test
.page("https://devexpress.github.io/testcafe/example/")
("First Test", async t =>{
    await t
        .typeText("#developer-name","TAU")
        .click("#macos")
        .click("#submit-button")
        .takeScreenshot();
});

test
.page("https://devexpress.github.io/testcafe/example/")
("Second Test", async t =>{
    await t
        .typeText("#developer-name","TAU")
        .click("#macos")
        .takeScreenshot()
        .click("#submit-button");
});

test
.page("https://devexpress.github.io/testcafe/example/")
("Third Test", async t =>{
    await t
        .typeText("#developer-name","TAU")
        .click("#macos")
        .takeElementScreenshot("#submit-button")
        .click("#submit-button")
        .takeScreenshot();
});
So let's run our tests - for example, here, if we wanted to run the third test only, we can just pass - as we know - -t with the test name.
testcafe chrome tests/ScreenshotDemo.js -t "Third Test"
So let's run this one and check what happened during our test.
TestCafe will open the server, redirect to the URL, execute the steps.
After that, we can check the folder for the screenshots to see if it includes the elements or not.
Then we need to submit button, and here we go.
So our test passed and so for example, we need to open the folder.
There we have yes, here we have this is the screenshot for the element #submit-button.
And here we have the screenshot for the whole page.
To be able to take a screenshot, just takeElementScreenshot and pass the selector or takeScreenshot for the whole page.
What if we need to take a screenshot only when the test cases are failing?
We don't need to take a screenshot for everything. We just need to take a screenshot when something wrong happened during our test.
Here we will remove the screenshots folder to ensure that the screenshot will be saved if we have any problem in our test, and then we will remove any screenshot line or function here in our demo.
We don't have any screenshot in our test case, and we can only pass it when we are running our tests with only failed test cases.
Here we can just run our test. Then we can say -s takeOnFails=true.
testcafe chrome tests/ScreenshotDemo.js -t "Third Test" -s takeOnFails=true
Here we are just passing this parameter -s which is a shortcut for the screenshot, takeOnFails only equals true, which means that we will take a screenshot only on failure.
Let's run our tests and check what happens - if we have a screenshot or not.
We will run the server, TestCafe will redirect to the URL and execute our test case.
After we finish, we will notice that we don't have anything saying that we took a screenshot and we don't have any screenshots folder.
Why? Because our test passed.
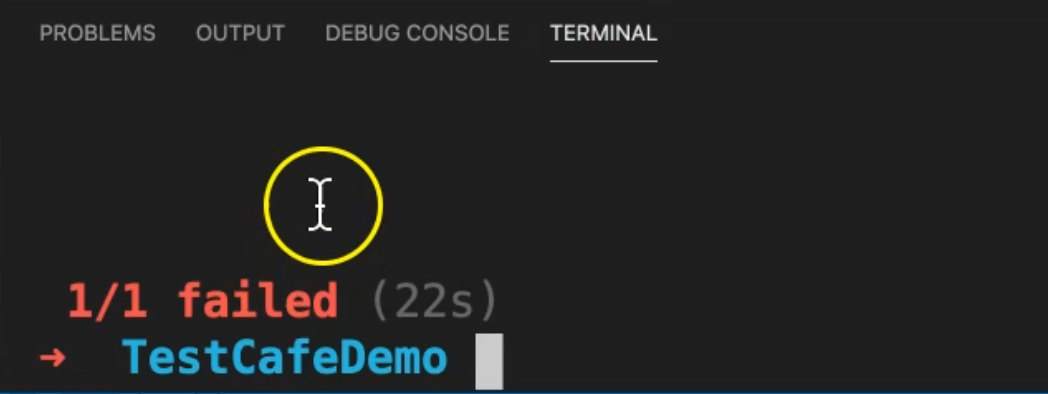
So what if, for example, we changed something here in the selector and to try to run our test again?
We will change our selector from #submit-button to #submit-buttonrrr and our test should fail and we will check what happened during our test.
Normally, we enter the text, select the radio button, and we have a problem after that in the selector for the button. TestCafe is now waiting for the element to appear in the DOM, but after the time out or a specific time out, the test will fail.
So then here we have one test failed.
And if you scroll up, we will see that we already have one screenshot in the folder with the name errors.

So if we open the screenshots here, we have 1.png.
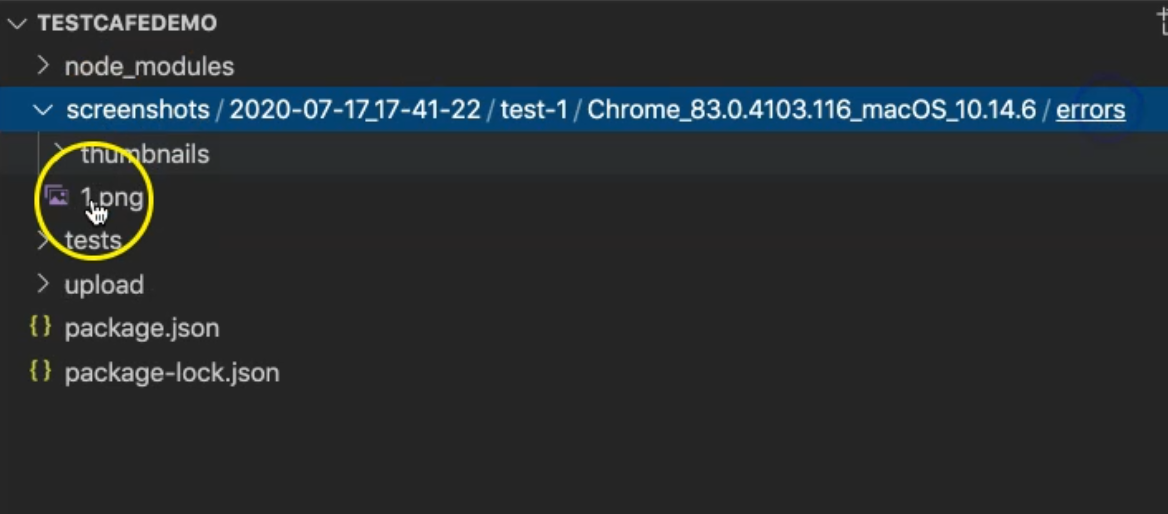
So if we open screenshots, we have date and time, then the test name, then the browser name chrome and operating system name, and the folder errors. And if we open errors, we will find that screenshot and also we have thumbnails.
We can take a screenshot only on failure. We can take a screenshot for elements and we can take screenshots if you want, from any line inside our test cases.
Resources
Quiz
The quiz for this chapter can be found in 6.5
