

Transcripted Summary
# How to change the test speed
In this demo, we will learn how to change the test speed. As we noticed previously, when we run our test, the test is very fast. And maybe sometimes we can't find what happened during our test. So in this demo, we will learn how to reduce the speed of the test. For example, here, we can copy firstTest.js and change the name of the new file to setTestSpeed.js.
We will just change the name of the test for example Set Test Speed Test and the fixture name to be Speed Test Fixture.
And here before we interacting with our elements so we just need to add setTestSpeed this is our function or the method that we will use in the part, this one specifies the speed of the test execution and we are passing the speed as a number for example if we add 1 this is the fastest speed and I think this is the default value and if add this value 0.01 this is the slowest one.
For example, if we try the slowest value here we will add 0.01
And after that, we will check our test with
testcafe chrome tests/SetTestSpeed.js
and we will check what happened during our test, So we will check the speed of the test case, So we are opening the URL and here we will find that the test is now slower than before and we can check what happened during our tests or our steps.
So what if we can change for example remove 0 to be .setTestSpeed(0.1) and I think it's faster than before, let's try it again by running our test again and as we noticed it's faster than before.
We can use setTestSpeed for just to change the speed of our testcase
import { Selector } from 'testcafe';

fixture `Speed Test Fixture`
    .page `http://devexpress.github.io/testcafe/example/`;

const nameInput = Selector('#developer-name');

test(`Set Test Speed Test`, async t => {
    await t
        .setTestSpeed(0.1)
        .typeText(nameInput, 'Peter')
        .typeText(nameInput, ' Parker');
});
# How to set the page load timeout
In this demo, we will learn how to set the page load timeout.
For this example, we will click on tests and create a new file setPageLoadTimeout.js. Here, we can paste our code with the fixture and name it "Set page timeout Fixture". We will also rename the test title to "set page timeout Test" also.
fixture("Set page timeout Fixture")
    .page("http://devexpress.github.io/testcafe/");

test("set page timeout Test", async t =>{
    await t
    .navigateTo('http://devexpress.github.io/testcafe/');
});
In this example, we are navigating to another URL. We are opening the page from the fixture and after that, inside our test, we are navigating to another URL.
Before navigating, we can call setPageLoadTimeout(), which specifies the amount of time within which TestCafe waits for the window.load event to fire before starting the test.
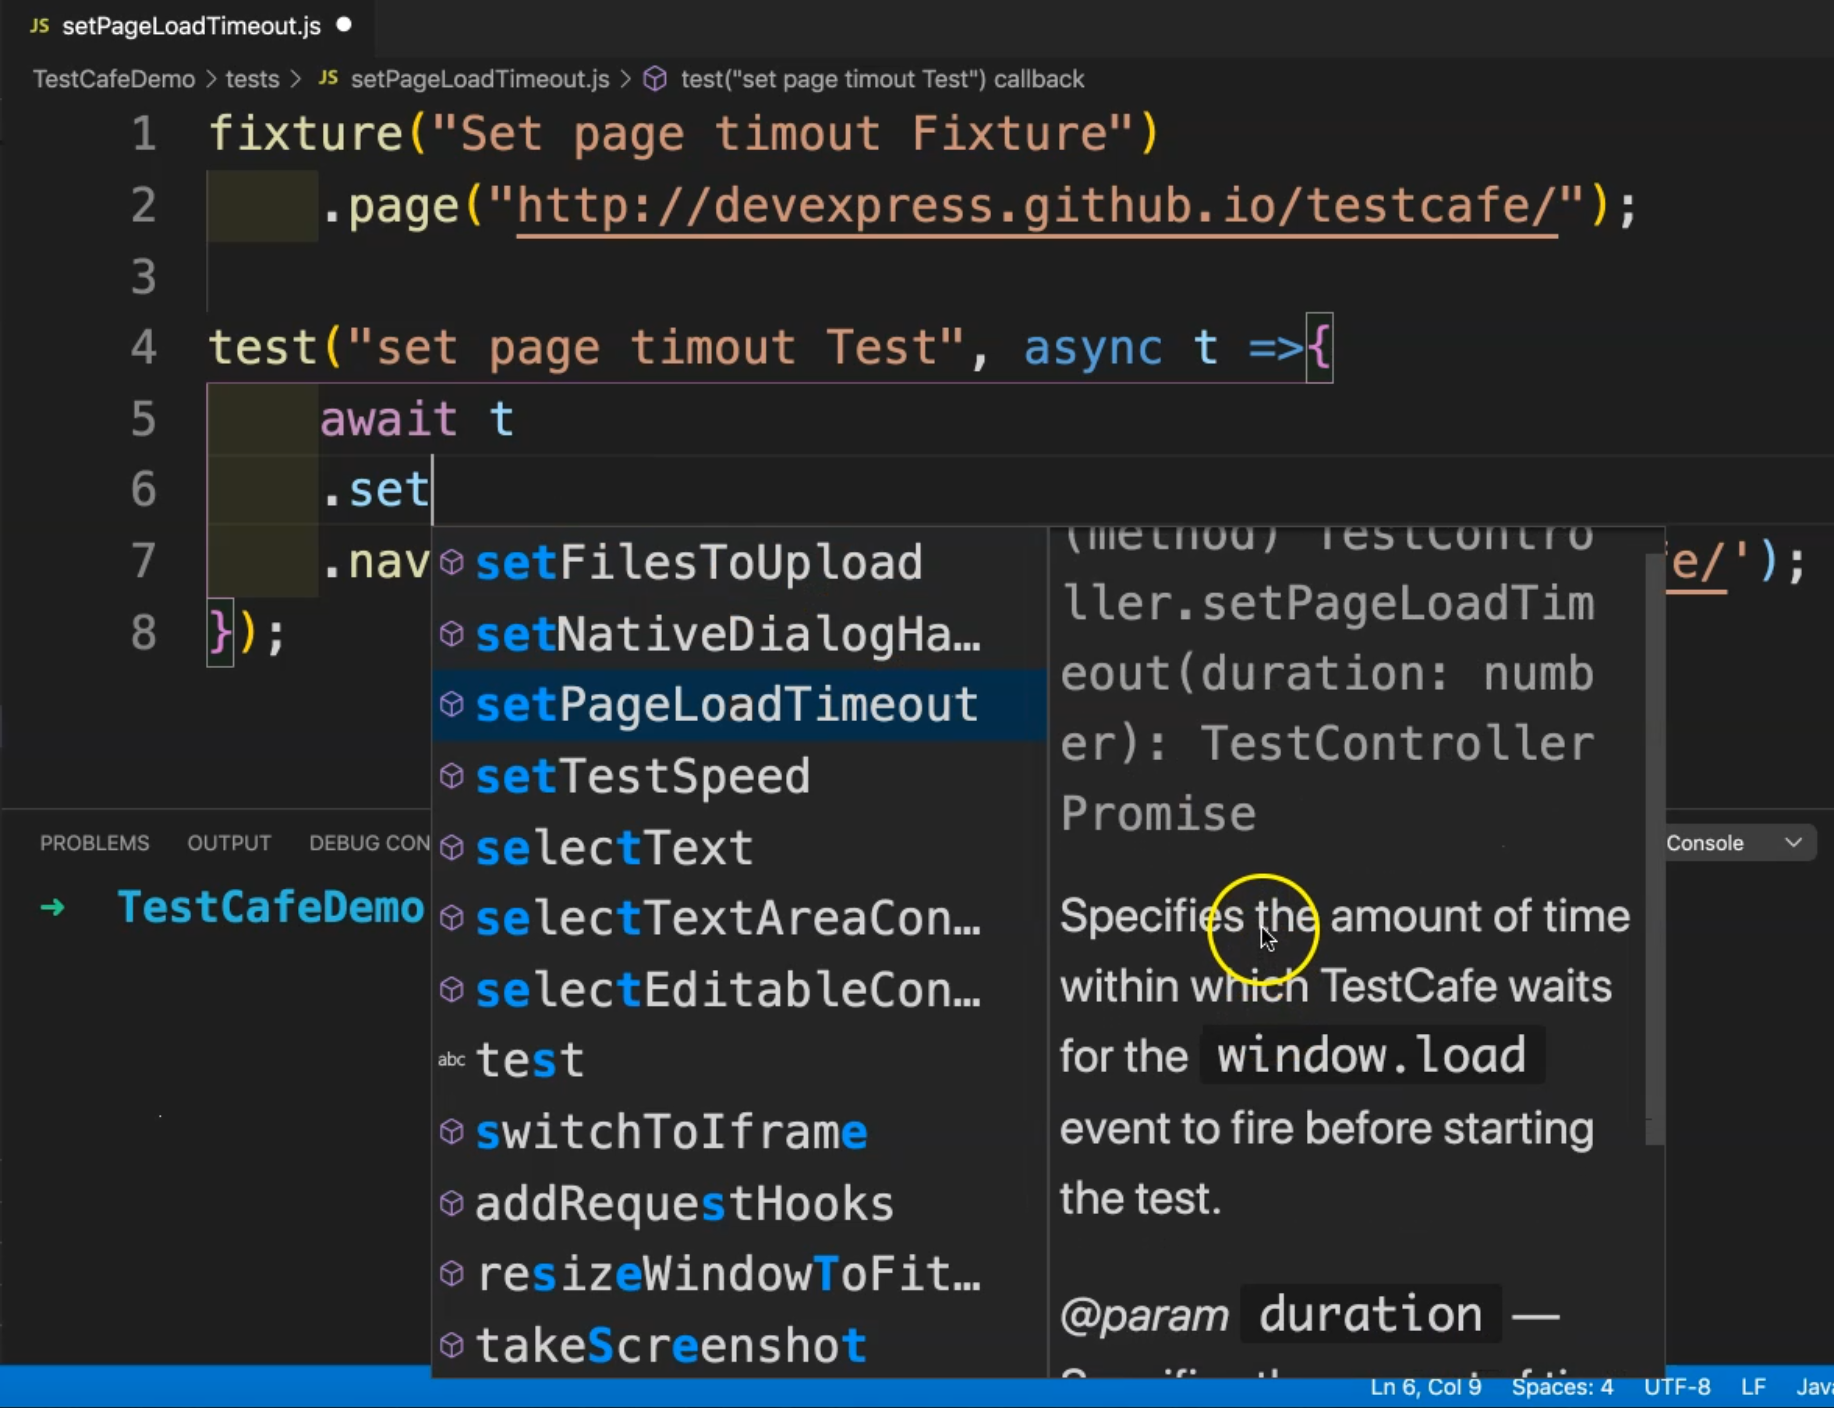
For example, here we can specify that we don't need any time - so it's zero - we don't need to wait until the page is loaded. Then we start to navigate to our test.
fixture("Set page timeout Fixture")
    .page("http://devexpress.github.io/testcafe/");

test("set page timeout Test", async t =>{
    await t
    .setPageLoadTimeout(0)
    .navigateTo('http://devexpress.github.io/testcafe/');
});
From here, we can test our code:
testcafe chrome setPageLoadTimeout.js
And we will check the result.
Now TestCafe is opening its server, then we redirect to the URL. We redirect to the main URL, then we have redirected again without any timeout - we don't need to wait until the page is loaded.
# How to drag an element to a specific offset using TestCafe
In this demo, we will learn how to drag an element to a specific offset using TestCafe.
In our example page, we have a slider and it will be able to drag to a specific offset.
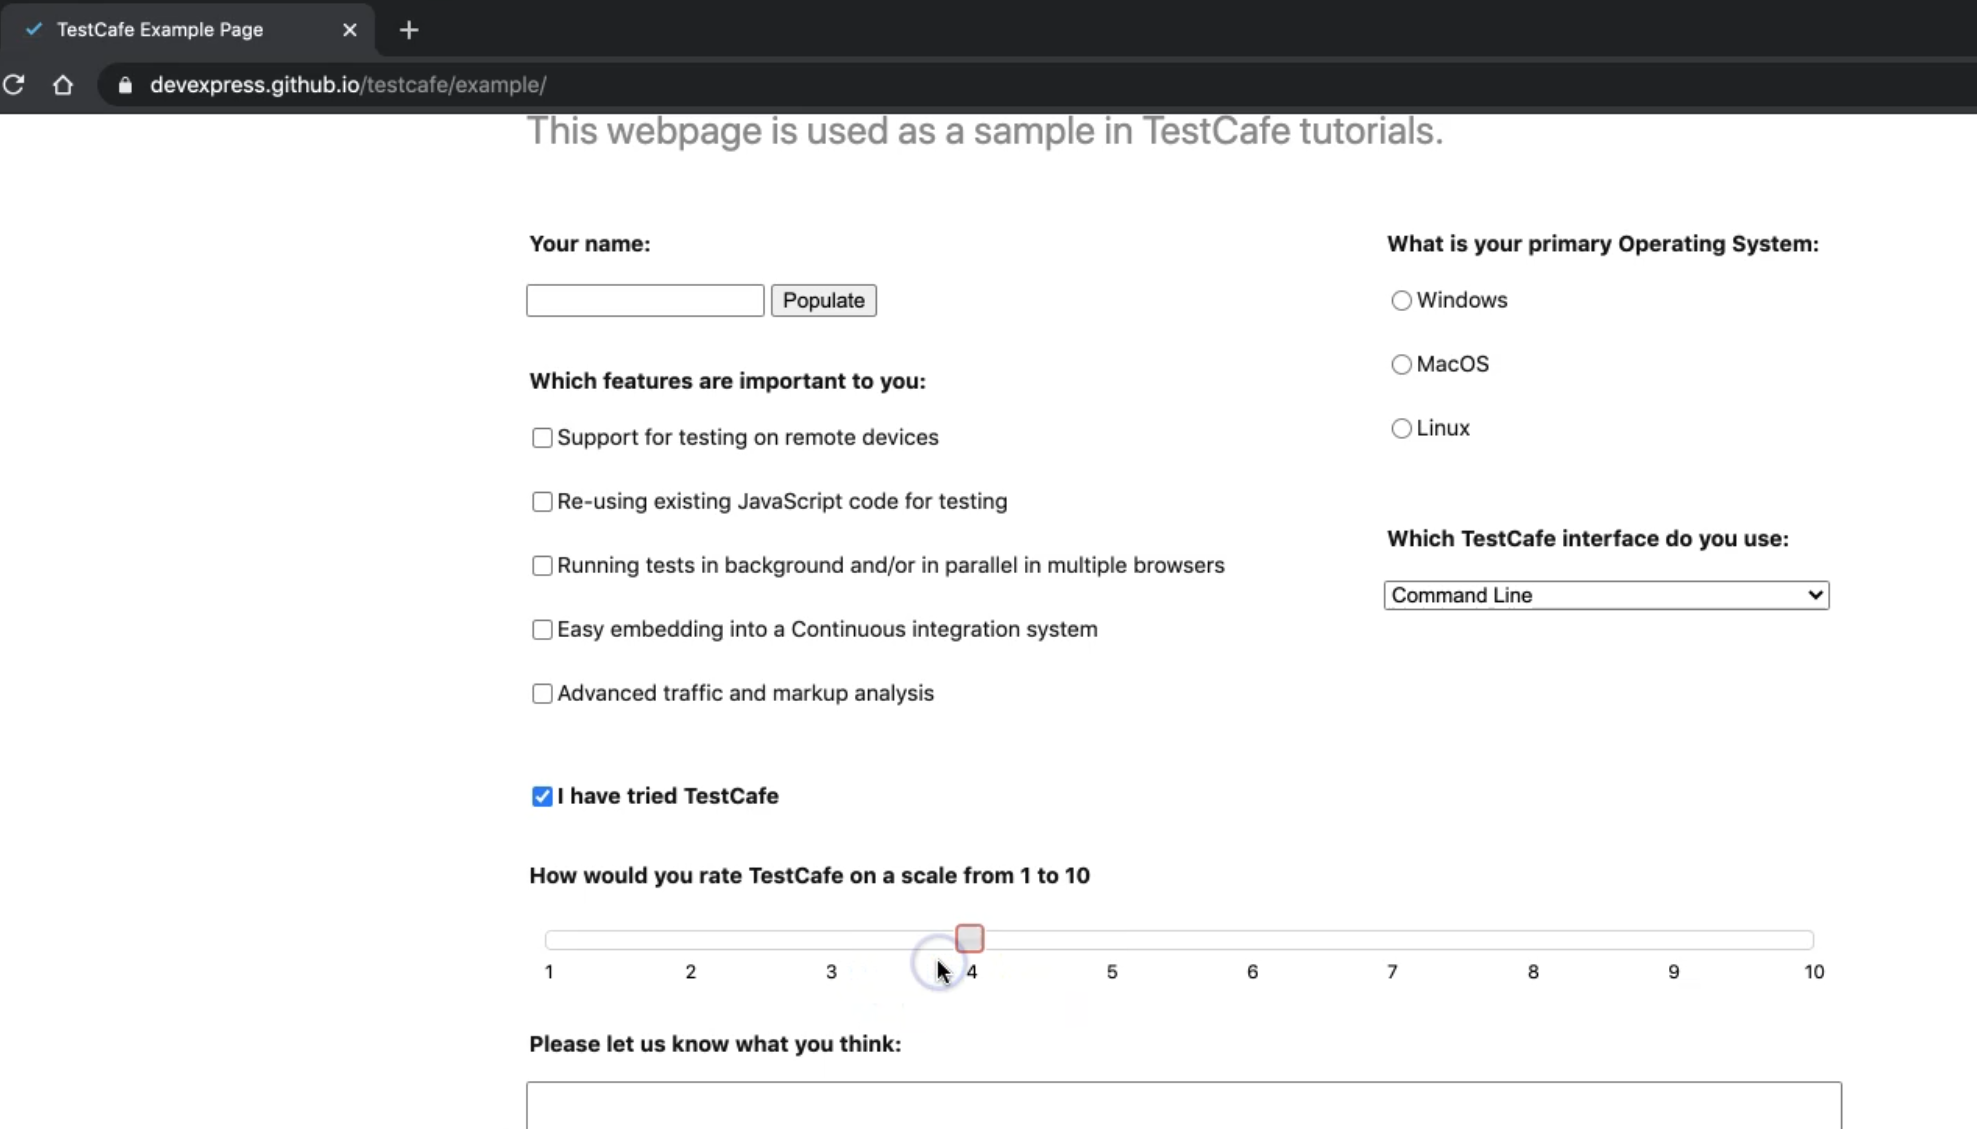
We need first to check "I have tried TestCafe". And after that, we can change the value of the slider to what we want.
To be able to use it with TestCafe, we need to use a different command - drag() from TestCafe.
So let's open our project and inside tests, we can create a new file dragTest.JS.
Then we will add the import line for example
import { Selector } from 'testcafe' ;
Then we need to find the elements that we will be working with if we open our page I just need to click on I have tried TestCafe and then after that, we will be able to work with the slider, so here we have 2 elements
So I will right-click here and inspect this element and from the inspector, we have the item and for example, I can get the label or I can find the label with this string.
So here I can just add one const and name it like
const triedCheckbox = Selector('label').withText("I have tried TestCafe")
So this is the first element.
After that, we will add one const again for the slider and I can name it "slider" and we can go to the slider and here I have a slider and we already have a div for a slider and I can get this one
const slider = Selector('#slider');
So these are the two elements that we will be working with and after that, I can start writing my test and my fixture, so here we will add fixture and it will be for example "Drag Test" and add .page and I can copy the URL from the website or our application under test
fixture ('Drag Test')
.page('https://devexpress.github.io/testcafe/example/');
And then we will add our test and the test is the "Drag Testcase" and the function body
test('Drag Testcase', async t =>{
 await t

});
The first step I will click on I triedCheckbox
Then I will use the new command in our video here, it's the drag command
so if I open this one, drag is using different offsets of X and Y of the mouse pointer so here I can add for example of the element of the slider and adding 360 as a position and add 0, then add offset of offsetX:10 and offsetY:10.
So here I click first to enable the slider and then after that I need to click on the slider to move the pointer to any position on the screen.
So let's run our test and check what happened during our test with:
Testcafe chrome tests/DragTest.js
Then we will wait until testcase to initialize the server and after that, we will check our test, then we will redirect to the test and the test is passed
We will notice that was very fast and in this case, if want to check the drag function we can just add before click .setTestSpeed(0.01) and just it.
Let's run it again and check our test case.
import { Selector } from 'testcafe';

const triedCheckbox = Selector('label').withText("I have tried TestCafe");
const slider = Selector('#slider');

fixture ('Drag Test')
.page('https://devexpress.github.io/testcafe/example/');

test('Drag Testcase', async t =>{
 await t
    .setTestSpeed(0.01)
    .click(triedCheckbox)
    .drag(slider,360,0,{offsetX:10, offsetY:10});
});
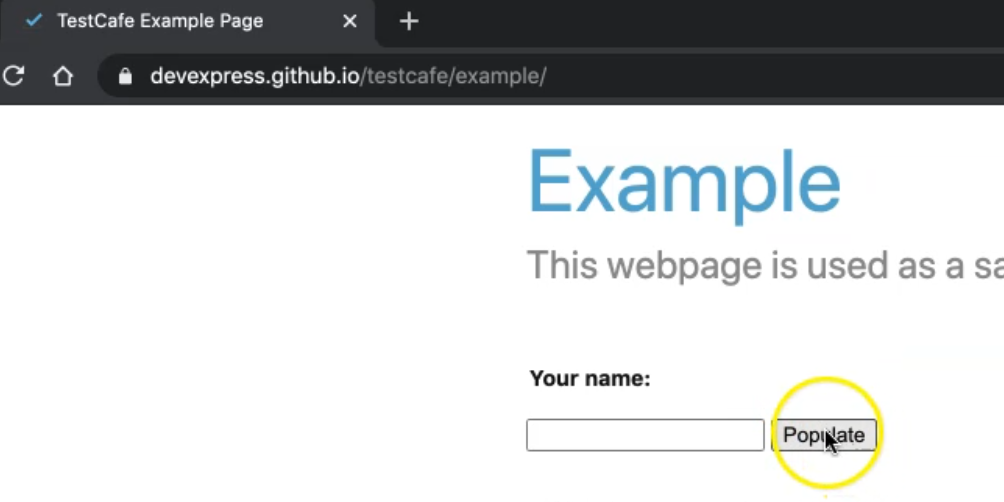
# How to use hover with TestCafe
In this demo, we will learn how to use hover with TestCafe. For example, I want to hover on this button in our test.
Let's open our code - inside of the tests, we can create HoverTest.js and we can add the fixture with the page URL, and the test with the hover, and await, and setTestSpeed to be able to check that the mouse, or that pointer, is already hovering on that button.
fixture("Hover Fixture")
.page("https://devexpress.github.io/testcafe/example/");

test('Hover test', async t => {
    await t
        .setTestSpeed(0.1);
});
In the beginning, we just need to inspect this element to get the CSS selector.
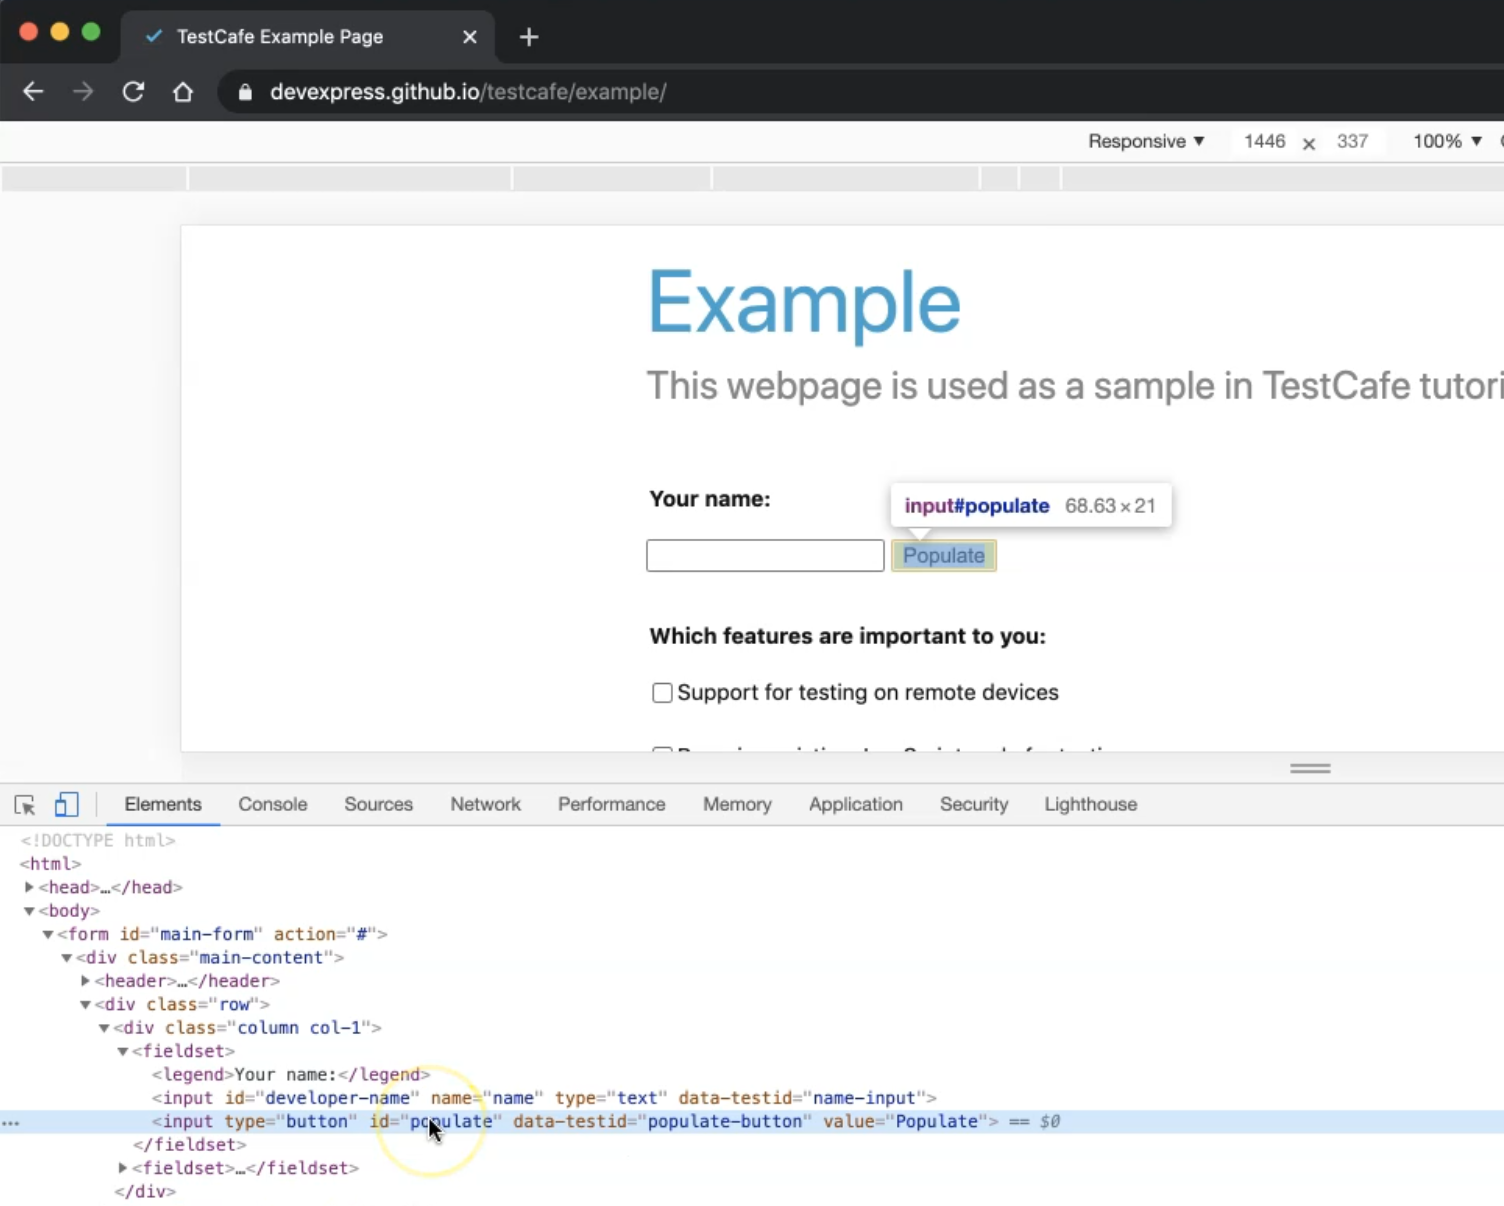
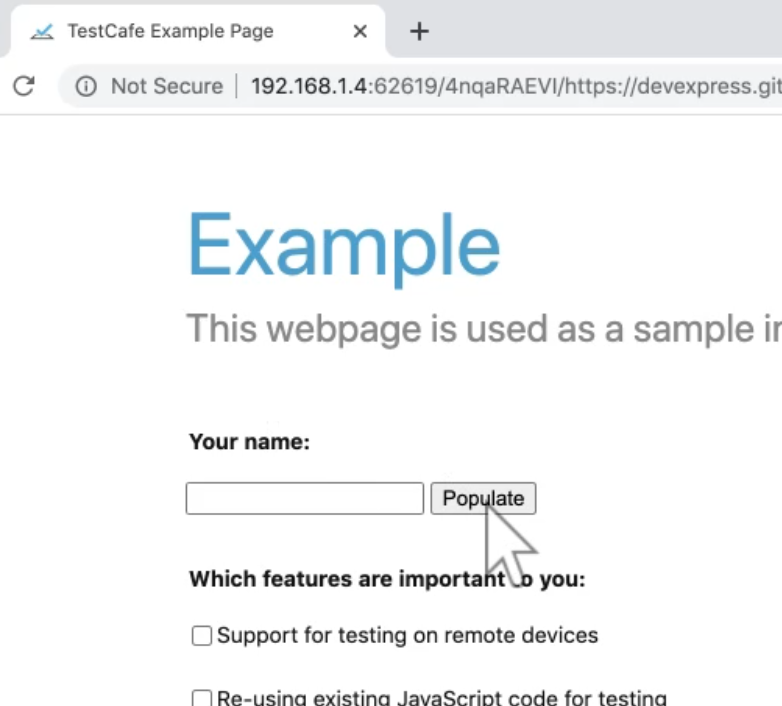
Here we have an input and populate is an ID. So I can use the command hover().
What is the description of hover?
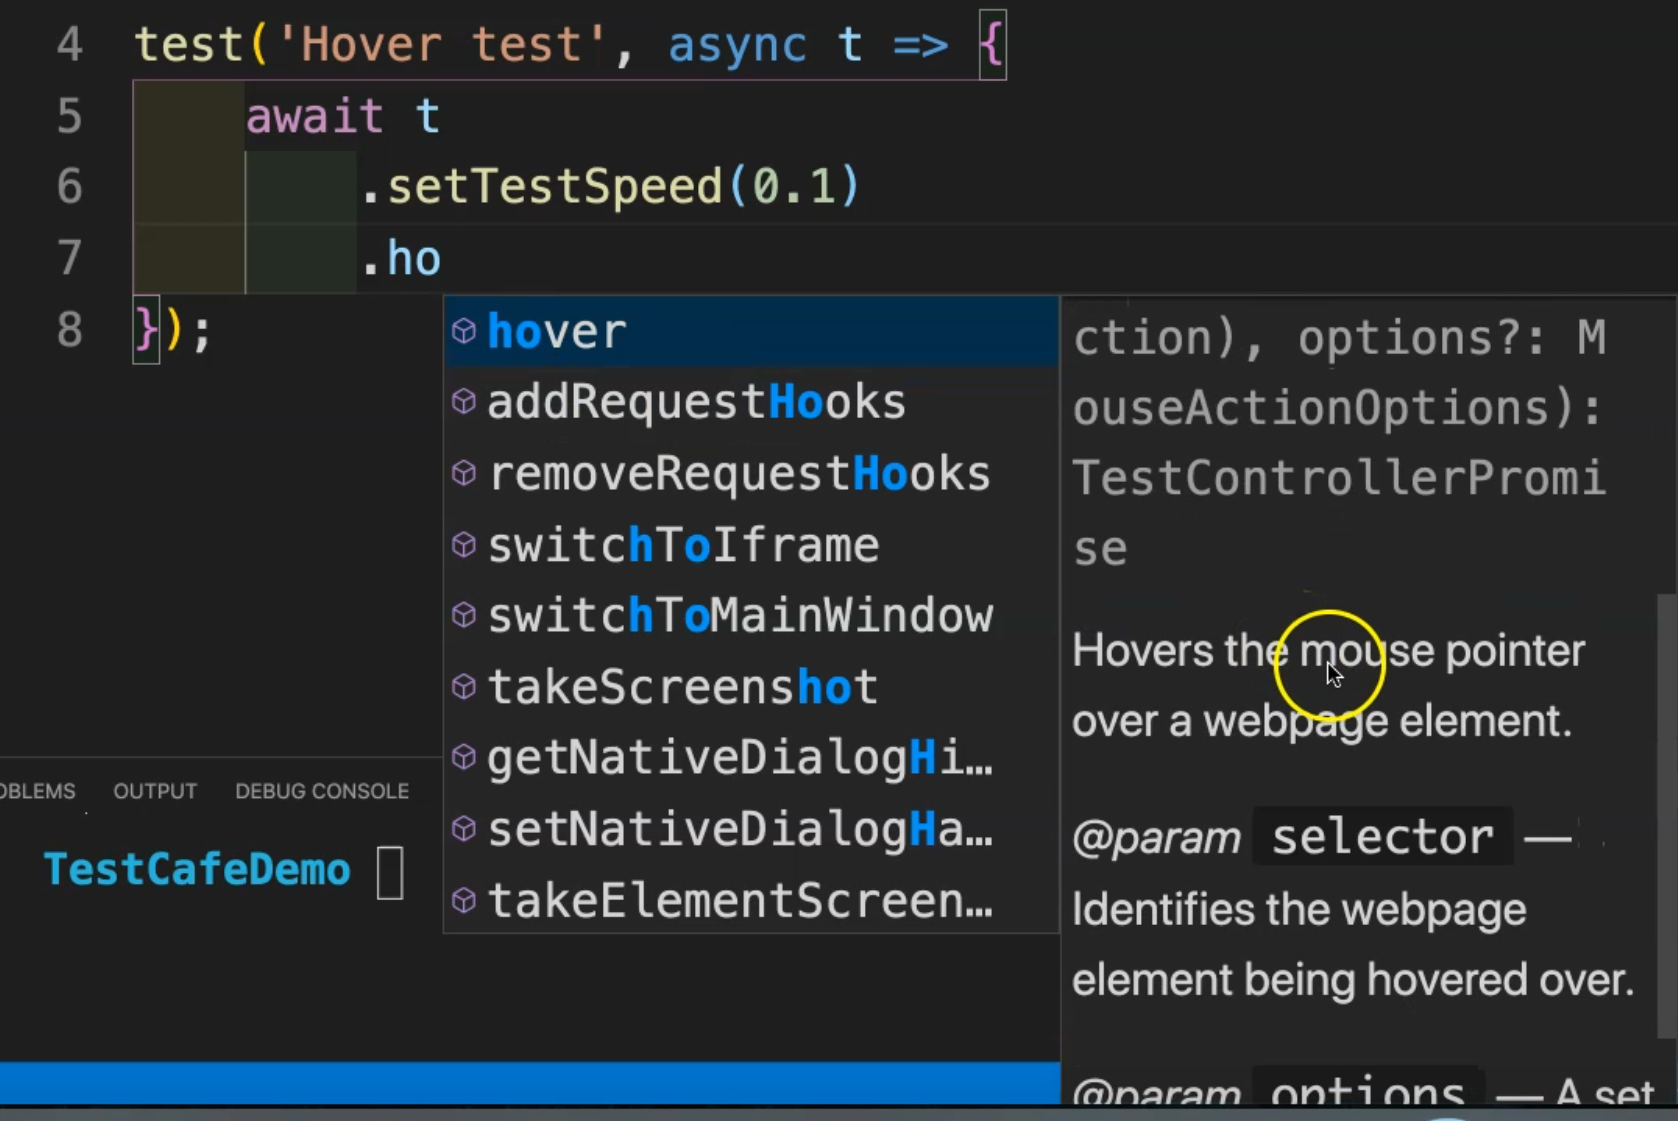
It hovers a mouse pointer over a webpage element, so we need to pass the element - in our case - it's input, and we have ID populate.
fixture("Hover Fixture")
.page("https://devexpress.github.io/testcafe/example/");

test('Hover test', async t => {
    await t
        .setTestSpeed(0.1)
        .hover('input#populate');
});
In this test, we just check how we can use hover with TestCafe.
We can just run:
testcafe chrome tests/HoverTest.js
So now we'll check what happened during our test. TestCafe is running now, and we'll redirect. We also added the test speed and reduced the test speed, so here, we just hovered on the button. As the mouse pointer is on the button, and our test is passed.
Resources
Quiz
The quiz for this chapter can be found in 4.10
