

Transcripted Summary
# Run Tests in Parallel With TestCafe
TestCafe allows us to execute tests concurrently.
In concurrent mode, TestCafe invokes multiple instances of each browser.
These instances constitute the pool of browsers against which tests run concurrently. For example, each test runs in the first available instance.
To enable concurrency, use -c or --concurrency with the command line.
In this example:
testcafe -c 3 chrome tests/test.js
This command invokes three Chrome instances and runs tests concurrently. 3 is the number of instances we need to run from Chrome, so we will run three Chrome instances. After that, we are passing our test file.
The concurrency with TestCafe means that we are running or splitting the test with different concurrency. We are not repeating the test with the same or with each instance. This is the main idea or main point about concurrency or parallelization with TestCafe.
We can also use concurrency when testing against multiple browsers. For example:
testcafe -c 4 safari,firefox tests/test.js
This means that we will open four instances of Safari and four instances of Firefox browsers and run our tests. And finally, one important note - the concurrent test execution is not supported in Microsoft Edge.
# Run Tests in Parallel Demo
In this demo, we will learn how to run our tests in parallel using the concurrency options with TestCafe.
For example, here from the command line, I can say:
testcafe -c 2 chrome tests/HooksTest.js
This means that I need to open two instances of Chrome browser. Then with tests, I can, for example, test the Hook test.
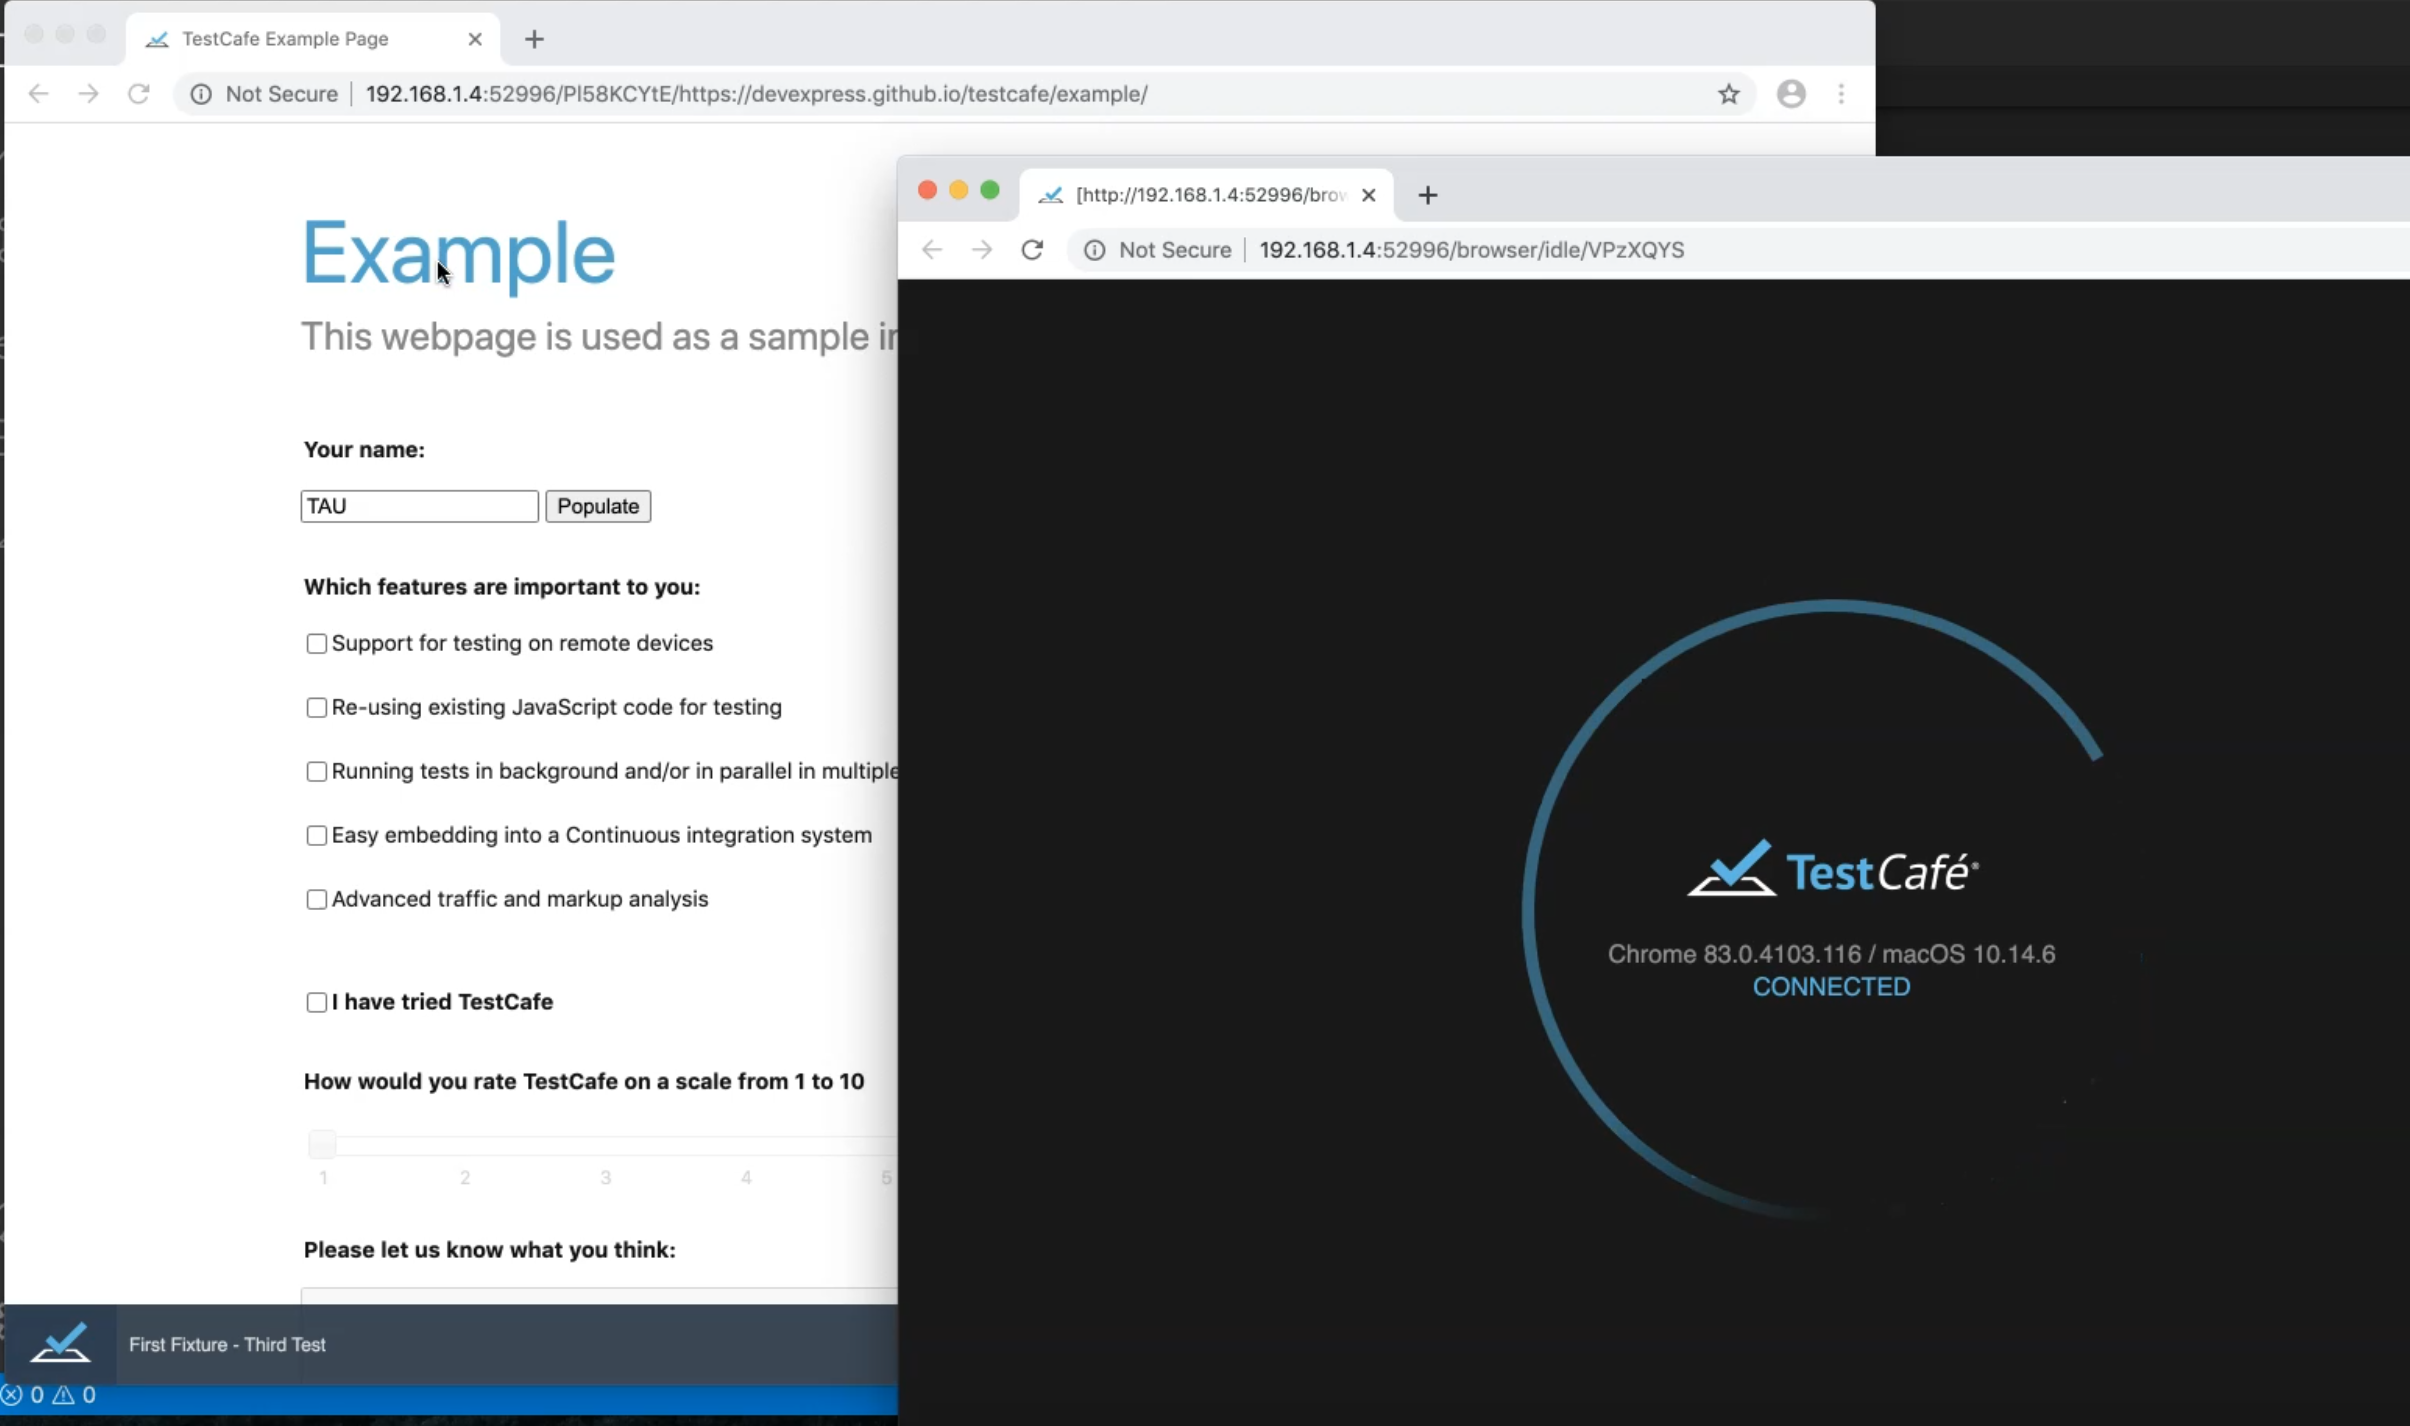
Now we are running our TestCafe and will note that we are opening two instances of Chrome.
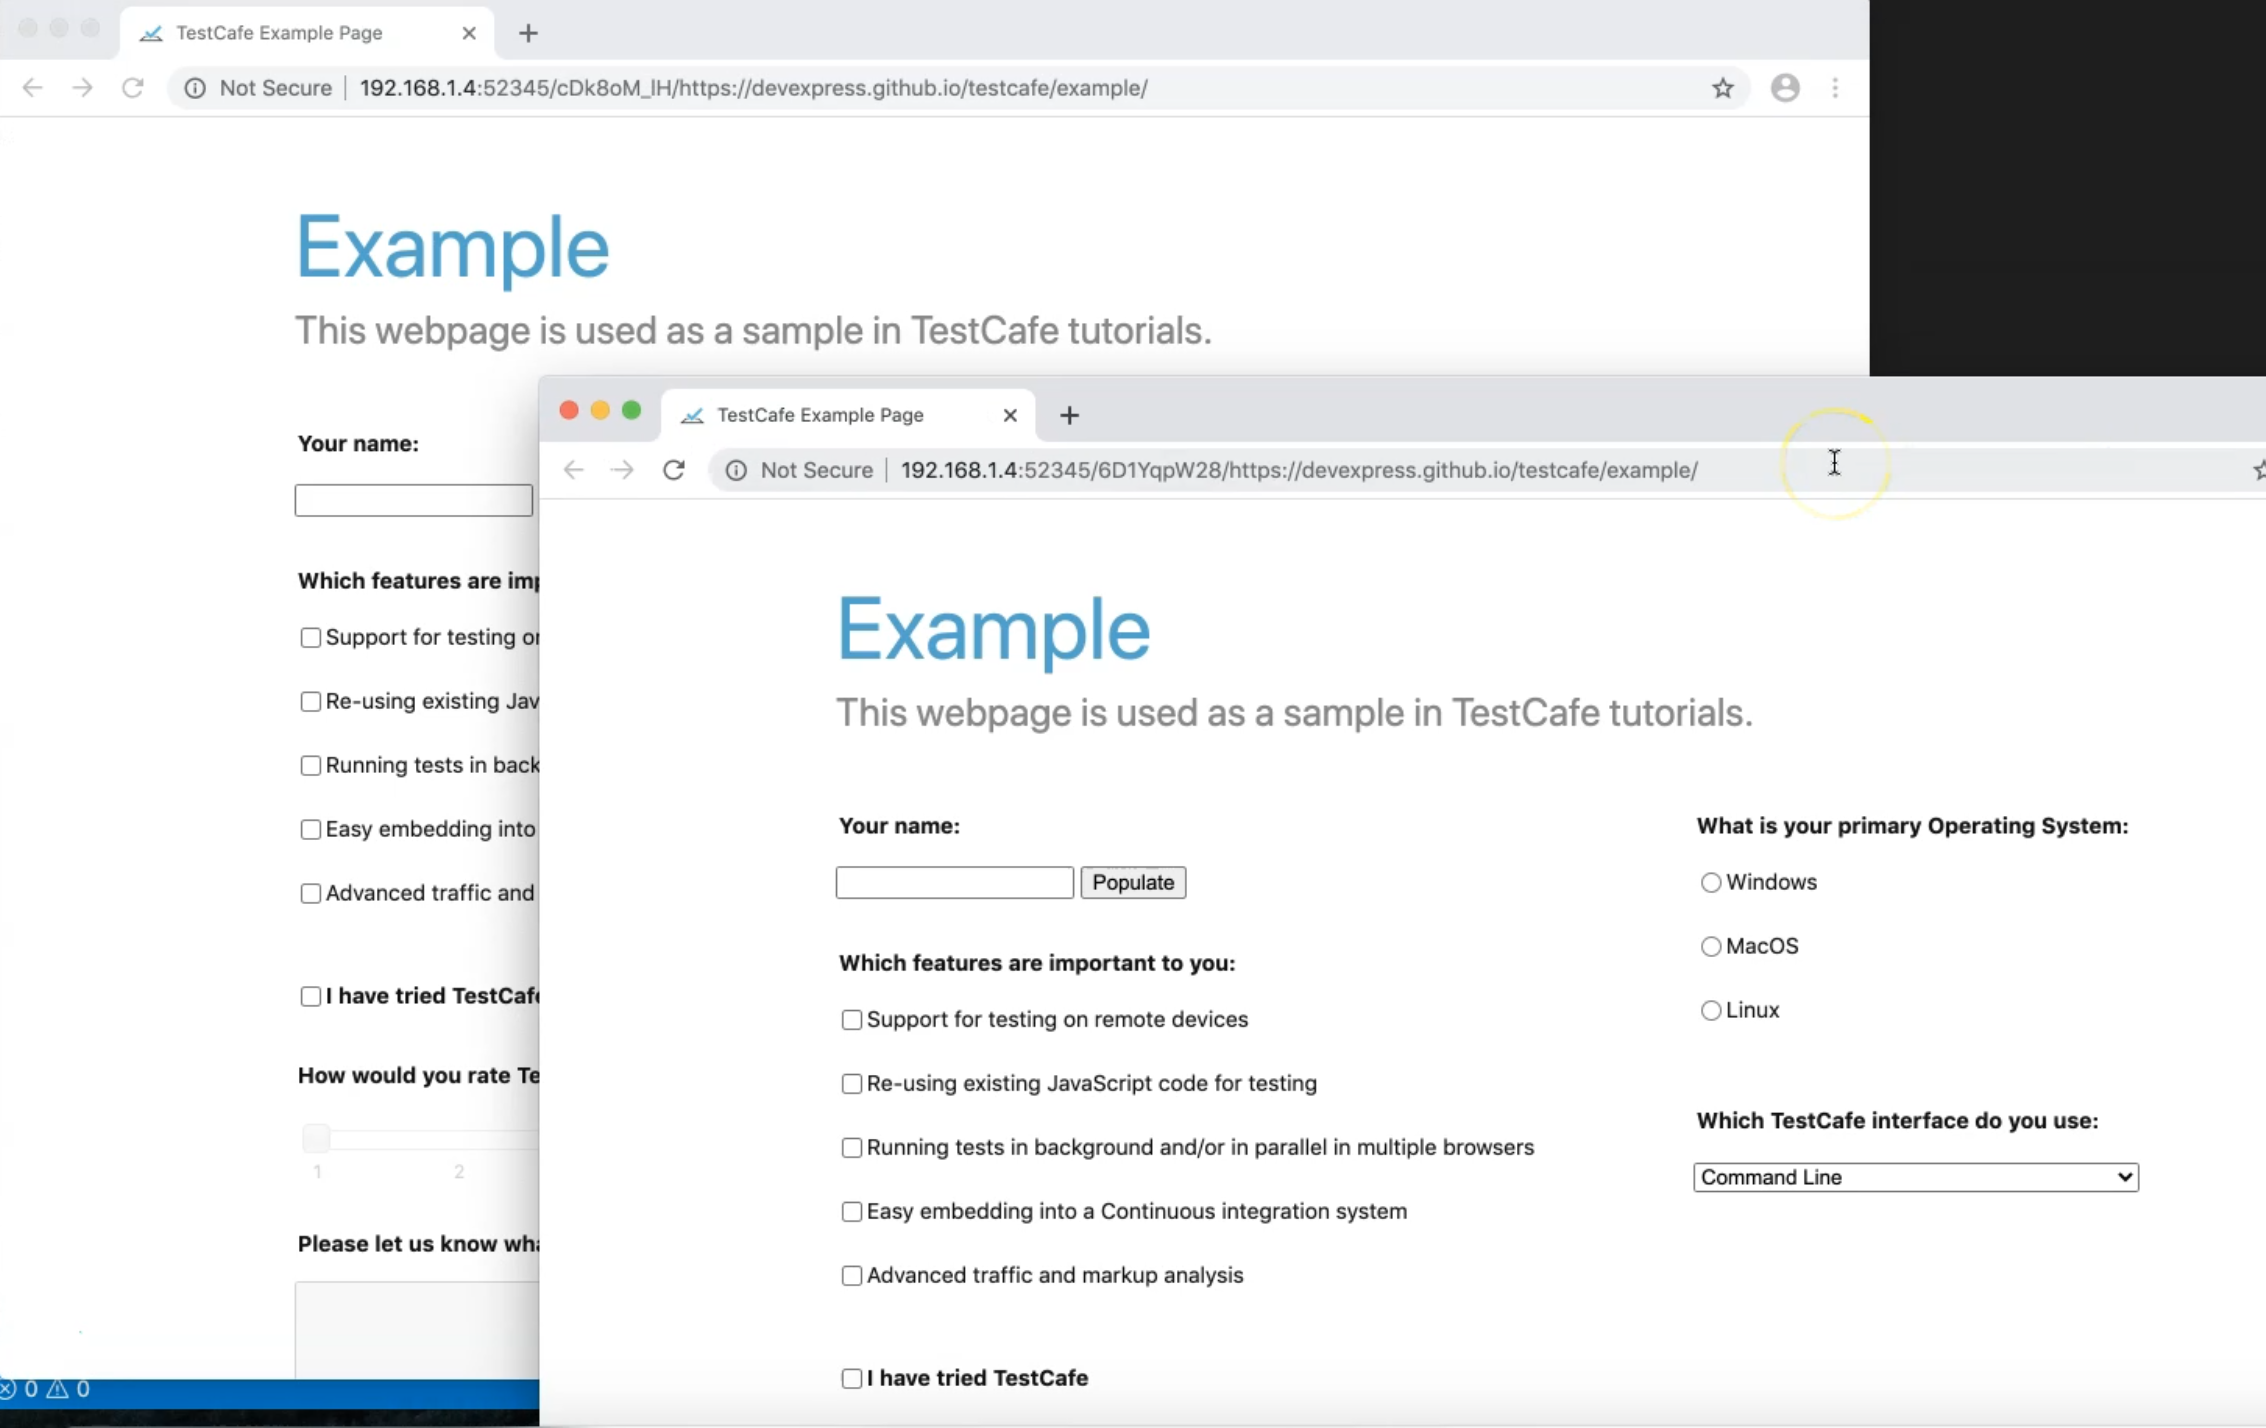
We are now running in two different instances in our test cases, and after that, we can maximize the window and check the result.
So here, our test cases are passed.
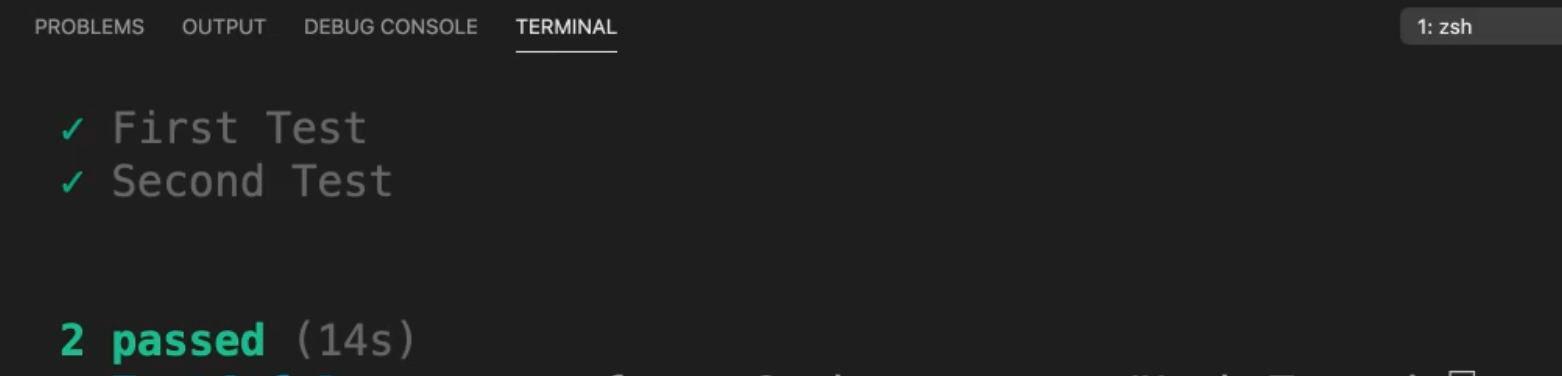
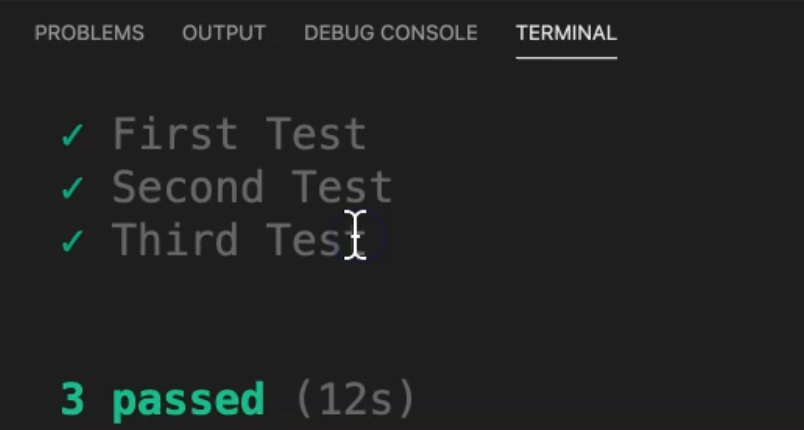
What if we open our test HooksTest.js, and here we can remove the maximizeWindow() just to try something else? Here we can copy one test from this, and we can add it to the bottom. So this is the third test case. So here we have three test cases in one file.
fixture("First Fixture")
    .page("http://devexpress.github.io/testcafe/")
    .beforeEach(async t =>{
        await t
            .setTestSpeed(0.1)
            .setPageLoadTimeout(0);
    });

test
.page("https://devexpress.github.io/testcafe/example/")
("First Test", async t =>{
    await t
        .typeText("#developer-name","TAU")
        .click("#macos")
        .click("#submit-button");
});

test
.page("https://devexpress.github.io/testcafe/example/")
("Second Test", async t =>{
    await t
        .typeText("#developer-name","TAU")
        .click("#macos")
        .click("#submit-button");
});

test
.page("https://devexpress.github.io/testcafe/example/")
("Third Test", async t =>{
    await t
        .typeText("#developer-name","TAU")
        .click("#macos")
        .click("#submit-button");
});
Now we'll run:
testcafe -c 2 chrome tests/HooksTest.js
Let's run our test and check what happened during our test.
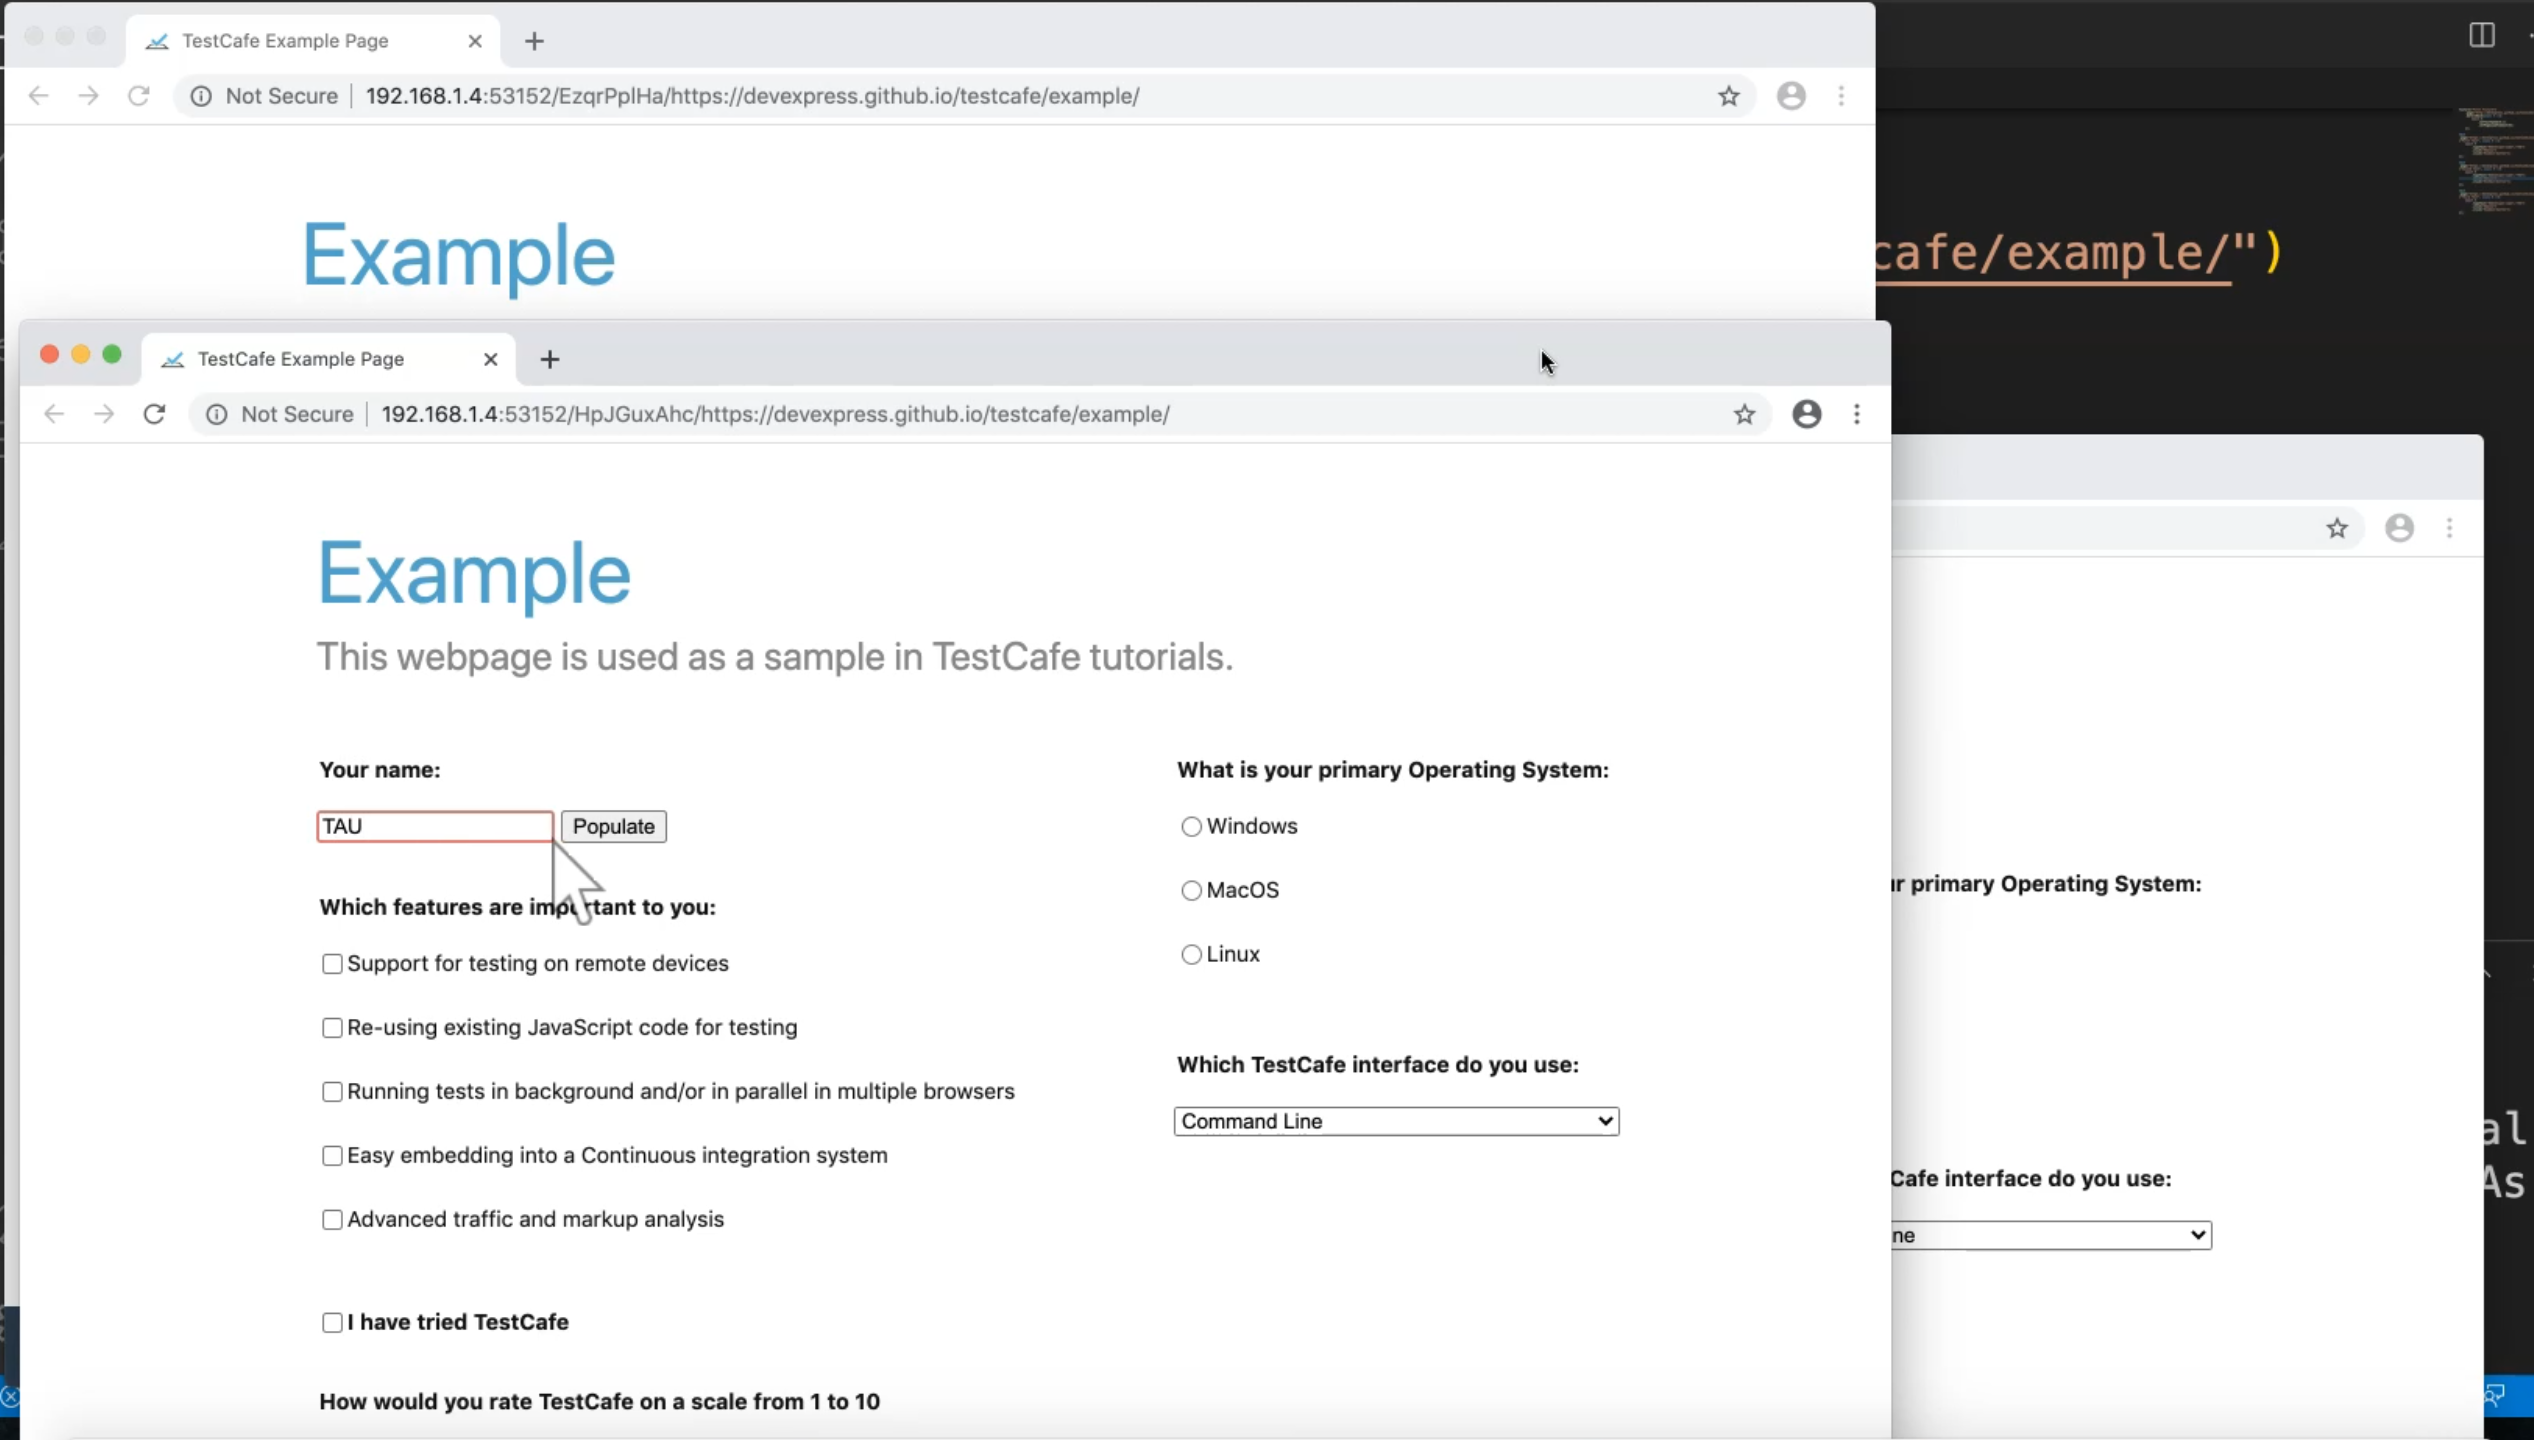
Here we have two instances, and we entered the same values because this is the same script. So here, this one is finished because here we are running two instances.
This means that when we are running different tests with concurrency and that we are splitting the test cases in different instances of browsers.
Let's run something like:
testcafe -c 3 chrome tests/HooksTest.js
Let's check what happened during our test execution. So we are now opening three instances because each instance will take one test and run it. So here, our tests are running in parallel, and it's splitting our test into different instances or different browsers, and all of them are using beforeEach.
So here we have three tests passed; we have the first, and second, and the third one.
# TestCafe Live Mode
Live mode ensures TestCafe and the browsers remain active while you work on tests.
You can see test results instantly because the tests are restarted when you make changes.
We can use -L or --live flag to enable live mode from the command line interface.
For example:
testcafe chrome tests/test.js -L
# TestCafe Live Mode Demo
In this demo, we will learn how to run our test with TestCafe in live mode.
To run our test in a live mode, as we mentioned in our slides, we can use -L on the command line.
For example, here, we will open firstTest.js, and we'll try to run this one.
testcafe chrome tests/firstTest.js -L
Here, before we run our test, maybe we can just return it to the command line or the terminal, and here we have different commands.
Tests now are working in live mode.
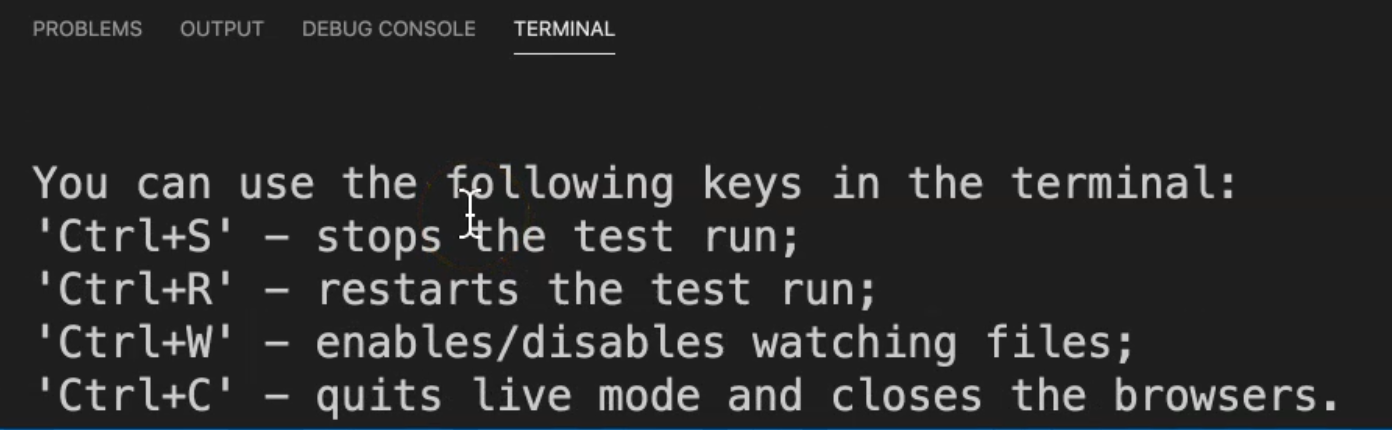
So from the terminal, you can click on:
Ctrl+Sto stop the test runCtrl+Rto restart the test runCtrl+Wto enable or disable watching filesCtrl+Cto quit the live mode and close the browsers
Let's open the browser again. So here, our test is finished, but it's still waiting for us until we take an action.
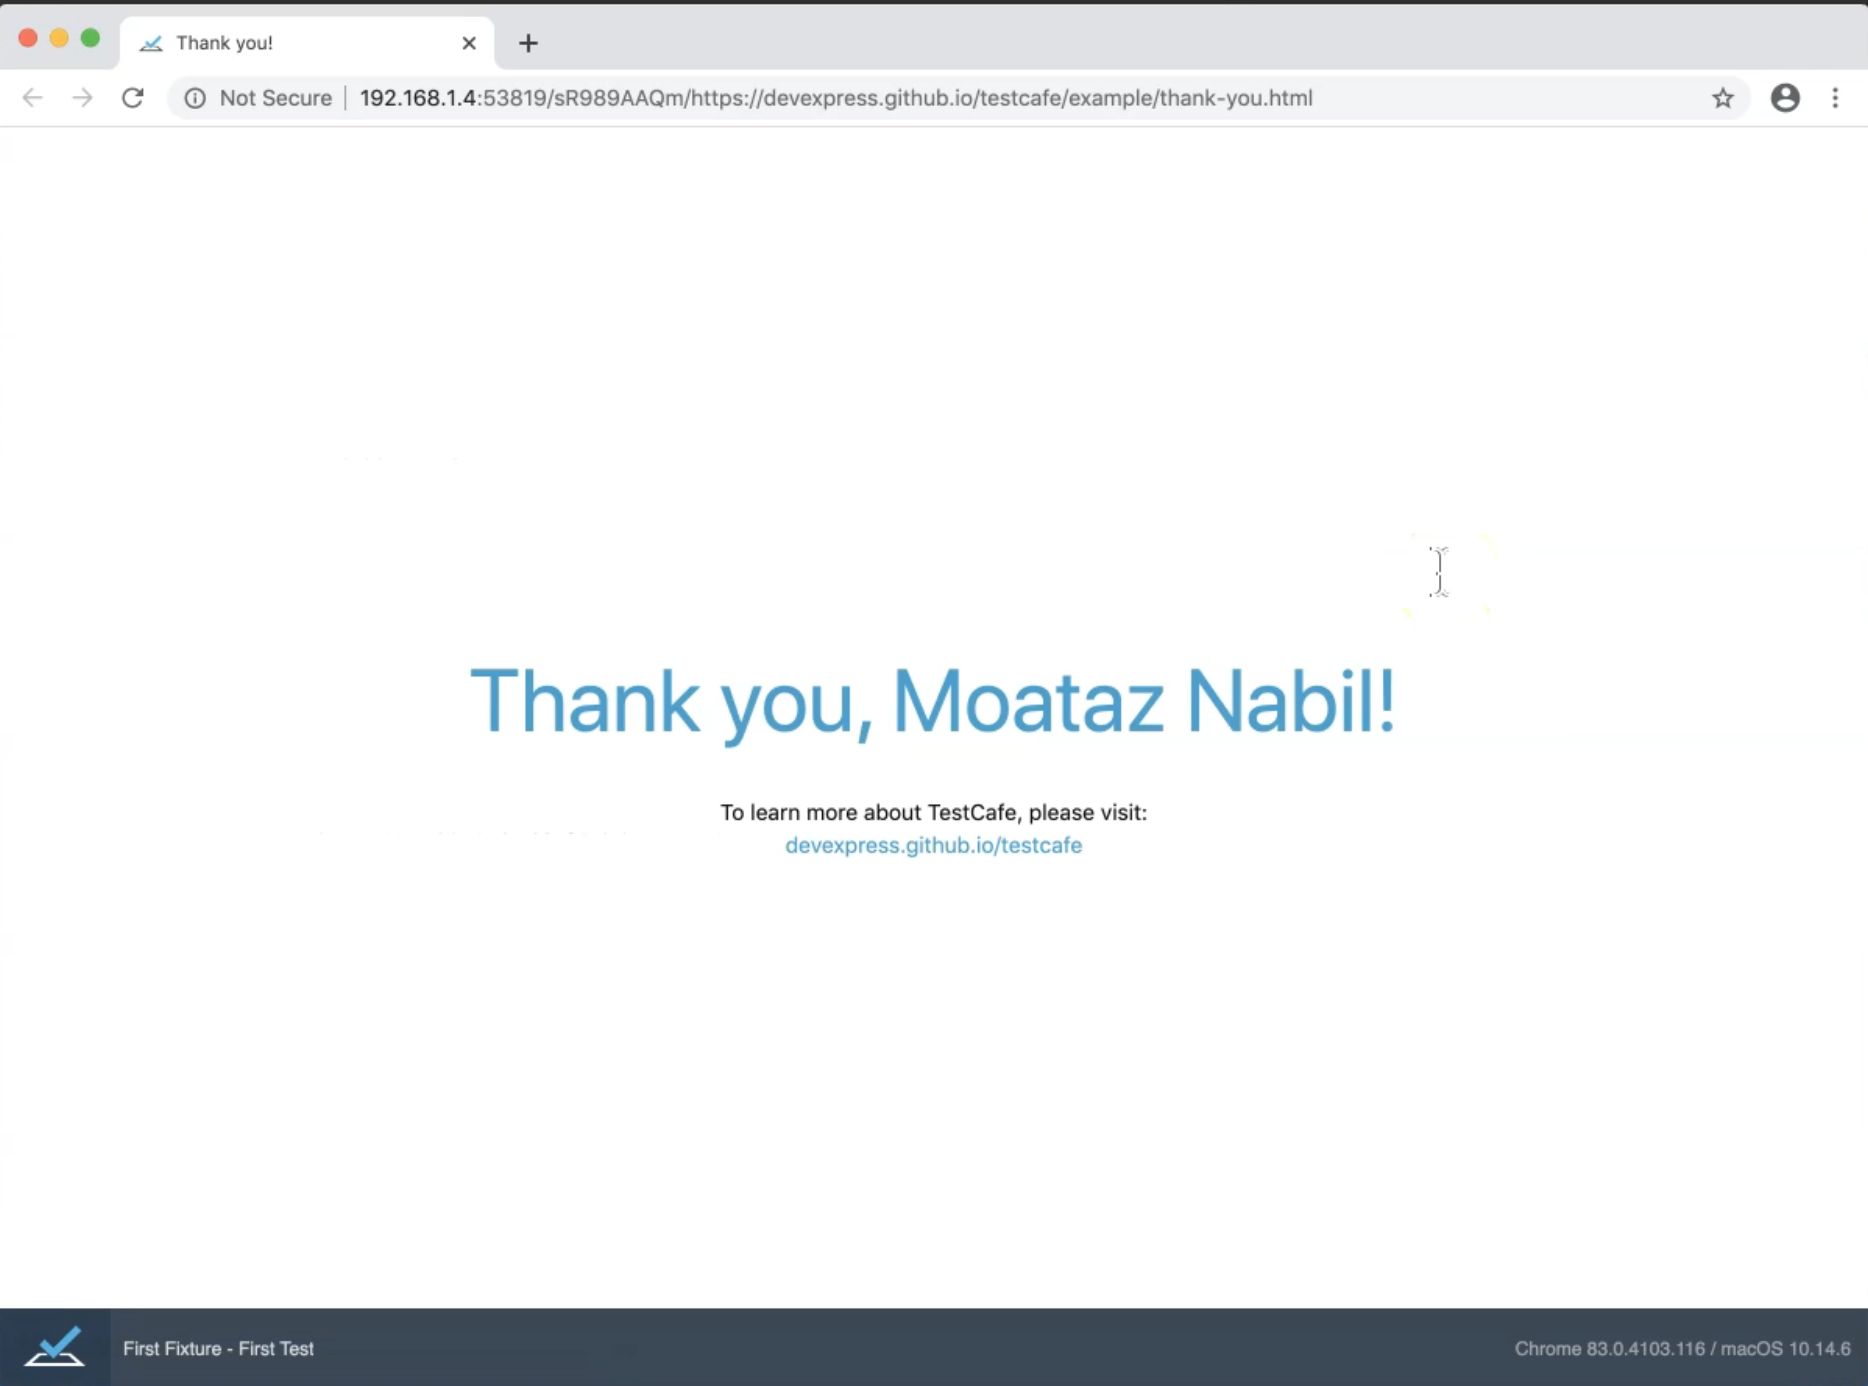
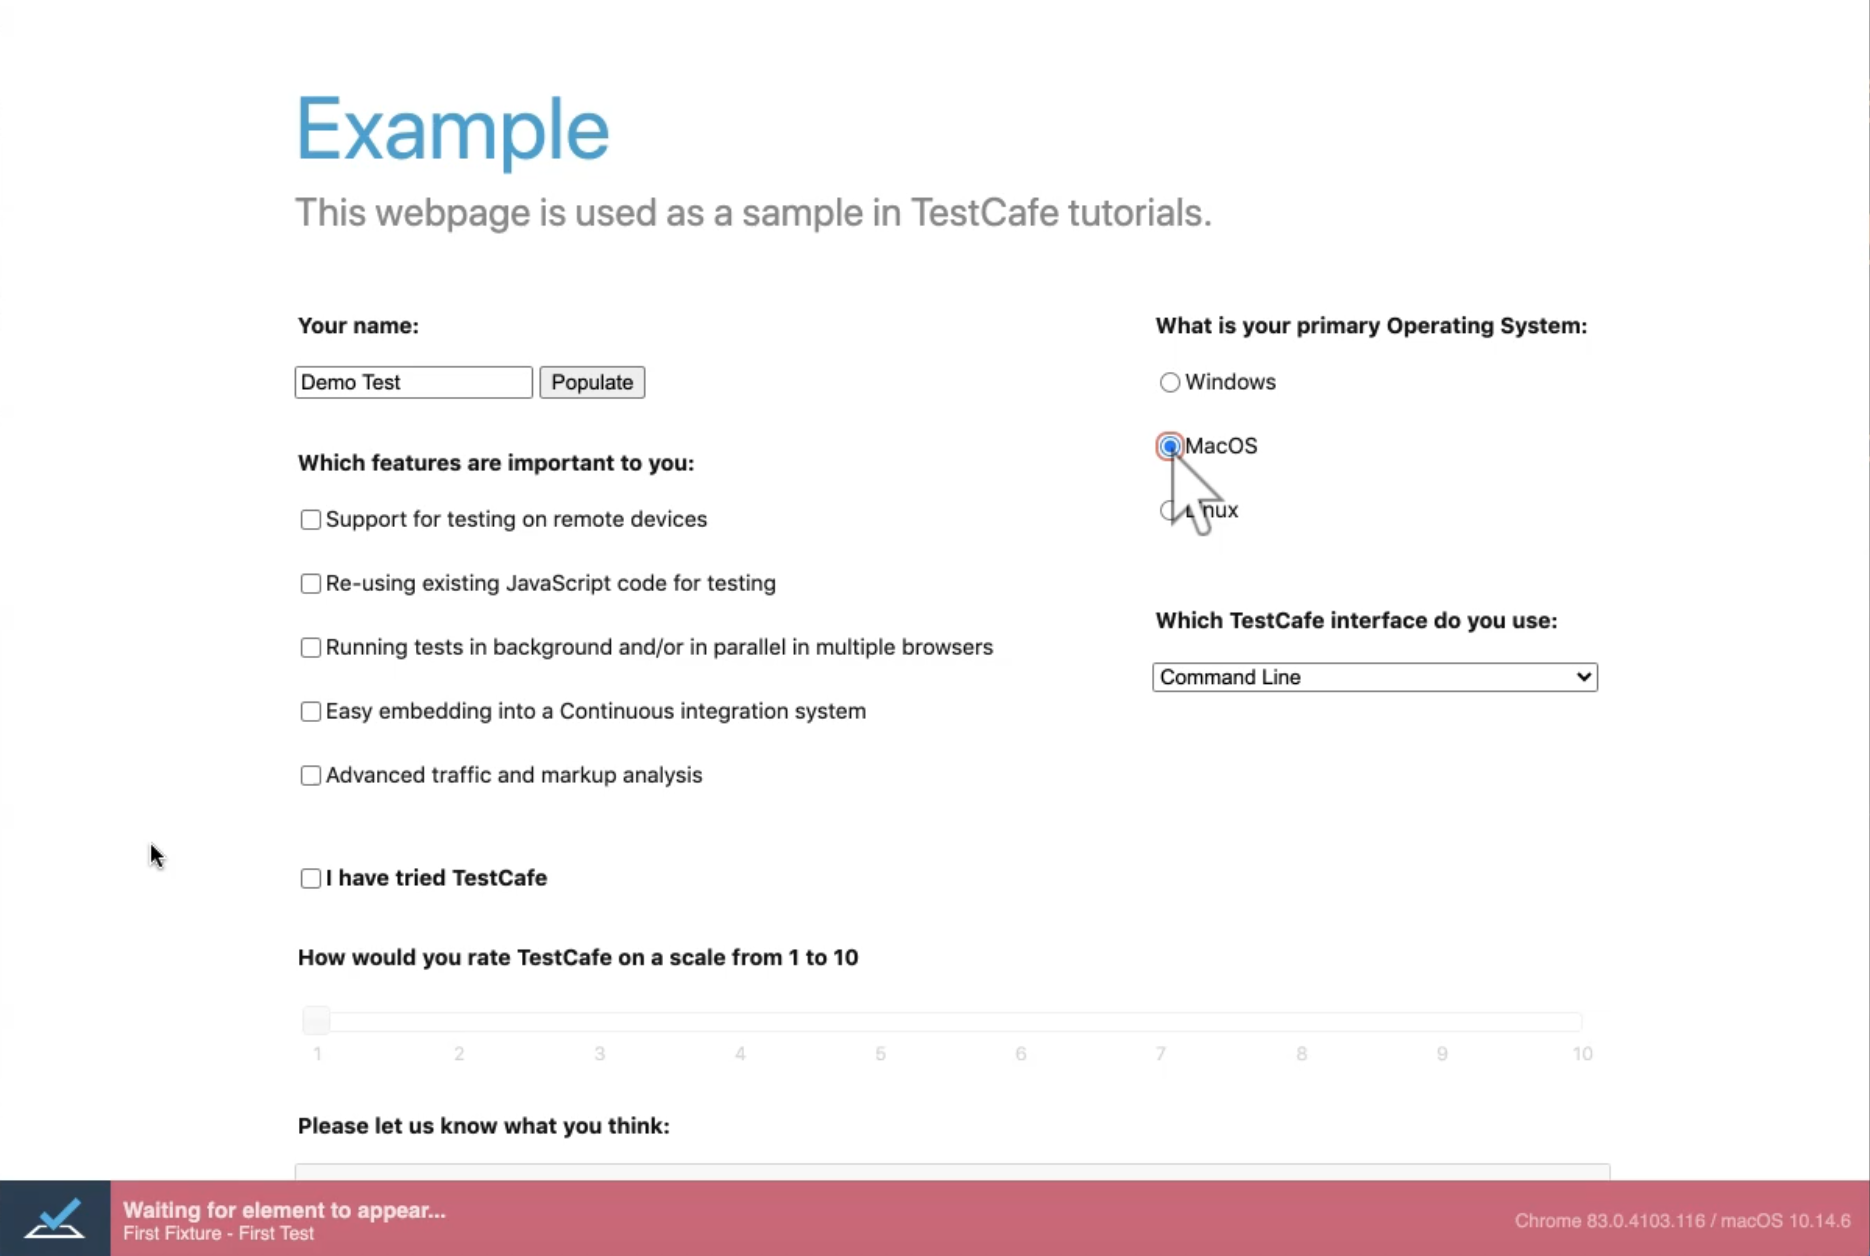
For example, we entered "TAU" as a developer name in the text box. What if I change it to "Moataz Nabil", for example, and save it.
Here, I would find that the test is run again, and changes the value to "Moataz Nabil".
I will change the value back to the "Demo Test". I didn't save it - when I click or choose Ctrl+S to save the file, the test will run again with the values.
With live mode, you can change anything in your script, and after that, the test will run again automatically and take the change, and you can check what happened.
For example, here, if I change one of the selectors from #submit-button to #submit-buttonss, and after that, I found that TestCafe is waiting for elements to appear in the DOM, but I still have a problem in this one.
When I change the file, now the test is failed, and we have one failure. The test has failed because there isn't anything with this selector. The test failed, but we are still waiting until we finish our test.
But we will return it to the correct selector, and the test will run again.
Then, we can just click on Ctrl+C to stop the live mode and finish our test case. This is the live mode and how we can use live mode with TestCafe.
Resources
Quiz
The quiz for this chapter can be found in 5.2
