

Transcripted Summary
# Behavior-Driven Development with TestCafe and CucumberJS
In this chapter, we will be talking about BDD tests or Behavior-Driven Development with TestCafe and CucumberJS.
We will start talking about:
What is BDD, or Behavior-Driven Development?
What is Gherkin?
Add Gherkin and CucumberJS plugins in the project
Write Cucumber feature definitions
Write step definitions implementations with TestCafe and our test cases
# What is BDD, or Behavior-Driven Development?
Behavior-Driven Development is a pattern or technique for building software in which the product owner, developers, and the testers collaborate together to agree about the acceptance criteria.
The Behavior-Driven pattern is improving communication and collaboration between teams.
Like the TDD or Test-Driven Development, which starts development by writing test cases.
But in BDD, it's similar, but we start writing the business features file before we start writing the automated test cases.
With BDD we start writing features, we are using plain English sentences and the Gherkin language.
It contains three steps:
- Given
- When
- Then
It's used to communicate with our stakeholders how the application is supposed to act and respond.
# What is Gherkin?
With Gherkin, we start writing the feature file with When and Then blocks and convert these steps in the scenario to actual code to be able to run these tests against the application.
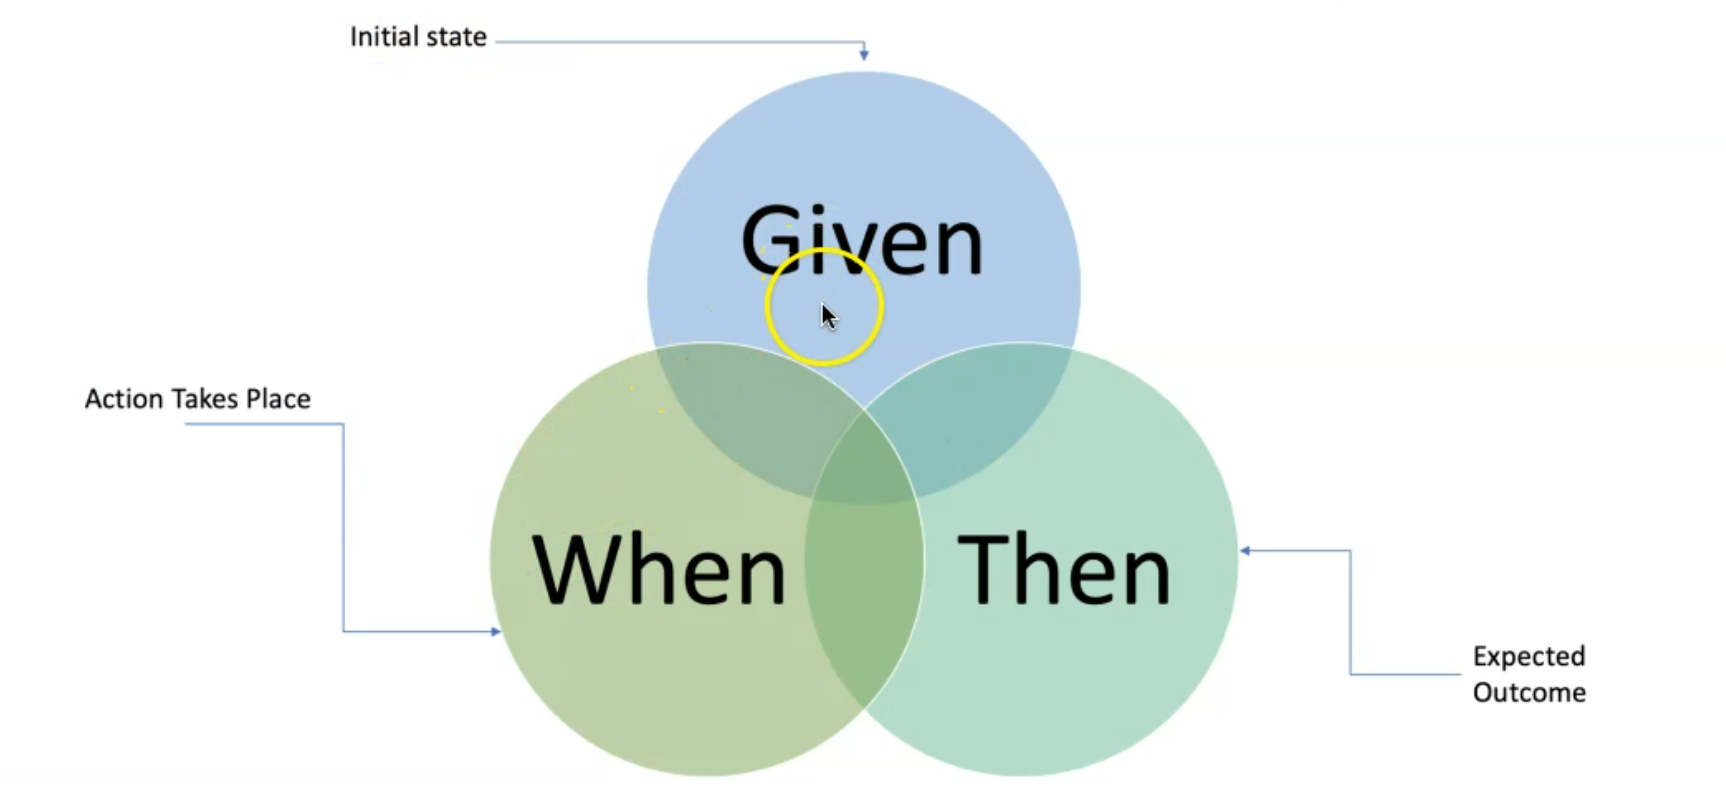
For example, here we have three keywords with the BDD and Gherkin keywords: Given, When, Then.
Given is the initial state for the feature file, or the starter buoyant.
When - the action takes place.
And Then - the expected outcome.
For example, if you wanted to create a test case for a user login scenario and BDD - the steps to do that - create a feature file in the project with the following structure example.
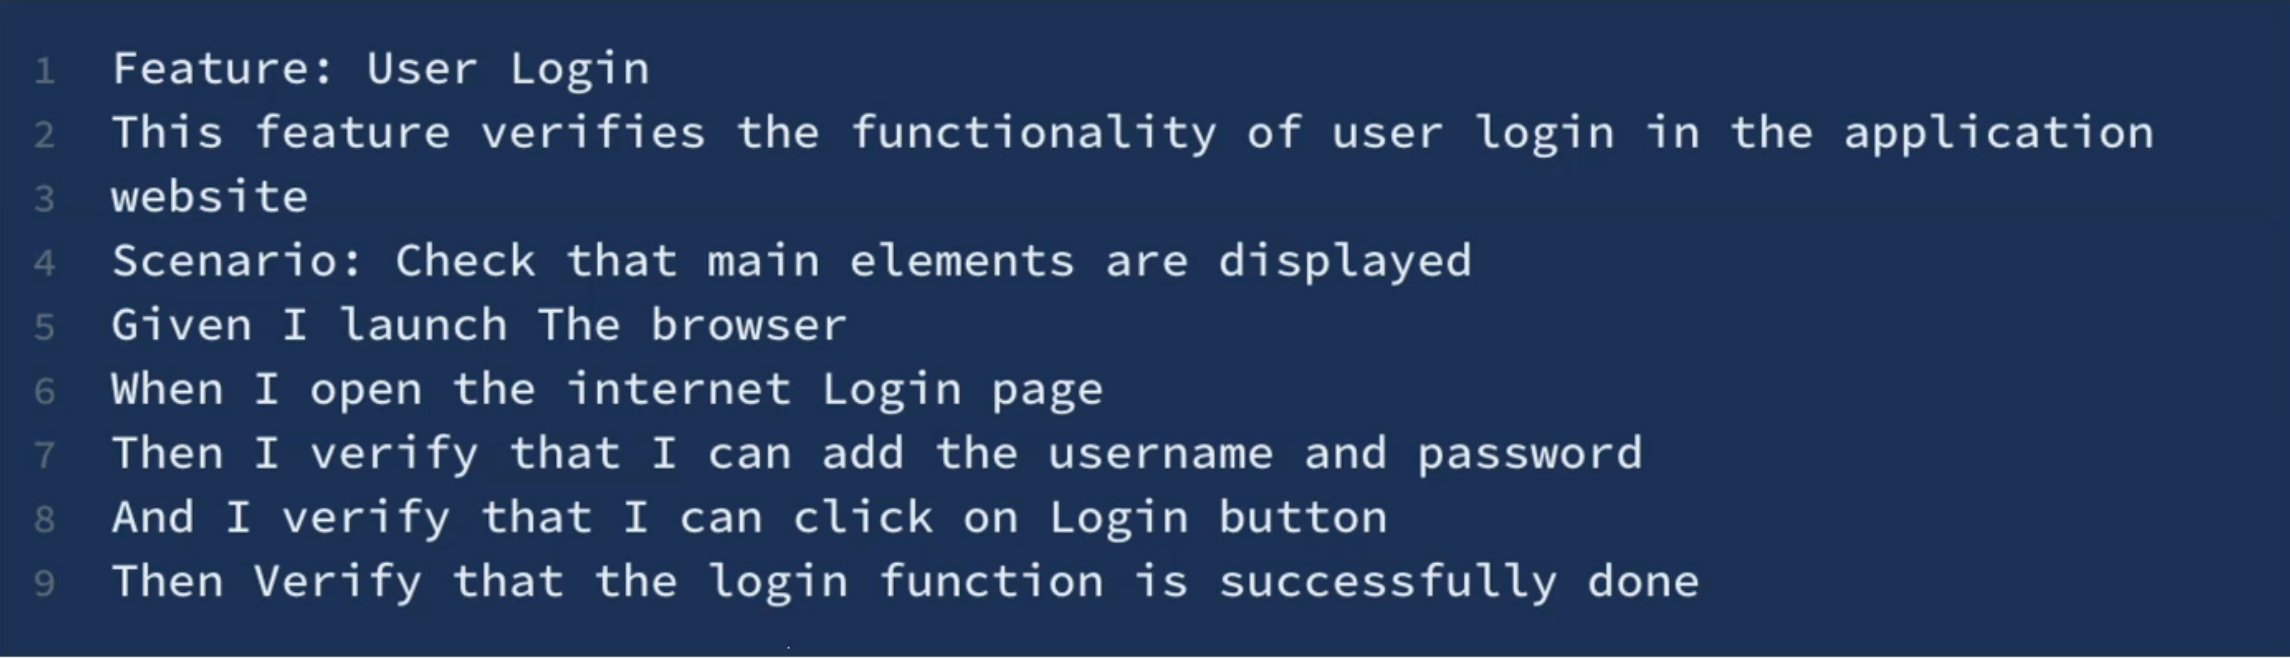
We are starting the feature file with the Feature keyword and the feature name with the description.
Then, adding a Scenario keyword to explain the steps.
Then we will add main keywords in the feature file - like Given with the initial step, When with the actions, and Then verify the output as expected.
# Install Cucumber Plugin Demo
In this demo, we will start by installing the Cucumber plugin or extension for the Visual Studio Code that will help us in writing a feature file with the autocomplete.
We will install the Cucumber plugin or extension for Visual Studio to support us to write feature files.
Under the extensions on the left side, we can search about "Cucumber".
The first one in the search is what we need - Cucumber (Gherkin) Full Support - this extension adds rich language support for Cucumber and VS Code, including Syntax highlight, Basic Snippets Support for the steps that we need to do.
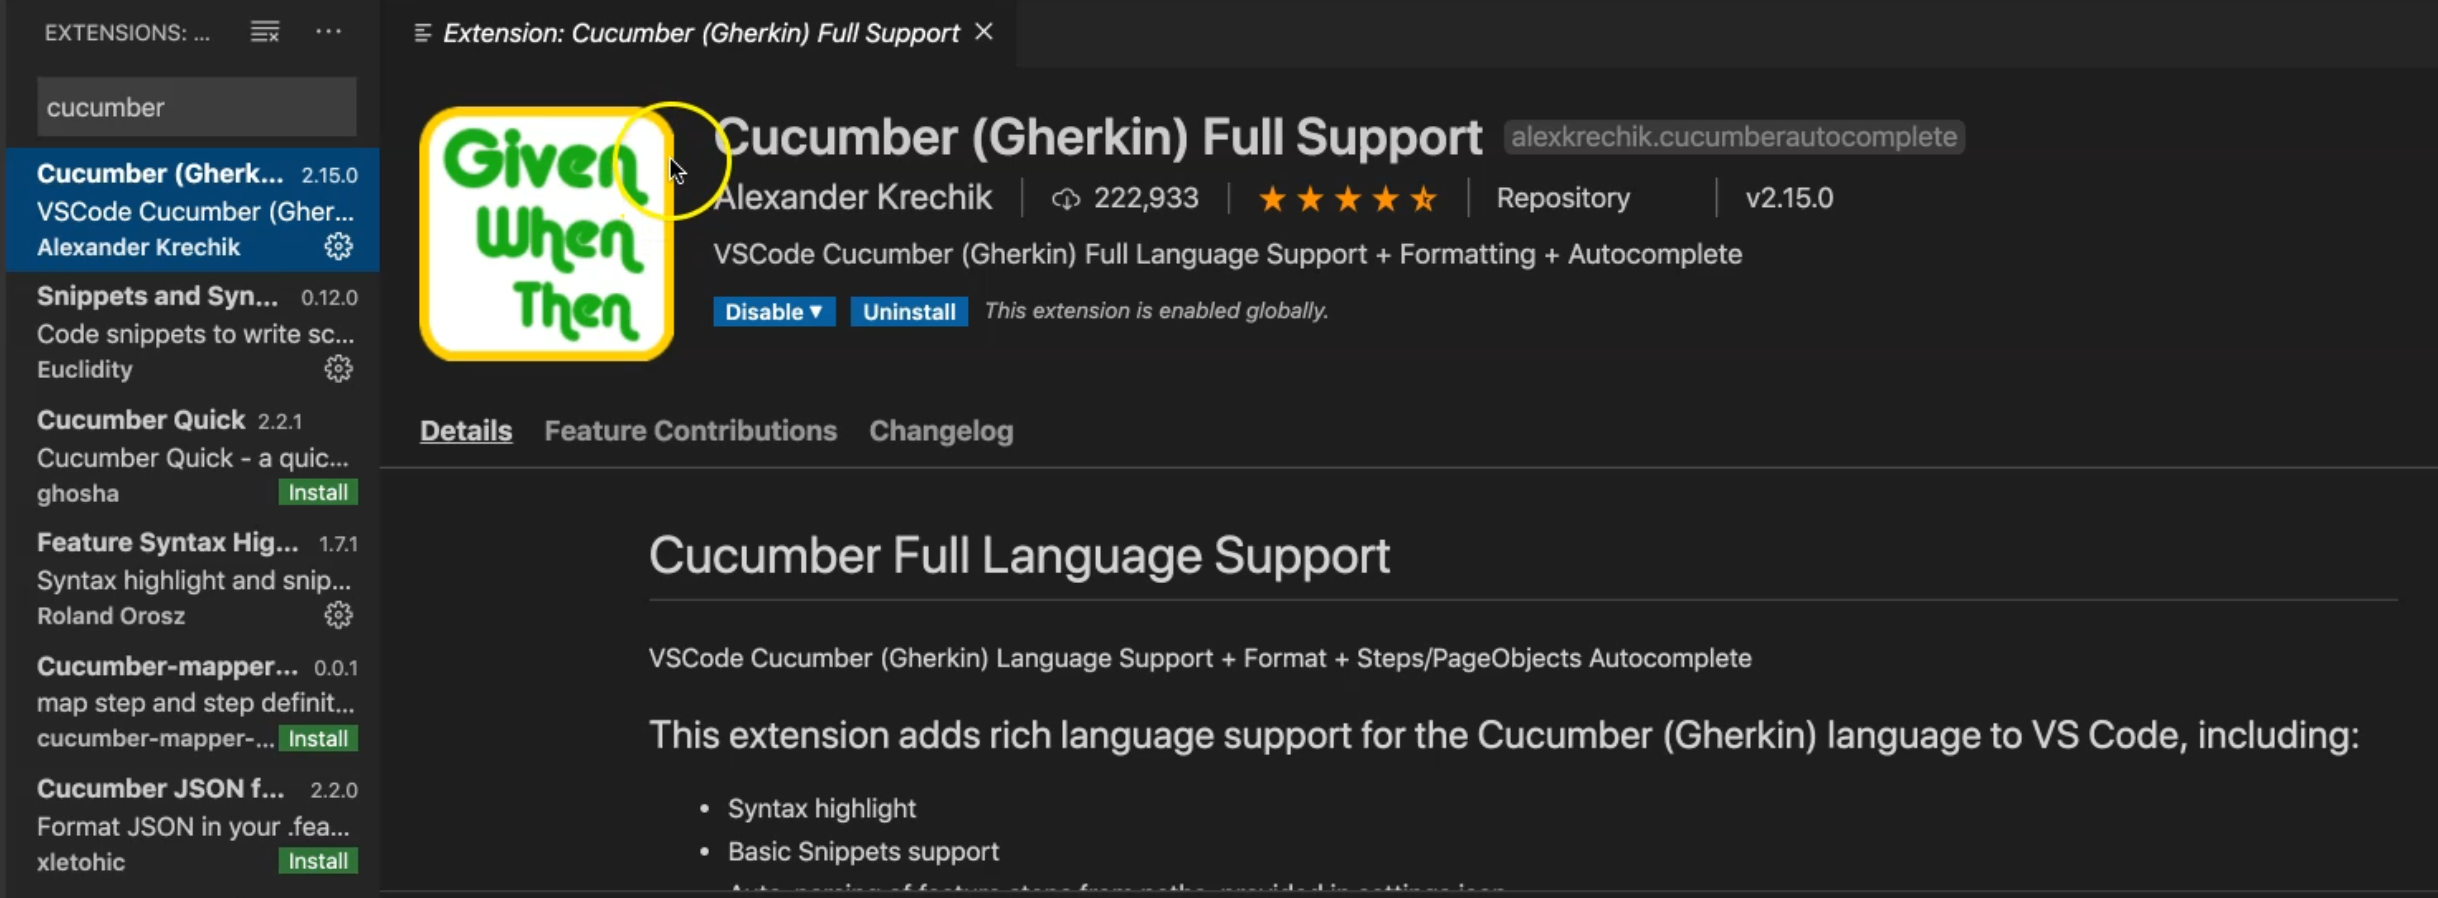
I already installed it, so in your case, you just need to click "Install", and then maybe you need to reopen or relaunch Visual Studio Code to install the step.
So we need this one to support us in writing the feature files.
After we install the Cucumber plugin or extension for Visual Studio, now it's time to install Cucumber itself in our project using npm.
If we open our browser - in my case Google Chrome - and I can search about CucumberJS or Cucumber for JavaScript.
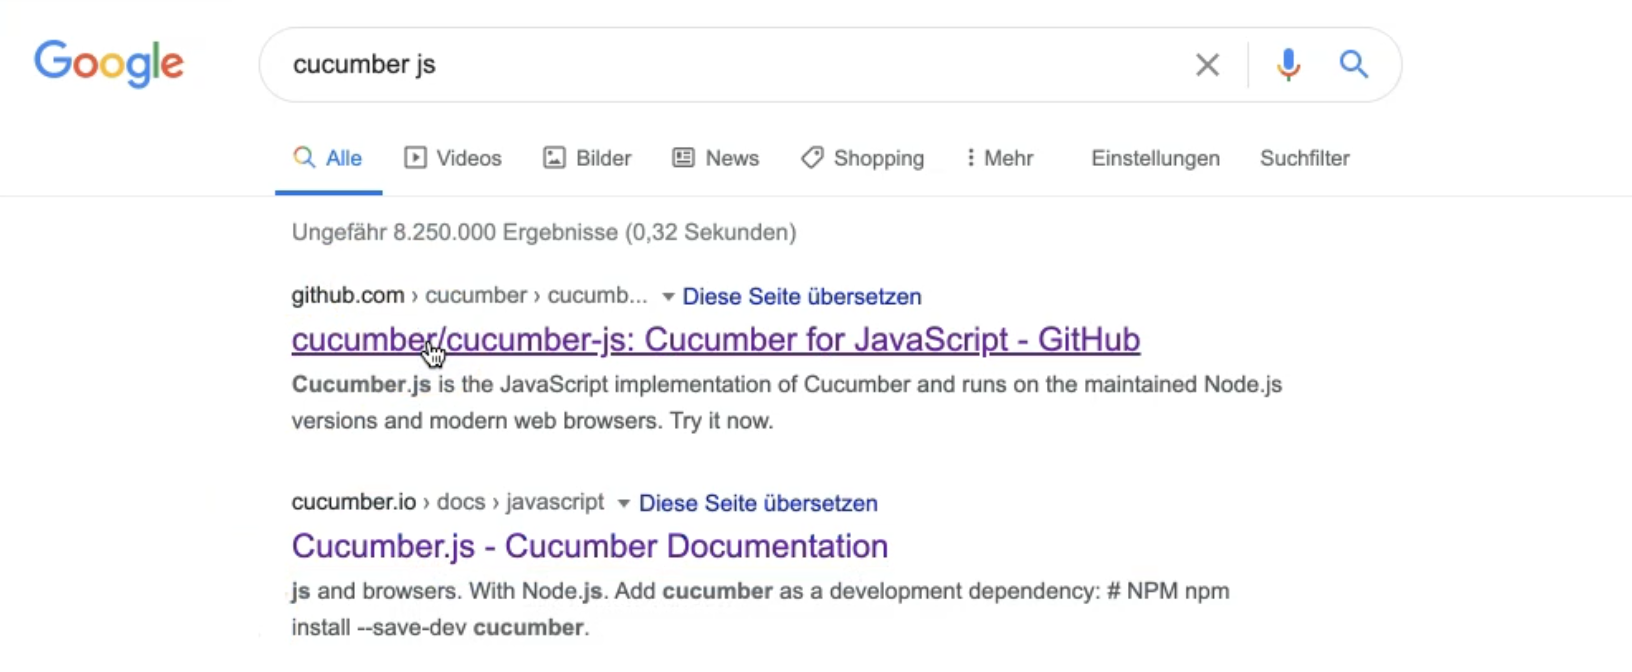
I can find CucumberJS, Cucumber Documentation, or also I can find the repository on GitHub with CucumberJS.
To be able to install CucumberJS. We can just use
npm install cucumber
Here, you have all the things that we need.
For example, the support files that we will use in our application or our code to be able to run Cucumber tests or feature files and the step definitions with the TestCafe.
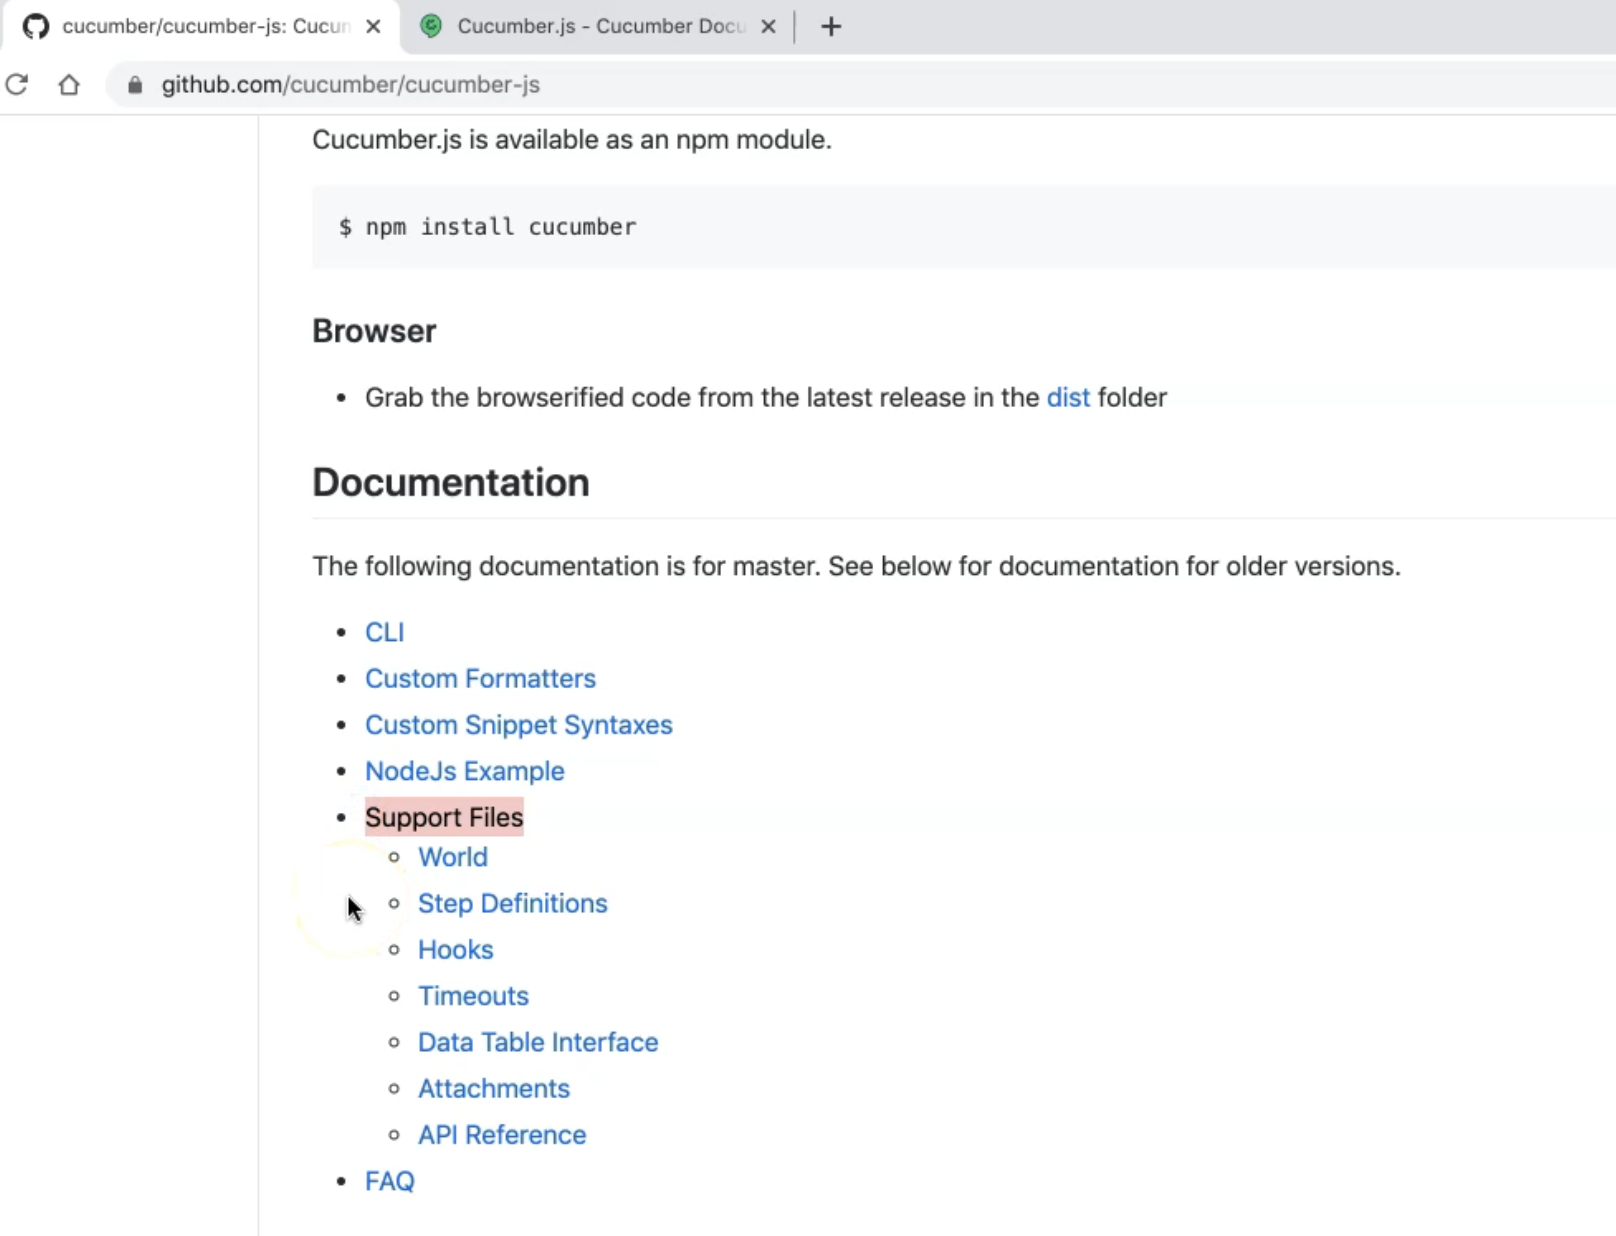
We just need to install Cucumber with this command line.
Also, this is a CucumberJS.
With NodeJS we can just run npm install and --save-dev, or just npm install without --save-dev.
So we can run it, and it will put it in the dependency section.
npm install --save-dev cucumber
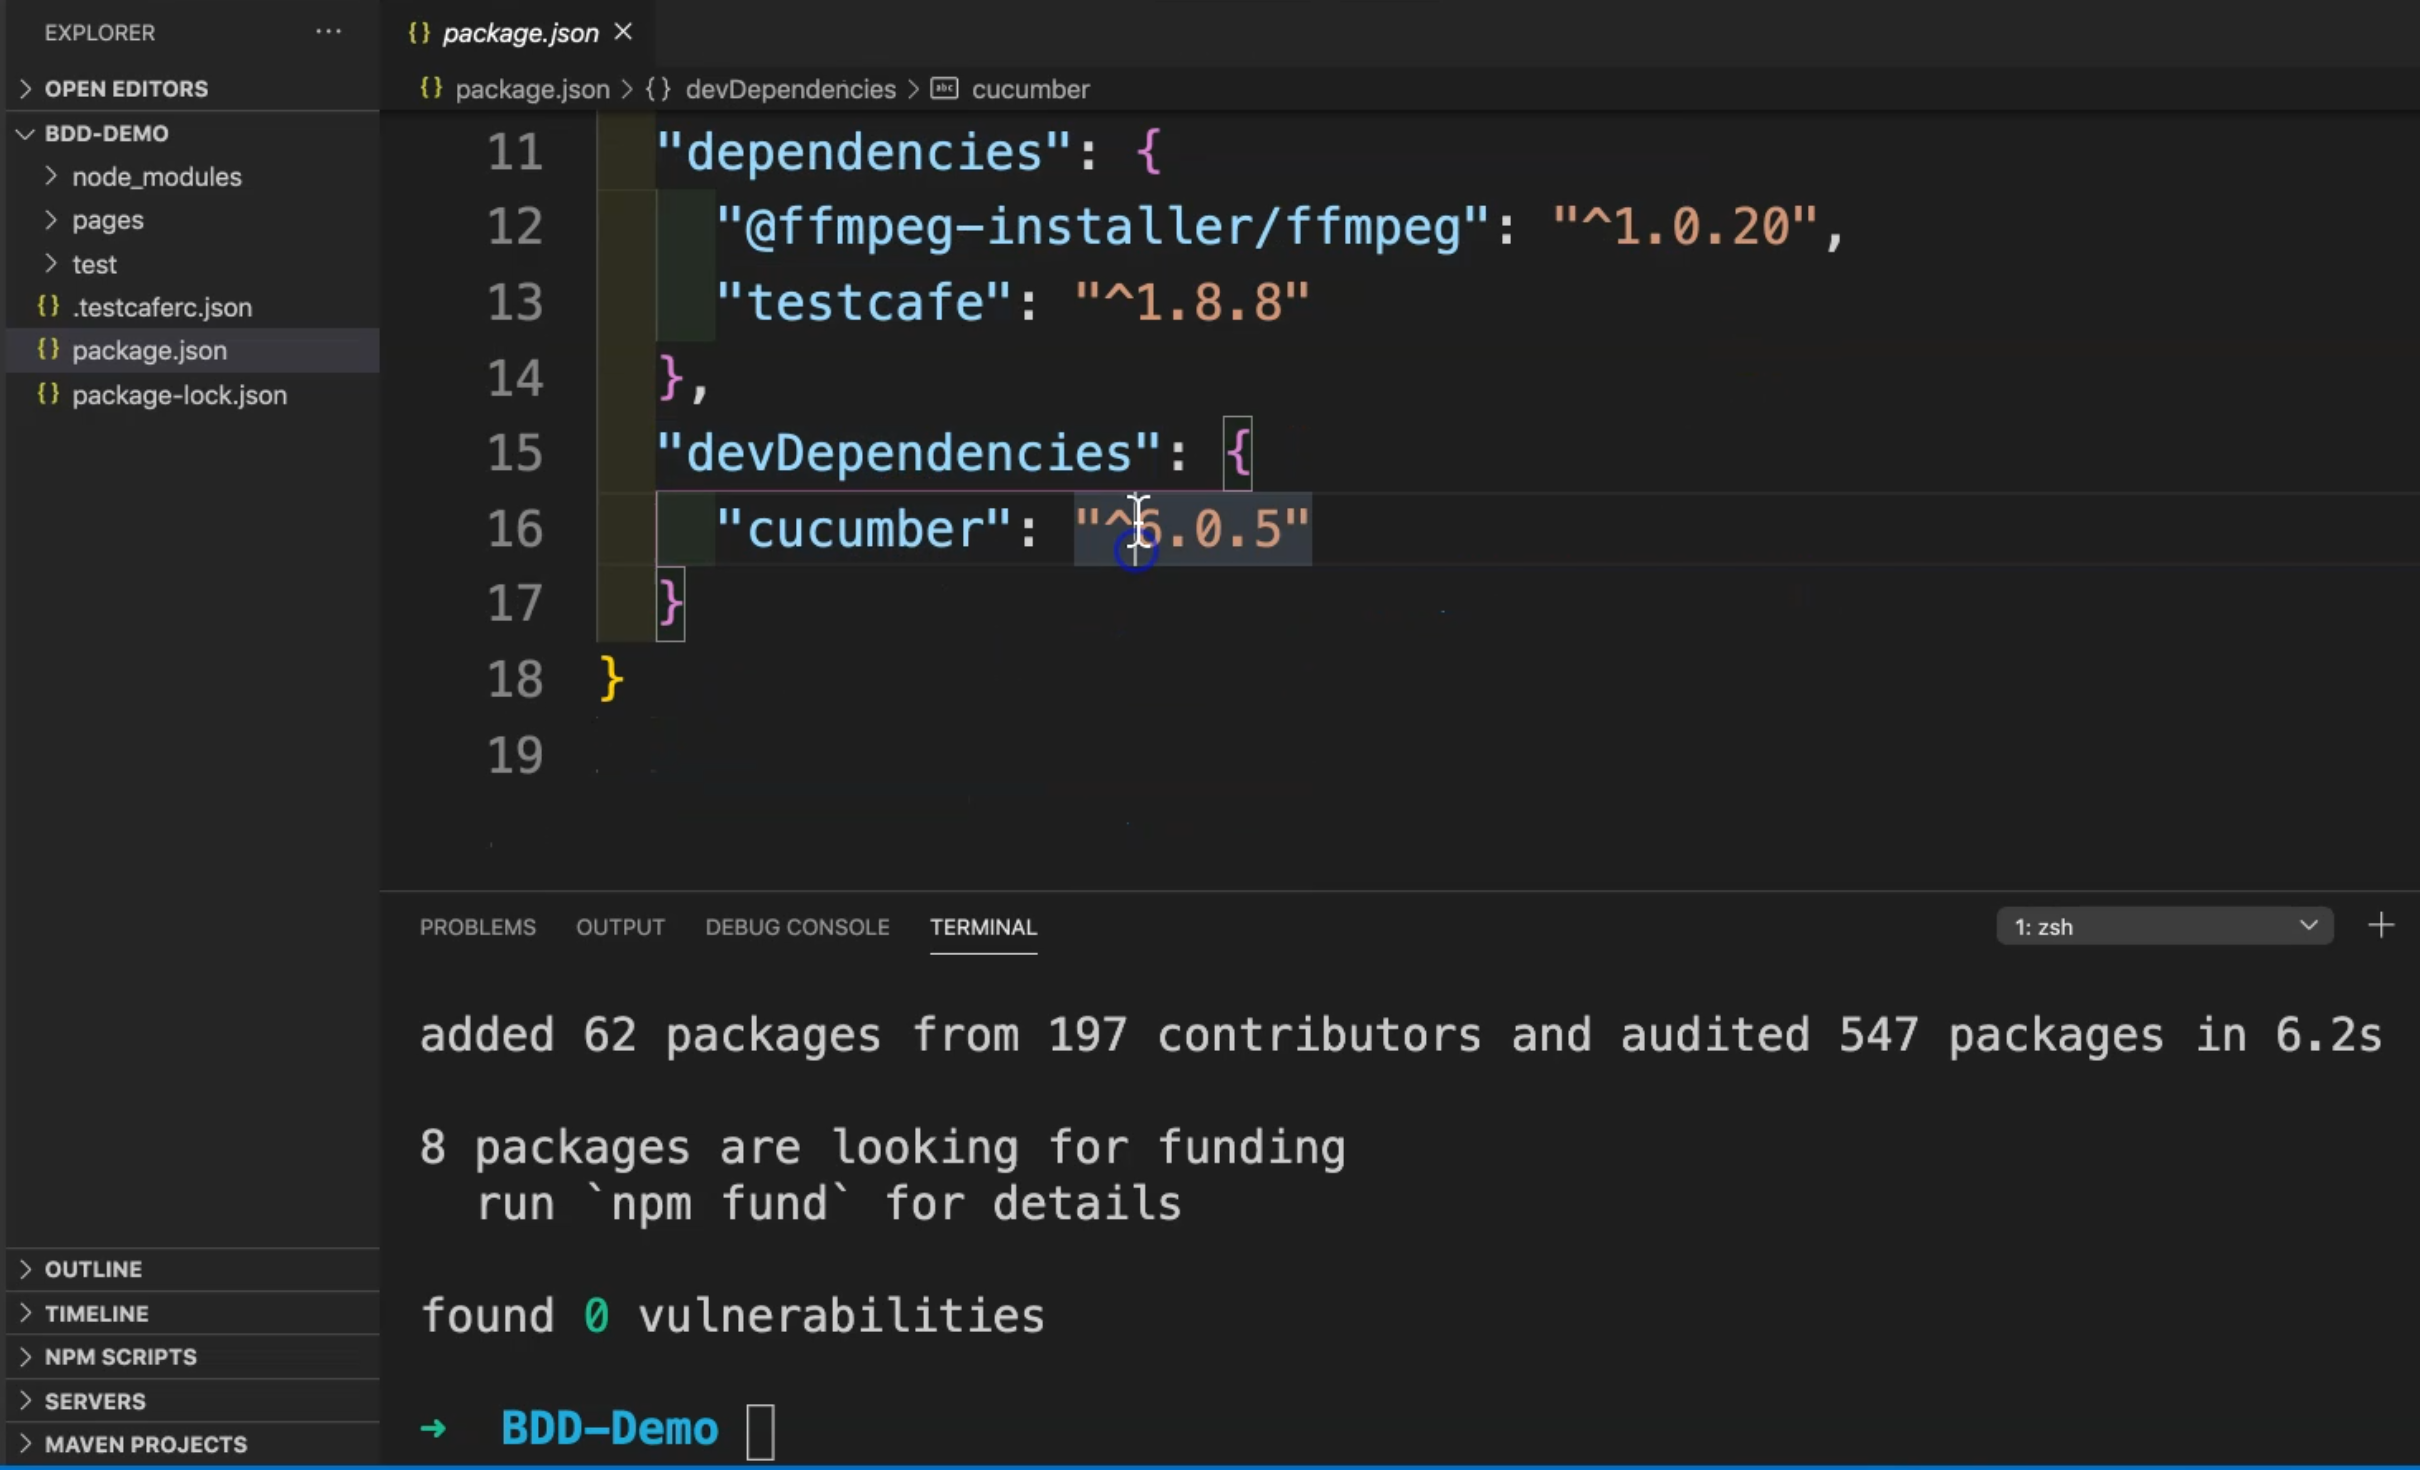
Here we can just open our project and in the package here, we can find that in the devDependencies, we have cucumber with the version and it should usually be the latest version.
So with CucumberJS, we can add it with NodeJS, or also we can watch the video or listen if you want to install CucumberJS on your machine.
Now our project is ready with the Cucumber plugin, or Cucumber and Gherkin plugin or extension for Visual Studio.
Also here in our package, we have cucumber.
We can start now and also inside node_modules we can find the Cucumber in our nodeJS.
So it's time now to start writing our first feature file.
Resources
Quiz
The quiz for this chapter can be found in 9.7
