

Transcripted Summary
In this chapter, we will talk about integrating TestCafe with GitHub Actions.
What we will cover during this chapter:
Introduction to GitHub actions or what is a GitHub action
Create a GitHub account
Add our existing project on GitHub
Configure the YAML file for GitHub actions
Run TestCafe tests with GitHub actions on every pull request or as a nightly build
# Introduction to GitHub actions
GitHub Actions make it easy to automate all your software workflows, now with world-class CI/CD, or continuous integration and continuous delivery.
You can build, test, and deploy your code right from GitHub - make code reviews, branch management, and the issues management work the way that you want.
Run a workflow on any GitHub action, like kick-off workflows with GitHub Actions events like push, issue creation, or a new release.
Combine and configure actions for the services you use, built, and maintained by the community.
# What is the GitHub Actions workflow?
Workflows are custom automated processes that you can set up in your repository to build, test, package, release, or deploy any code project on GitHub.
Workflows run in Linux, macOS, and Windows, and containers on GitHub-hosted machines.
You can create a workflow file configured to run a specific event - like every pull request, scheduled, or manually.
# Create a GitHub account
In this demo, we will create our free GitHub account to be able to use GitHub actions with TestCafe.
We will redirect to github.com - this is the official website for GitHub.
After we click on signup, we can start signing up with the username - for example, I can say "testcafedemo" and my email, and I can add the password.
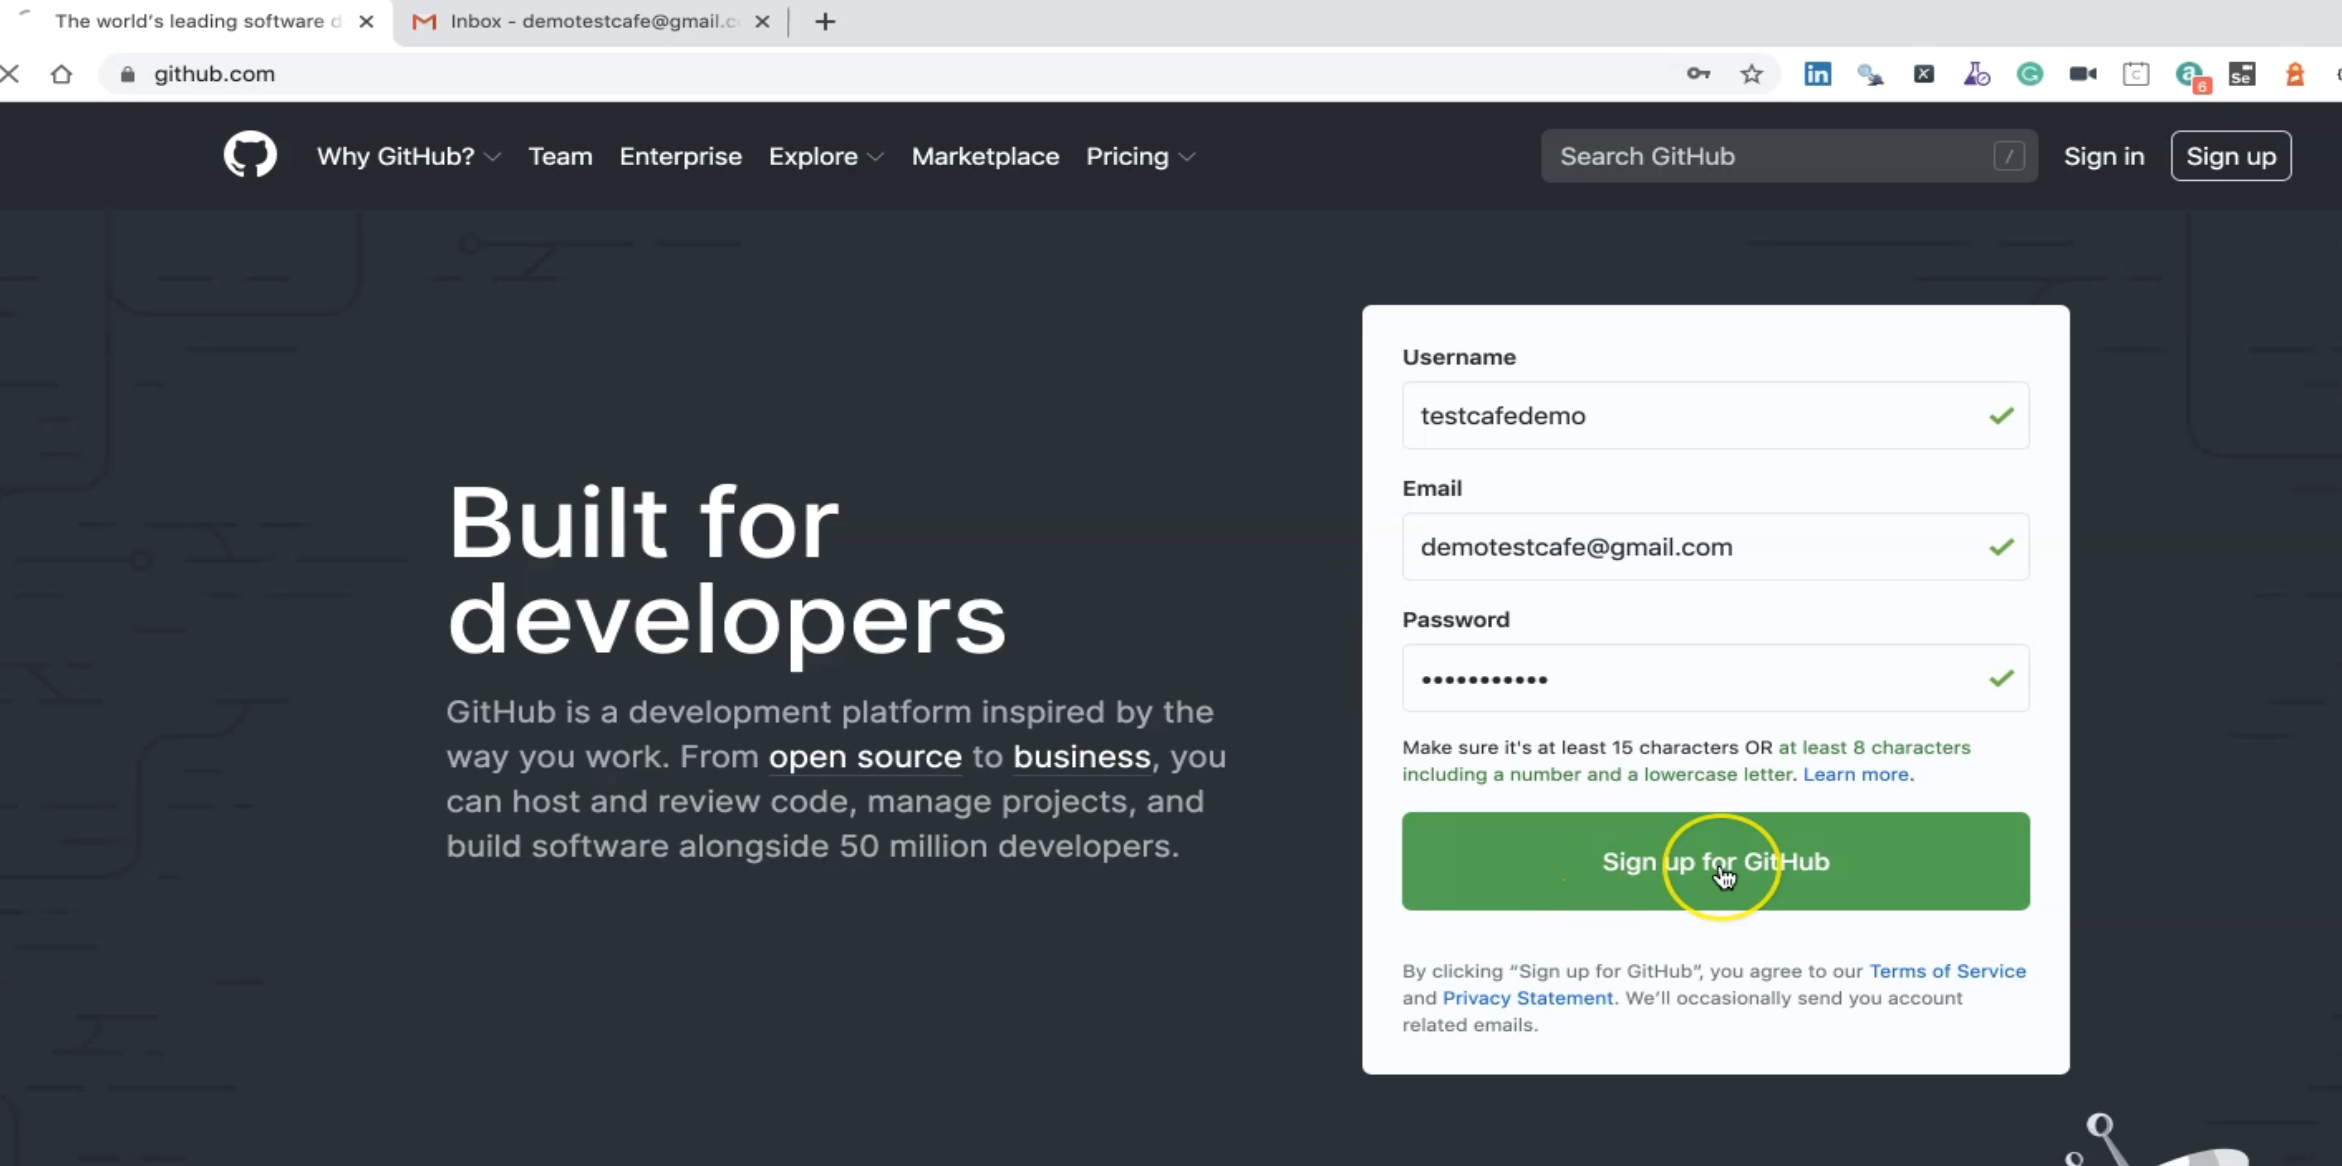
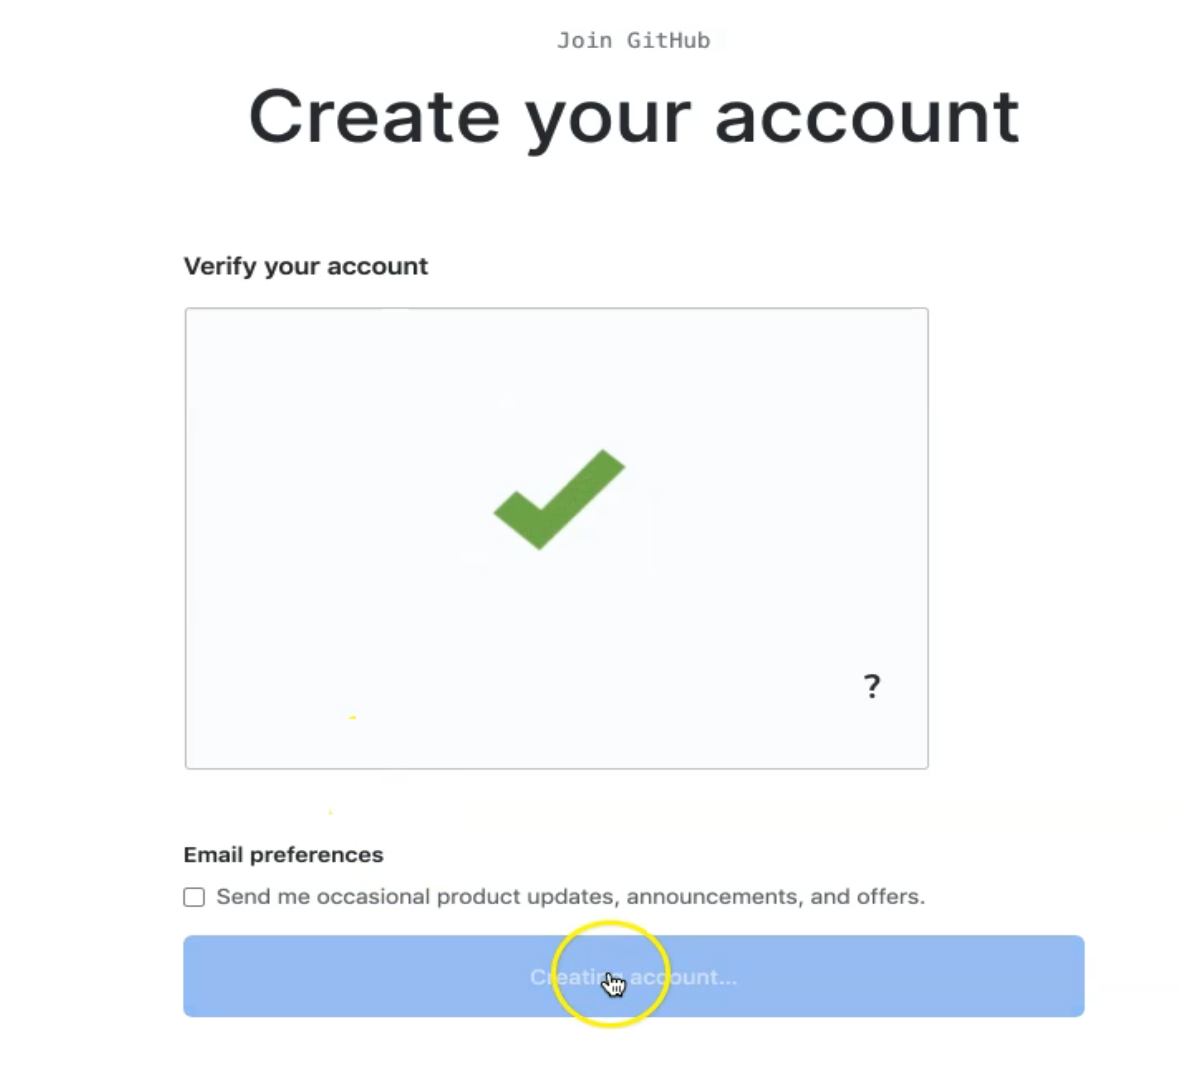
We are now creating our account, and we need to verify the account to be able to start to use our account.
We just need to confirm this one and join a free plan.
So it will be a free account.
After that, this is like a survey so we can answer it or not - so we'll just complete the setup.
Here we get a verification email in our email so we can just start opening it and verify it.
So our email now is verified, and we can start our new project.
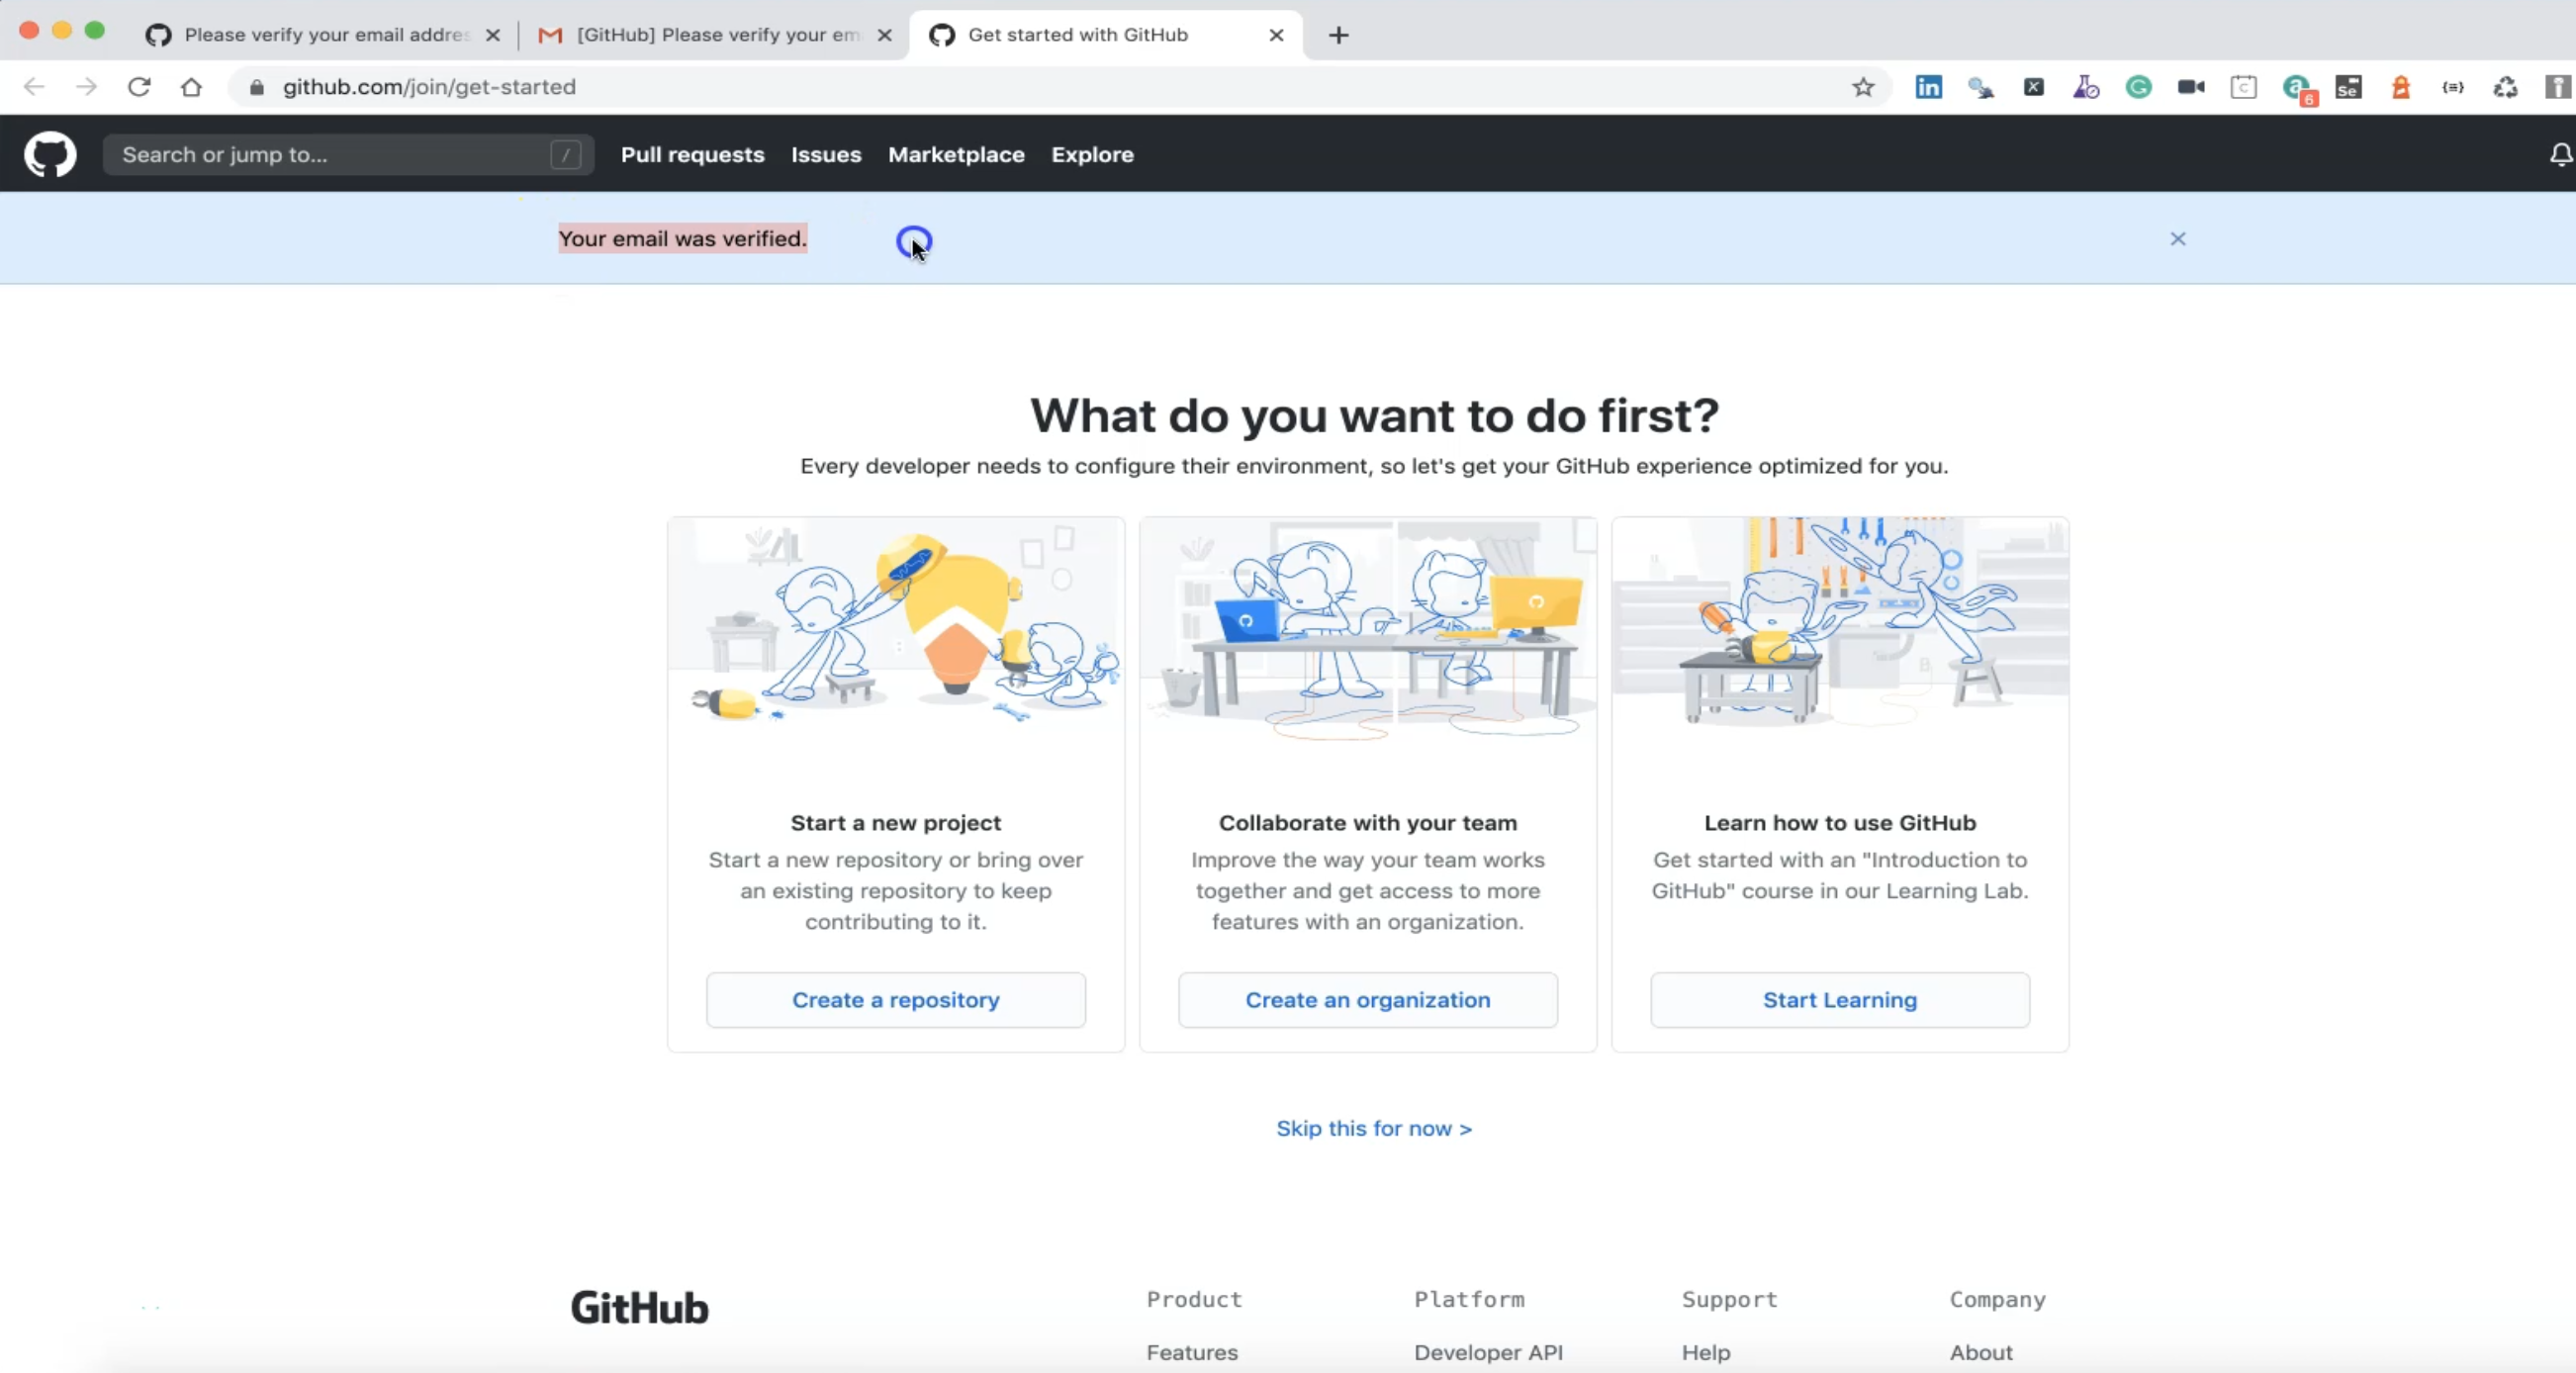
From here, we can start to create a new repository.
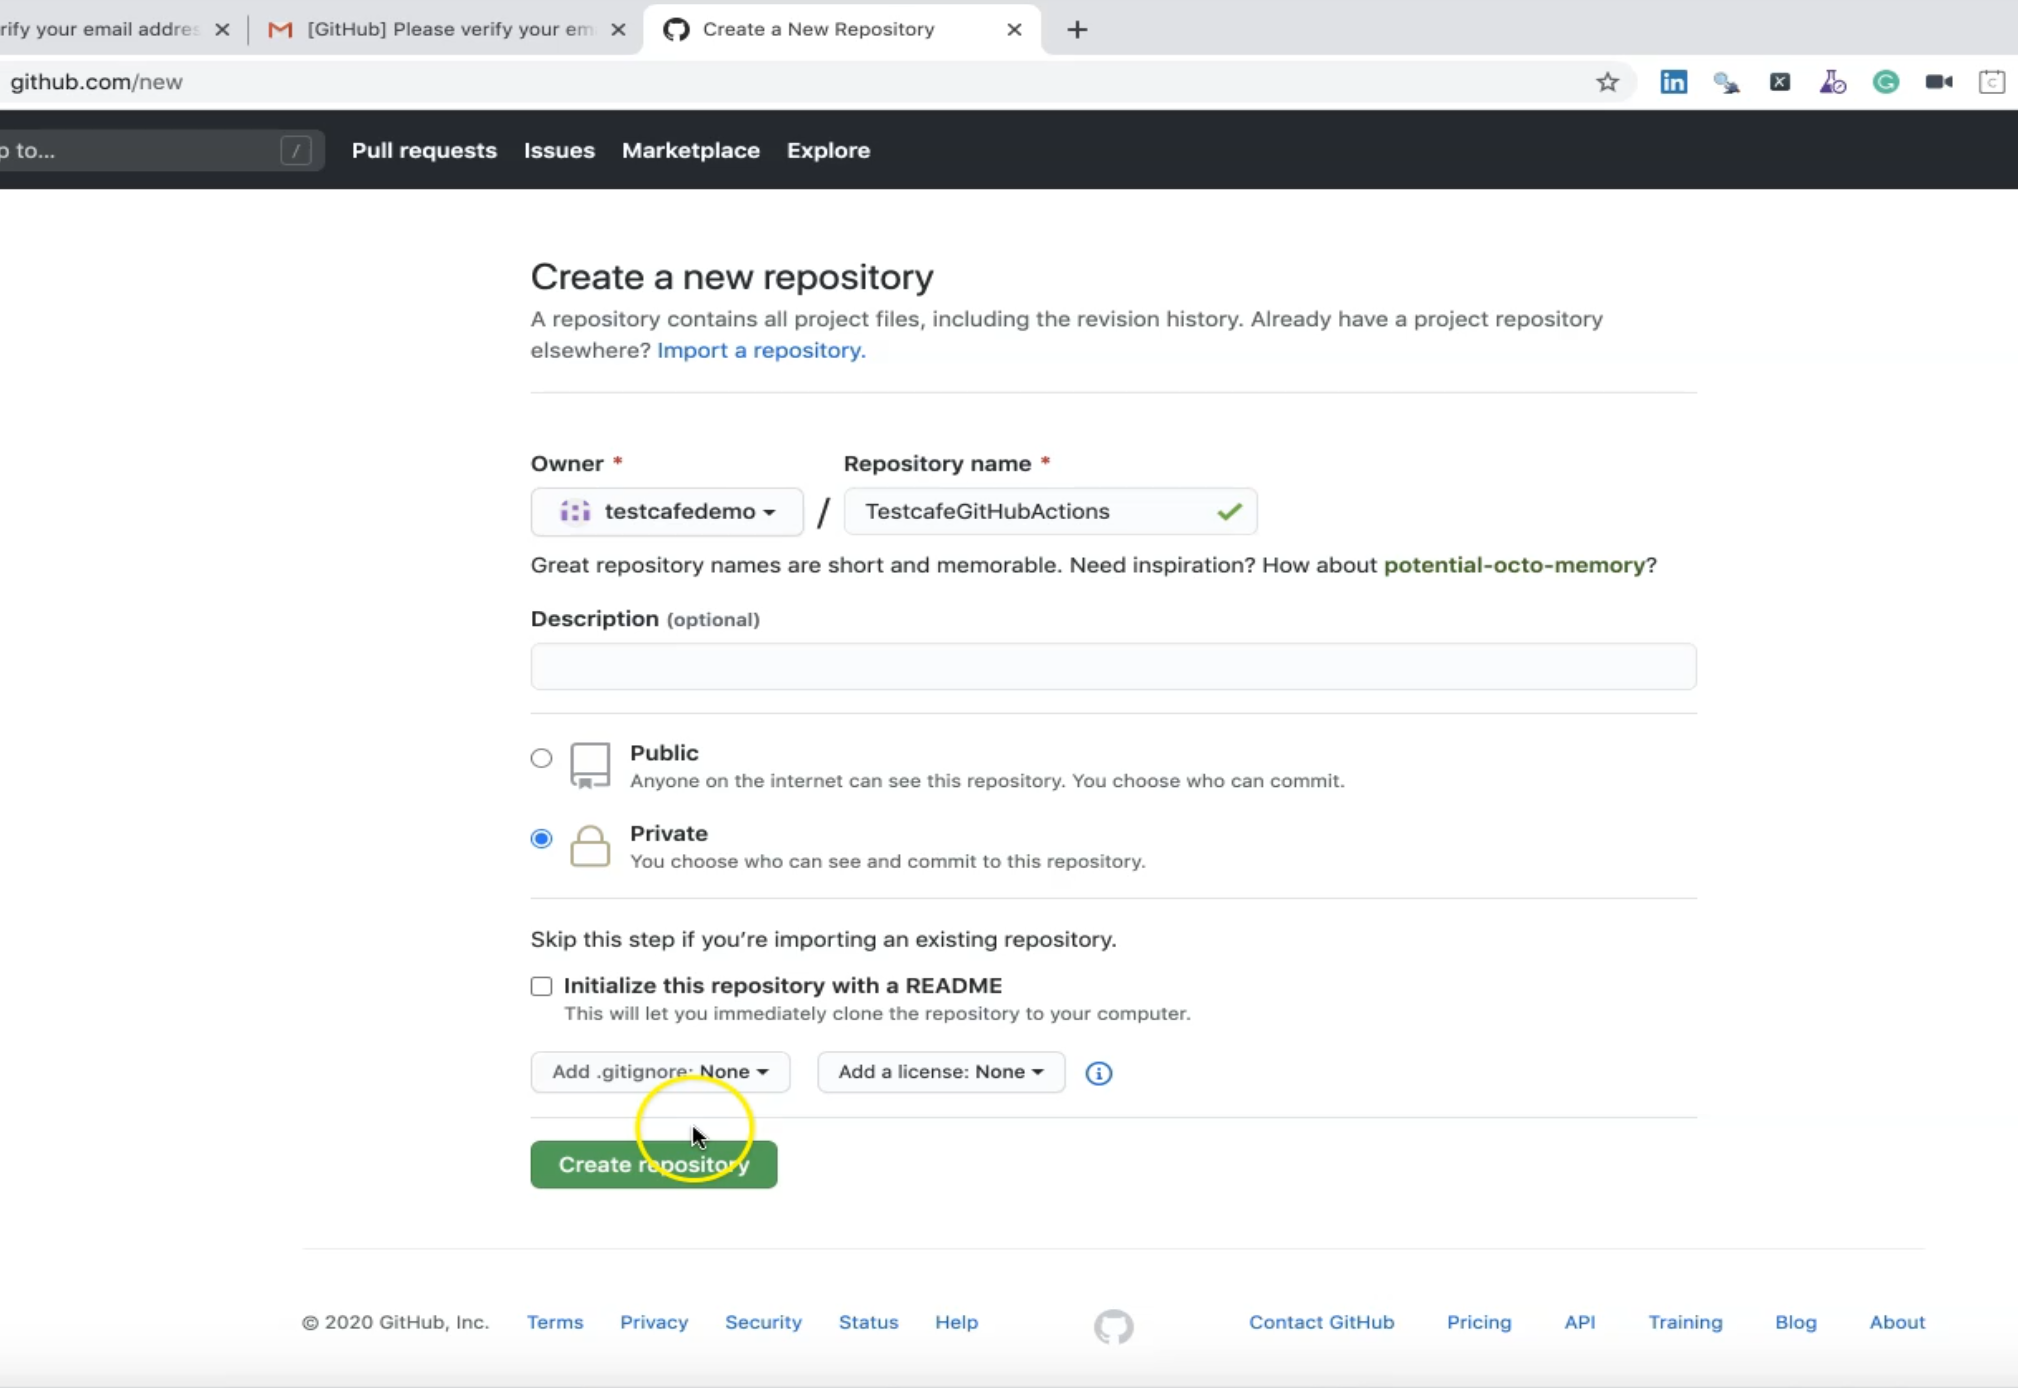
We need a Repository name so we can add "TestCafeGitHubActions", for example.
It can be public or private - as we want.
Also, we can add the README file in the repository - we don't need that at the beginning so we can start creating our repository.
This is our repository in GitHub.
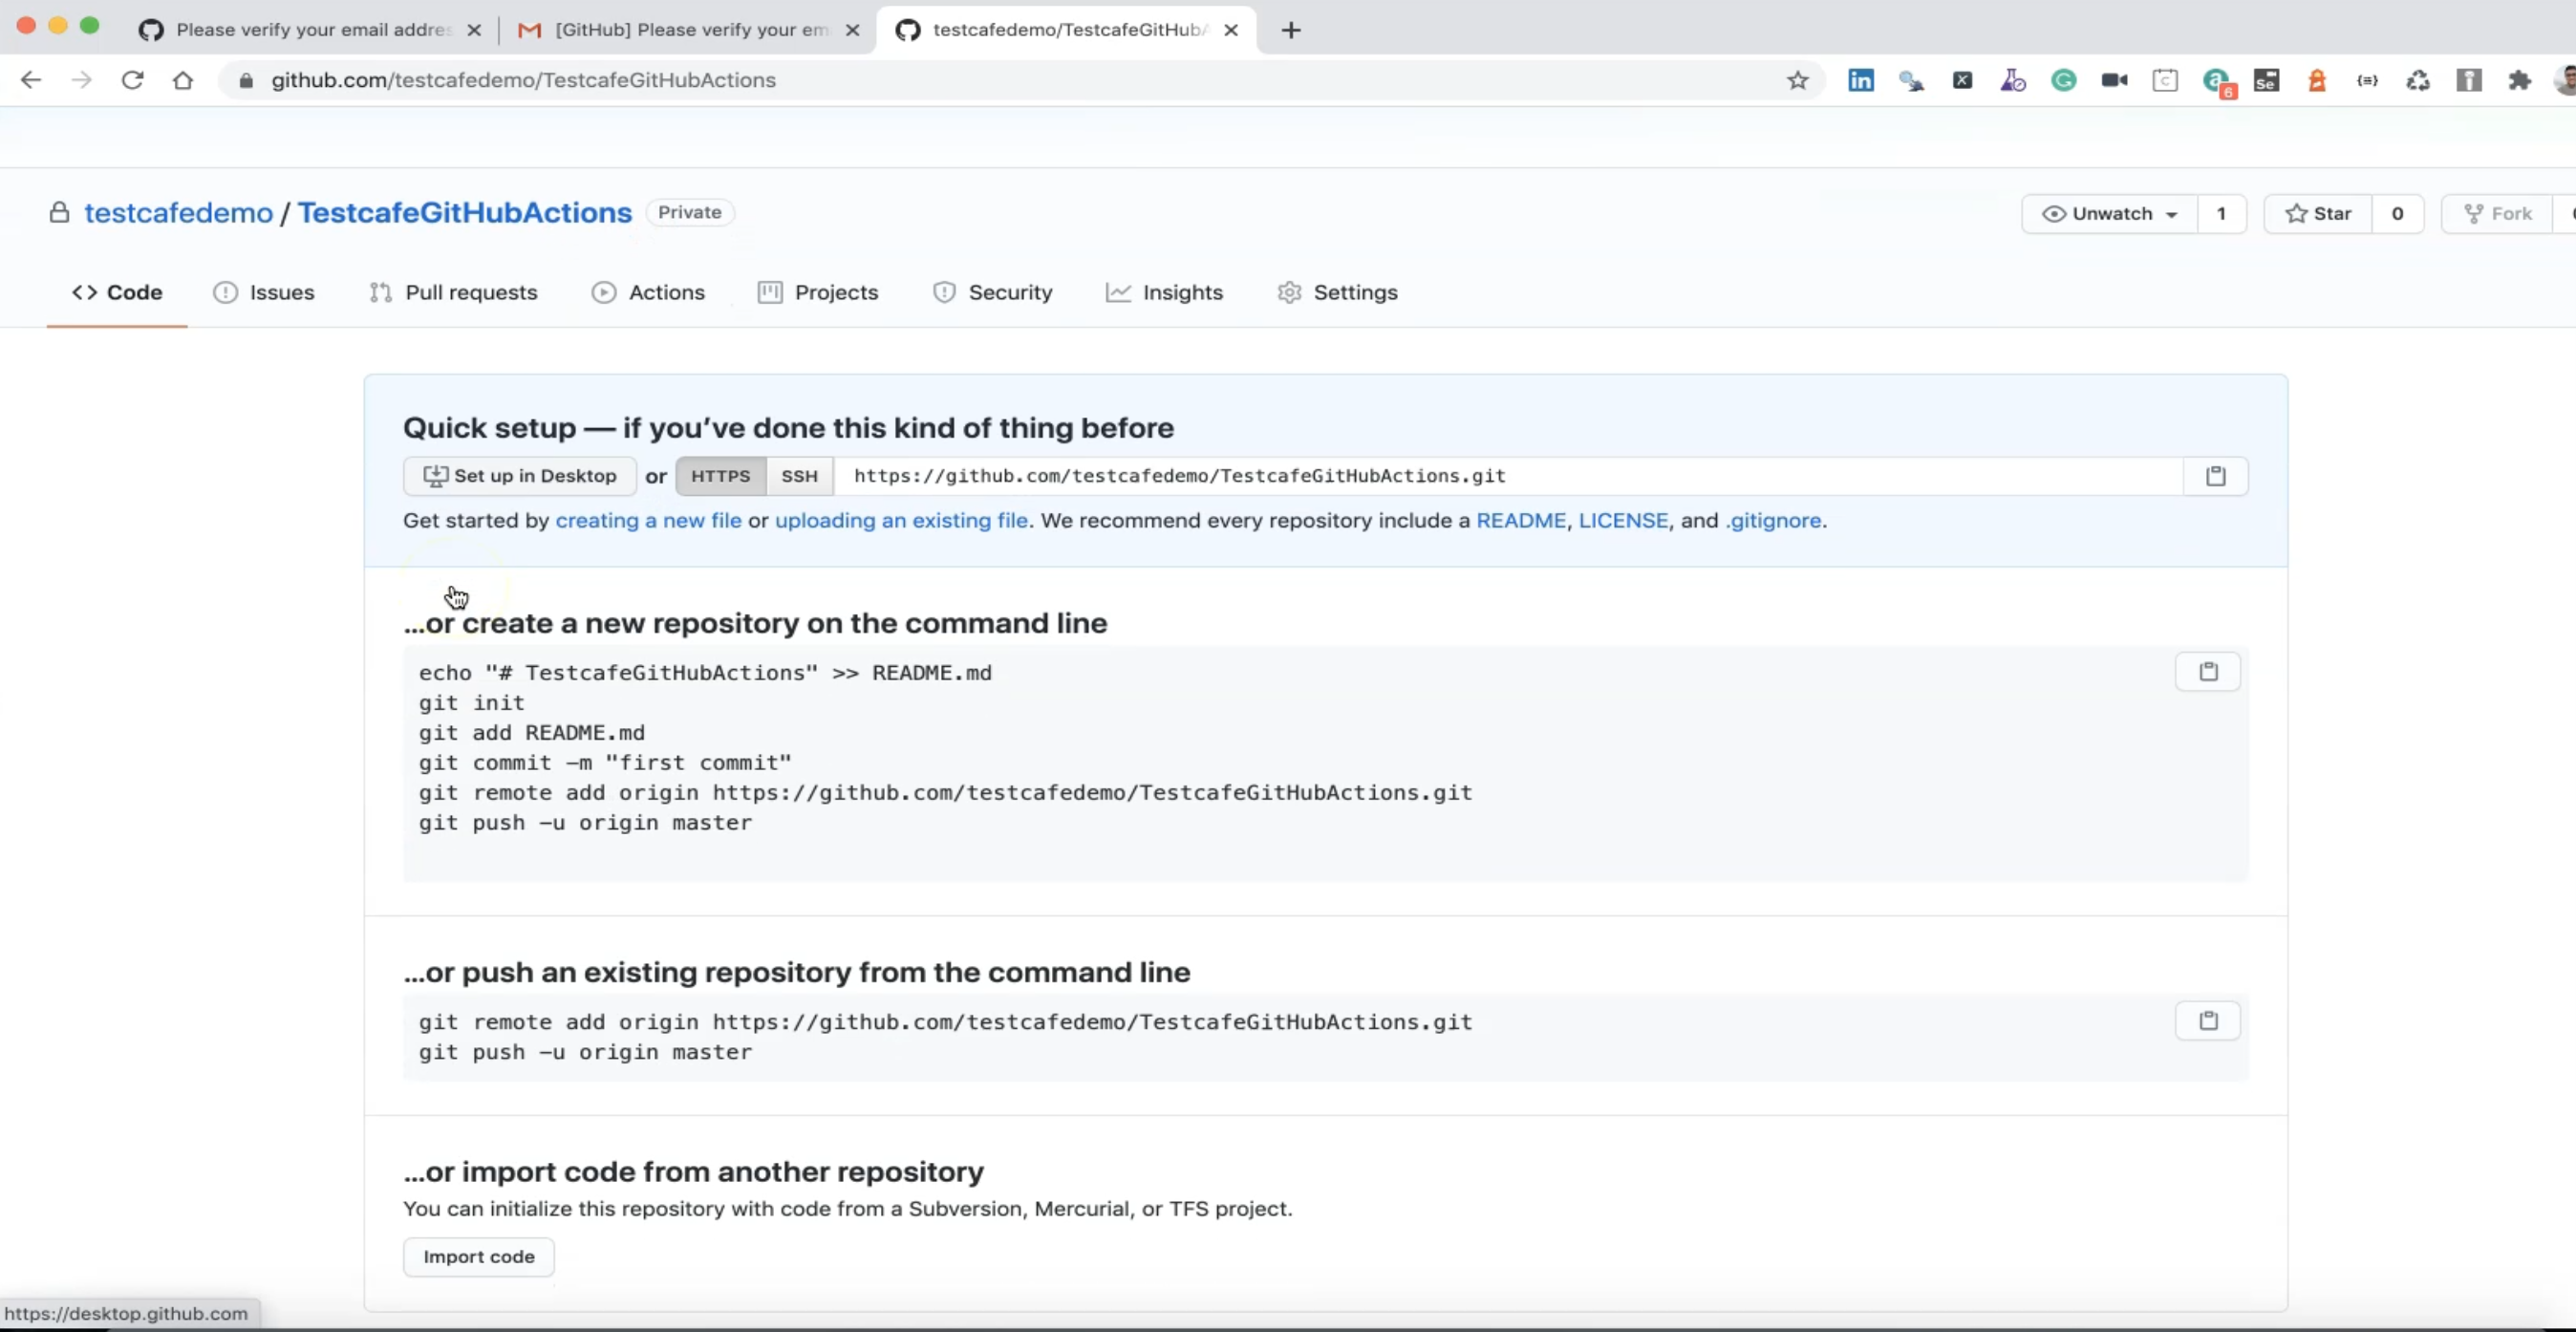
After that, we need to push our existing project to GitHub to be able to start using GitHub Actions and running our tests using GitHub Actions.
# Add our existing projects with TestCafe and GitHub
In this demo, we will add our existing projects with TestCafe and GitHub.
We created our account to be able to create a GitHub action YAML file and run our tests with GitHub actions.
After we created our first project on GitHub and created our account.
So now it's time to push our existing repository from the command line.
We need first to initialize a repository in our project.
After that, we can git remote add our project to this repository.
So, in Visual Studio Code, in CHAPTER12 - this is the project that we need to push that is using page object and data-driven that we are usually using in our demo.
And here, we can say
git init
to initialize an empty GitHub Repository in this folder.
After that, we can say...
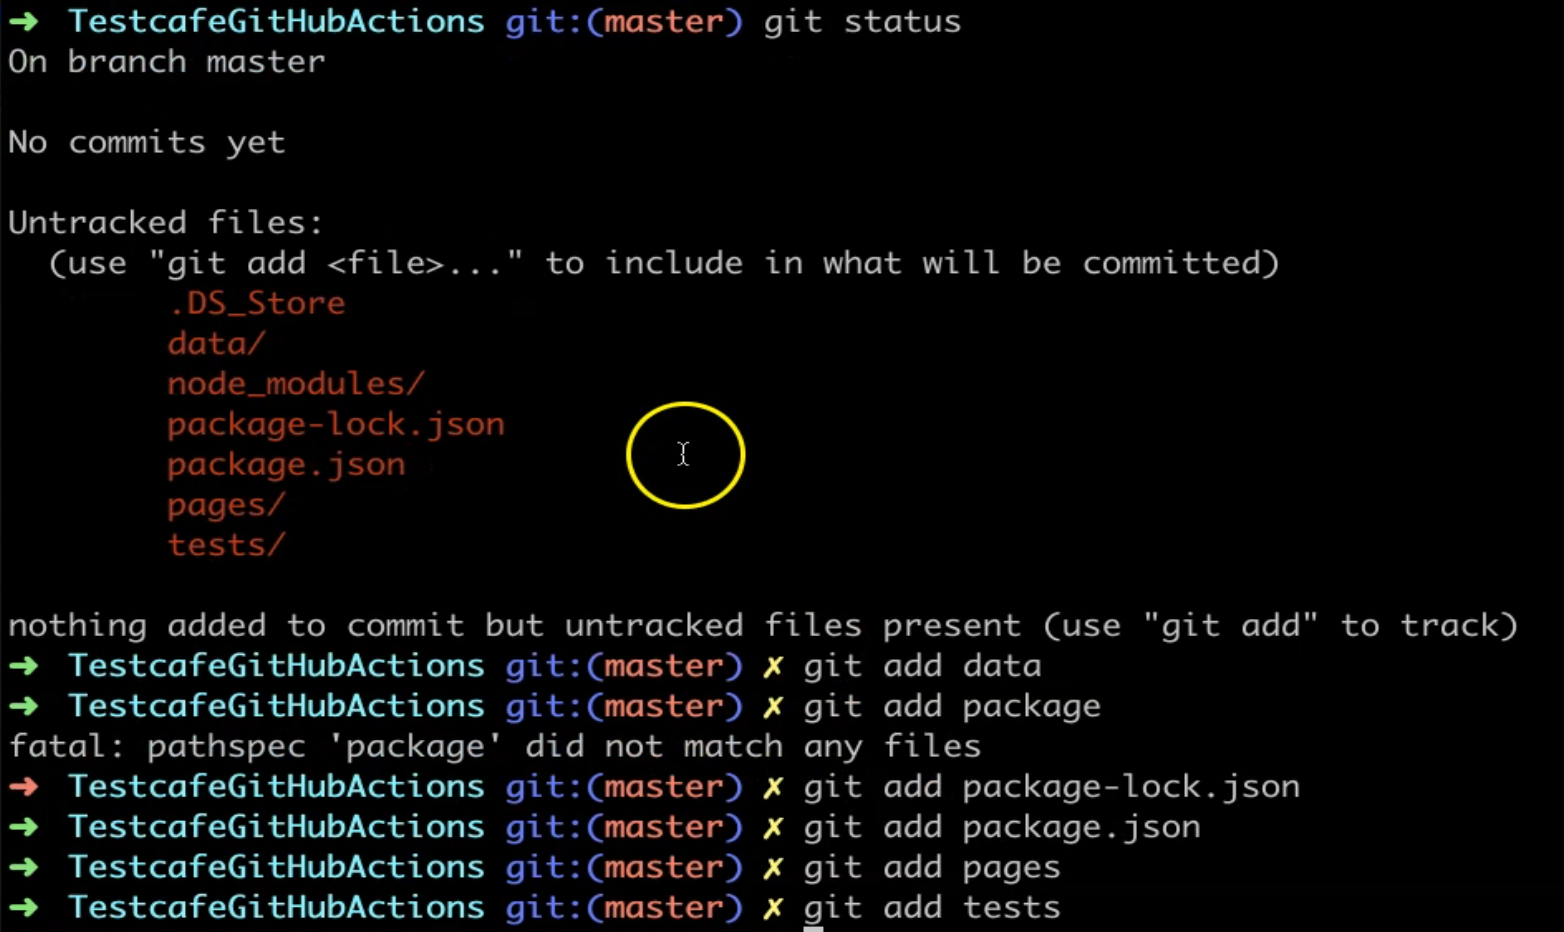
git status
And here we find the data that we need to push.
This is the data that was changed in our local repository, and we need to push it to the remote repository.
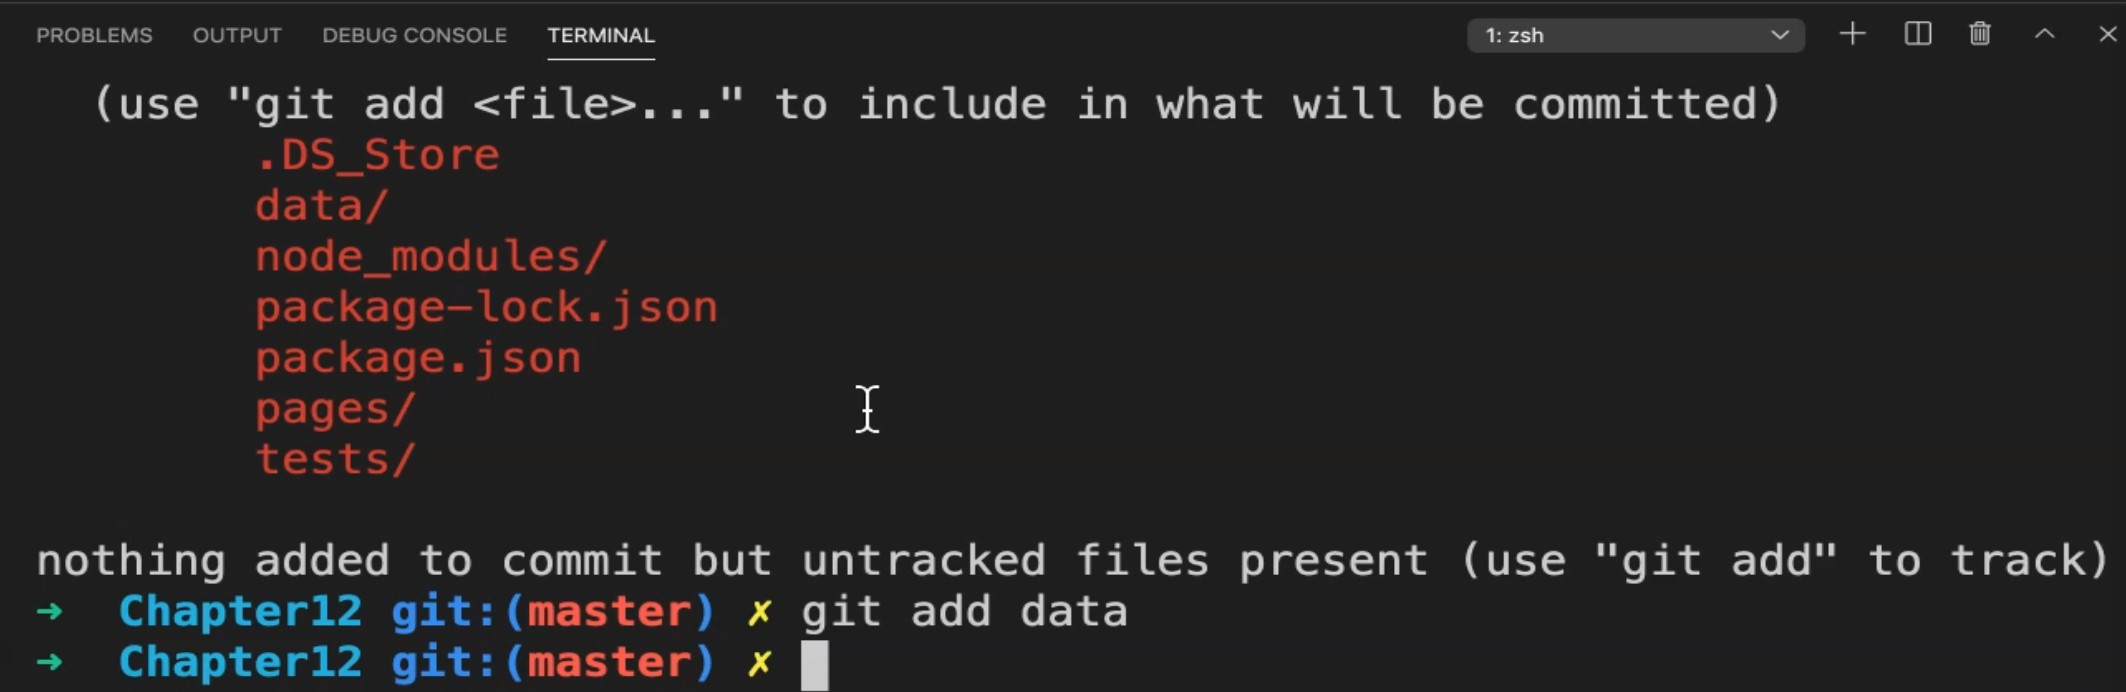
We can start by adding...
git add data
So we will add the data folder.
We will not add node_modules because it will take up a huge size and we don't need it because if you downloaded it or cloned the repository locally, and you can just run npm install you will get the node_modules inside your project.
So we will not push node_modules, we just need to push the package.
git add package-lock.json
git add package.json
git add pages
git add tests
Then we will use...
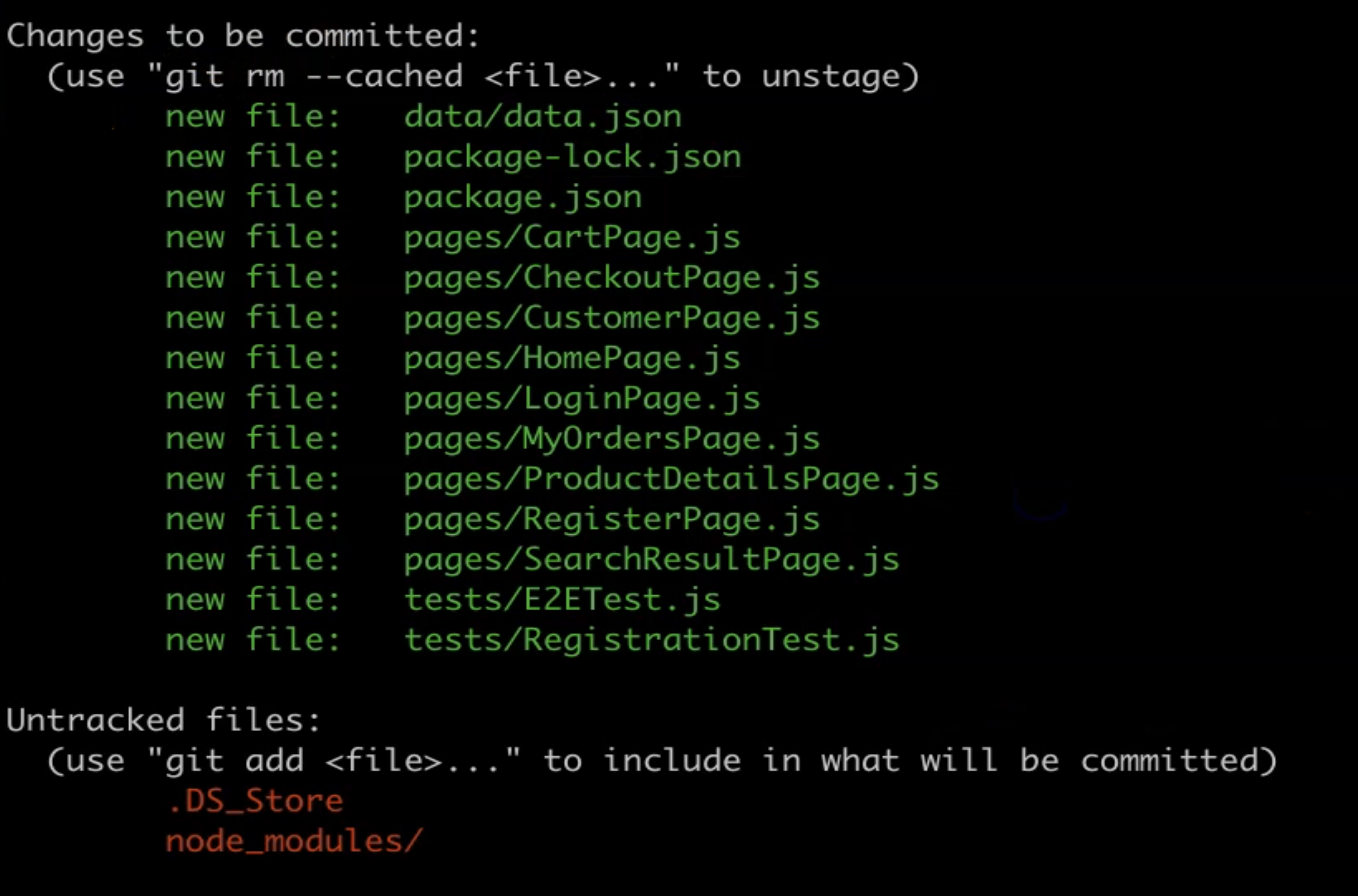
git status
... again to check.
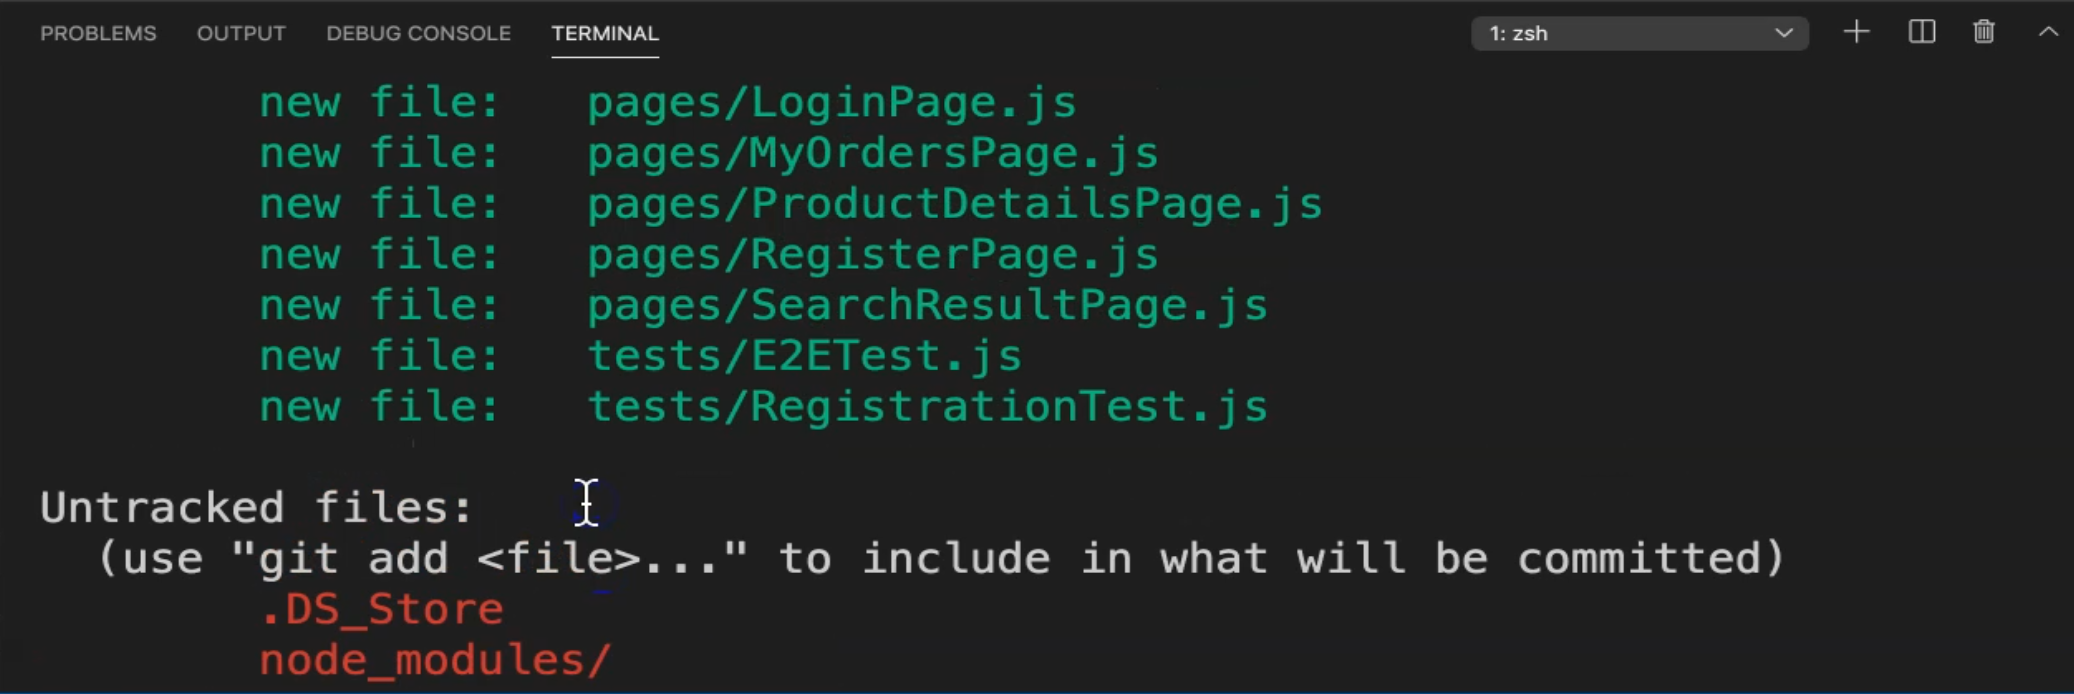
So now node_modules is not added, but we have here pages which includes the page objects and test cases, and also data including data.json, and also we have the package.json file.
After that, we can say, git commit -m.
We need to commit locally first.
After that, we can push on the remote GitHub repository.
git commit -m "add the first testcafe project"
Then our files will be committed to our local repository.
To be able to push our local repository to our existing repository on GitHub, we can copy:
git remote add origin git@github.com:testcafedemo/TestcafeGitHubActions.git
We can use HTTPS or SSH.
After that, we can add:
git push -u origin master
After we completed our first project or repository in GitHub, if you face problems with your GitHub account, you can change it to be a public repository if you have any problem with your credential on your local machine.
Now we need to clone this repository locally and copy or add our files locally, and then we push the changes to our remote repository in GitHub.
So I will copy it and open the terminal and write
git clone https://github.com/testcafedemo/TestcafeGitHubActions.git
Then I can
cd TestcafeGitHubActions
and I can open this folder.
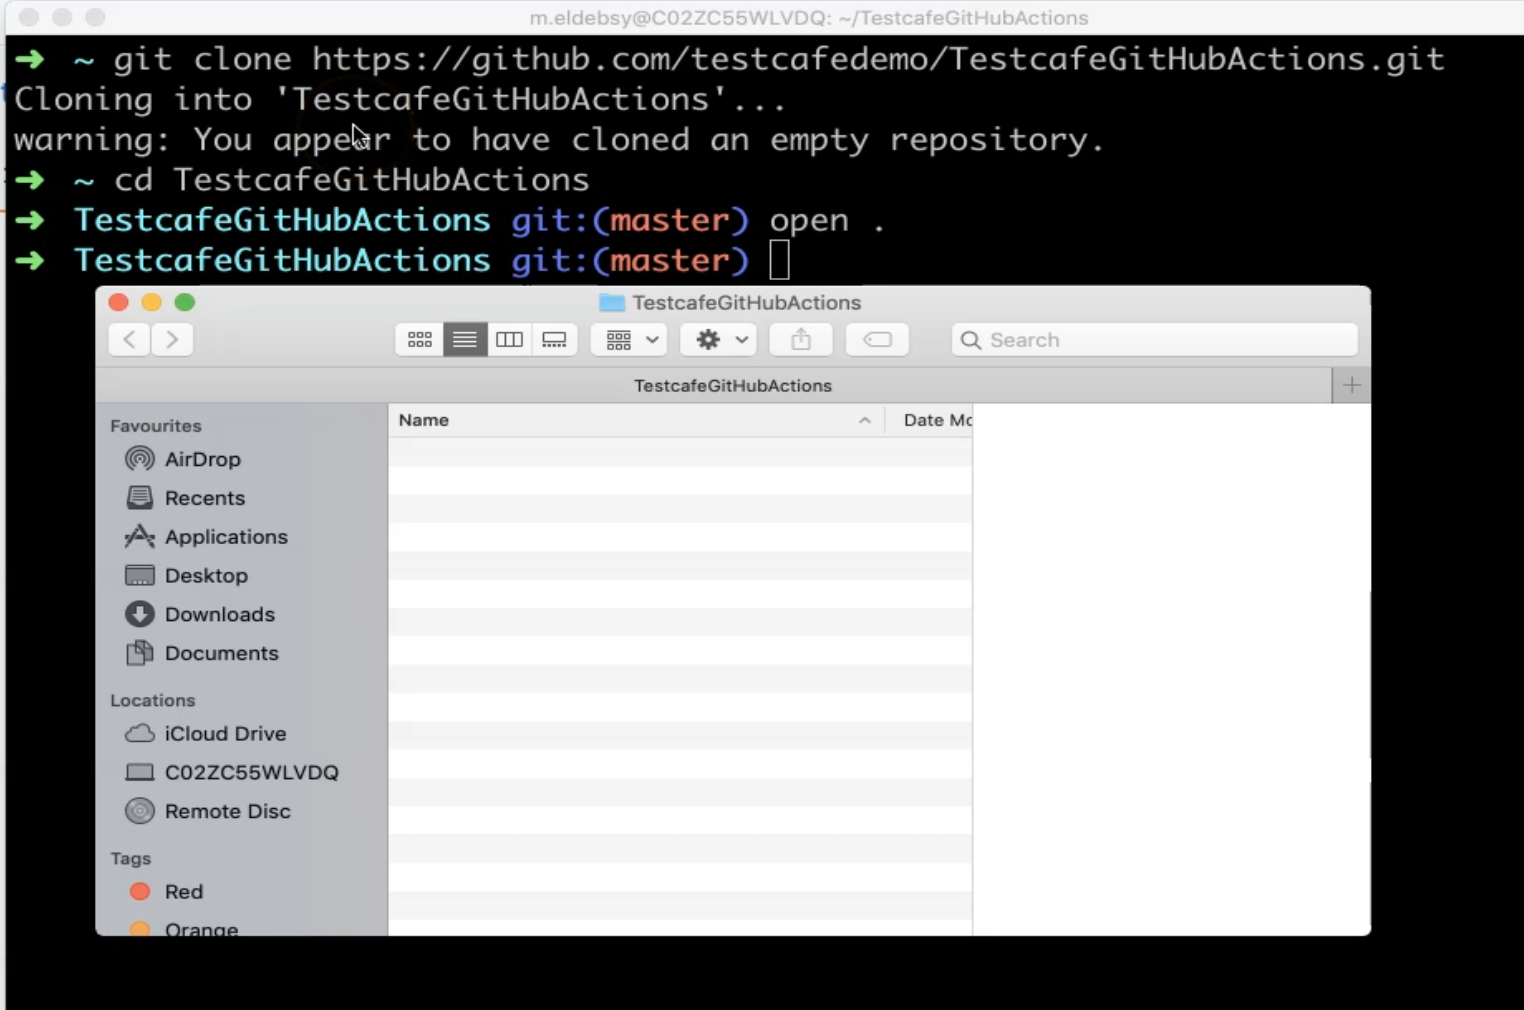
I have an empty folder here - there was a warning that "You appear to have cloned an empty repository".
Then I already have one example with my project.
Here I have the previous projects that we could create on page object and data-driven so I can copy it inside our GitHub repository, our empty folder.
After that, we can add our files into our local GitHub repository, and then push it to GitHub as a remote repository.
So here we can just write
git status
Here we have the files that we just copied and added in our folder.
git add data
git add package-lock.json
git add package.json
git add pages
git add tests
We will not add or push our node_modules because if you pull or clone the repository after that we can just run npm install and it will be initialized and run and put it in your project.
So we will run again:
git status
Here, these are the files that we need to push
Then we can just write
git commit -m "this is the first testCafe project"
git push
And after that, we will find that we uploaded, or we pushed, our changes to our remote branch.
So here, if we refresh our GitHub repository, we will find the data is pushed already.
Also if we need to add a README, we can do it.
Then in the next demo, we will start creating a YAML file for GitHub actions and use it with our code.
Resources
Quiz
The quiz for this chapter can be found in 12.3
