

Transcripted Summary
# Configure the YAML file for GitHub actions
Now it's time to configure the YAML file for GitHub actions and start running our test on every PR, or every pull request, or scheduled as a nightly build, for example.
After we pushed our code to our GitHub repository, now it's time to create our GitHub Action YAML file.
So we will click on Actions inside our GitHub repository, and we will open the starter page for GitHub actions, and here you can find the suggested workflows.
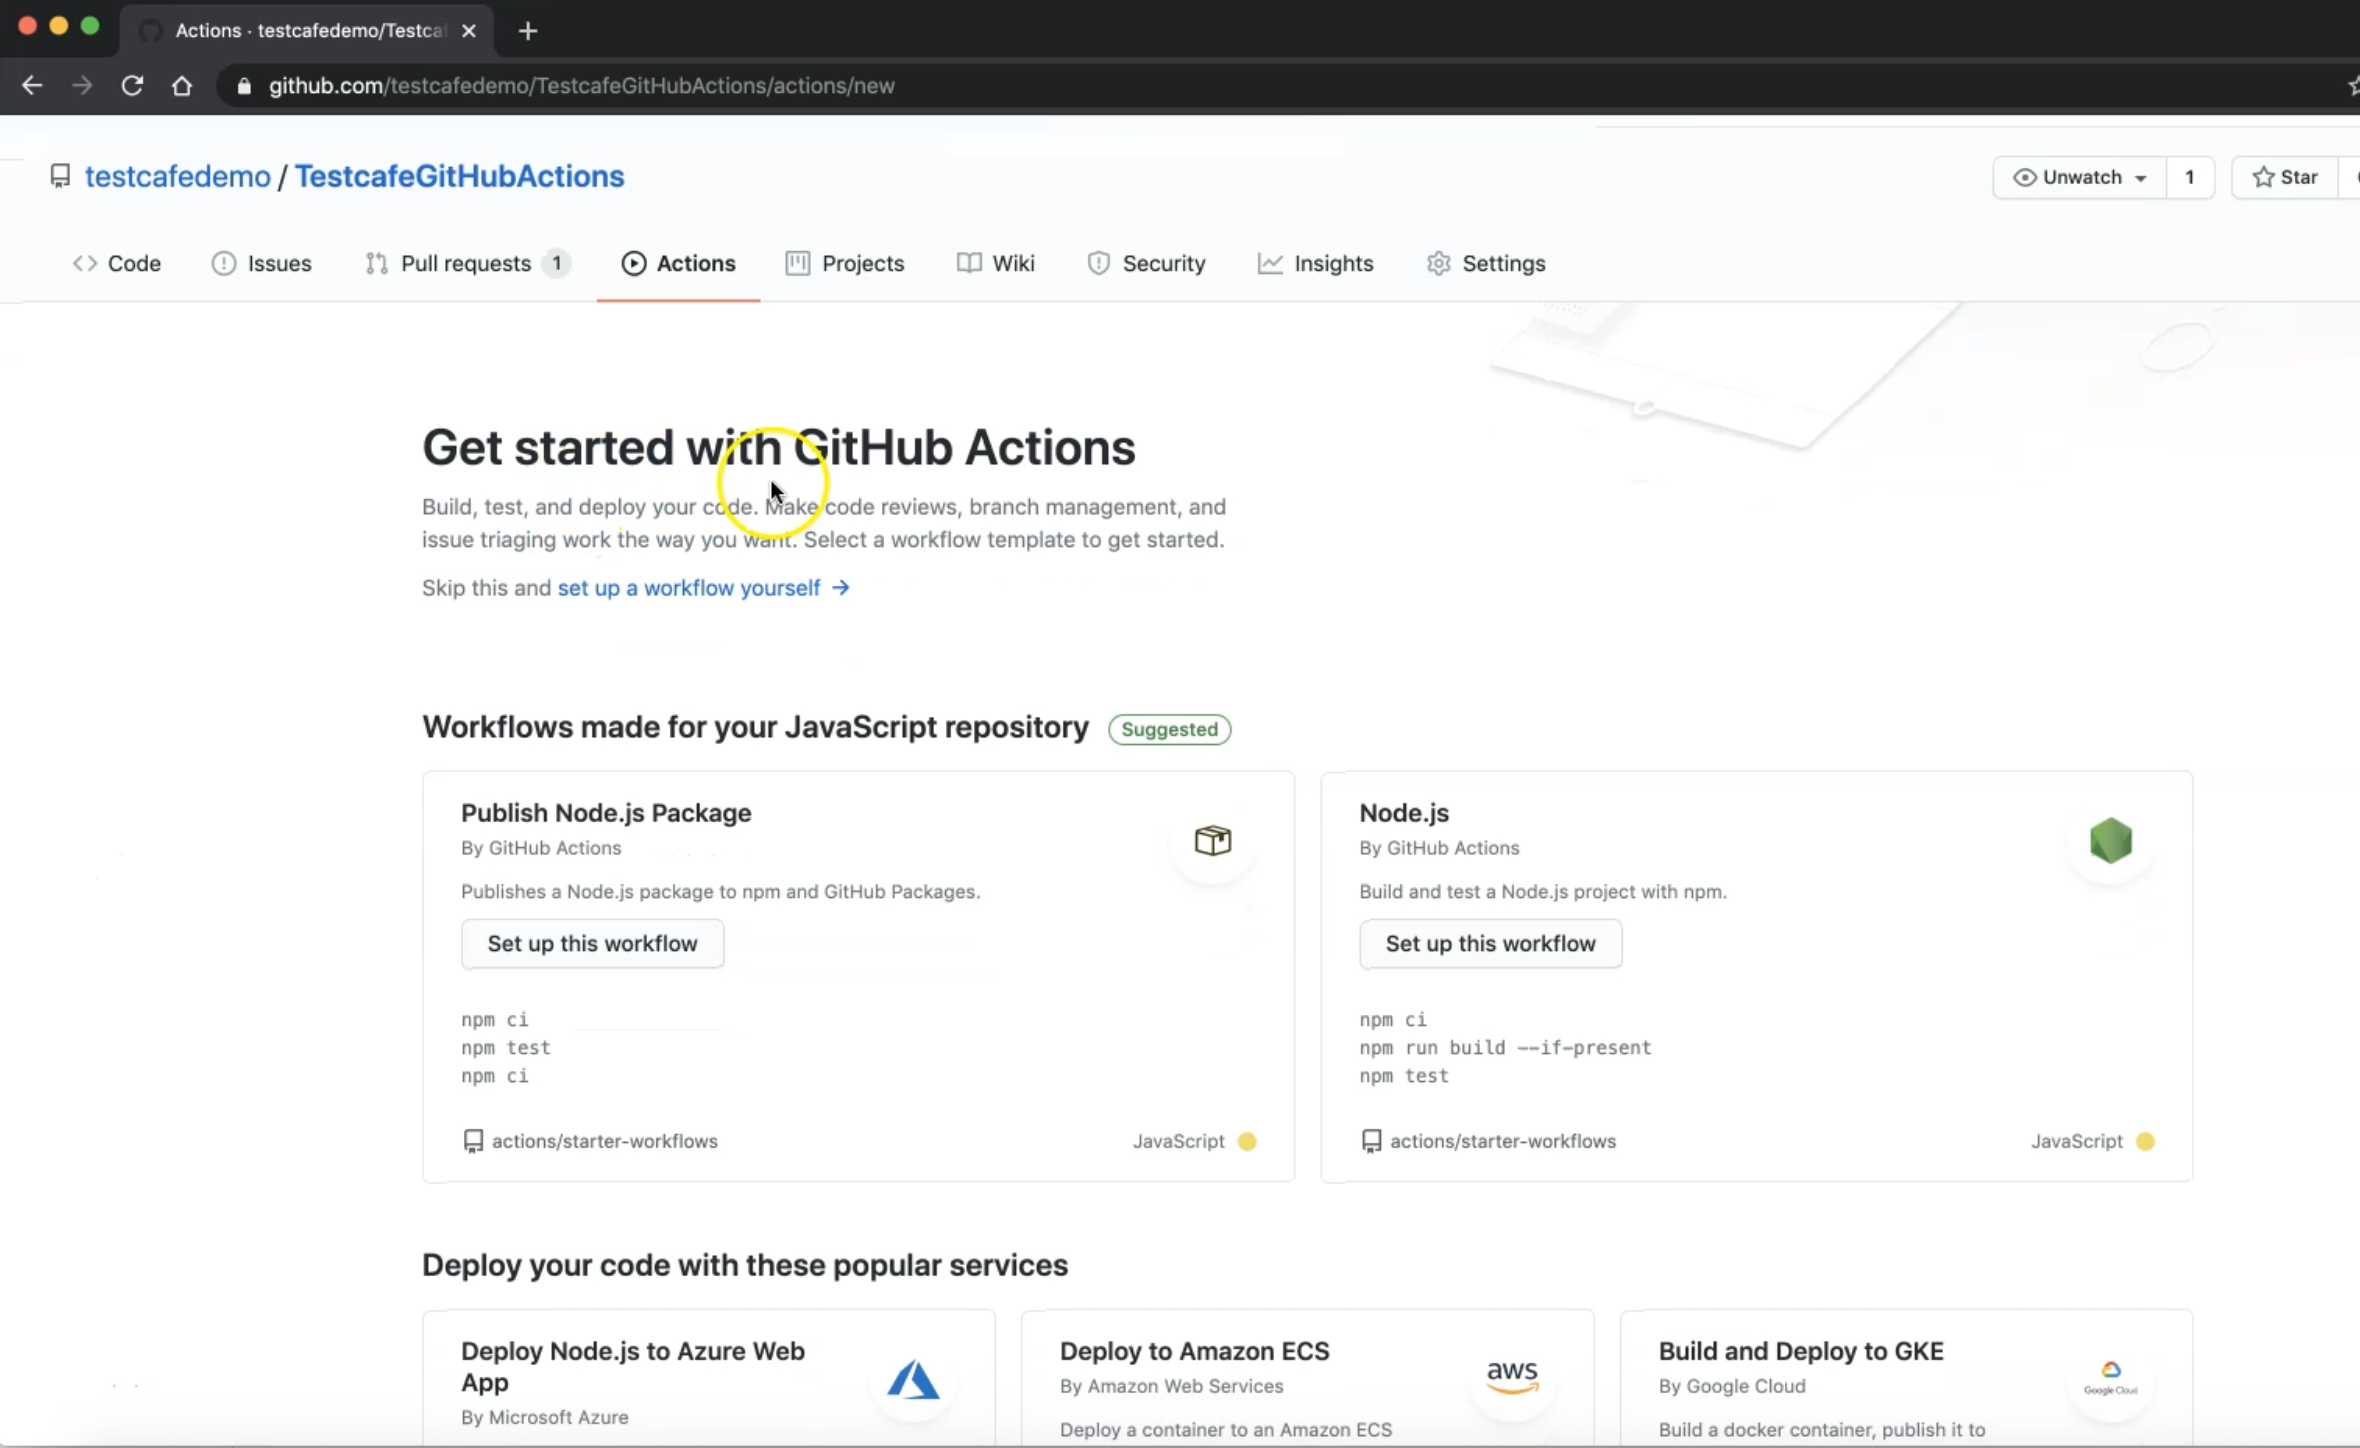
For example, this is for Node.js or Javascript repository because we are using Node.js they are auto-detecting our type of files or our projects, and also you can find all the other workflows or other templates inside GitHub actions workflows.
For example, Java with Gradle, Android, Ruby, .NET Core, or Kubernetes, and AWS.
Here, we can use a sample workflow - we can select the setup with node - or you can set a workflow by yourself as we want, or as we need.
We can set up our workflow and also we can just change a little bit here because we don't need all of these things.
In the steps, we can leave the checkout.
We can remove these steps because we will add ours that are related to TestCafe.
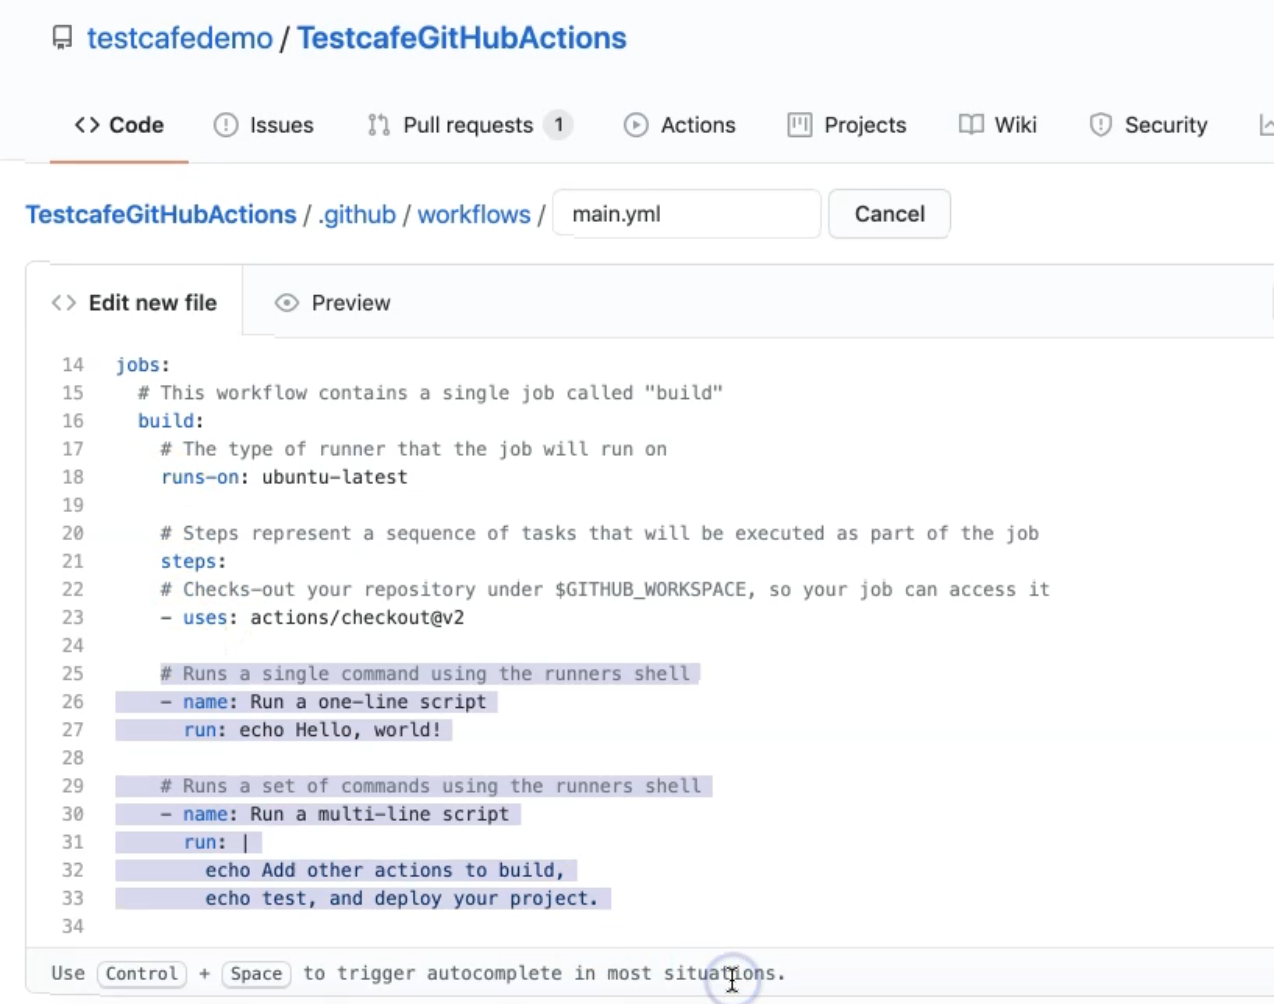
We will also remove the commented lines.
We can remove the pull_request but we need on:[push] and we don't need to specify any branch.
On every code change, we will run our workflow with TestCafe.
The file name is main.yml but we will name it nodejs.yml.
For the name, will change it from CI to TestCafe workflow.
We can change runs-on to be on windows-latest instead of Ubuntu.
Here we need to add one additional step.
So this is one step to check out the code from the repository.
After that, we need to add one step for adding TestCafe.
Then, in the marketplace section, we need to search for "testcafe".
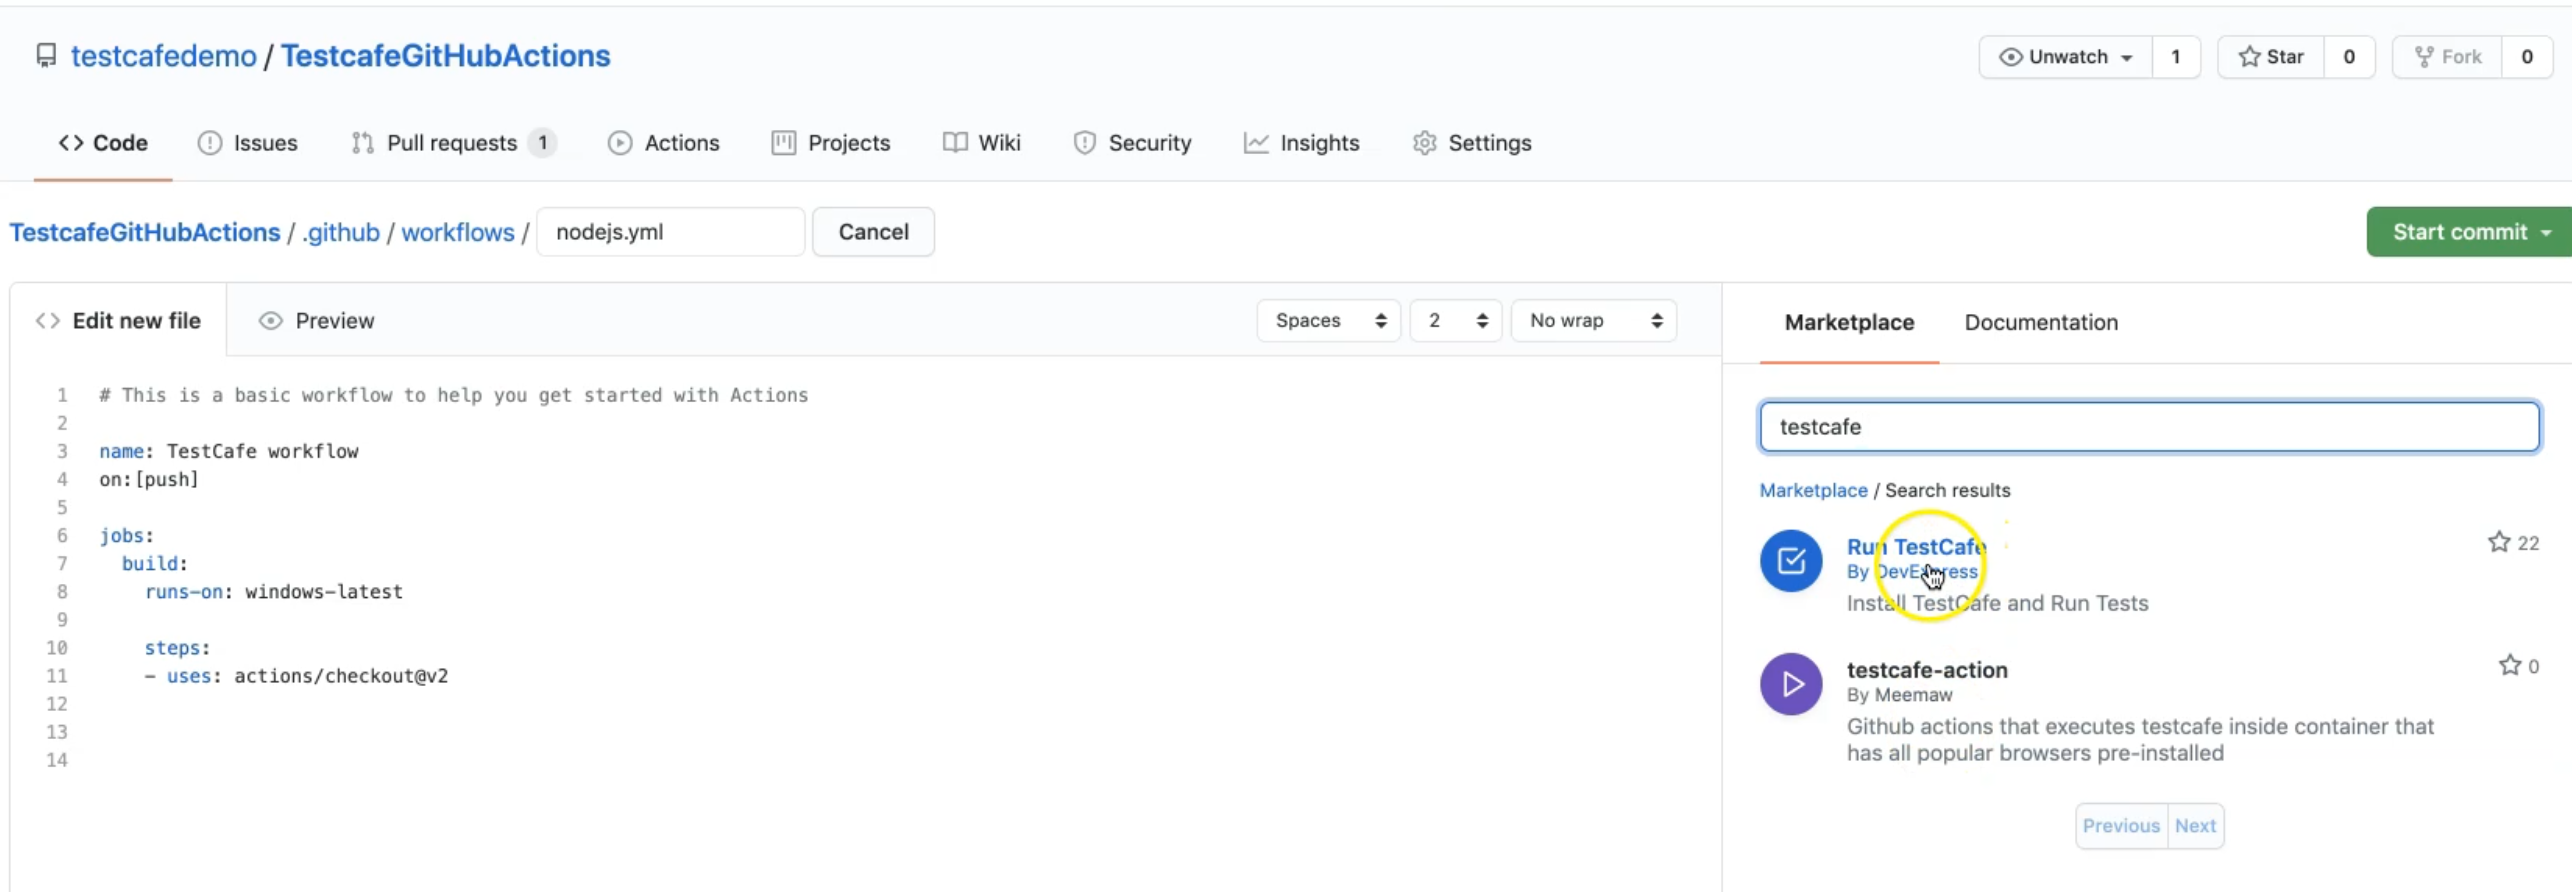
There we will find two actions - Run TestCafe, the official plugin from DevExpress from TestCafe, and this is another test-cafe action.
So we will use this first one.
Install TestCafe and Run Tests is what we need.
After that, we can find the installation instructions - copy and paste this snippet in your YAML file, and we can use it.
But actually, we need to open the full marketplace listing to open the repository to check the additional information.
Here is the usage.
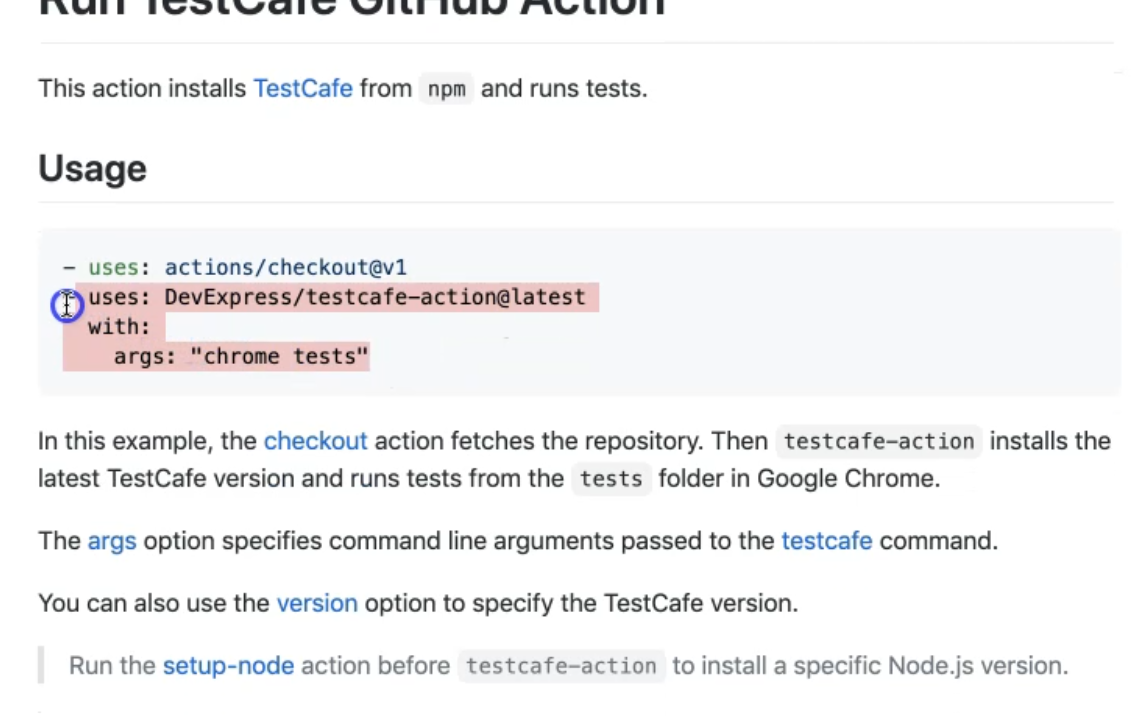
You can use the checkout and we already have the system in our YAML file.
After that, we can use DevExpress action at the latest, and with the args, we can specify what the arguments are that we need to run with the TestCafe command line.
For example, we need to run chrome tests - if we wanted to run all the tests inside our project, or we can also specify the fixture file - for example here - chrome fixture.js or also we can change the browser, if the image supports a different browser, for example, Firefox or additional browsers.
Also here, we can specify any parameter that we usually use with a TestCafe like -s to take a screenshot and only take a screenshot on fail.
Also -c for the concurrency, so it can run on three browsers or three instances of Google Chrome.
Let's start with the first one and just so we can copy this part.
        uses: DevExpress/testcafe-action@latest
        with:
          args: "chrome tests"
And after that, after the checkout, we can just specify this usage or uses.
This action will install TestCafe, and we will pass this argument to the testcafe command line and after that, we run our test.
We just need to ensure that the args is not under with:, but with an indent - we need to just check that we don't have problems with this.
Also for example, here we can add the name of that workflow - 'Run TestCafe Tests'.
Before this one, we can specify the name of the step with 'Install TestCafe from NPM and Run Tests'.
This is the step for installing this cafe action.
And after that, we will run our command.
name: Basic TestCafe Workflow
on: [push]

jobs:
  build:
    name: Run TestCafe Tests
    runs-on: windows-latest
    steps:
      - uses: actions/checkout@v1
      - name: Install TestCafe from 'npm' and Run Tests
        uses: DevExpress/testcafe-action@latest
        with:
          args: "chrome tests"
So we have here on push - on every change in the code - we run the build with the name 'Run TestCafe Tests' on windows-latest.
And with the steps uses action, check out the code from our repository.
And after that install the TestCafe action and run our command.
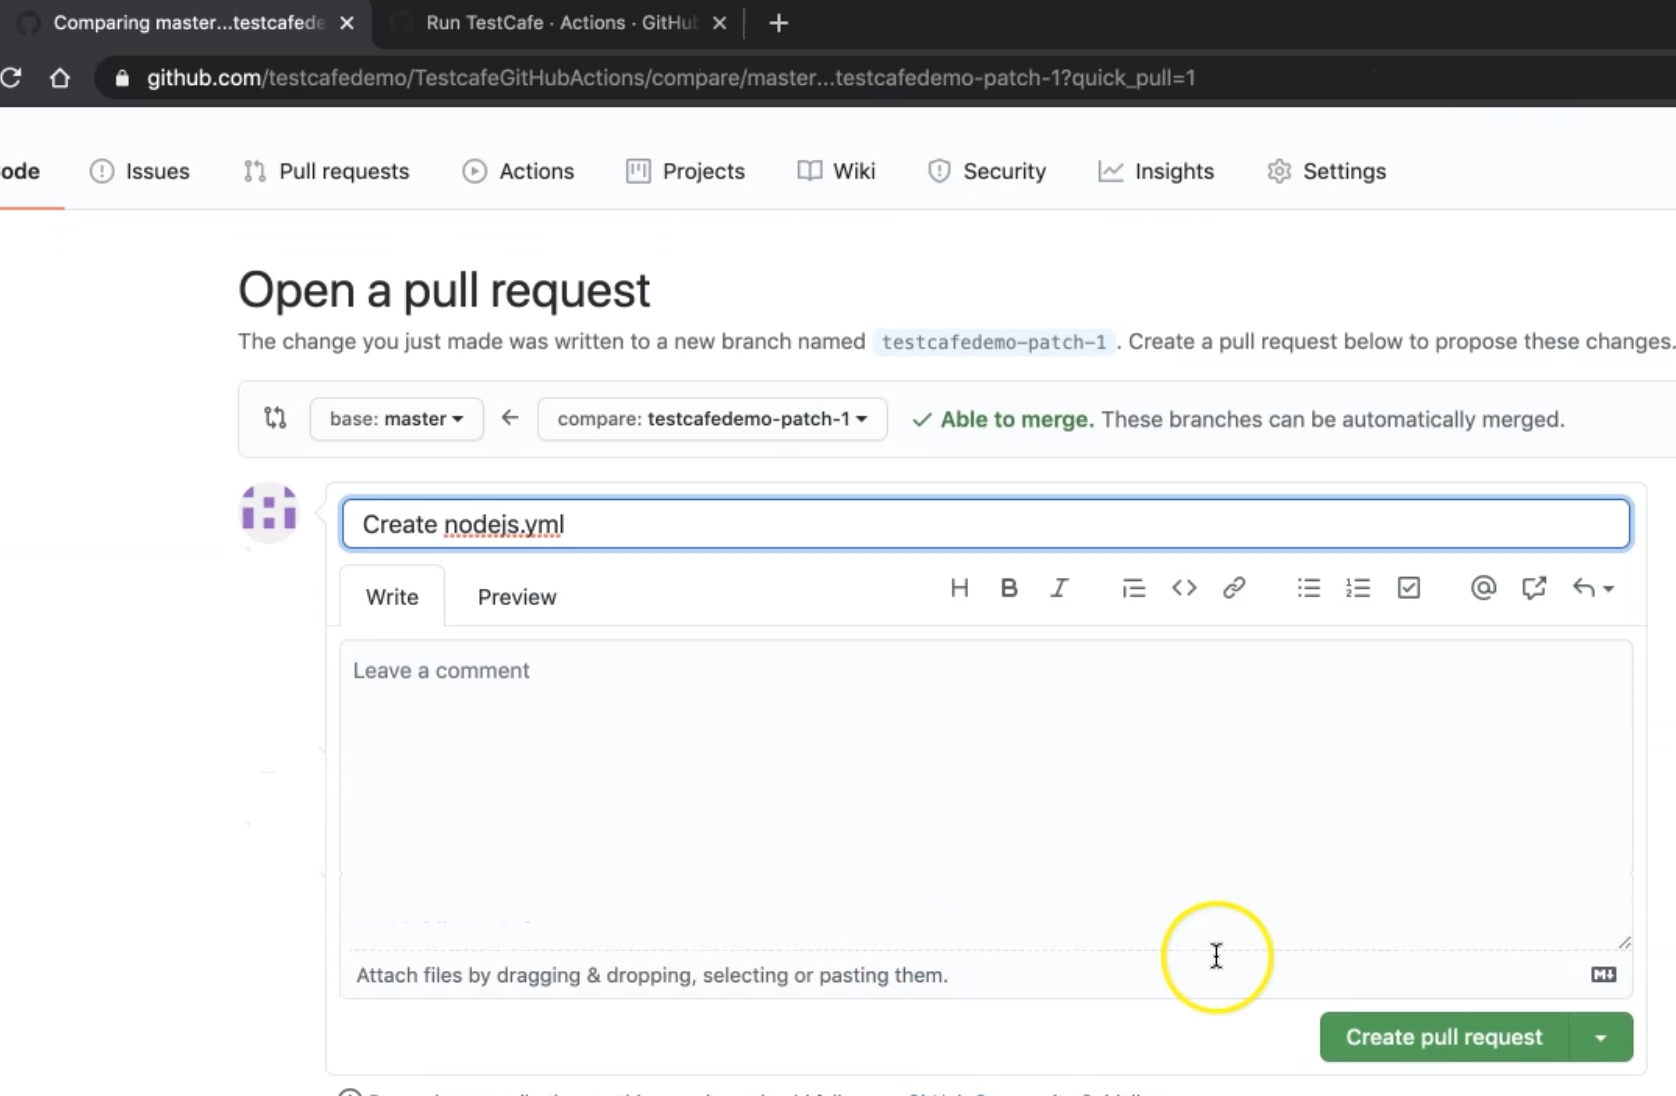
So let's start a commit and we can create a new branch testcafedemo-patch-1 or change it.
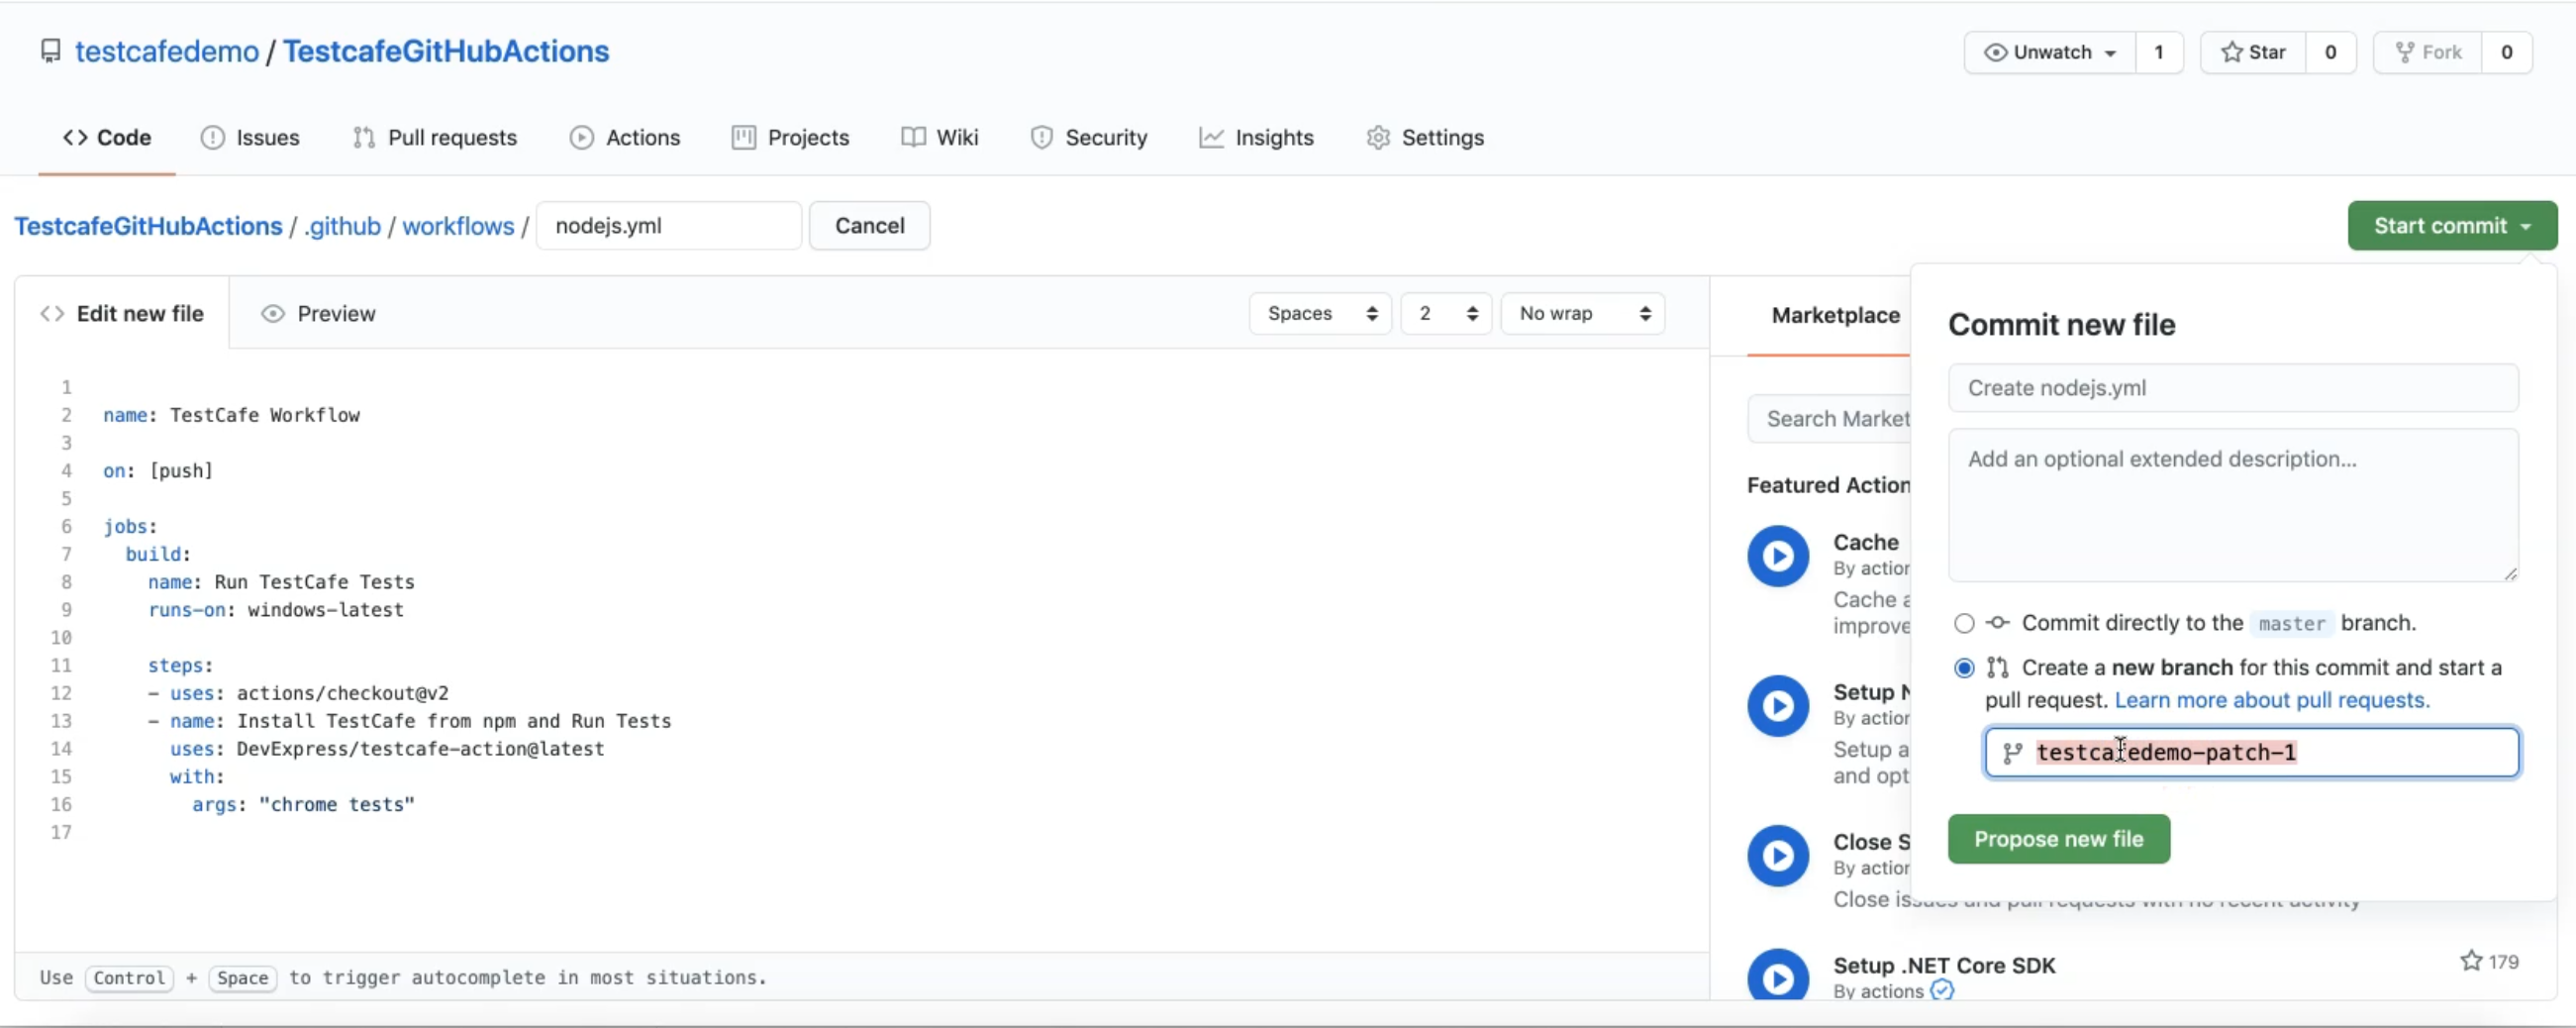
We can "Propose new file" with this file and after that, we can create a new PR or new pull request.
Here we will check that TestCafe workflow is running now with the push, because we changed one file on our repository and this means that we are pushing our new code, so we can open the workflow from here, GitHub action.
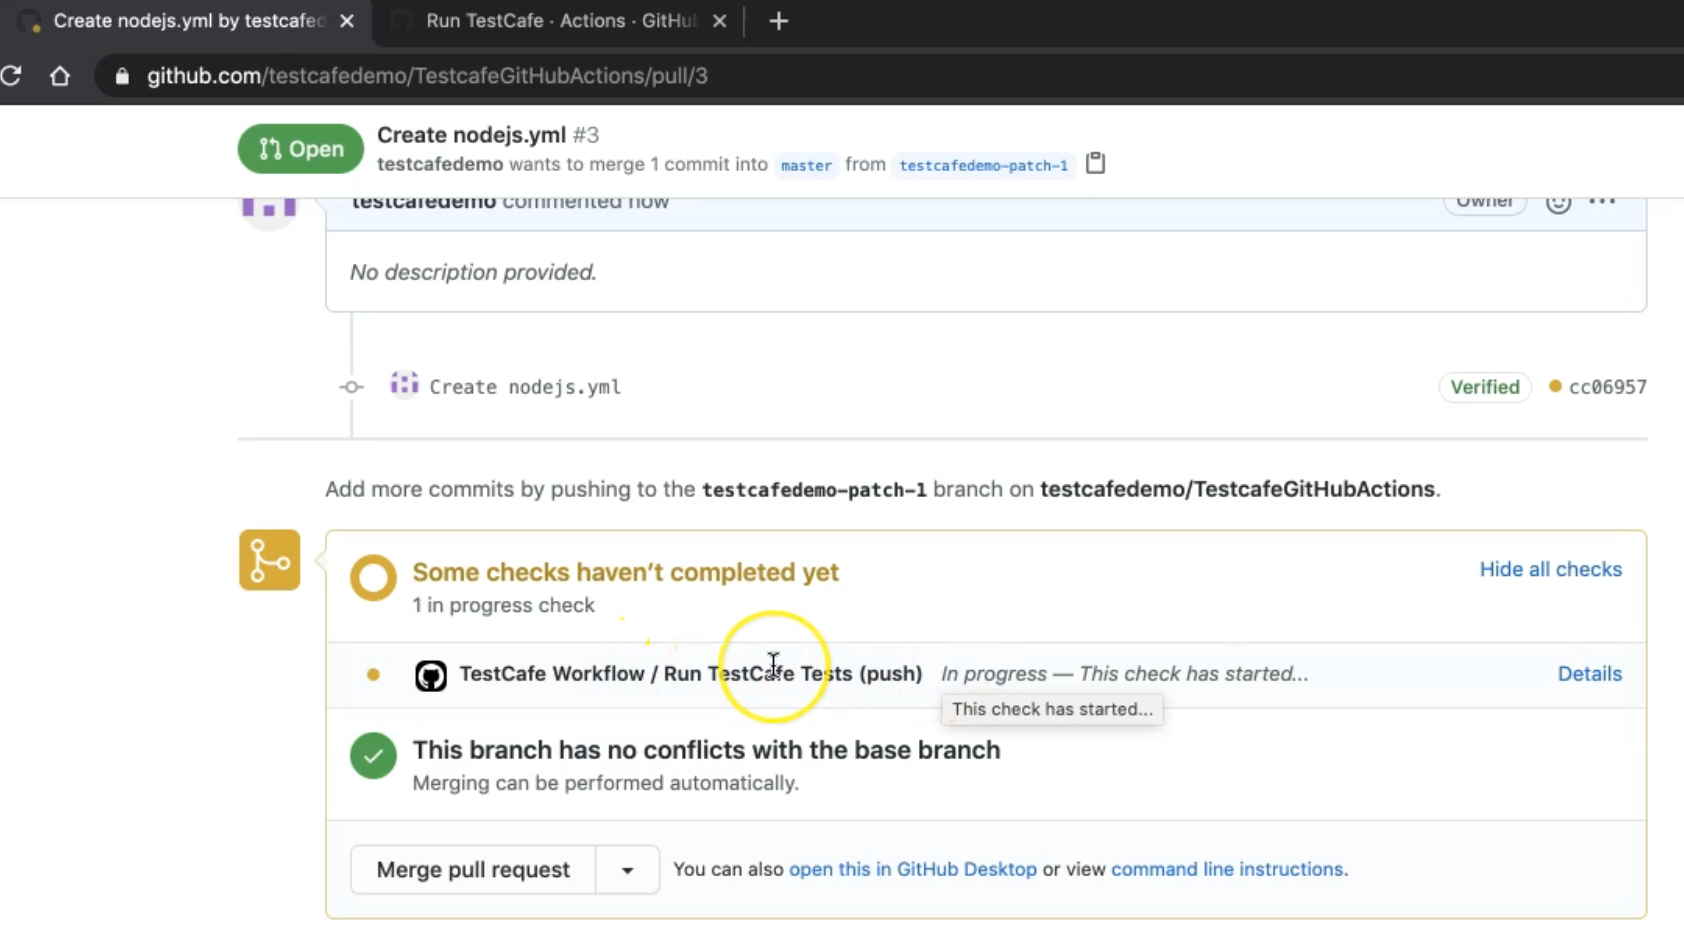
After that, we can check that now we are running - now we are checking out the repository and getting and initializing the latest version with the git command.
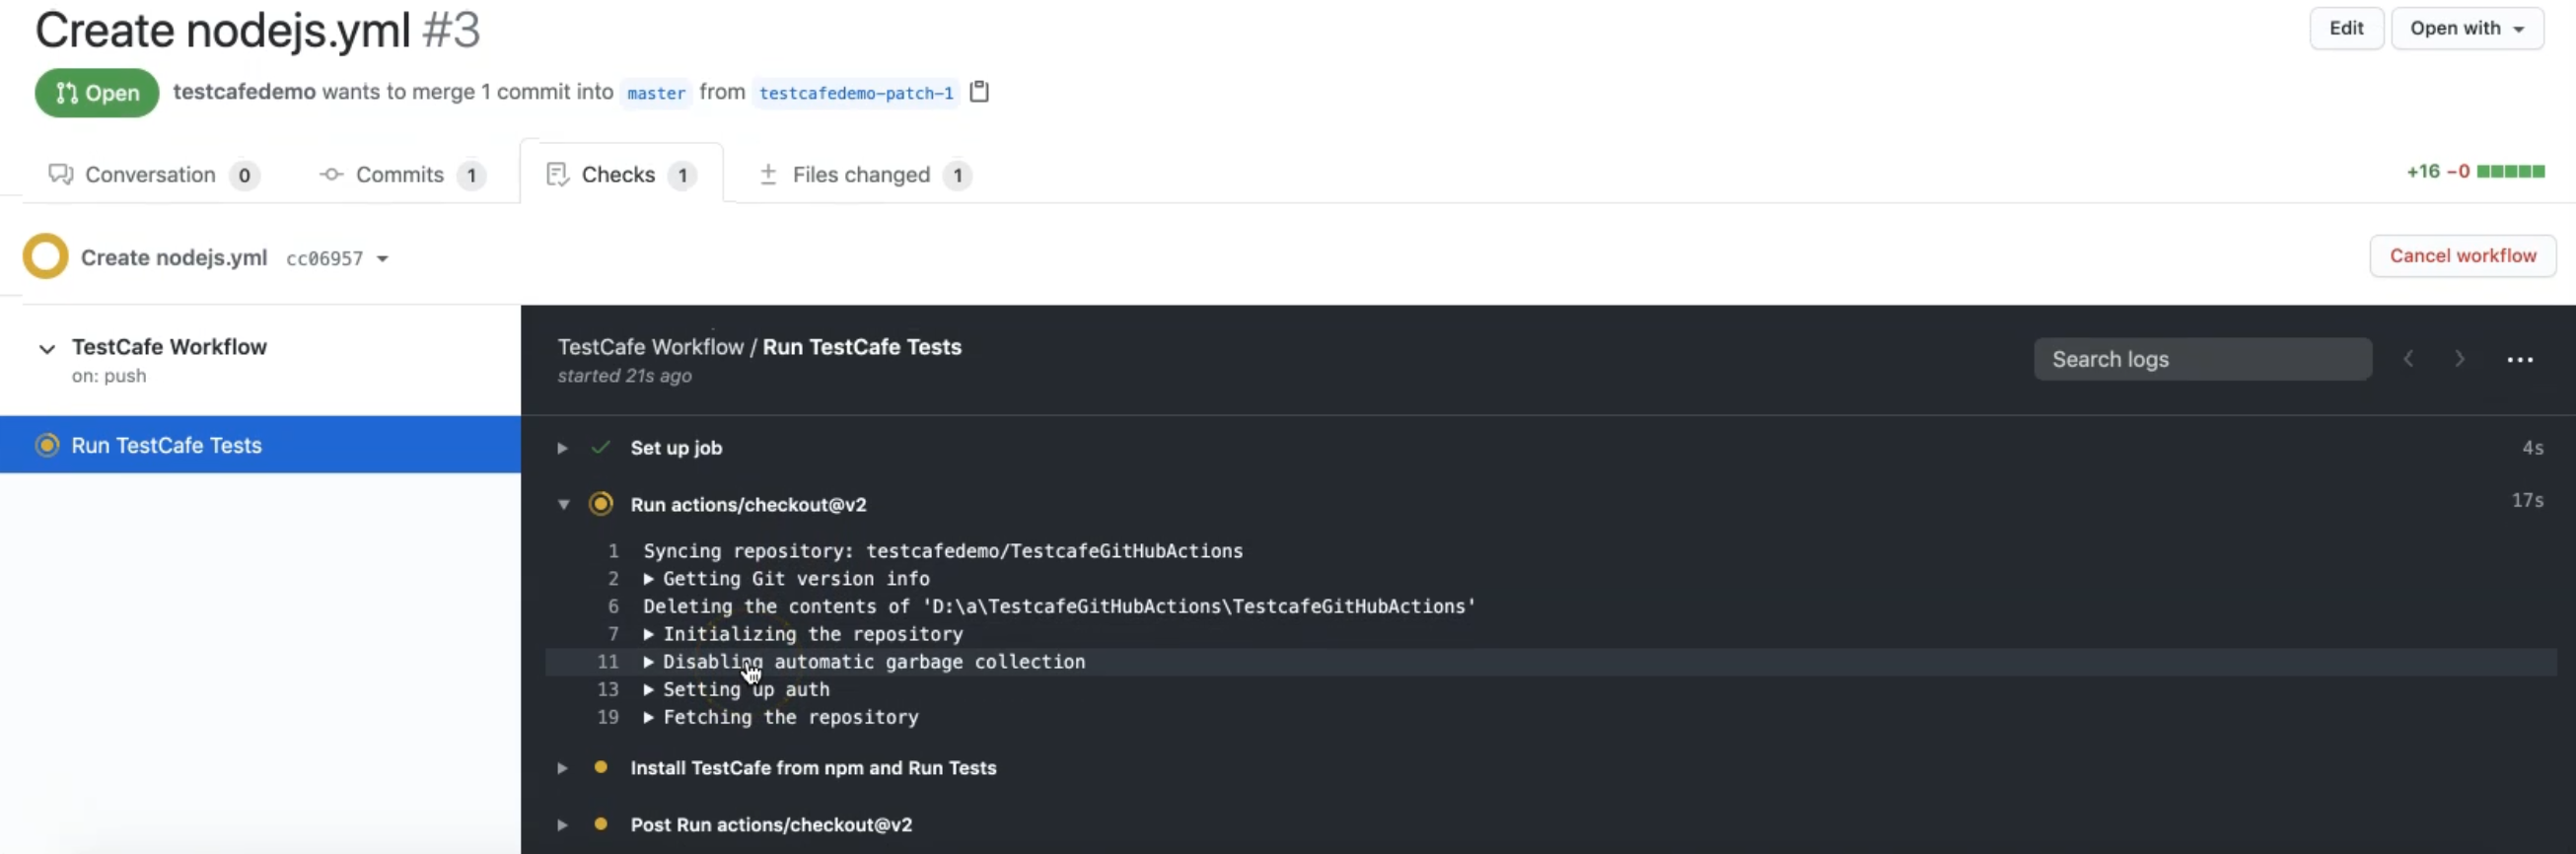
After that, now we are installing TestCafe and running our tests, and then the post-action will display the test results.
We would wait until the workflow finishes to check the test results.
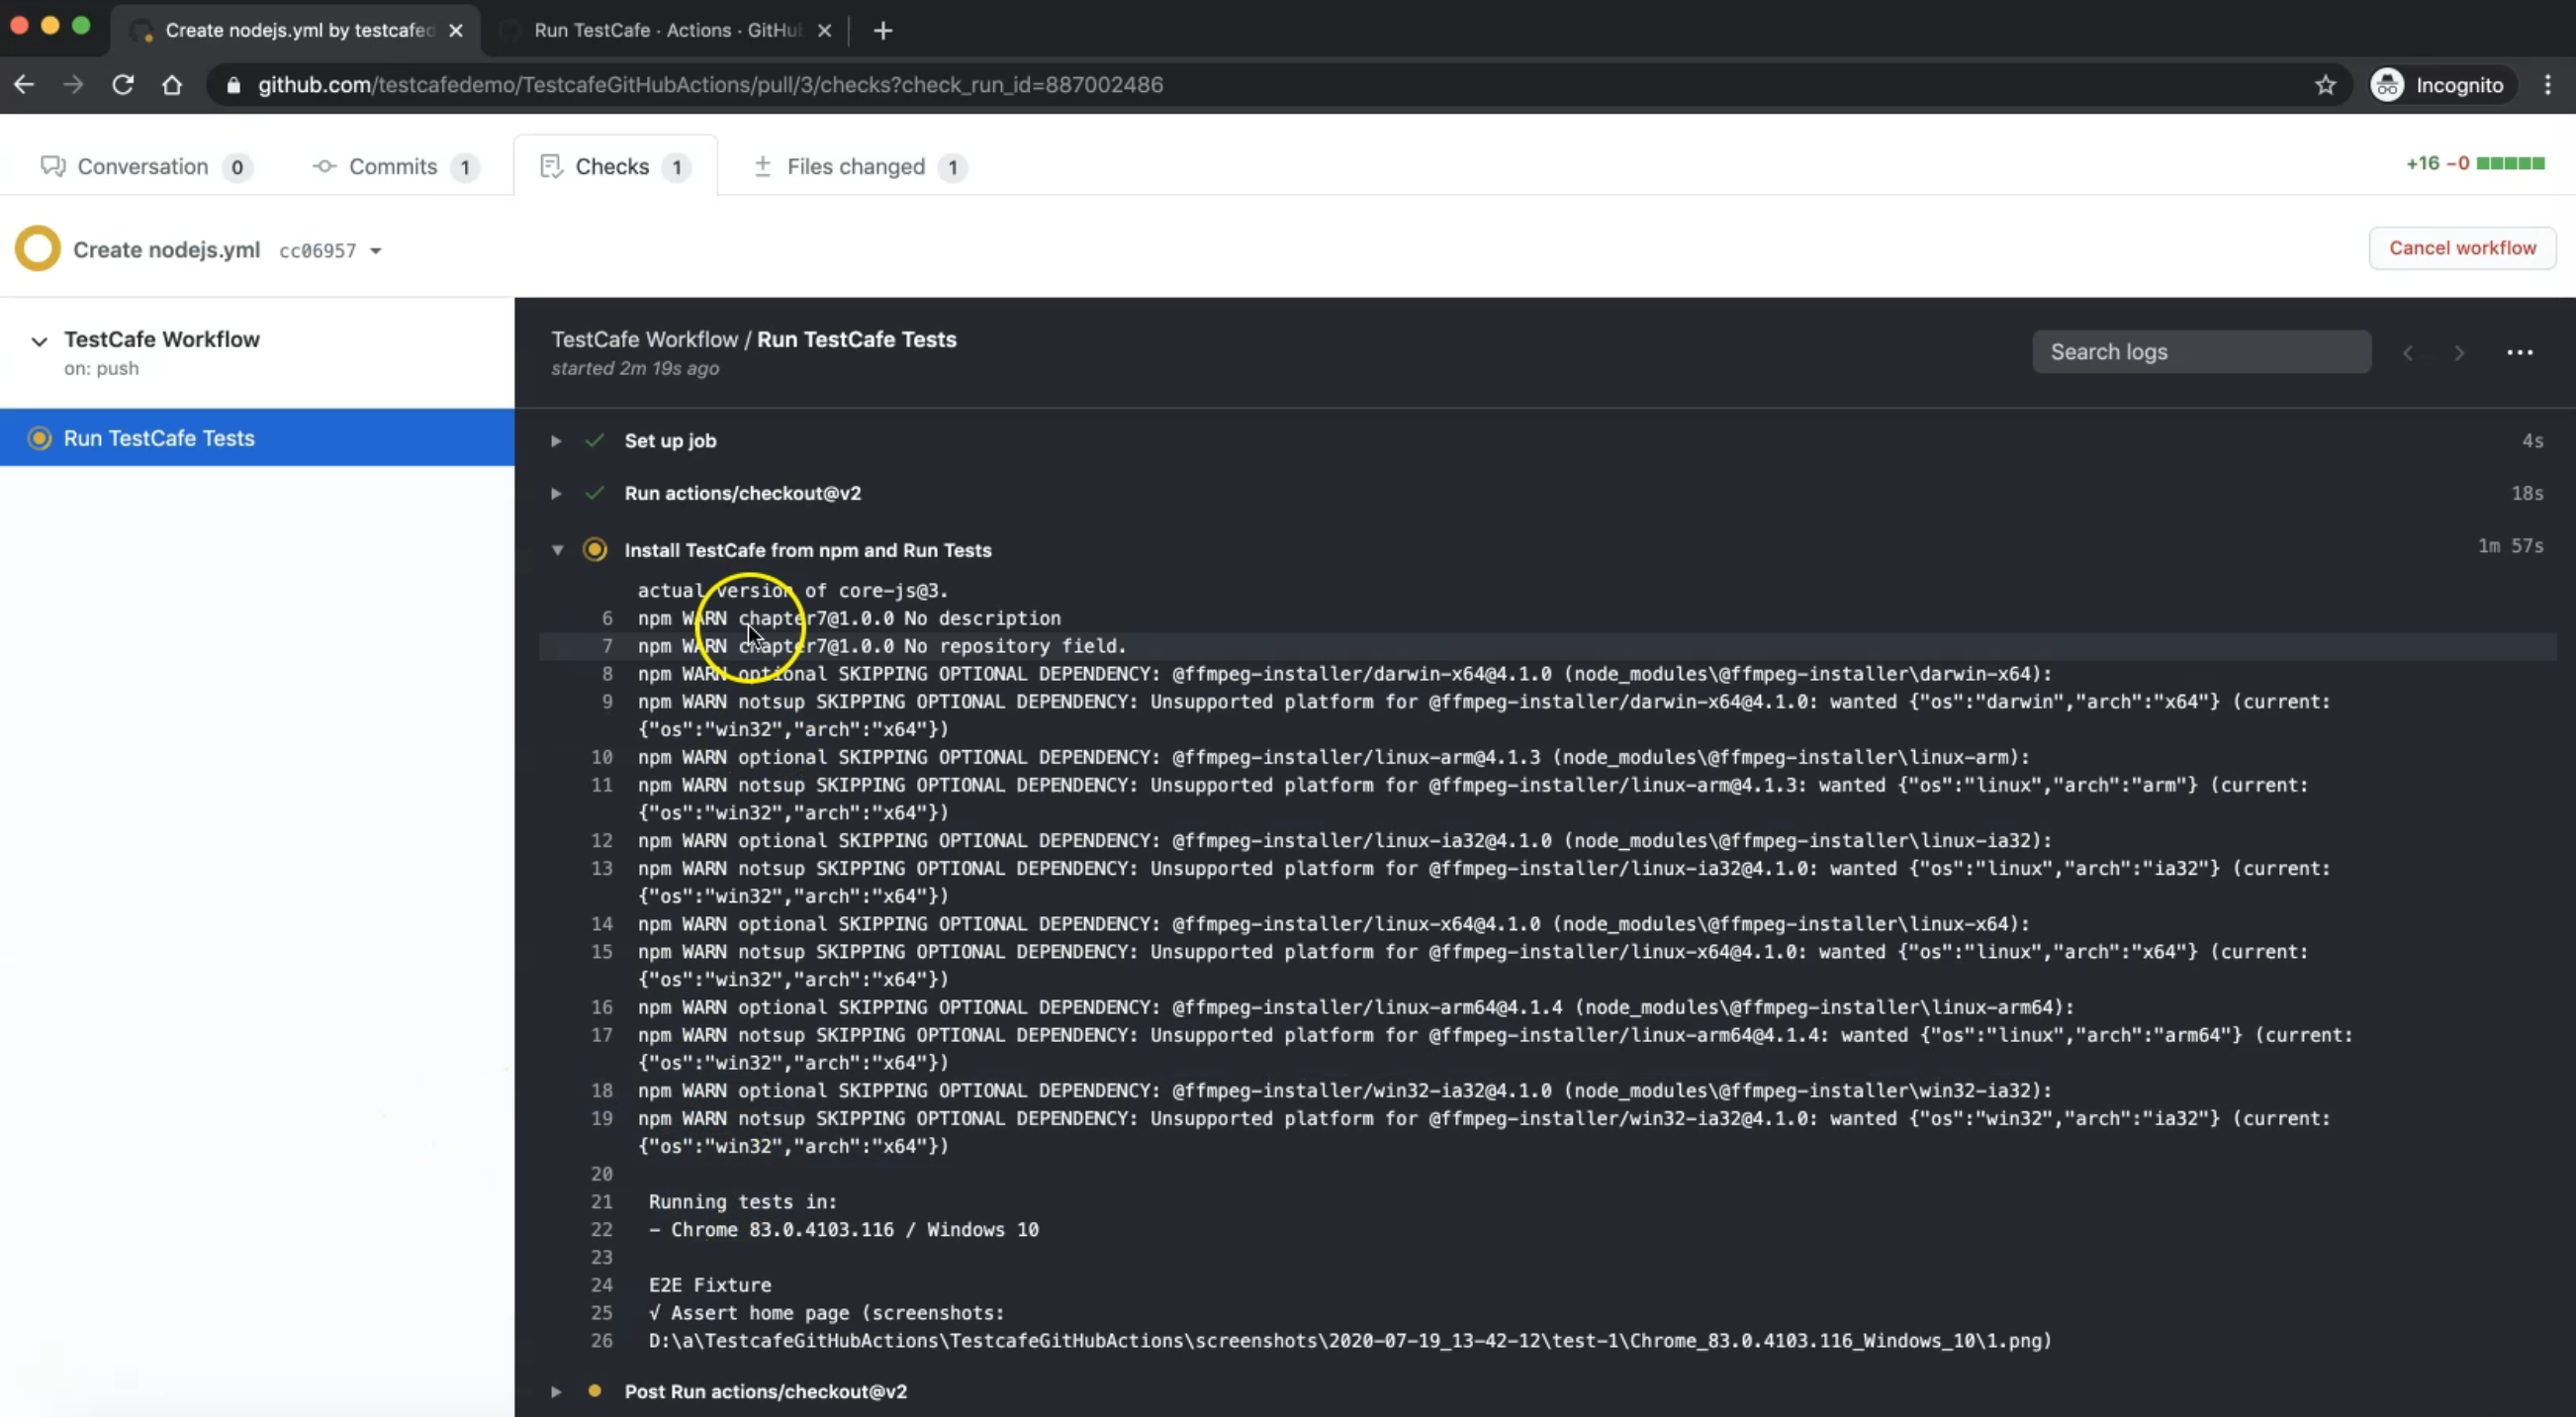
So we will notice now that after we installed TestCafe and NPM starts running - we are running on Chrome with Windows 10 because we selected Windows as the operating system.
Our end to end fixture is now running.
This is the "Assert home page". And here we have the screenshot because we still have a screenshot in our code, and we are continuing to run our test.
In the end, we will check our results.
So now our test or our workflow is finished and we don't have any problems.
So our test passed, and with TestCafe we can check that we have five passed.
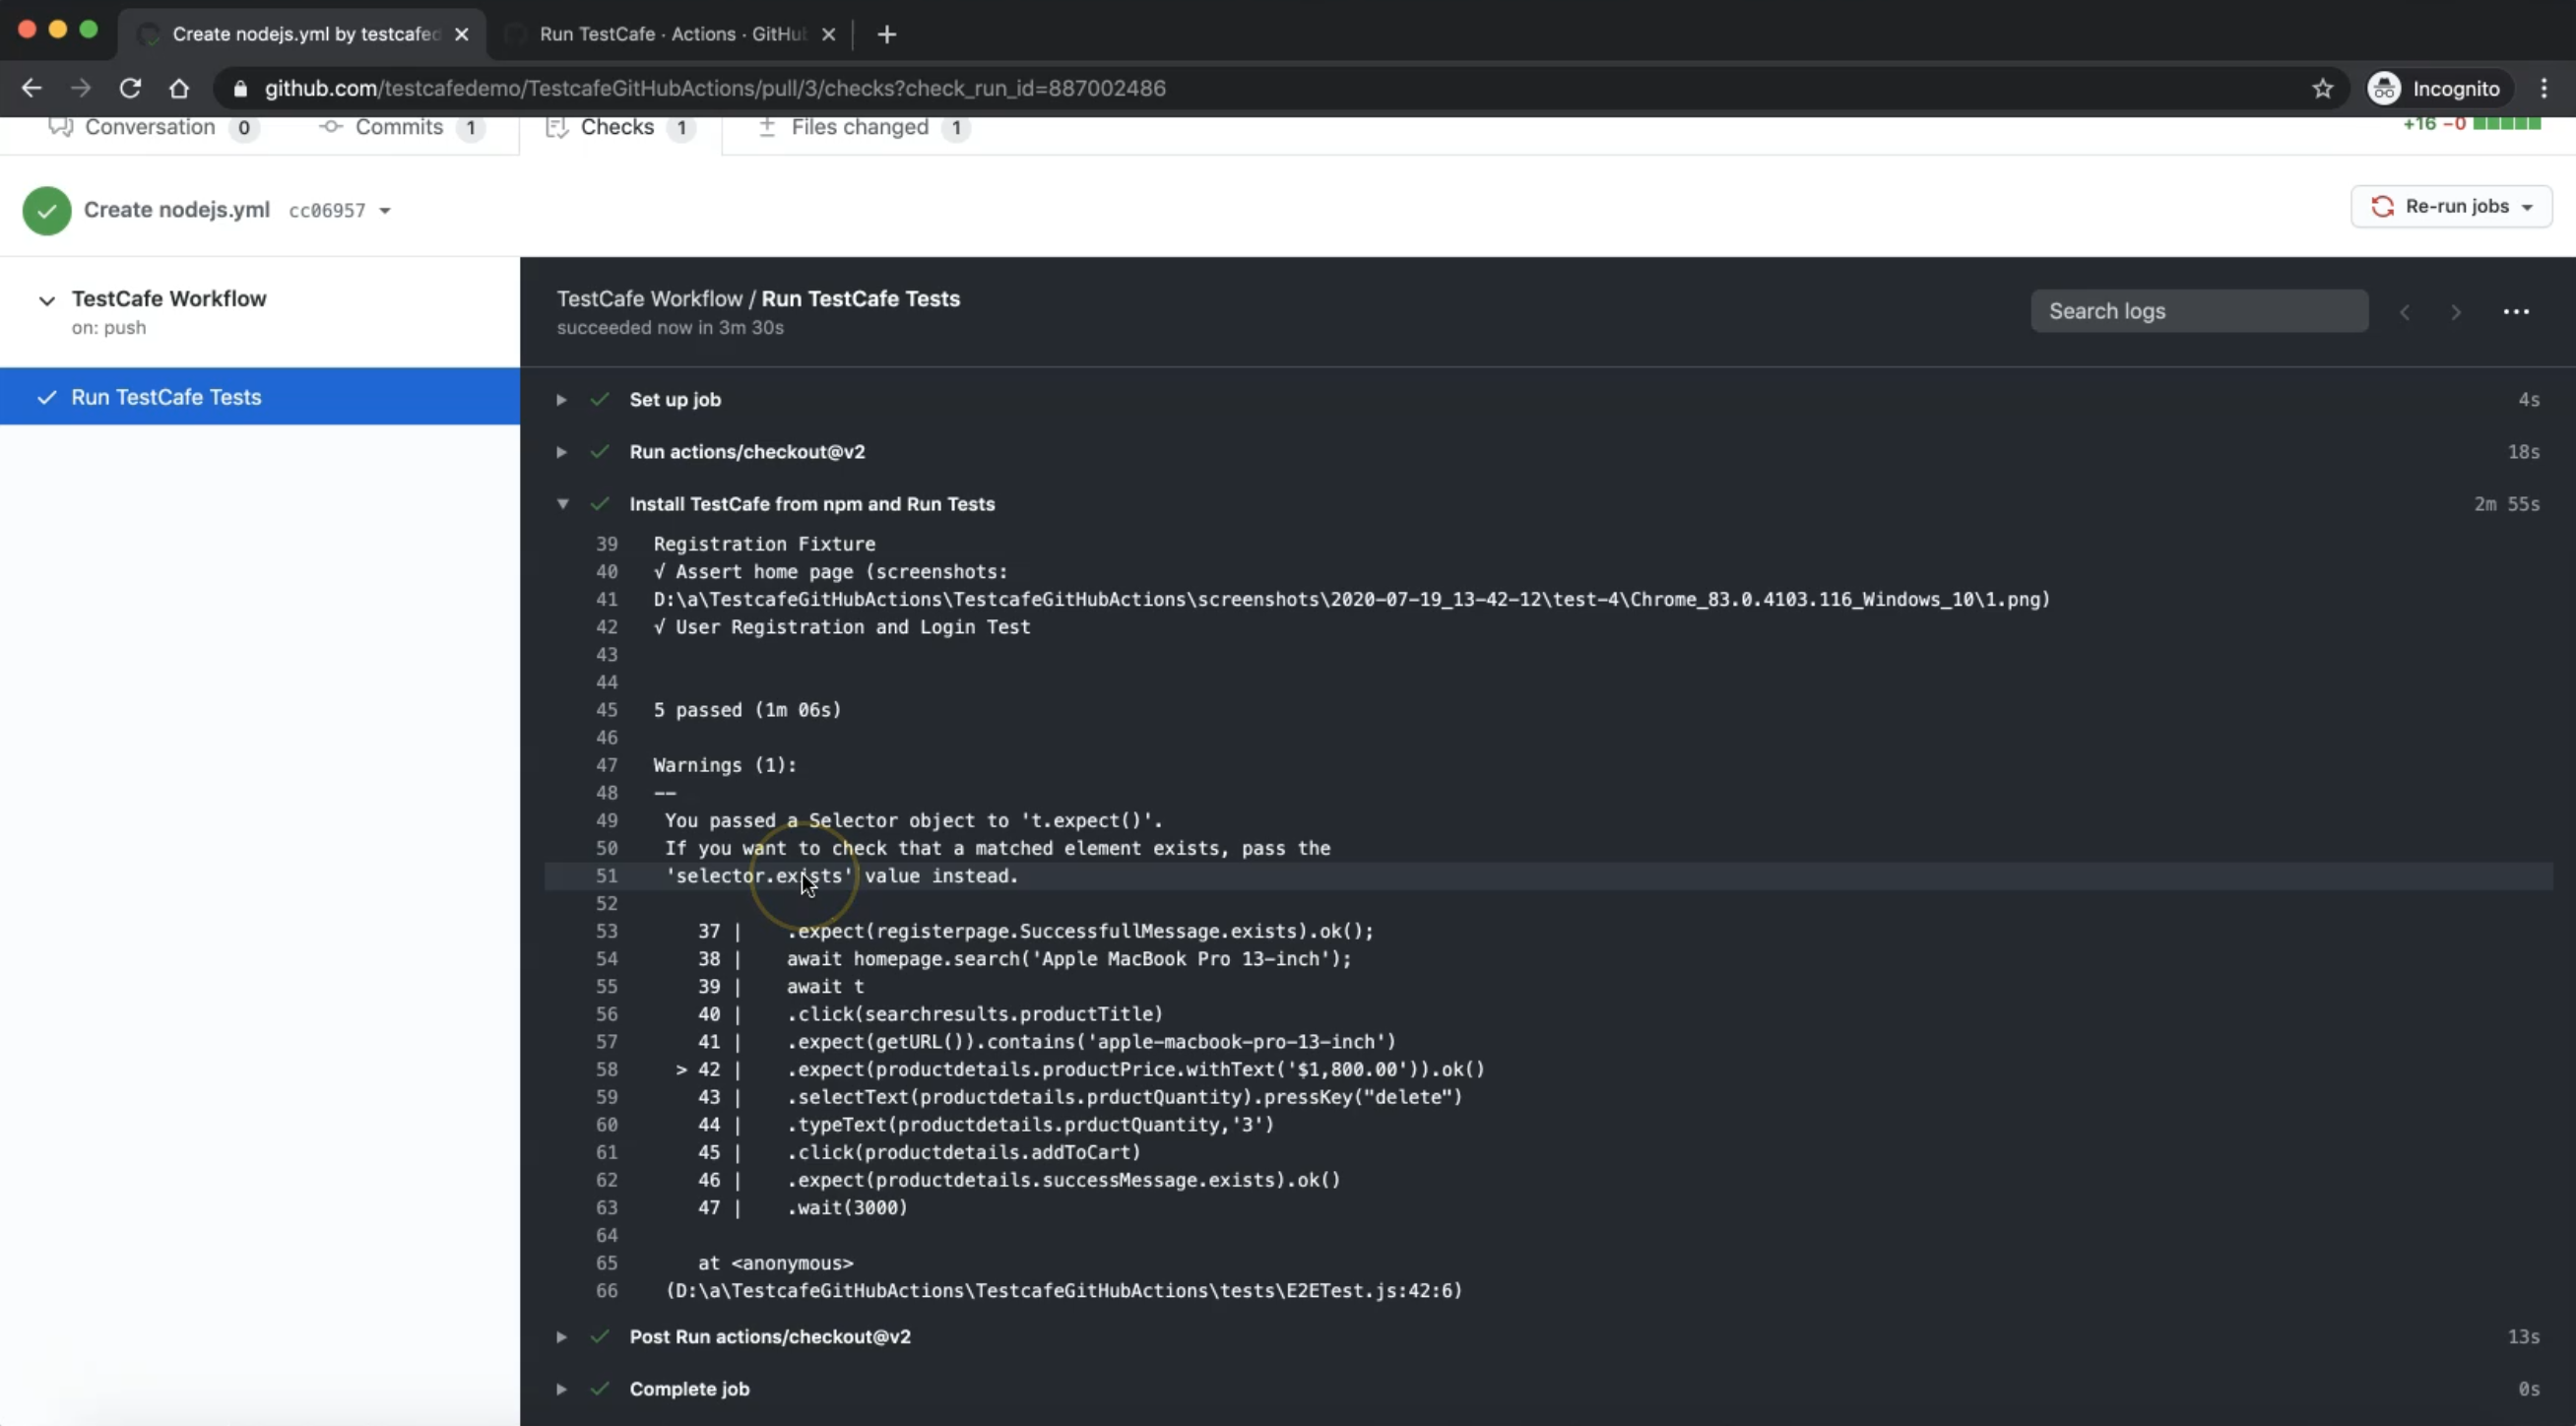
We have one warning in our test that we are using passing a Selector object to expect but we can use something like this.
So this is a suggestion or warning from our code, but we don't have any problems.
Here we have the Registration and the Login test case.
We have the Change Currency test, and also we have Place Order E2E Tests and we have screenshots.
Under that, we have the Post.
After that, maybe we can add one additional code to pull the screenshots and put it or upload it somehow to somewhere, or upload the file or the reports.
We can also install an HTML reporter and use it or pull it from GitHub Actions.
Then we will go back to our PR or our pull request to merge this PR to our master branch.
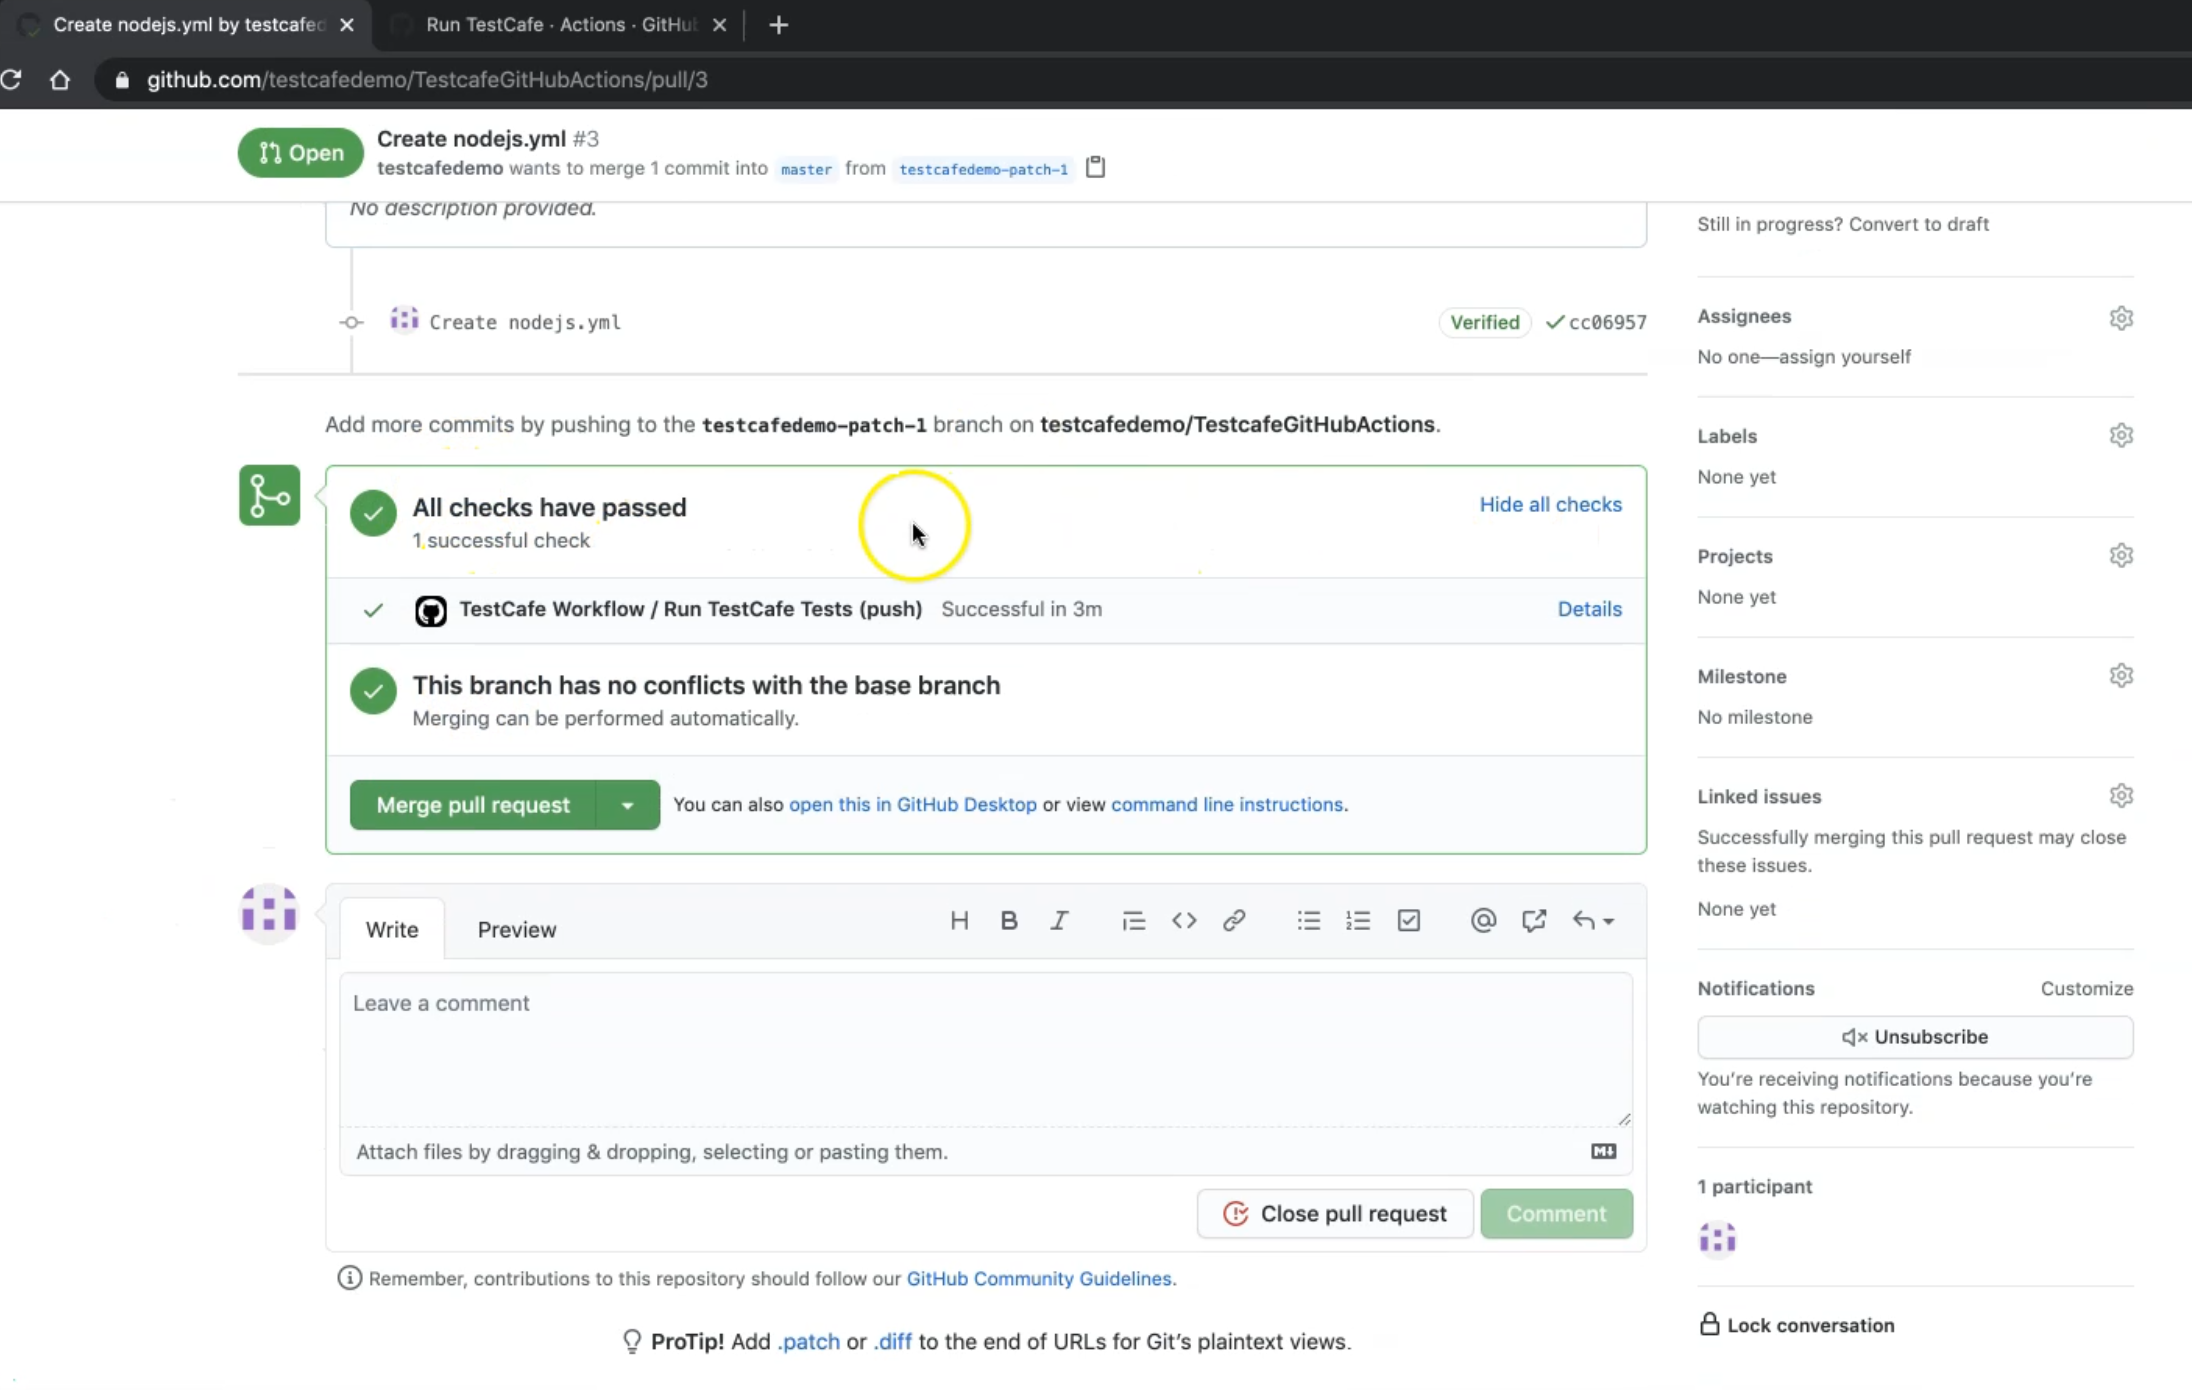
So here all checks have passed.
Our test cafe workflow is successful in three minutes.
Here we can merge our PR and now our workflow is on the master branch.
So we can redirect to the project and there we can find the ./github/workflows folder and the inside of this folder, we have the nodejs.yml file and we can again check our workflow.
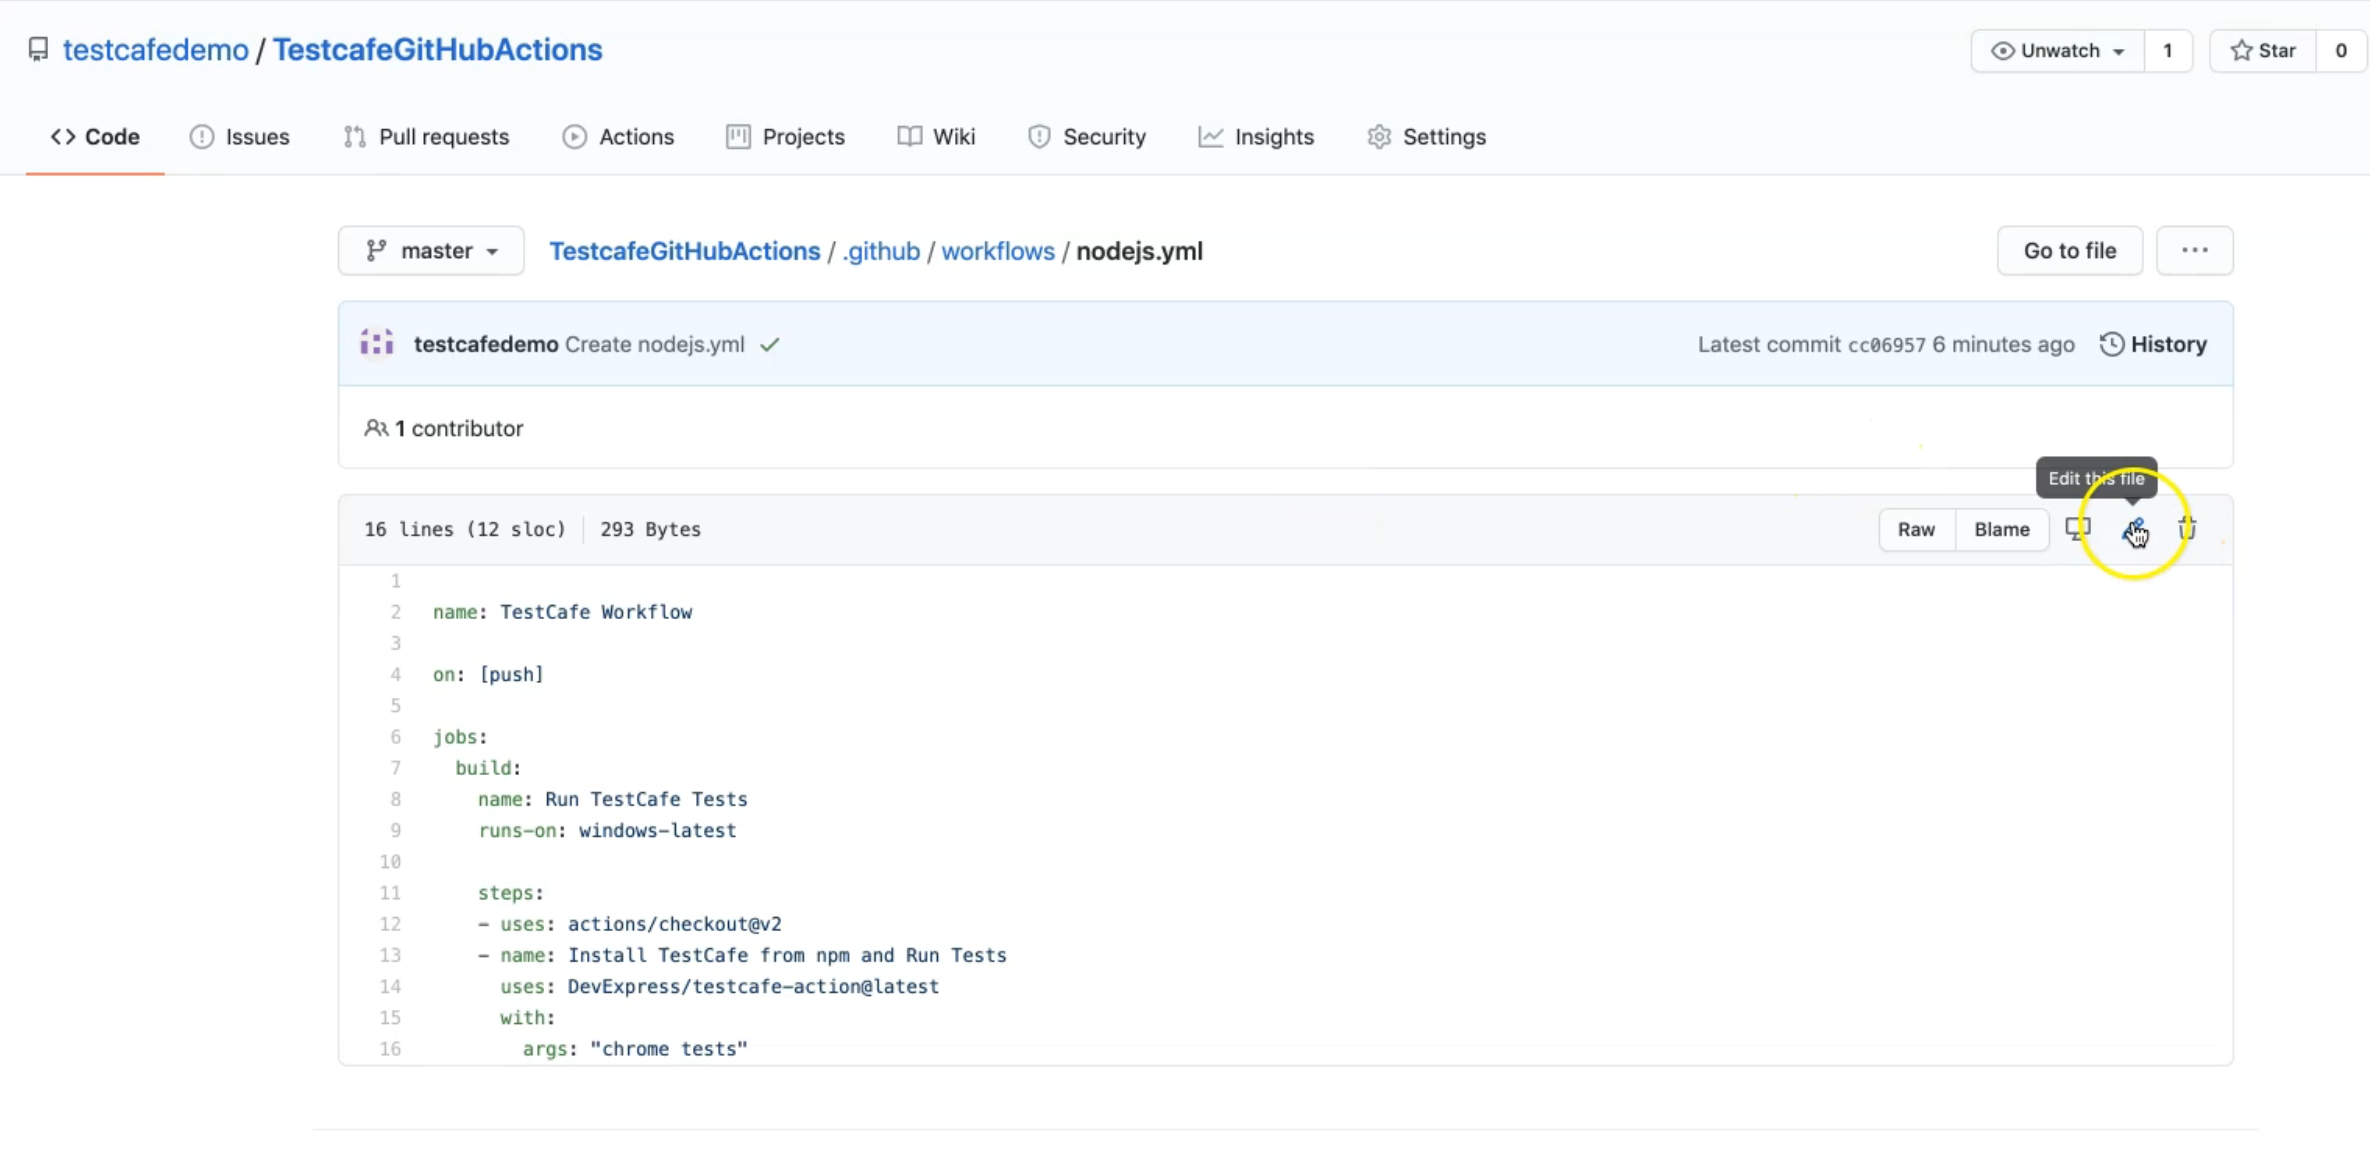
If you want to change or edit this file, we can just click on edit.
Here we can go again to the design view.
And here we can add an additional step, or we can change anything.
Resources
Quiz
The quiz for this chapter can be found in 12.3
