

Transcripted Summary
# Video Recording with TestCafe
In this video, we'll be talking about:
Prerequisites for video recording
Enable video recording
Basic video options
# Prerequisites for Video Recording
TestCafe allows you to record the videos of test runs, but we should install the FFmpeg library to record the videos.
Do the following if the Test Cafe can't find the FFmpeg library on your local machine - install their npm package (@ffmpeg-installer/ffmpeg) or npm library from npm.
Then, videos are saved in the .mp4 format.
# Enable Video Recording
After that, to enable the video recording, use either of the following to enable the video recording options:
From the command line, you can add --video to record the video of the test run.
For example:
testcafe chrome test.js --video artifacts/video
We are passing the file of the TestCafe test case, then --video, and after that, we need to specify the path for saving the video.
We will create a folder with artifacts and inside artifacts, we'll create a folder videos.
# Basic Video Options
For the basic video options, we have different options that TestCafe supports.

For example, we can record the video for the failedOnly test cases. We can say it's true, and record the video only for the failed cases, or use false to record all test cases, whether they pass or fail.
Another option is singleFile - which is also a Boolean option - to save the entire recording as the one single file, false to create separate files for each test.
The path for FFmpeg code executable, if you want, will be auto-detected by default and the path pattern, or the directory that you wanted to save the file or the videos on it.
# Install the FFmpeg library Demo
In this demo, we will install the library FFmpeg to be able to record the videos with our TestCafes test cases.
To install the resource library FFmpeg, we need to redirect to npmJS and we'll find this package here.
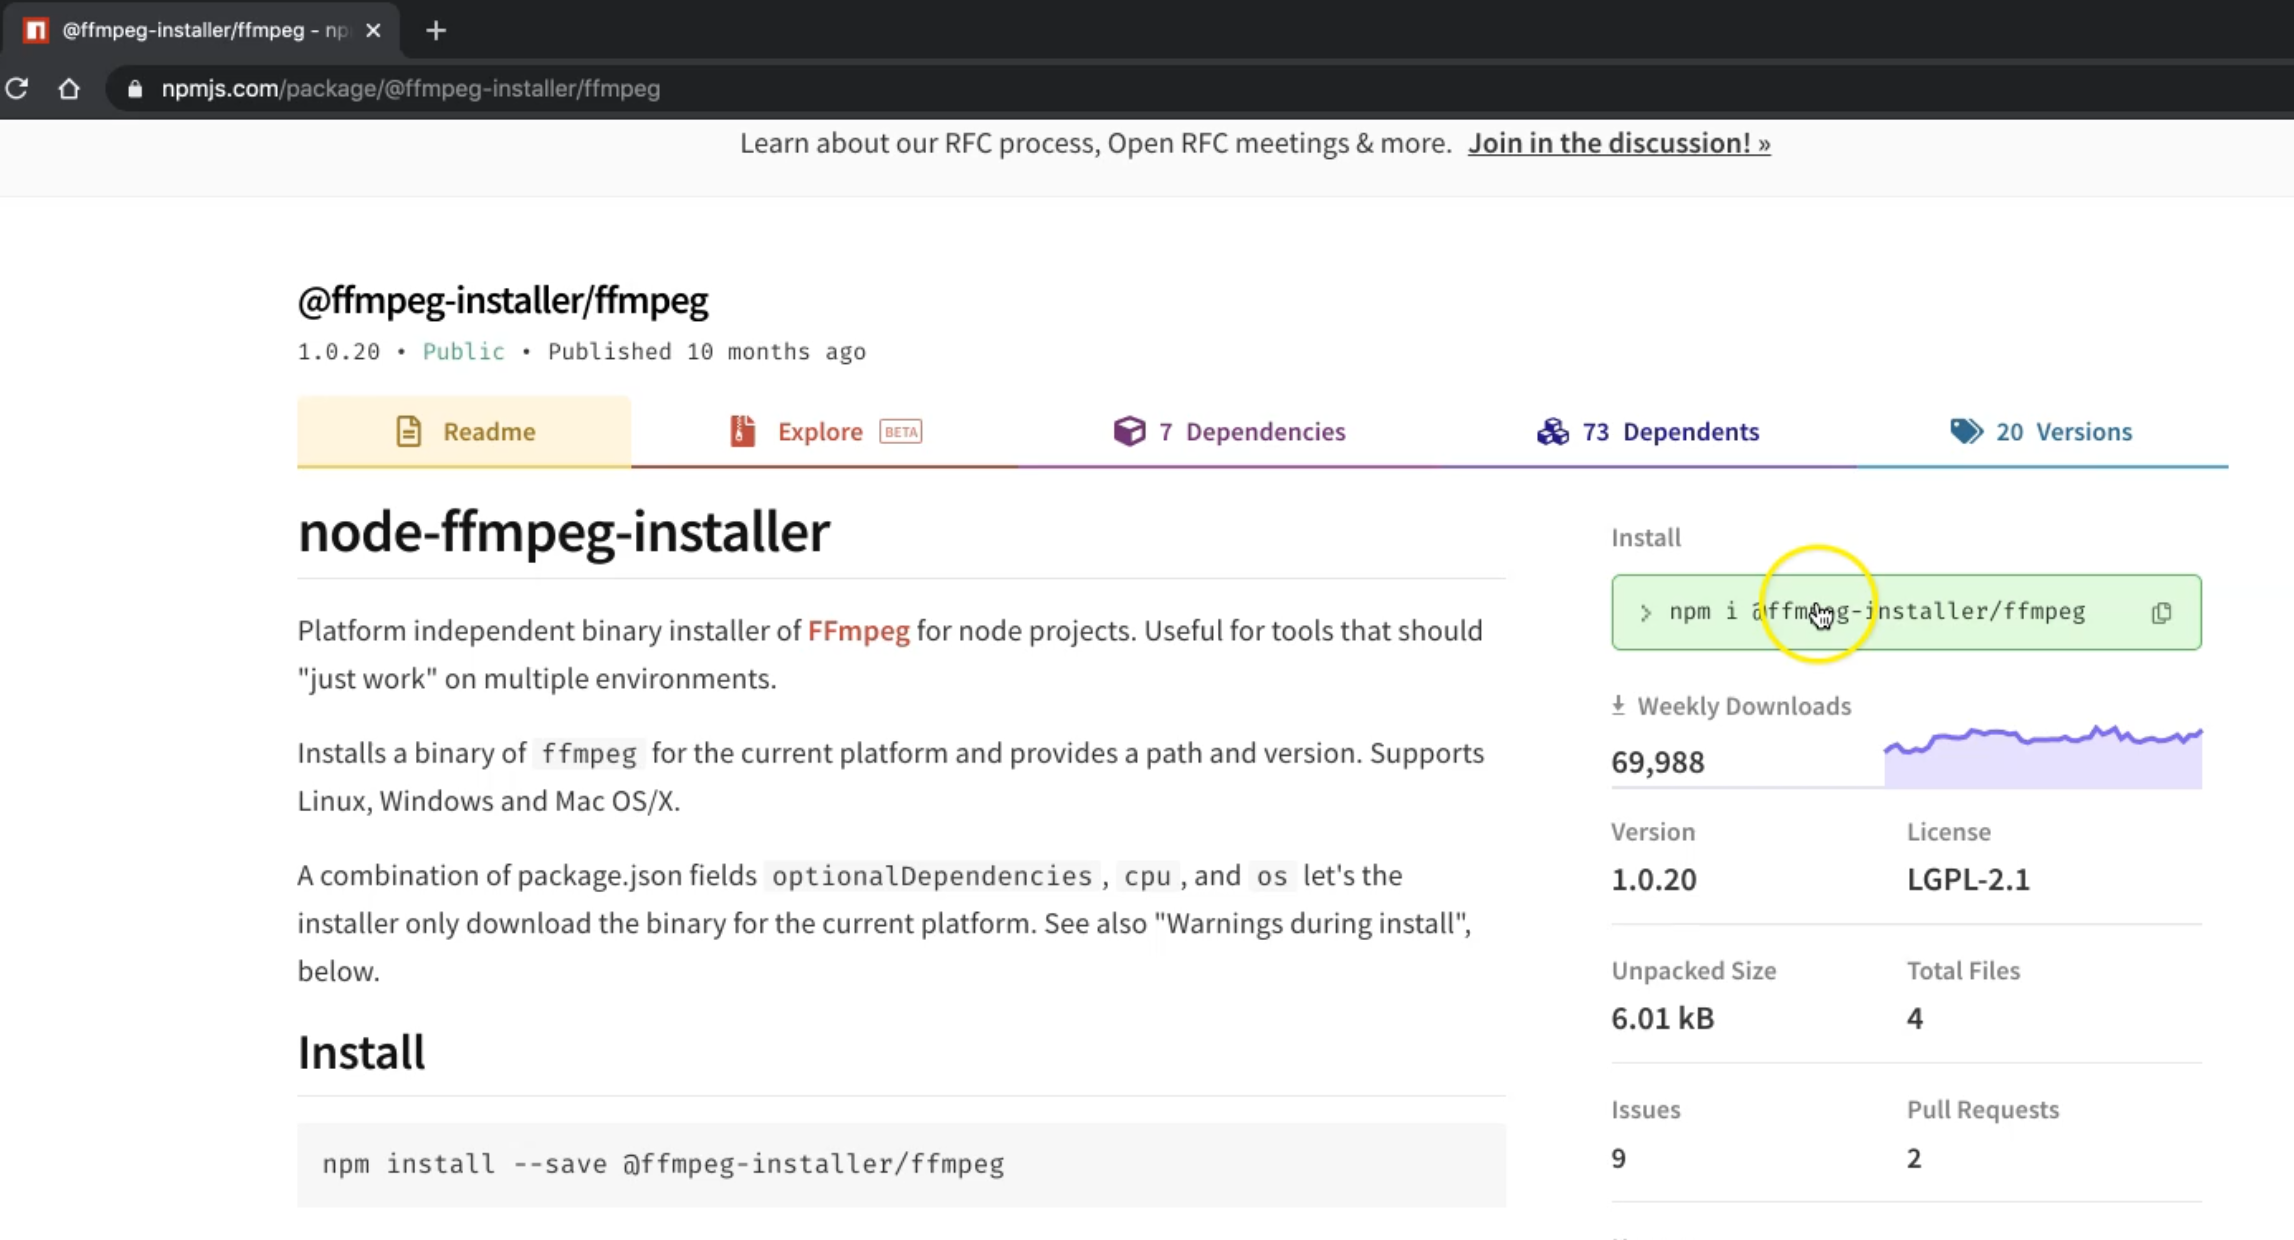
This package helps us to be able to record the videos with nodeJS.
So we can just copy this install command:
npm i @ffmpeg-installer/ffmpeg
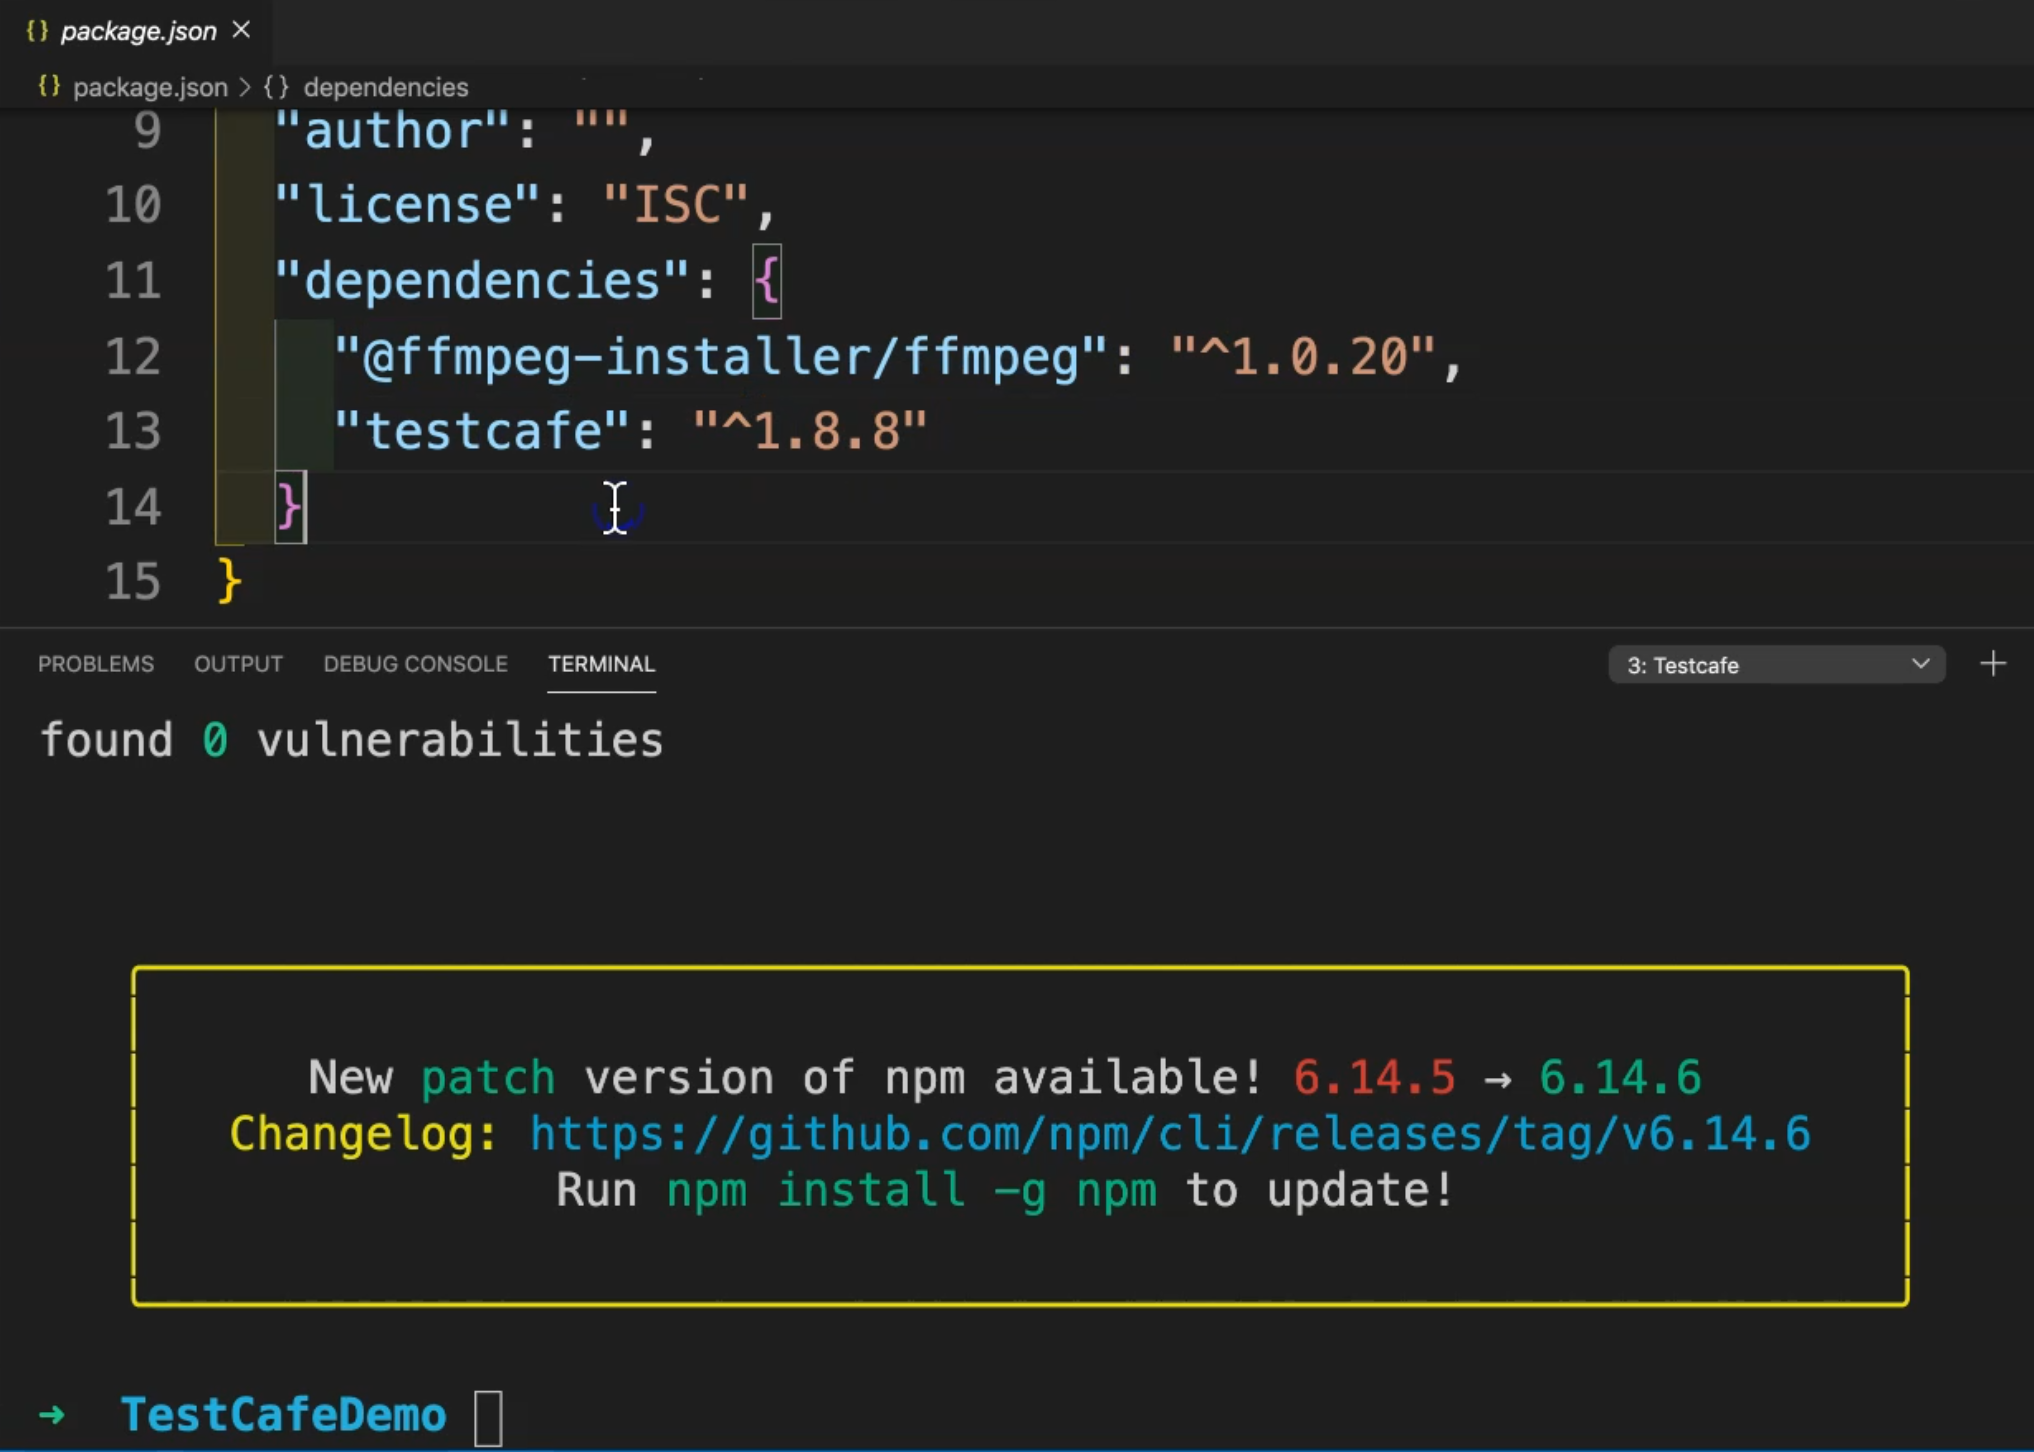
Then open our project, and here we can just install it by entering it on the command line.
npm i stands for install, so we can use i, or we can use install.
After that, we can use this library.
So npm is installed, and also again, check it for the package that we have the library for ffmpeg installed like TestCafe on our machine.
So now in our project, we can start using or record the videos with TestCafe for our test cases.
# How to record videos with TestCafe Demo
In this demo, we will learn how to record the videos with TestCafe while we are running or executing our test cases.
To record the video with TestCafe, we can use the following command:
testcafe chrome test/IframeTest.js --video artifacts/videos
We will use the normal TestCafe command line, testcafe chrome, and then we can add the IframeTest.js, for example, and then we need to pass --video, and then we can add the folder for the video - so for example, we can say artifacts and include videos inside this one.
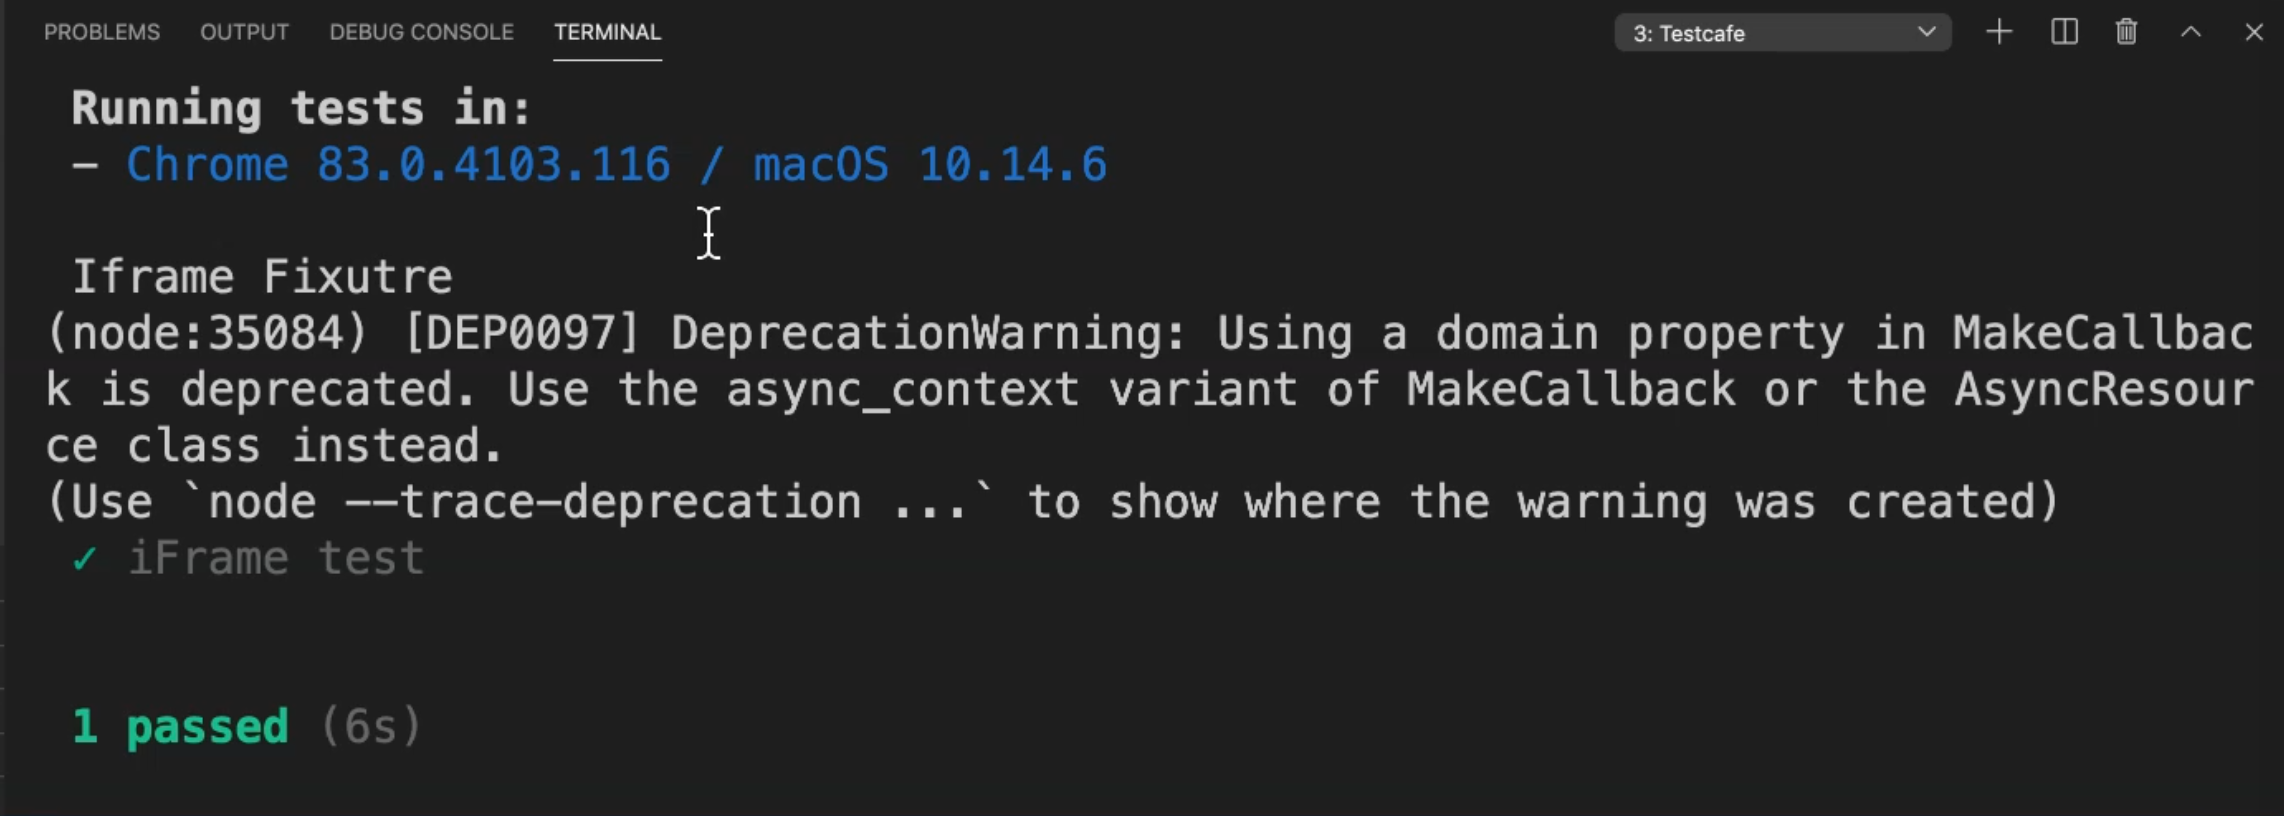
So we'll run our test and then check what happened.
Here, we are selecting the path for saving the video file and the video by default - as we mentioned in our slides - is in mp4.
We ran our test and we can find that we have a folder artifacts and here we have inside the videos.
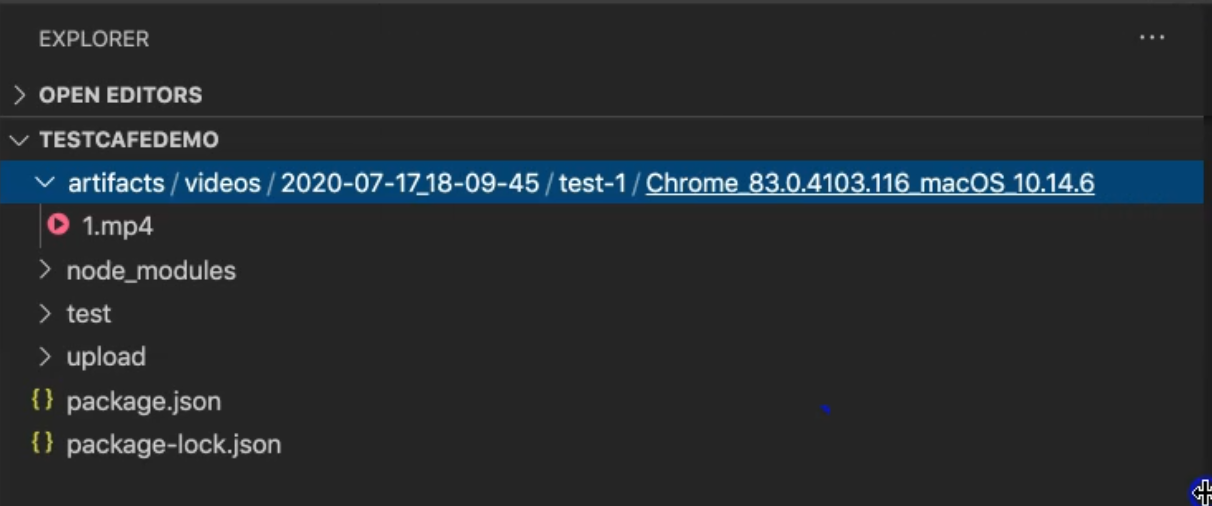
Also, we have here the date, the test case name, the browser name, and the operating system.
Inside this, we have one video 1.mp4, but it will not display here for sure, because it's not supported, but we can right-click and "Open in Finder" and just double-click and then we can run this test.
So here is a video from our test and also it helped us to debug our test scripts, or if you have any problem in the tests that we can find them.
What if like the screenshots we need to only record the video for failed test cases?
So with our command line, we can say:
testcafe chrome test/IframeTest.js --video artifacts/videos --video-options failedOnly=true
So testcafe chrome, we are testing our IframeTest, --video with artifacts, and then we can add this option - with --video-options, we can say failedOnly equals true.
So in this case, we will record video for only the failed test cases.
Also, you can add if it should be a single file, or you can add also anything with the --video-options.
So let's run it and also remove the artifacts folder from here to check if there will be video in case the test passes. After that, we will fail our test and to check what happened.
Here we are running through the normal test and we don't have any videos created.
So let's open our test and change anything in the selector.
For example here, we can change this one - Selector('body#tinymce.mce-content-body') - to Selector('body#tinymce.mce-content-bodyeee') and run our test again.
Now, we are trying to find the selector or TestCafe is waiting for the element to be displayed or appear in the DOM.
After the timeout, we have a problem and we will find that we have artifacts and we have a video for that failed test case.
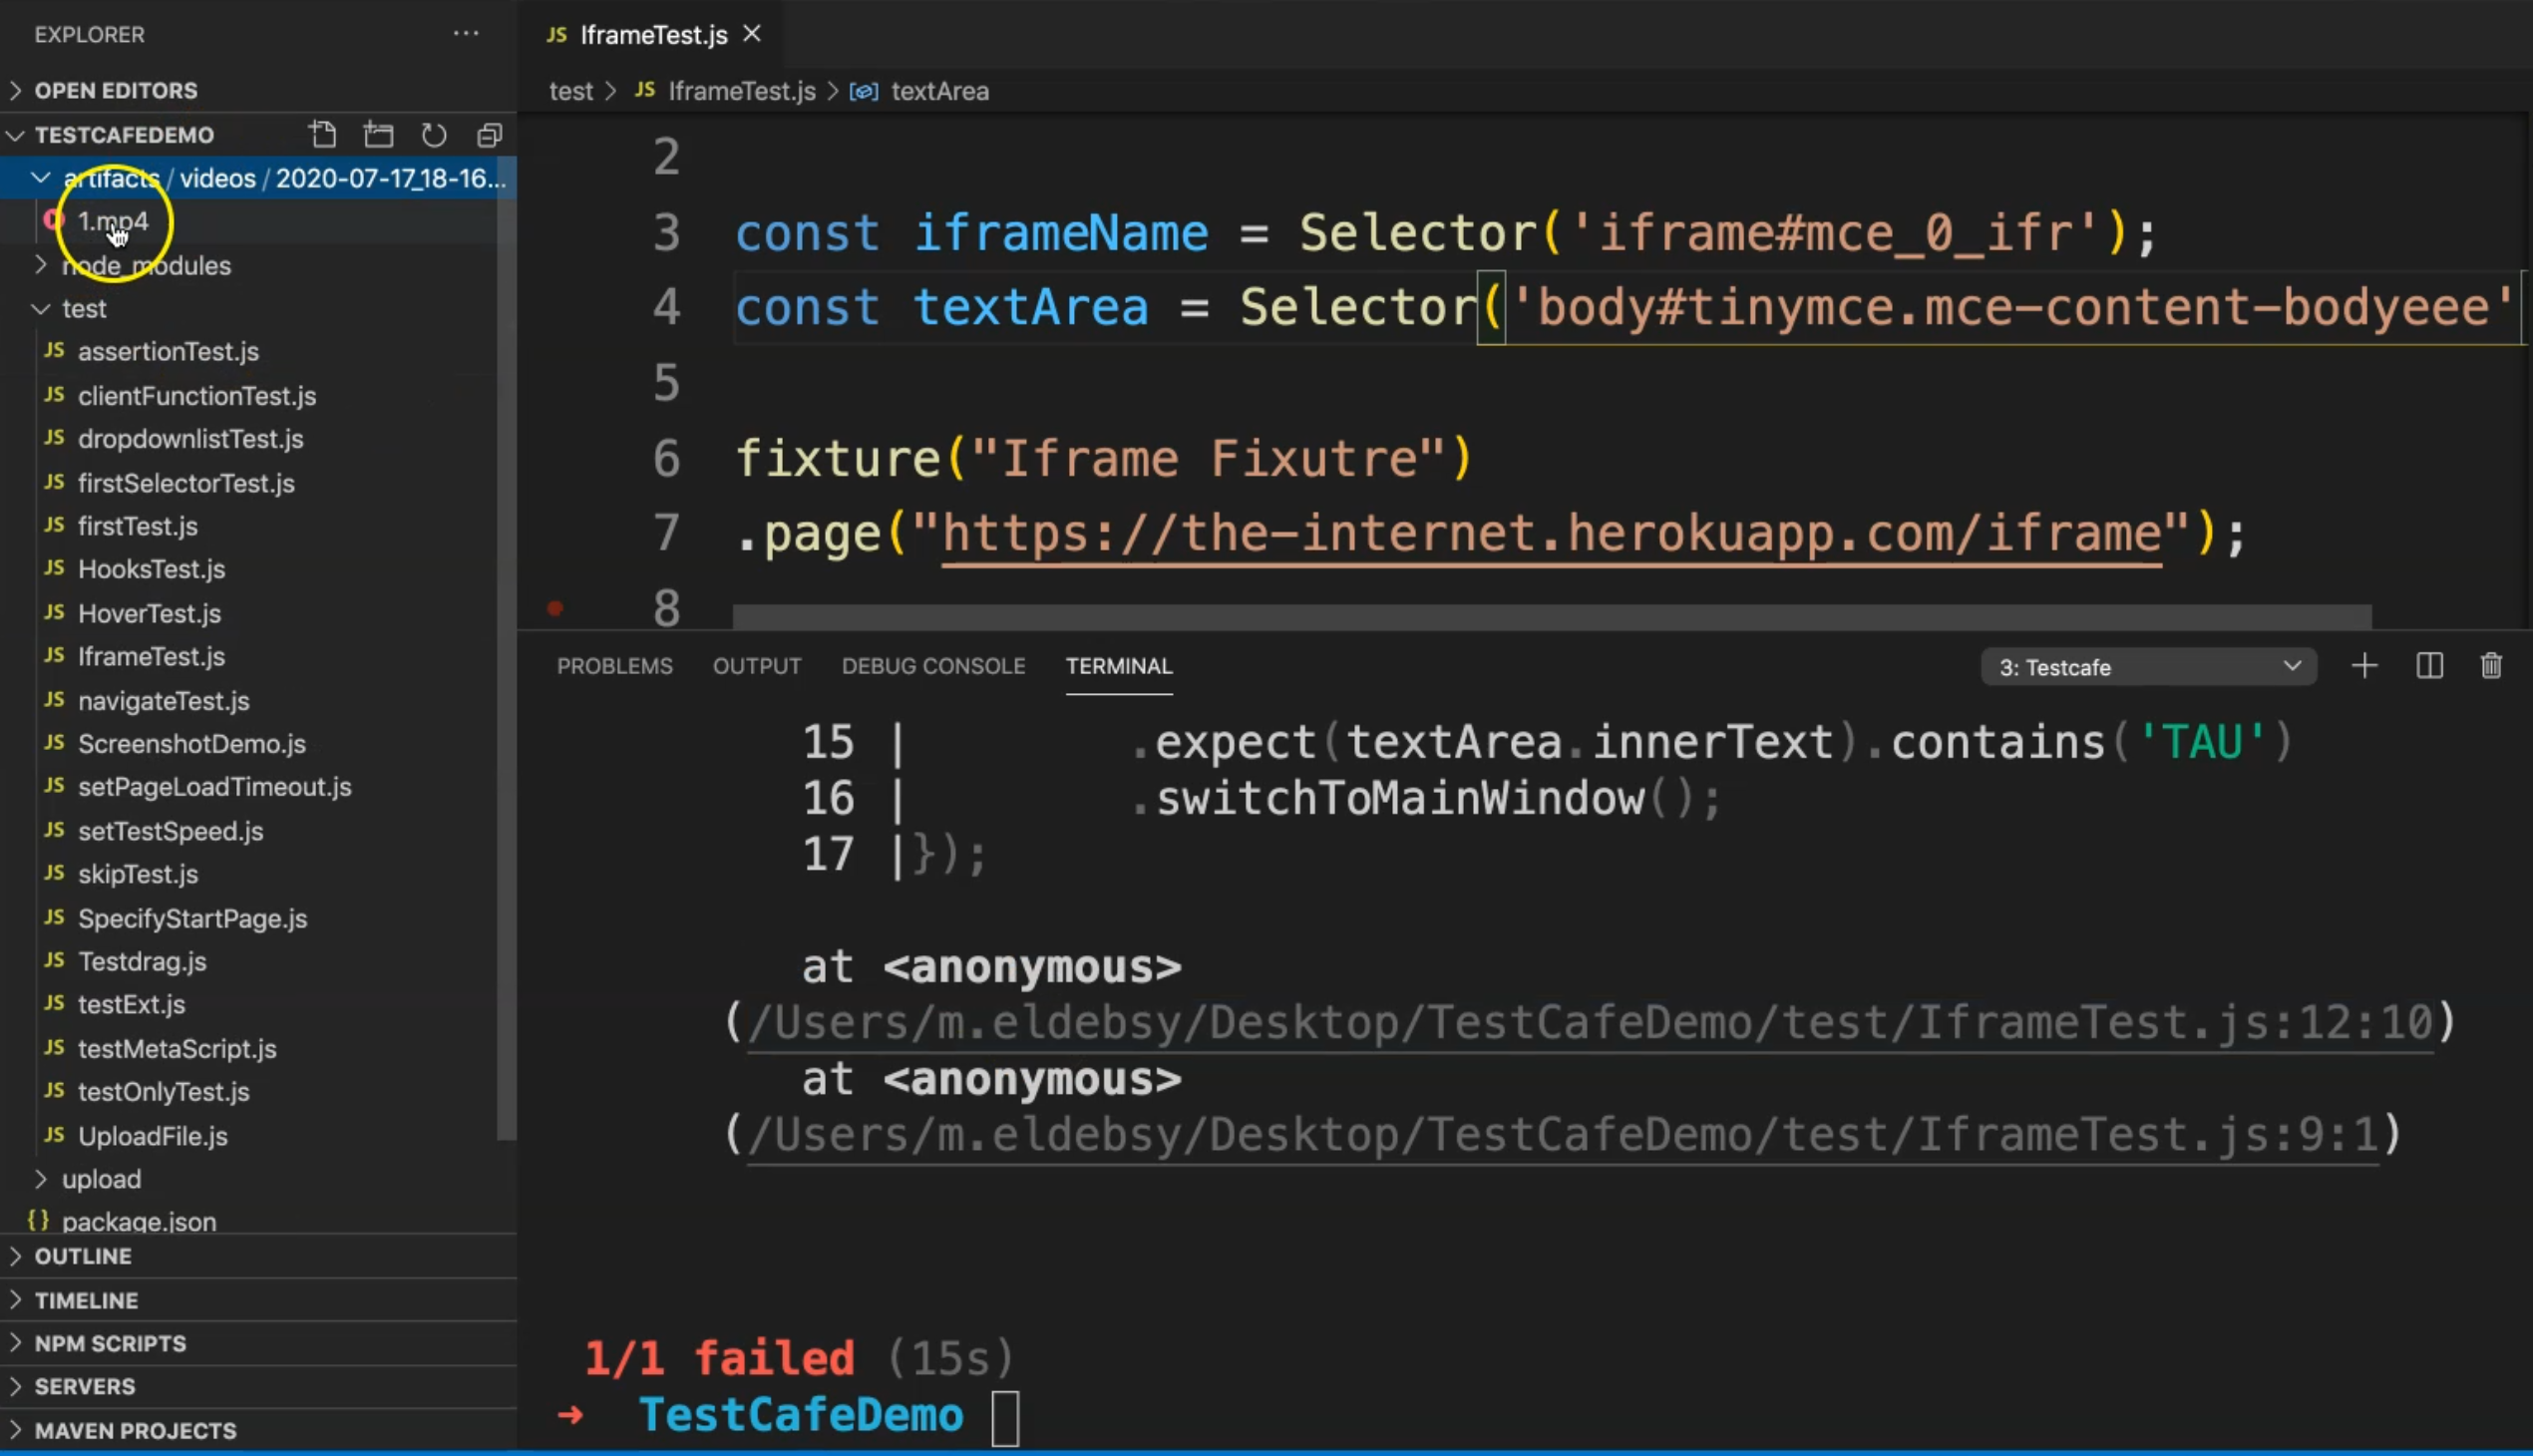
As usual, we can open it in the Finder and double-click and run it.
Here we will find, or we will understand what happened during our test with this video.
The video is like a screenshot - like a debug mode - and will help us to check what happened during our test.
Resources
Quiz
The quiz for this chapter can be found in 6.5
