

Transcripted Summary
# How to work with drop-down lists with TestCafe
In this demo, we will work with the drop-down list with TestCafe and how we can select an option inside the drop-down list.
Inside our test, we'll create a new test with dropdownlistTest.js.
After that, we need to open our URL for our example page. Here we have one drop-down list - "Which TestCafe interface do you use?". The options are "Command Line", "JavaScript API", and "Both".
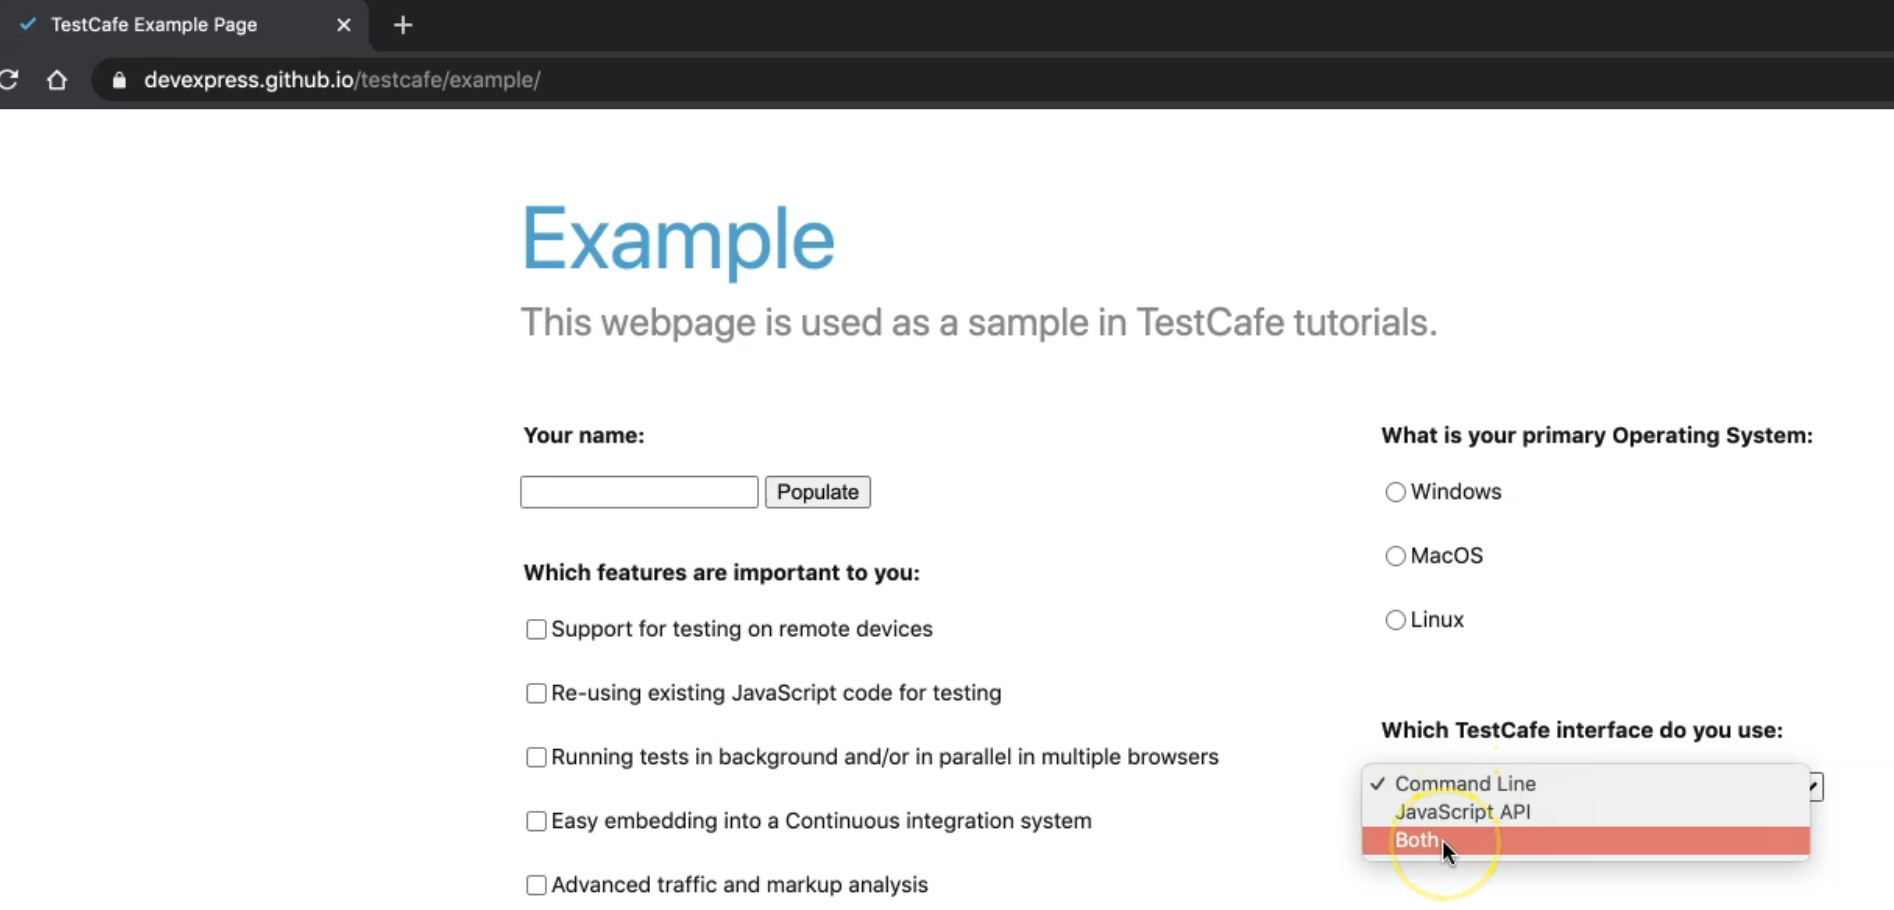
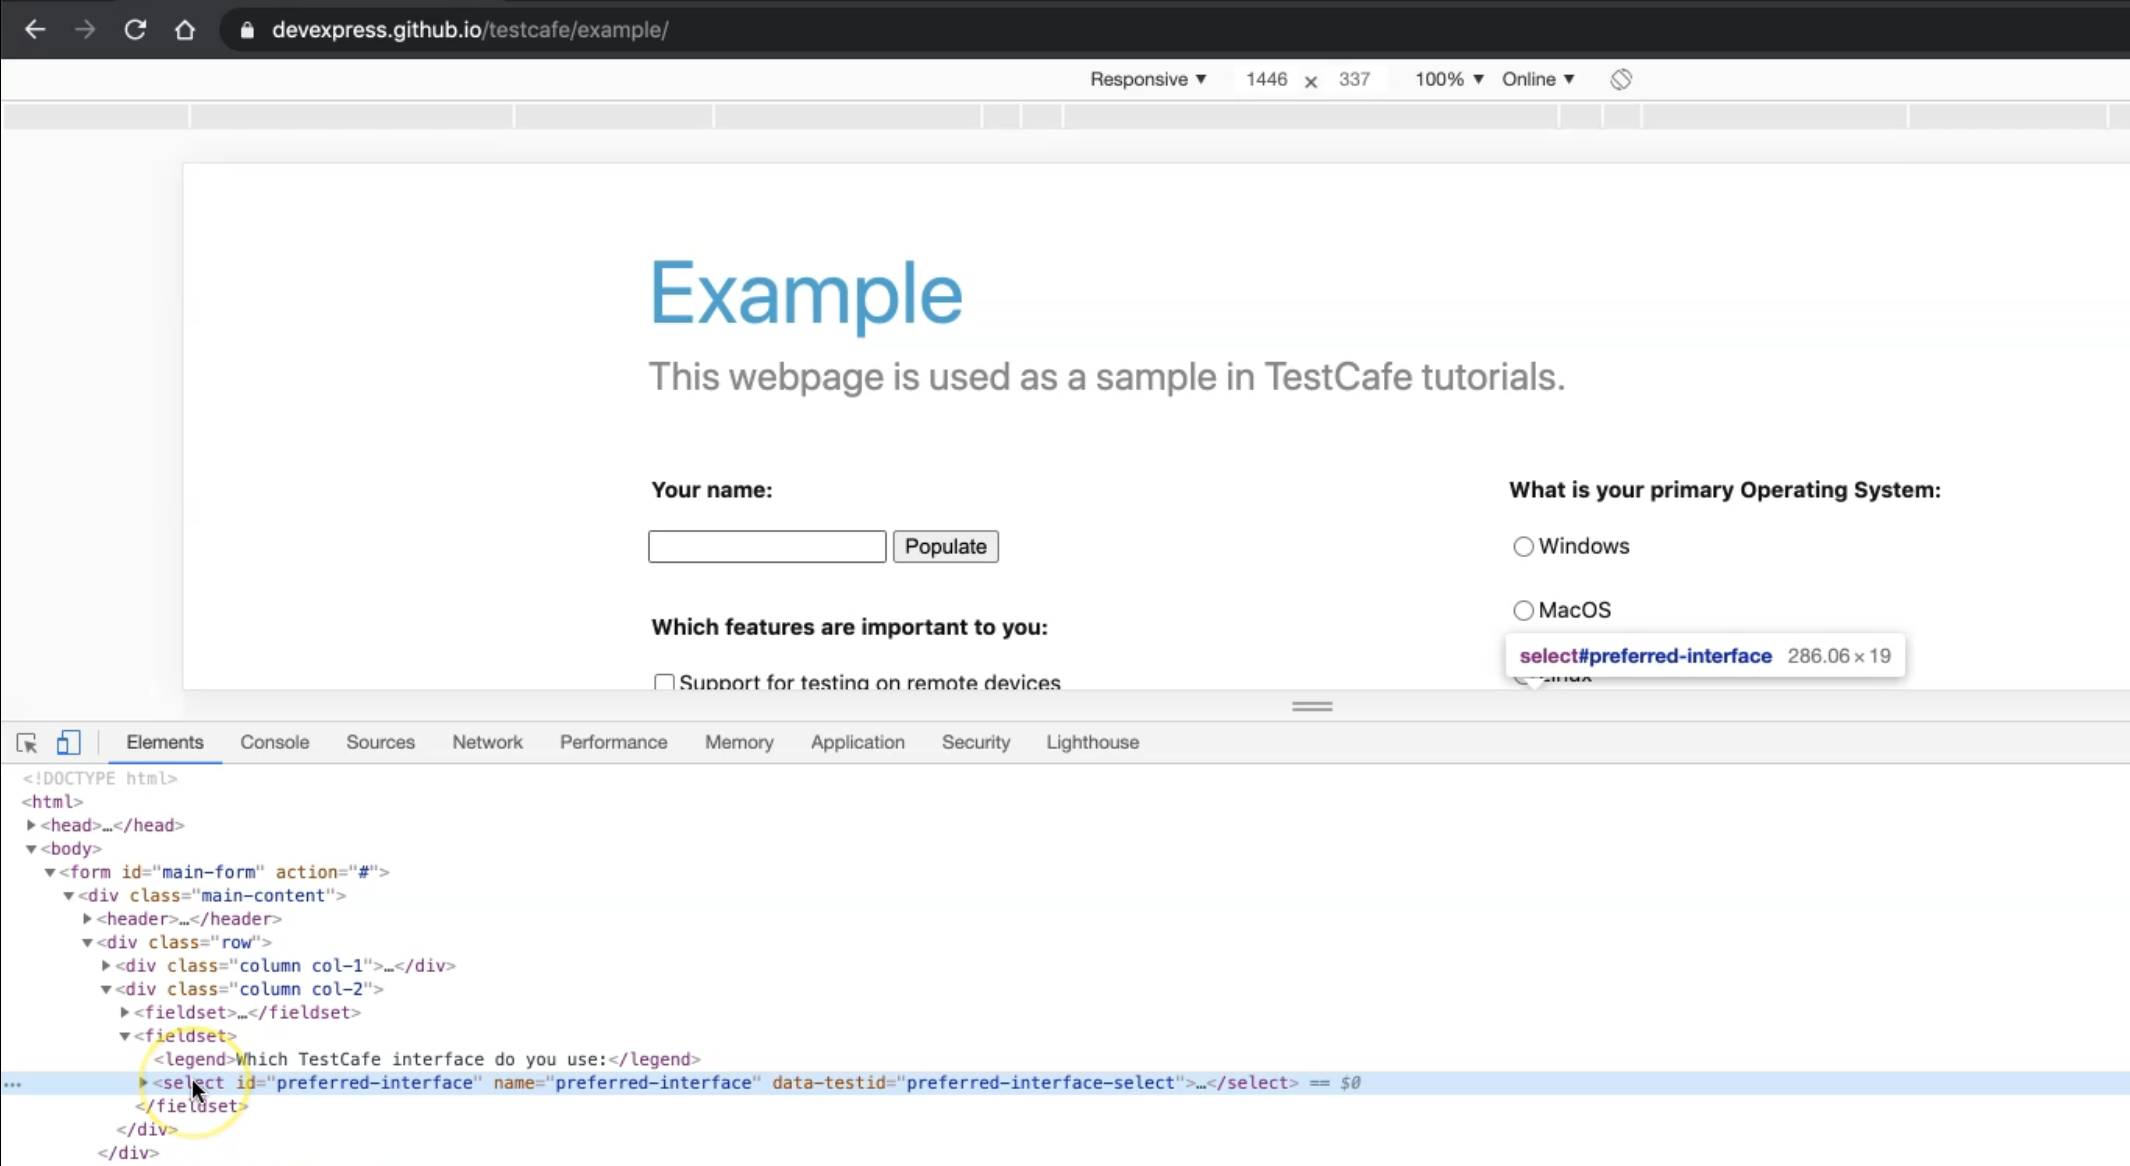
In our demo, we need to select "Both" from this drop-down list. If we Inspect this drop-down list, we will have two elements we need to work with.
The first one is the select element, which is our drop-down list with ID "preferred-interface" and we can copy the selector #preferred-interface as a CSS selector with TestCafe.
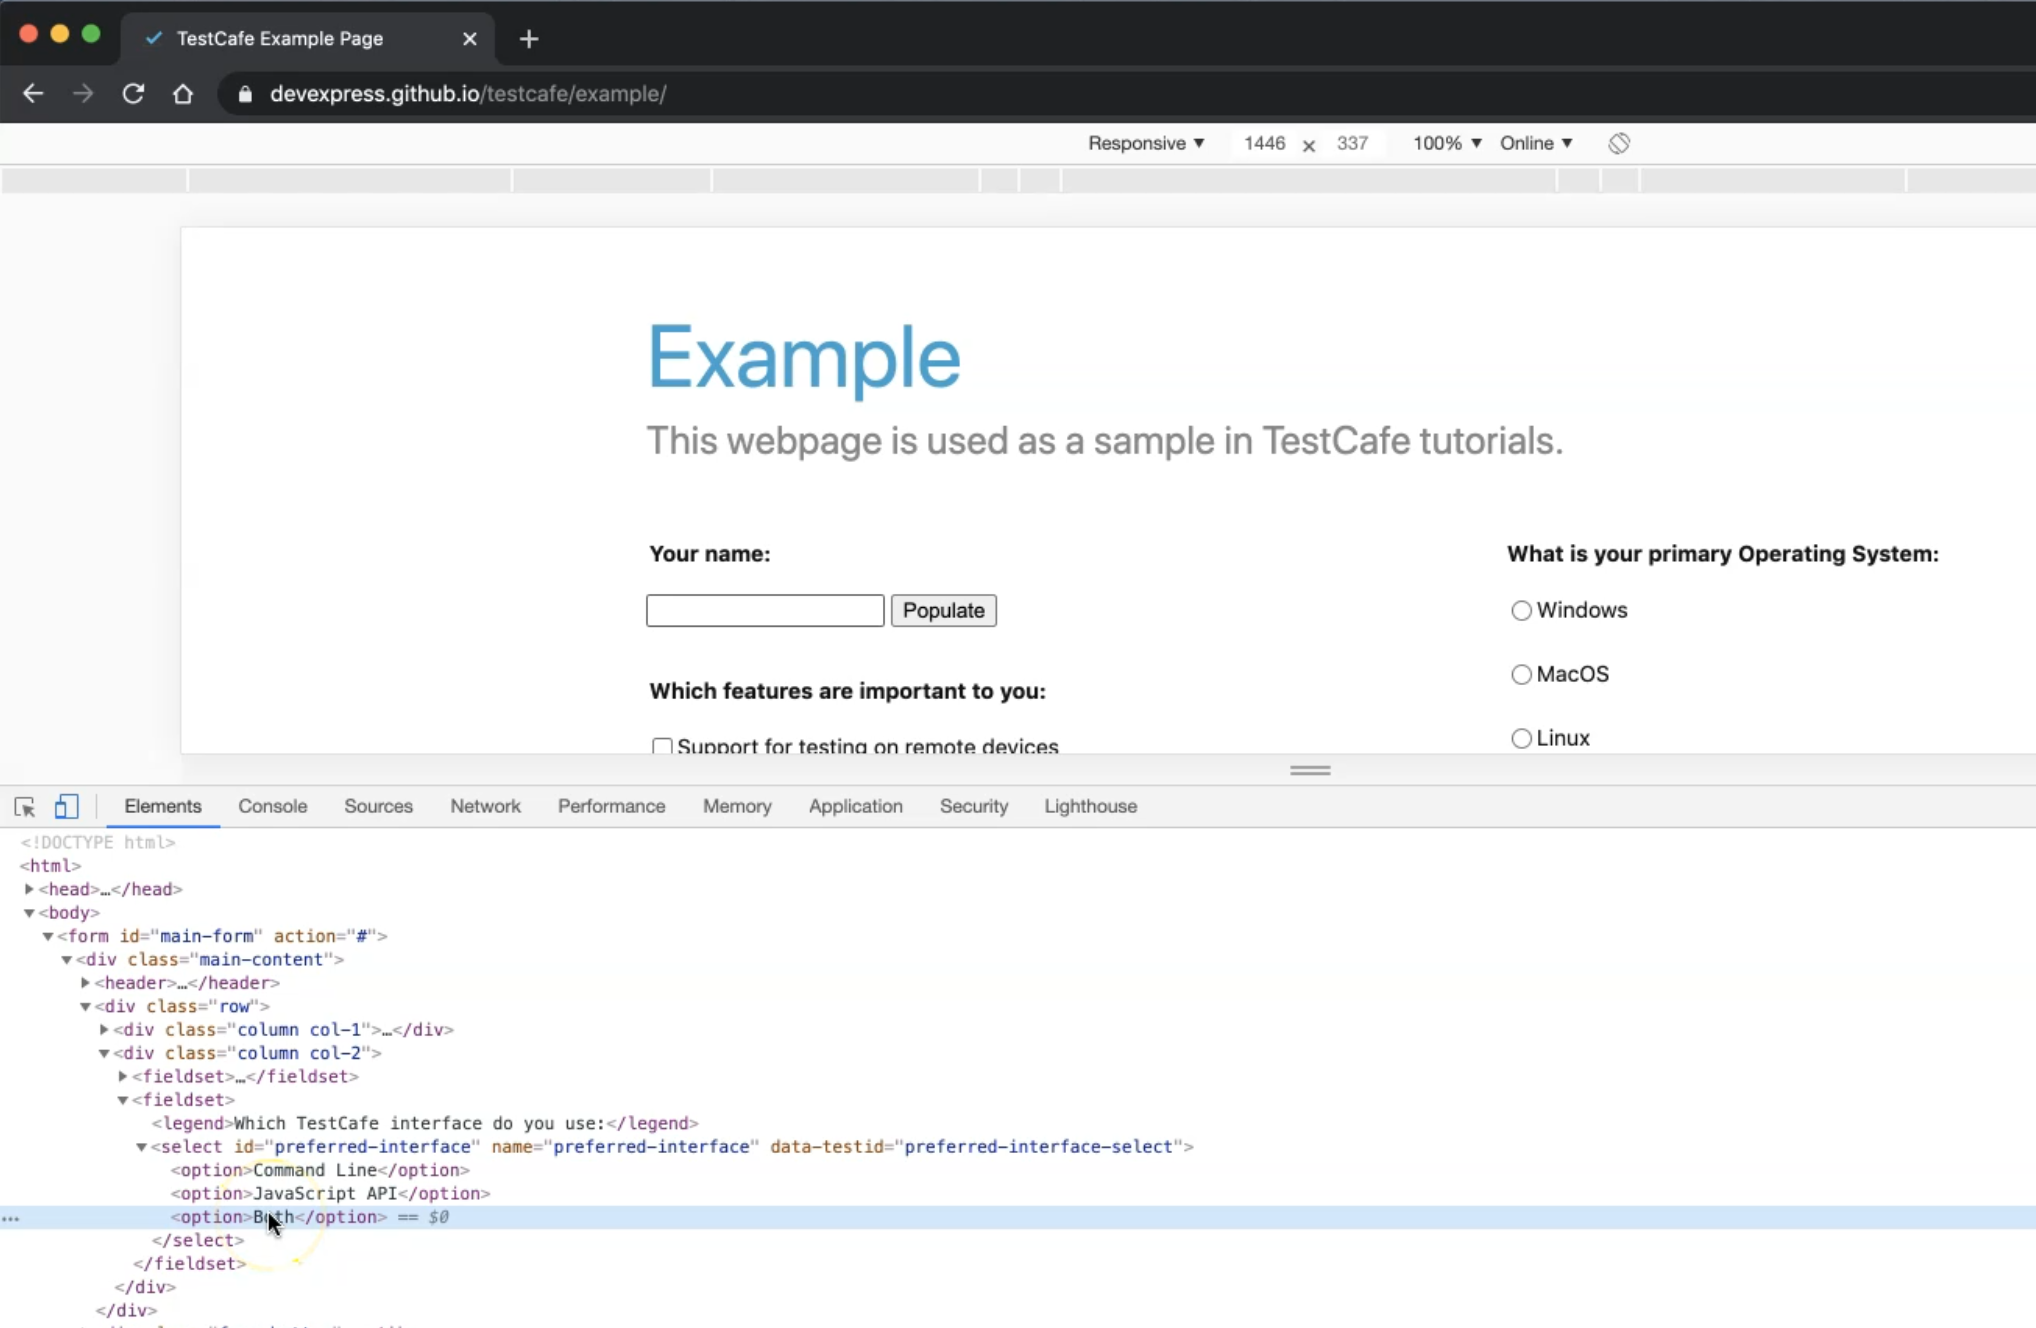
Then inside this one, we have options, so we need to get the option with the text for "Both".
Here we can import the Selector from TestCafe.
After that, we can add one const for interfaceSelect. This will use the selector that we had, and we will pass select, and then add the preference or #preferred-interface.
Then with another const we need to get interface options - we won't use Selector in this case - but we will select it with interfaceSelect.find(), and search for option. This line means inside the drop-down list we need to find option. After that, with interfaceOptions, we will start searching for "Both" as text inside this option.
import {Selector} from 'testcafe';

const interfaceSelect = Selector('select#preferred-interface');
const interfaceOptions = interfaceSelect.find('option');
After that, we have a fixture and the fixture title is "Select element from Dropdownlist" - we can use double quotes or single quotes. Then we can use .page and we can get the page URL.
Then we will write the test and the test is called 'select element test' - for example - and after the name, we need to add the test controller with async t. After that, we can add the arrow function just to eliminate the body of the function.
Then we can add await t to handle the wait of the elements.
Then we will have two things - we need to click on the drop-down list to open it first and after that, we need to select options inside this drop-down list.
So here we will have click() and we need to click on interfaceSelect.
Then we need another .click() - we need to click on the interfaceOption with the text "Both" since this is the option name in the example.
import {Selector} from 'testcafe';
const interfaceSelect = Selector('select#preferred-interface');
const interfaceOptions = interfaceSelect.find('option');
fixture("Select element from Dropdownlist")
.page("https://devexpress.github.io/testcafe/example/");
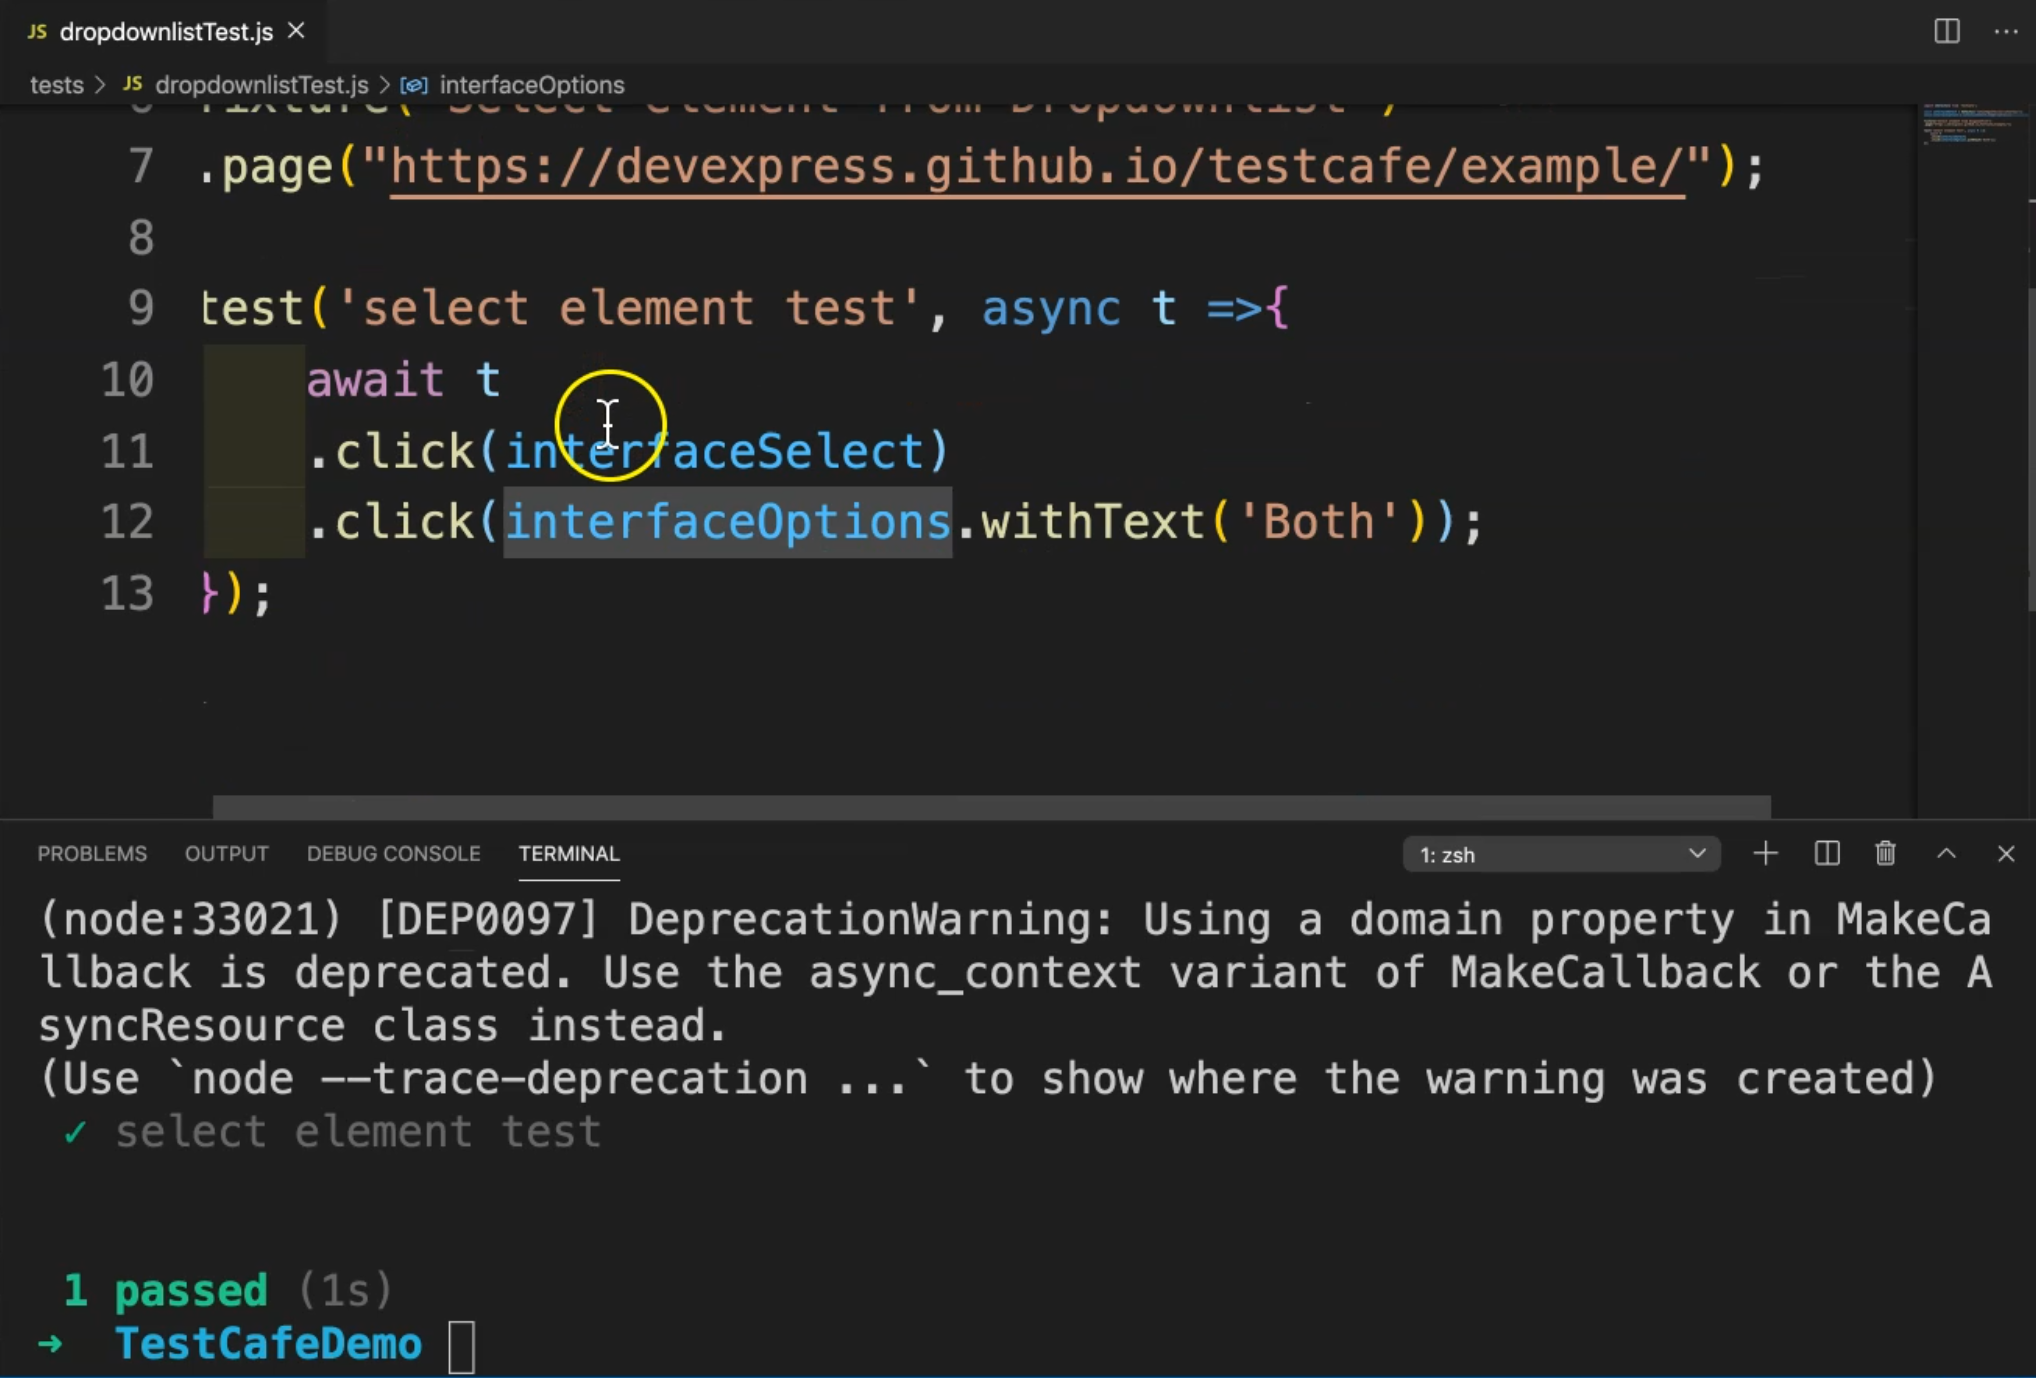
test('select element test', async t =>{
await t
.click(interfaceSelect)
.click(interfaceOptions.withText('Both'));
});
Then we can close our test.
We can run our test with the TestCafe command line:
testcafe chrome tests/dropdownlistTest.js
Then we will run our test and check what happened in the result.
TestCafe will run the server, redirect to the URL, change the drop-down list, and finish. So here we change it and our test passed.
So working with drop-down lists, it's usually working with both things - we need to get the drop-down list first, and after that, we are working with the options inside the drop-down list.
# How to upload a file with TestCafe
In this demo, we will learn how to upload a file with TestCafe.
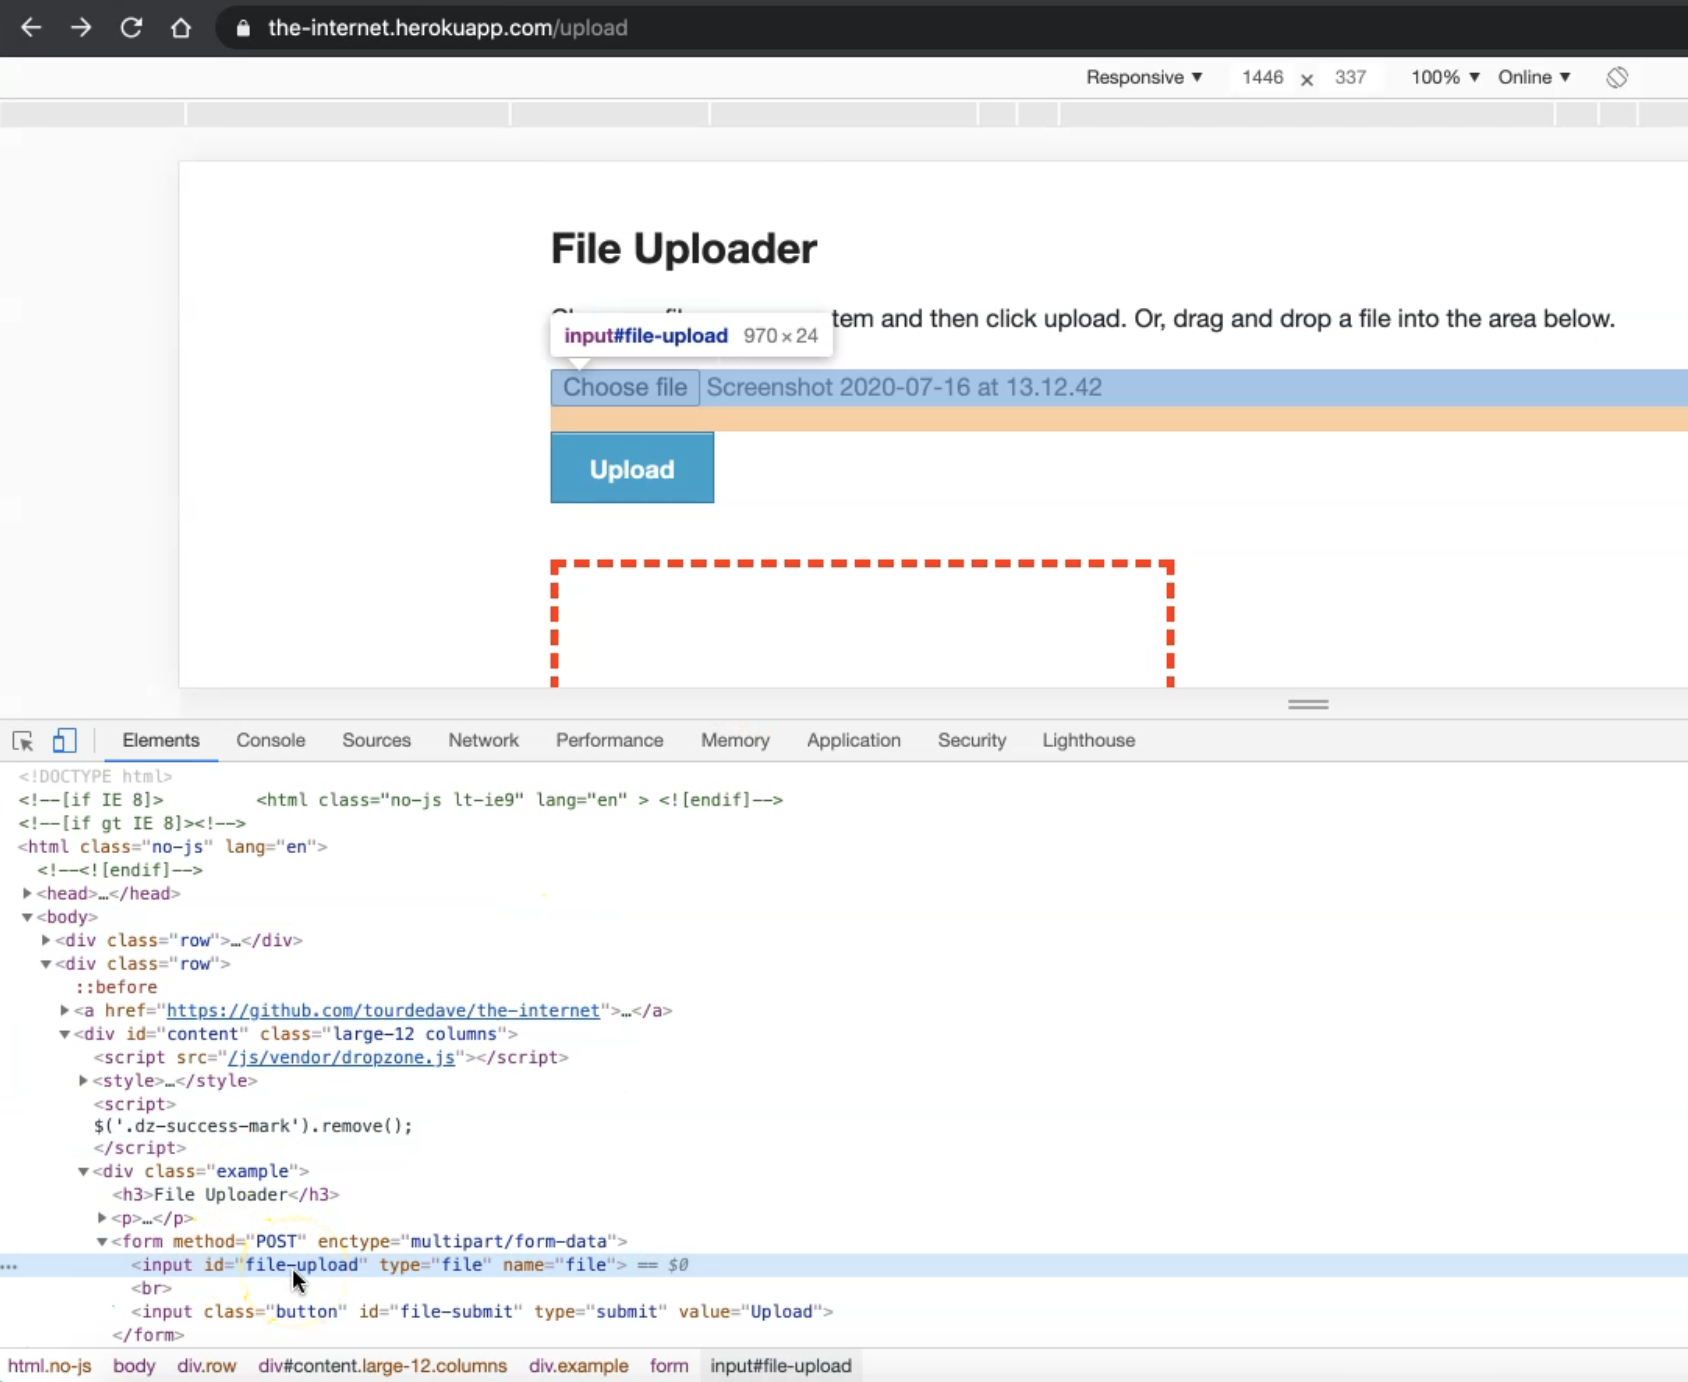
Here, we have another example for a File Uploader.
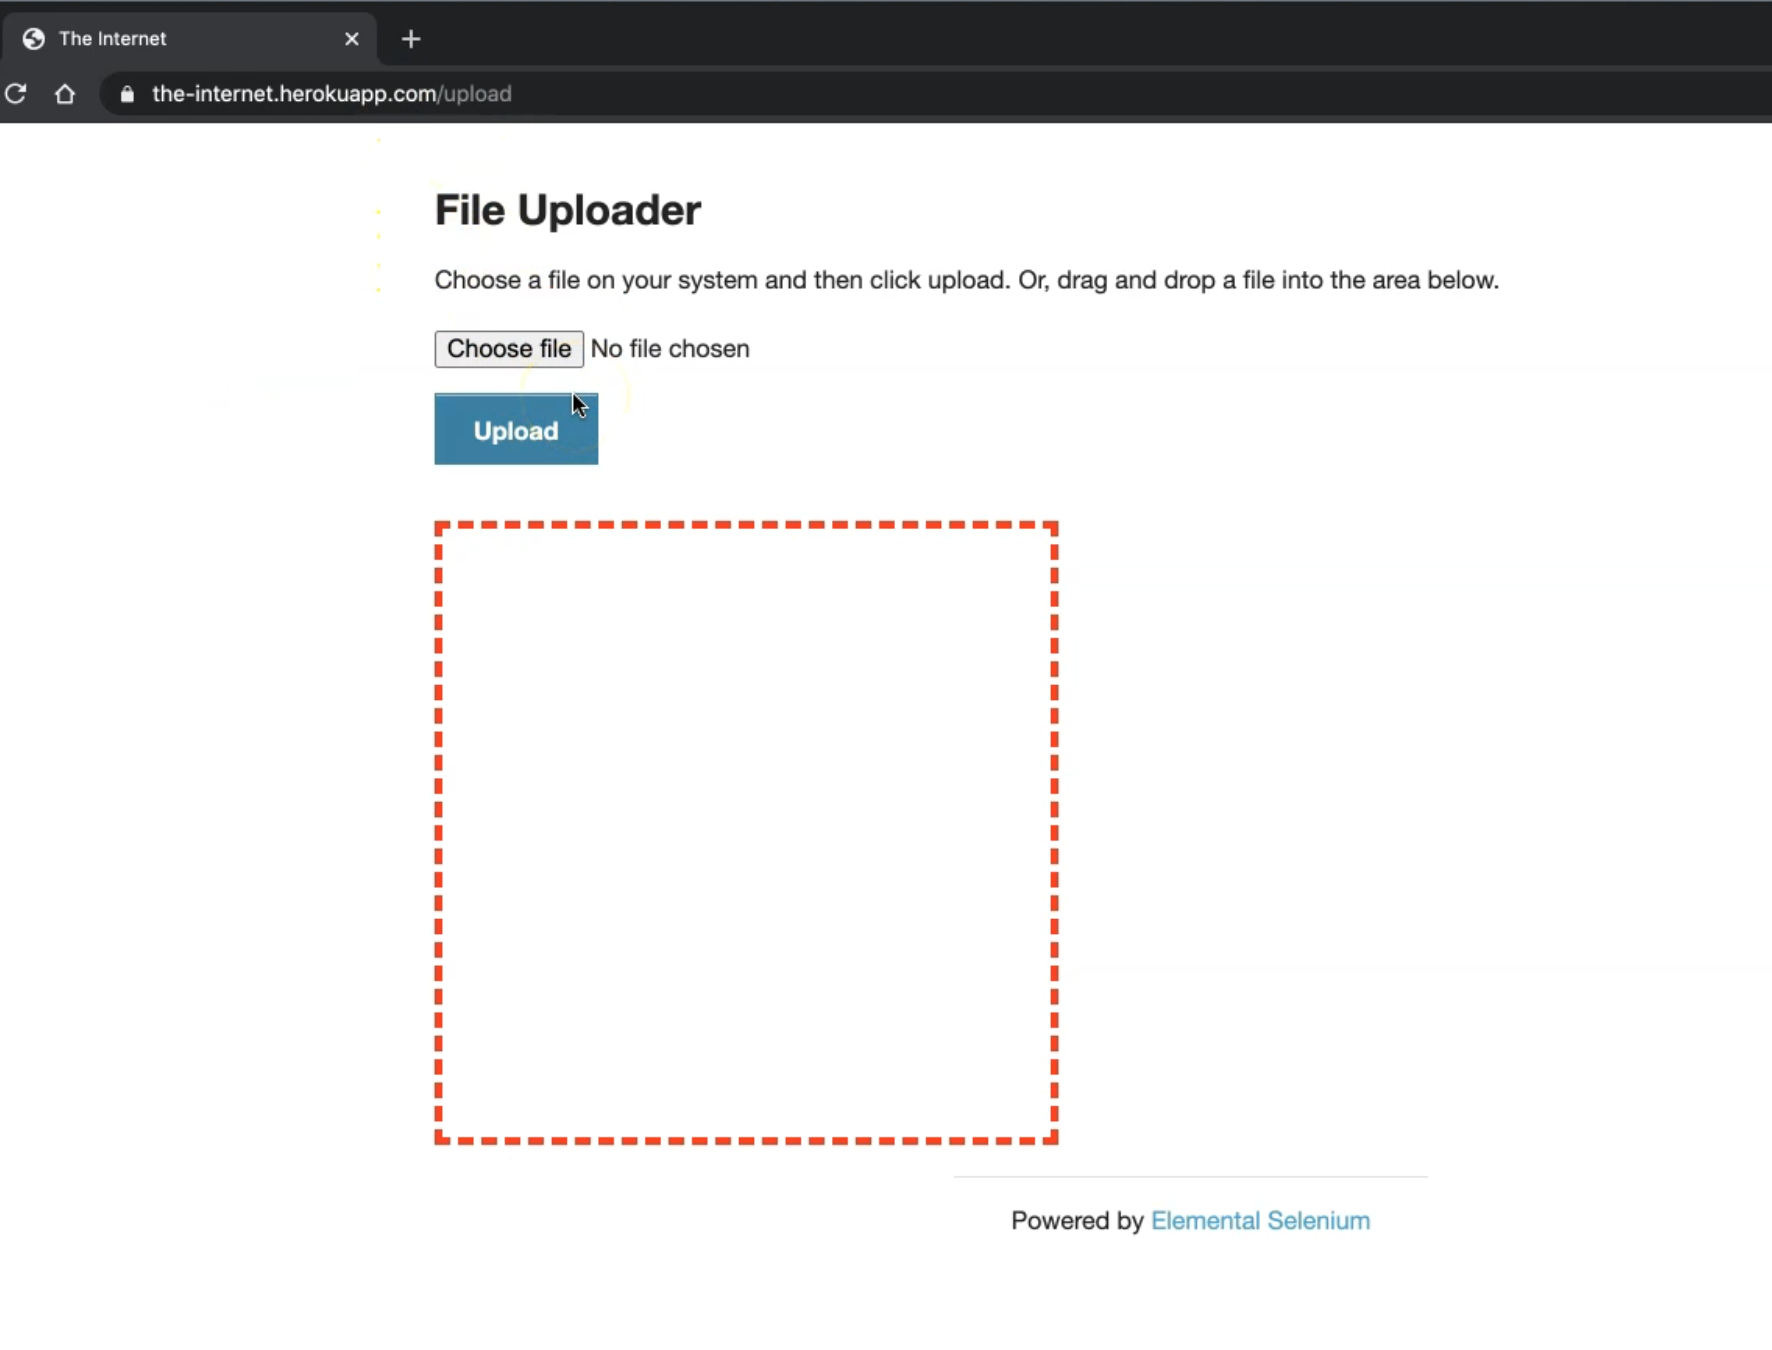
Here we have a file uploader control, and we have a button. After we upload the image, we can click on this button.
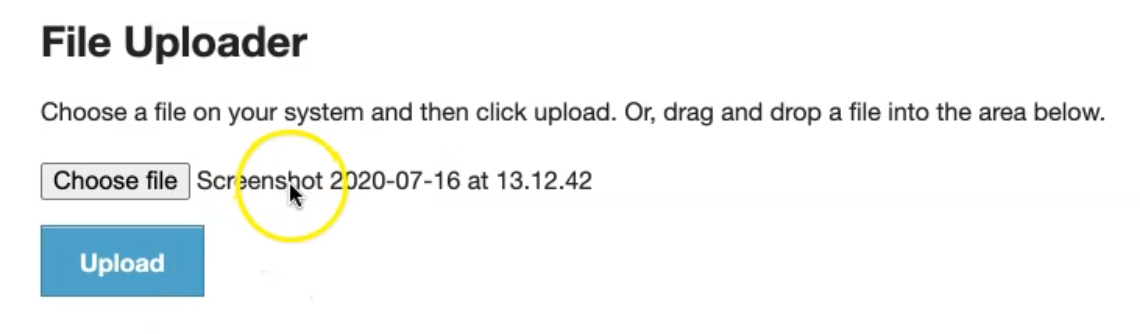
So for example, if I select this image, and here is the image path uploaded, and after that, I can click upload.
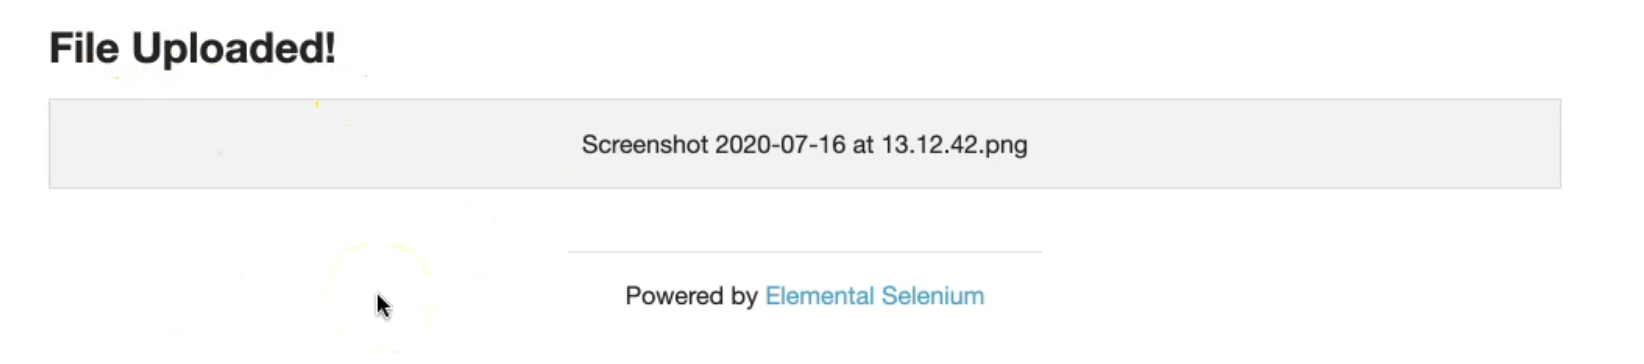
Then, I will be redirected to the file uploaded page.
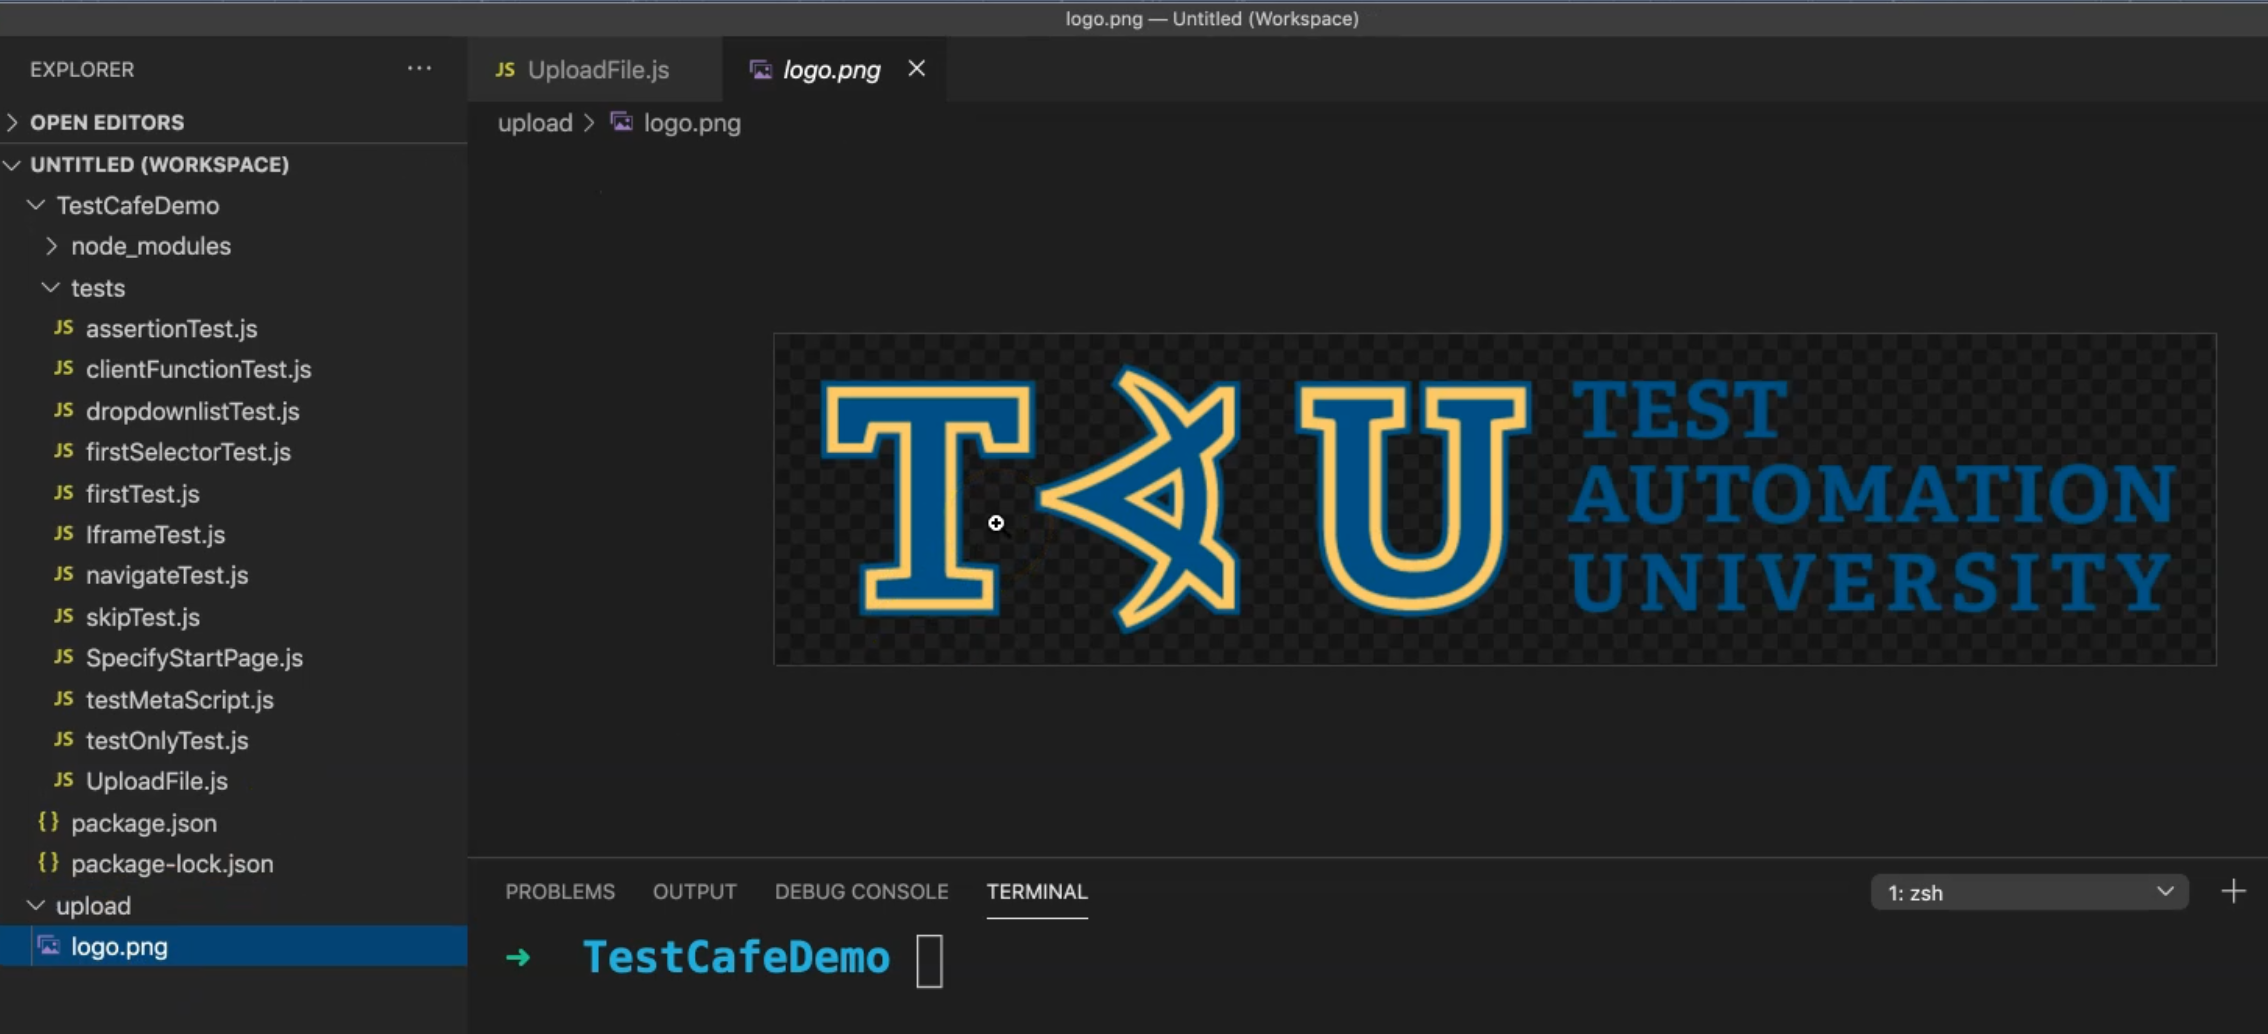
So let's open our project, and inside the tests folder, we can create one file with the name UploadFile.js.
And also, here I have a folder, and inside this folder, I have the logo for the Test Automation University or any image you want. I need to upload this image to our demo.
As usual, we will import the Selector and after that, we can add the const for file upload and the button for uploading the files.
After I import the selector, I will add the const for file upload with the selector #file-upload. When I inspect this, I can find this is an input so the selector will be input#file-upload.
After that, we can find that button to upload or to click on the uploaded image.
So in our test case, we add the two const and the fixture.page(), and after that, we can start writing our test.
import { Selector } from 'testcafe';

const fileUpload = Selector('input#file-upload');
const uploadFileButton = Selector('input#file-submit.button');

fixture("File Upload Fixture")
    .page("https://the-internet.herokuapp.com/upload");
Now we will write the test and the test will be called "File Upload Test". Then we need to add the test controller with async t and the arrow function
Then we will use await t.
Then, how can we upload a file with TestCafe?
We have one function for uploading files is called setFilesToUpload().

This is a specific file upload input with file paths.
So we need to have the file path and we already have the folder including the test - or the images that we need to update or to upload.
Where do we need to upload this file?
We need to upload it to the file upload control or element. So we need to add the path of the file. The path will be here inside the upload folder. We can add the logo.png. And if we have any problem in the path, from the error we will be able to see the path is wrong.
import { Selector } from 'testcafe';

const fileUpload = Selector('input#file-upload');
const uploadFileButton = Selector('input#file-submit.button');

fixture("File Upload Fixture")
    .page("https://the-internet.herokuapp.com/upload");

test("File Upload test",async t =>{
    await t
        .setFilesToUpload(fileUpload,'../../upload/logo.png')
});
Then we need to click() on the uploadFileButton. We need to add a semicolon after the click and at the end of the test.
To run the test case, we can run:
testcafe chrome tests/UploadFile.js
We can check if the test is running successfully or if we have a problem in the file path.
Here, we are opening the Testcafe server, we will redirect to the URL, and then we will upload the file, and then click on the button.
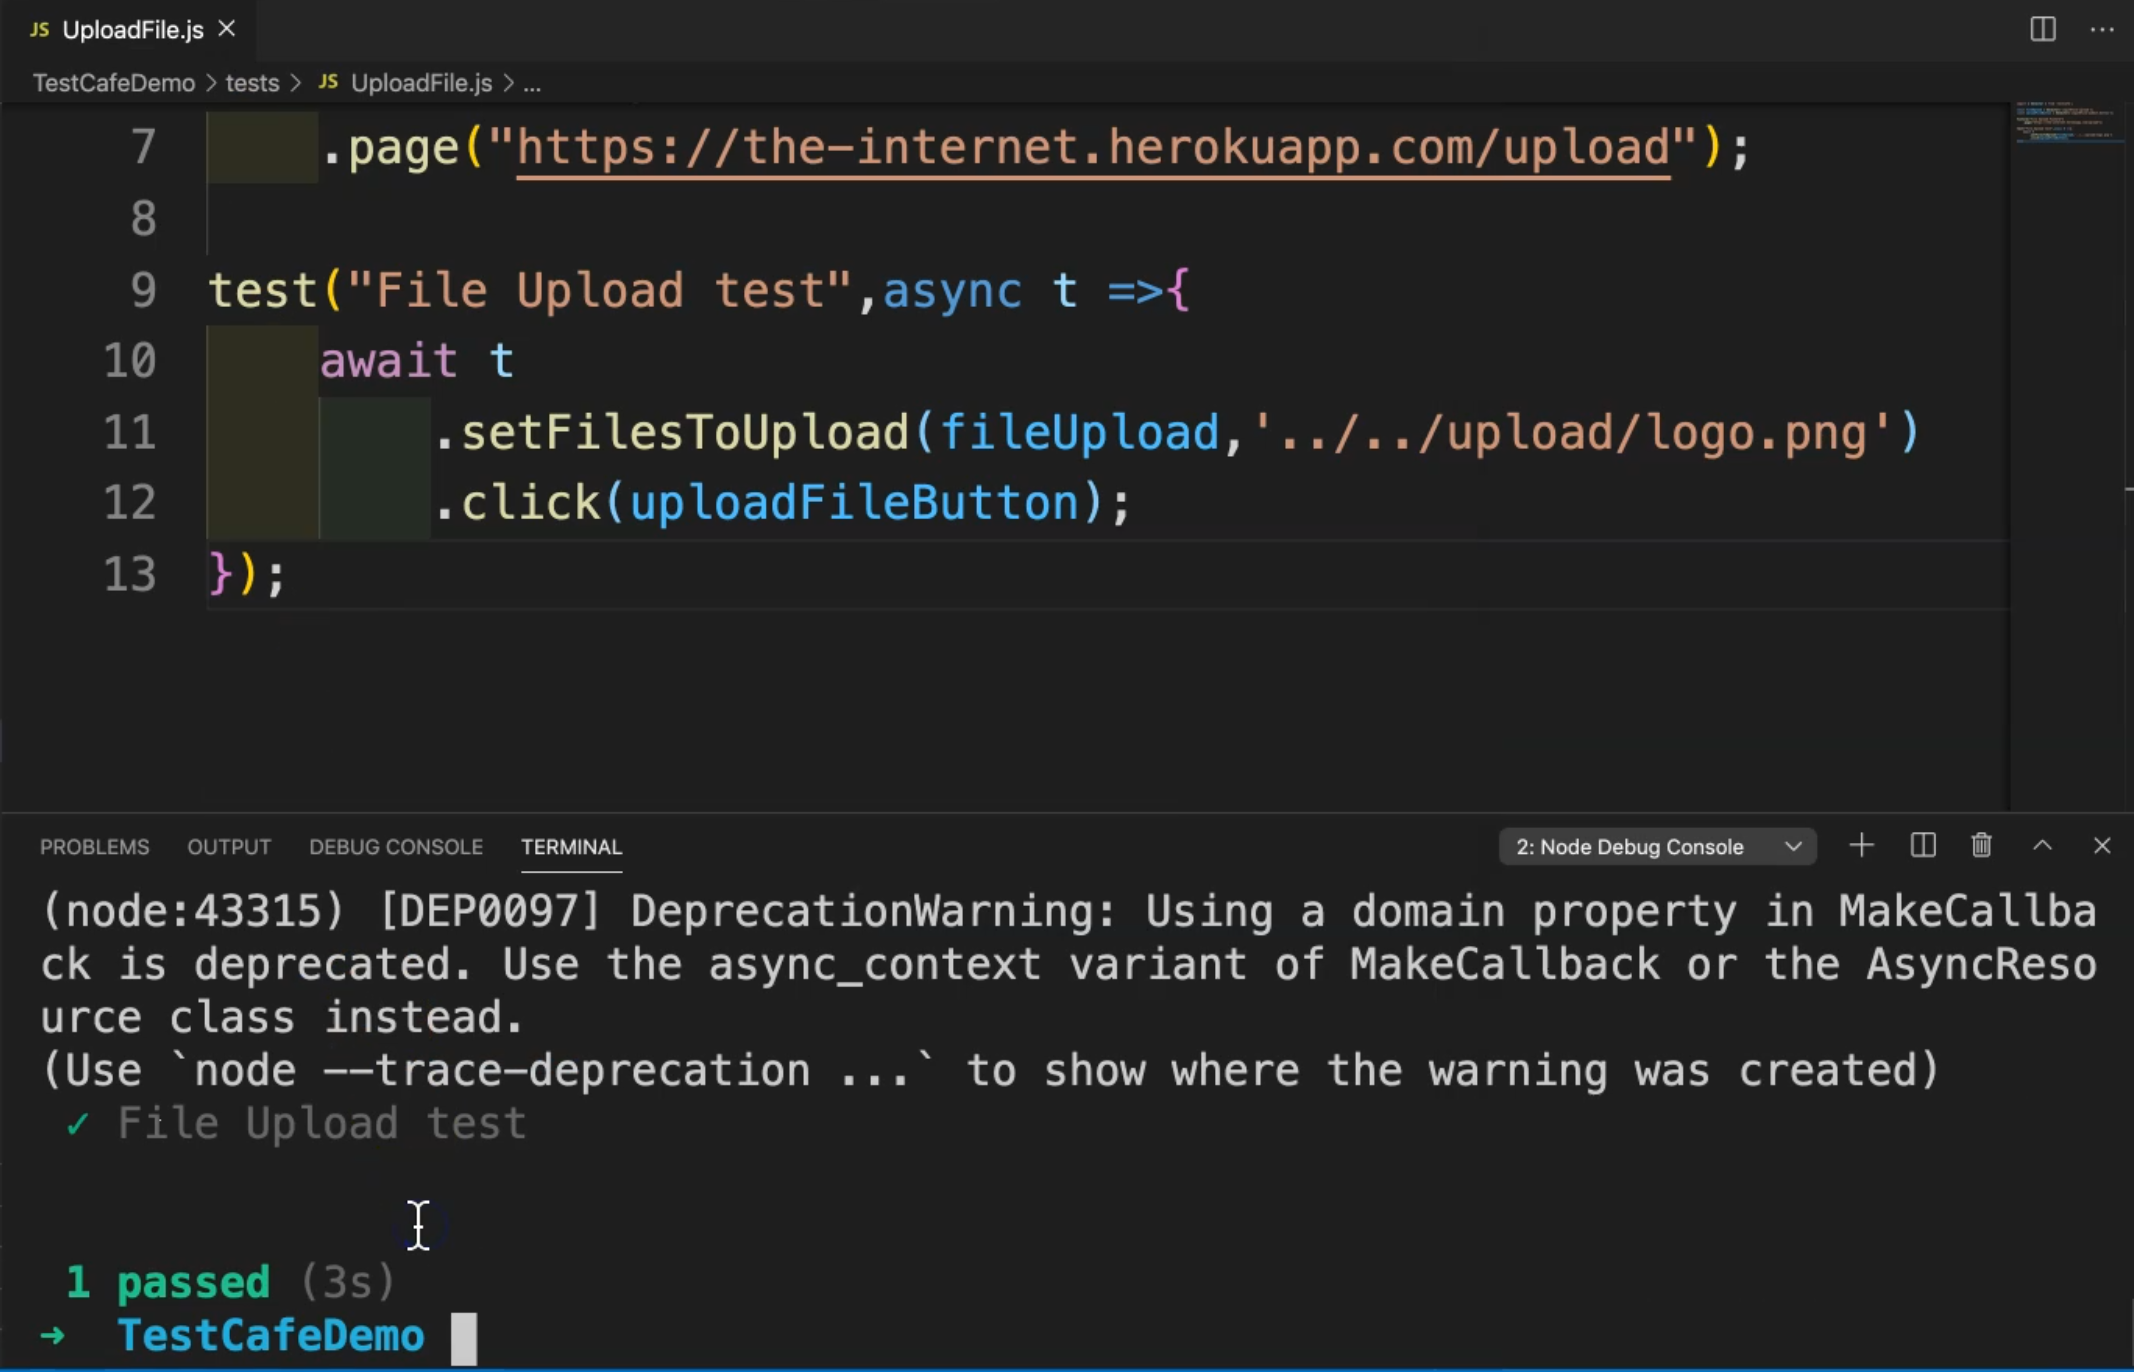
So the file upload test passed without any problem.
And also, there's something to note about setFilesToUpload() with TestCafe - it automatically waits until the file is uploaded to the server. We don't need to add any additional commands or any additional libraries to wait for the file to upload.
Then, we are clicking on the file upload button after that.
Also, we have one additional command or one additional function with Testcafe that we can clear the uploaded element or control with one command. So here, for example, we can click on clearUpload(). This removes all the file paths from the specific file upload input.

For example, if I add a file and then remove it again, here I can clear the file, and then I can copy it or copy the first command again to set the file and check what happened during our test.
import { Selector } from 'testcafe';

const fileUpload = Selector('input#file-upload');
const uploadFileButton = Selector('input#file-submit.button');

fixture("File Upload Fixture")
    .page("https://the-internet.herokuapp.com/upload");

test("File Upload test",async t =>{
    await t
        .setFilesToUpload(fileUpload,'../../upload/logo.png')
        .clearUpload(fileUpload)
        .setFilesToUpload(fileUpload,'../../upload/logo.png')
        .click(uploadFileButton);
So let's run our test and check what happened.
We will set the file, clear it, and after that, we will set it again, and click on the upload button. We are running our test now, we redirect to the upload, we set the file and we click and here, our test has passed.
Resources
Quiz
The quiz for this chapter can be found in 4.10
